Let me just say, when the scent of melted butter and gooey marshmallows starts swirling through my kitchen, it’s like a little celebration all on its own. There’s this almost magical transformation that happens as everything mingles with crispy rice cereal—the sweet aroma floats out, and suddenly, you know something good is coming. The first time I made these Valentine’s Day Rice Krispie Treats, I was instantly hooked. I remember pausing for a moment, spatula in hand, grinning because I knew I’d stumbled onto something seriously special (the kind of moment you wish you could bottle up and keep forever).
This recipe has a bit of childhood nostalgia baked right in. When I was knee-high to a grasshopper, my grandma would whip up big batches of classic Rice Krispie Treats for every holiday—always with her own twist. Years ago, I tried my hand at making them heart-shaped for Valentine’s Day, and let’s face it, they were a hit from the very first batch. My kids couldn’t stop sneaking them off the cooling rack (and honestly, I don’t blame them). Even my usually reserved spouse was caught munching on extras when they thought no one was looking!
There’s a pure, nostalgic comfort to these treats—dangerously easy, no oven required, and they’re perfect for potlucks, classroom parties, or just brightening up your Pinterest dessert board. I wish I’d figured out the festive heart-shaped trick years ago, because now it’s become a staple for family gatherings and sweet gifting. I’ve tested this recipe more times than I care to admit (in the name of research, of course), and every time, it feels like a warm hug you can eat. If you’re searching for a Valentine’s Day Rice Krispie Treats recipe that’s as easy as it is adorable, you’re going to want to bookmark this one!
Why You’ll Love This Recipe
You know what? There’s a reason these Valentine’s Day Rice Krispie Treats have earned a permanent place in my holiday rotation. I’ve spent plenty of time tinkering with the ratios and techniques—trust me, these aren’t just any old cereal bars. Here’s what makes this recipe stand out:
- Quick & Easy: Comes together in under 20 minutes—perfect for busy weeknights or last-minute classroom parties. No baking required!
- Simple Ingredients: You probably already have most of what you need (marshmallows, butter, Rice Krispies, and a sprinkle of festive decorations).
- Perfect for Valentine’s Day: The heart-shaped design is irresistibly cute and festive—just right for sharing with friends, family, or your sweetheart.
- Crowd-Pleaser: These treats always get rave reviews from kids and adults alike. Even the picky eaters go back for seconds.
- Unbelievably Delicious: The combo of buttery, gooey marshmallow and crispy cereal is classic comfort food, but the little touches—like a pinch of salt or a drizzle of chocolate—take it to the next level.
What makes my recipe different? I use mini marshmallows for quicker melting, a bit of extra butter for a softer, chewier texture, and a dash of vanilla for depth. And the heart-shaped cookie cutter trick? It’s simple, but it makes the treats look like they came straight out of a bakery. I’ve tried plenty of other recipes, but this one is my best version—balanced, just sweet enough, and always looking picture-perfect for Pinterest.
Honestly, these treats are more than just a dessert—they’re a way to make someone’s day. Whether you’re packing them for a lunchbox surprise or setting them out for a Valentine’s Day party, people close their eyes after that first bite. It’s comfort food, but faster and a little bit fancier. And you don’t need culinary school skills to pull off a batch that’ll impress guests and make your holiday memorable.
What Ingredients You Will Need
This Valentine’s Day Rice Krispie Treats recipe relies on simple, classic ingredients that come together for maximum flavor and fun. You won’t need anything fancy—just a handful of pantry staples and a few festive extras to make these treats pop. Here’s what you’ll want to gather:
- For the Base:
- Rice Krispies cereal (6 cups / 150g) – You can use store-brand or the classic. I’ve found Kellogg’s gives the best crunch.
- Mini marshmallows (5 cups / 250g) – Mini is best for smooth, faster melting. If you only have regular, just chop them up.
- Unsalted butter (4 tablespoons / 55g, plus extra for greasing) – Adds richness and keeps the treats soft. Salted works if you skip the pinch of salt later.
- Vanilla extract (1 teaspoon / 5ml) – Adds a subtle warmth and depth (I love Nielsen-Massey for big vanilla flavor).
- Pinch of salt – Balances the sweet and makes the flavors pop. Don’t skip it!
- For Festive Decoration:
- Heart-shaped sprinkles or nonpareils – Adds color and Valentine’s Day vibes. Wilton or Sweetapolita are my go-tos.
- Red or pink food coloring (optional) – For a rosy hue. Gel color works best for vibrant shades.
- White chocolate or candy melts (optional, for drizzling) – Makes the treats look extra fancy. Ghirardelli or Merckens melt smoothly.
- Mini chocolate chips (optional) – For a little chocolate surprise inside or on top.
Ingredient Tips: If you want gluten-free Valentine’s Day Rice Krispie Treats, use a certified gluten-free crisp rice cereal. For dairy-free, swap in vegan butter and marshmallows (Dandies brand works well). In a pinch, you can use coconut oil instead of butter, but the flavor will be a little different (still good!). For extra chewiness, stir in an extra half cup of marshmallows at the end before pressing into the pan.
Substitutions: Almond extract instead of vanilla adds a fun twist. If you want to add some fruit flavor, mix in freeze-dried strawberry pieces. You can always skip the food coloring if you like things classic, or go wild with rainbow sprinkles for a non-Valentine’s version. These ingredients are flexible—don’t be afraid to get creative!
Equipment Needed
Making these Valentine’s Day Rice Krispie Treats is a breeze with the right kitchen tools. Here’s what you’ll need (and a few handy alternatives):
- Large saucepan or pot – For melting butter and marshmallows. Nonstick is ideal for easier cleanup.
- Wooden spoon or heatproof spatula – For mixing everything together. Silicone spatulas are great for scraping all the gooey goodness.
- 9×13-inch (23x33cm) baking pan – Standard size for pressing and cooling the treats. You can use a smaller pan for thicker bars.
- Parchment paper or wax paper – Makes lifting the treats out and cutting easier. Foil works in a pinch, but grease it well.
- Heart-shaped cookie cutter – The secret to those adorable Valentine’s Day shapes. If you don’t have one, you can cut hearts by hand with a sharp knife (just go slow and embrace the imperfect shapes—still cute!).
- Nonstick spray or extra butter – For greasing your pan and cutter to prevent sticking.
- Small bowls – For sprinkles, chocolate chips, or melted chocolate drizzle.
If you don’t have a heart-shaped cutter, I’ve traced a heart onto parchment and used it as a guide for cutting with a knife. Works just fine! For budget-friendly options, dollar stores often have basic cookie cutters, and you really don’t need anything fancy. If you use your pan for other sticky desserts, a little soak in hot water makes cleanup super easy.
Preparation Method
-
Prep Your Pan:
Line a 9×13-inch (23x33cm) pan with parchment or wax paper, leaving an overhang for easy lifting later. Lightly grease with butter or nonstick spray. (Trust me, this step saves so much hassle when it’s time to cut hearts!) -
Melt the Butter:
In a large saucepan over low heat, melt 4 tablespoons (55g) unsalted butter. Watch closely—don’t let it brown, unless you want a nutty twist! The butter should be melted and fragrant, but not sizzling. -
Add Marshmallows:
Stir in 5 cups (250g) mini marshmallows. Keep the heat low and stir constantly. The marshmallows will slowly soften and melt into a glossy, gooey mixture (it should smell sweet and look smooth—no lumps). If using food coloring, add it now for a pink hue. -
Add Vanilla & Salt:
Once melted, remove the pan from heat. Stir in 1 teaspoon (5ml) vanilla extract and a pinch of salt. This is the flavor magic step—don’t skip it! -
Mix in Rice Krispies:
Working quickly, pour in 6 cups (150g) Rice Krispies cereal. Stir gently but thoroughly, folding until every piece is coated in the marshmallow mixture. The cereal should look shiny and slightly sticky, but not dry. -
Add Festive Mix-Ins (Optional):
If you’re using mini chocolate chips or freeze-dried strawberries, fold them in now. (Tip: Let the mixture cool for a minute first so chocolate chips don’t melt completely.) -
Press Into Pan:
Pour the mixture into your prepared pan. Use a buttered spatula or wax paper to gently press and spread into an even layer. Don’t press too hard—gentle pressure keeps treats soft and chewy, not dense. -
Decorate:
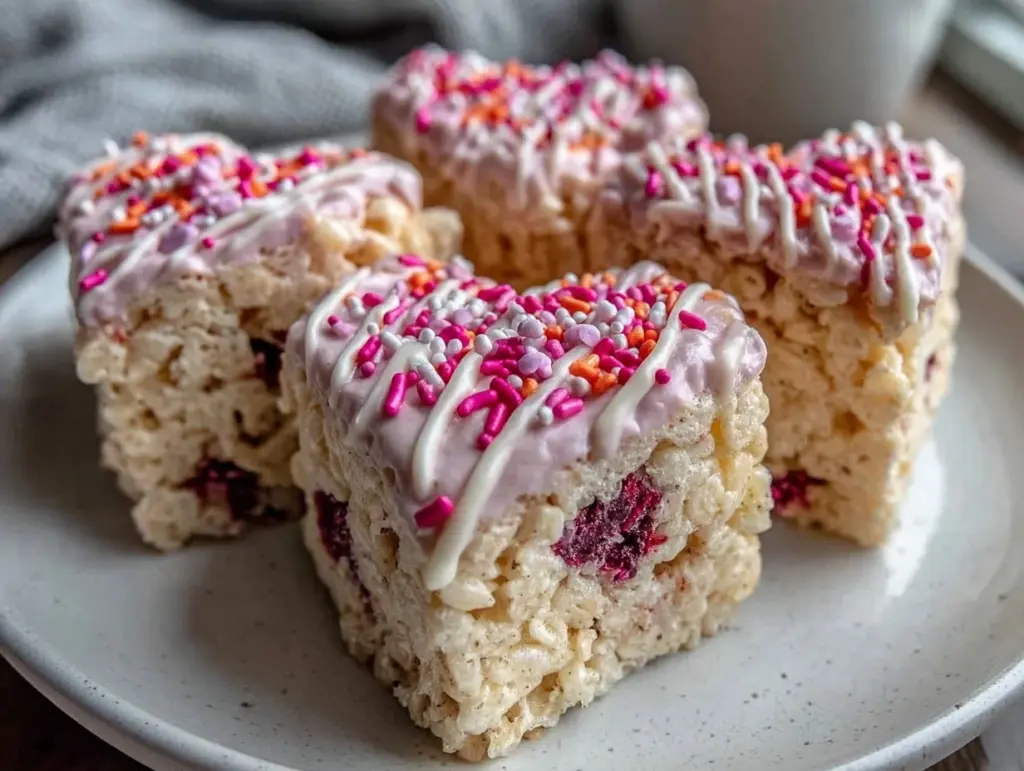
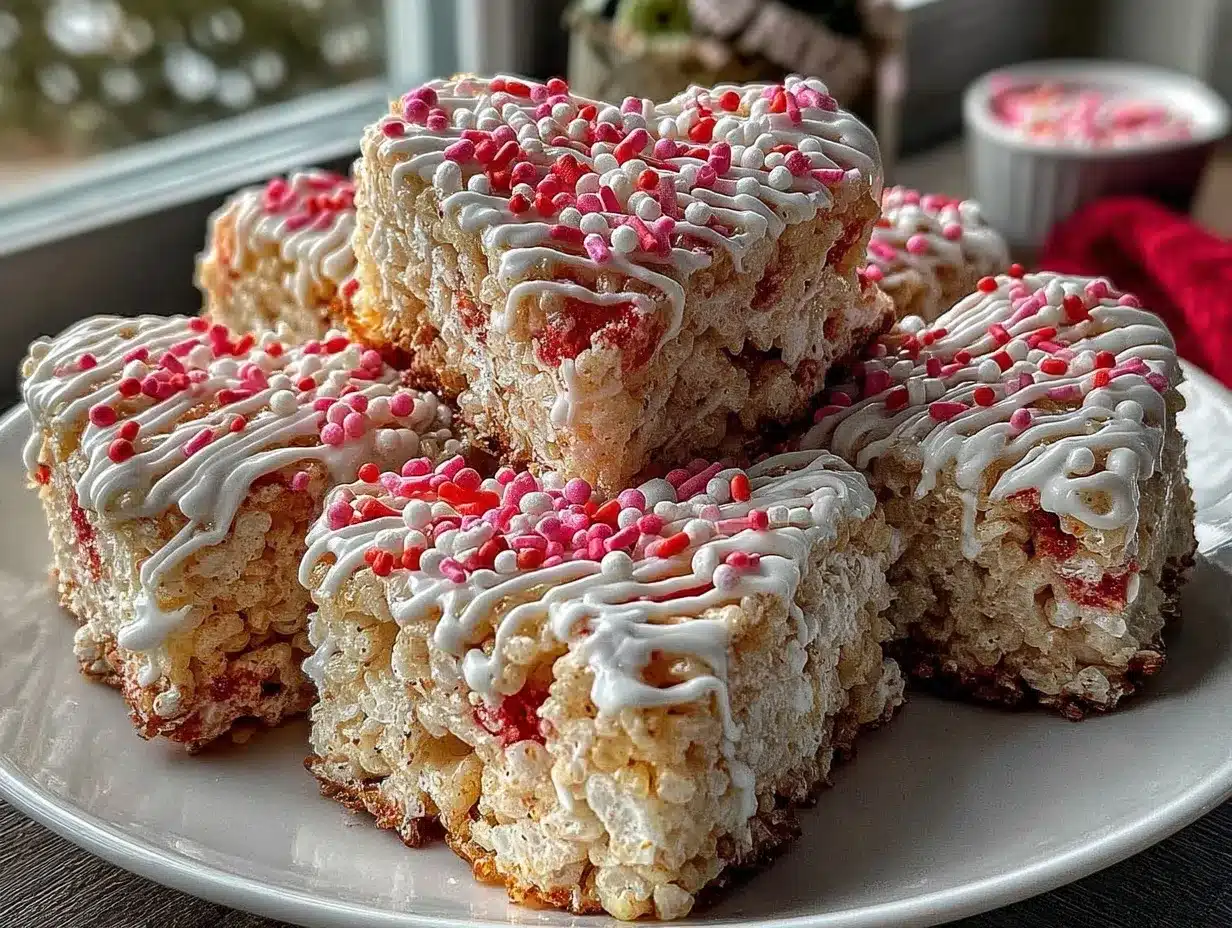
While the mixture is still a bit warm, sprinkle on heart-shaped sprinkles or nonpareils. Press them lightly so they stick. (You can add more decorations after cutting, too.) -
Cool Completely:
Let the pan sit at room temperature for at least 30 minutes to firm up. In a rush? Pop it in the fridge for 15 minutes. The treats should feel set, not sticky. -
Cut Heart Shapes:
Use a heart-shaped cookie cutter to press out treats. If the cutter sticks, dip it in a bit of butter or nonstick spray. Gently wiggle to release each heart. (Gather and gently press together any scraps to make extra mini hearts!) -
Drizzle with Chocolate (Optional):
Melt white chocolate or candy melts in a microwave-safe bowl (30-second bursts, stirring in between). Drizzle over the hearts and add more sprinkles if you like. -
Serve & Enjoy:
Let chocolate set, then arrange treats on a platter or pack in gift bags. These are best enjoyed fresh but stay soft for several days.
Notes: If the marshmallow mixture gets too stiff, microwave for 10 seconds to soften. If your treats are too sticky, add a little more cereal. For super clean edges, wipe your cutter between uses. And don’t stress about perfection—homemade always wins hearts!
Cooking Tips & Techniques
Over the years, I’ve picked up a few tricks (and made plenty of sticky-fingered mistakes) with Rice Krispie Treats. Here’s how to make sure your Valentine’s Day Rice Krispie Treats turn out perfect every time:
- Low & Slow: Always melt the butter and marshmallows over low heat. Rushing with high heat can scorch the sugar or make the mixture tough—learned that the hard way!
- Grease Everything: Butter your spatula, pan, and cookie cutter. There’s nothing more frustrating than the mixture sticking everywhere (trust me, it’s a sticky mess to clean up otherwise).
- Don’t Overpack: Press the mixture gently into the pan. Packing it down hard leads to dense, crunchy treats instead of soft, chewy perfection.
- Work Quickly: The marshmallow mixture sets fast. Have your cereal and decorations ready before you start, and move quickly from mixing to pressing.
- Chocolate Drizzle: If you want a pretty chocolate finish, let the treats cool before drizzling. Otherwise, you’ll end up with a melted puddle instead of pretty stripes (been there, done that).
- Cutting Shapes: Clean your cutter between uses with a bit of butter or spray. This makes each heart come out clean and neat.
- Batch Efficiency: If you’re making multiple pans, prep all your pans and cutters ahead—makes assembly line style super easy.
- Troubleshooting: If your treats are too hard, you may have used too much cereal. Add less next time, or stir in a handful of extra marshmallows for chewiness.
Honestly, I’ve had batches that were a little too crunchy, or ones that stuck to everything in sight. But with these tips, you’ll get consistent, soft, festive results—ready for pinning, gifting, or just munching in secret!
Variations & Adaptations
One of the best things about Valentine’s Day Rice Krispie Treats is how easy they are to customize. Here are a few of my favorite ways to switch things up:
- Gluten-Free: Use certified gluten-free crisp rice cereal and marshmallows. Most mainstream brands are fine, but always double-check labels.
- Dairy-Free: Swap unsalted butter for vegan margarine and use allergy-friendly marshmallows. Dandies makes a great vegan option.
- Flavor Boost: Add a few drops of almond extract for a bakery-style twist, or stir in freeze-dried strawberries for a fruity touch.
- Chocolate Lovers: Mix mini chocolate chips into the cereal before pressing, or use cocoa Rice Krispies for a chocolate base.
- Seasonal Shapes: Use different cookie cutters throughout the year—stars for July 4th, pumpkins for Halloween, or trees for Christmas.
If you want to bake (rather than no-bake), you can press the mixture into silicone molds and bake at 300°F (150°C) for 5 minutes to set the shape (though I rarely do this). For nut allergies, always check marshmallow and decoration ingredients—many sprinkles are processed near nuts. Personally, my favorite twist is adding a layer of melted white chocolate underneath before cutting hearts—it’s a little extra, but so worth it!
Serving & Storage Suggestions
These Valentine’s Day Rice Krispie Treats shine brightest when served fresh, but they’re also great for make-ahead occasions. Here’s how to serve and store:
- Serving: Arrange heart-shaped treats on a platter lined with parchment. Serve at room temperature for best texture. They look fantastic stacked in clear cellophane bags tied with ribbon—perfect for classroom handouts or sweet gifts.
- Pairings: Serve with hot cocoa, strawberry milk, or a glass of bubbly (for grown-up celebrations). They’re a sweet finish to a cozy Valentine’s brunch.
- Storage: Store in an airtight container at room temperature for up to 4 days. If you live somewhere humid, add a sheet of wax paper between layers to prevent sticking.
- Freezing: Freeze treats in a single layer, separated by wax paper, for up to 1 month. Thaw at room temperature—flavor and texture are still great!
- Reheating: If treats get too firm, microwave for 5-10 seconds to soften. Not too long, or they’ll melt!
Honestly, these treats rarely last long enough to worry about storage in my house. But if you’re prepping ahead for a party, flavor actually develops even more after a day (the vanilla comes through a bit stronger). Just keep them tightly covered to lock in freshness.
Nutritional Information & Benefits
Each Valentine’s Day Rice Krispie Treat (heart-shaped, about 2-inch size) contains approximately:
- Calories: 90
- Fat: 2.5g
- Carbohydrates: 18g
- Sugar: 8g
- Protein: 0.5g
These treats are naturally nut-free and can be made gluten-free and dairy-free with simple swaps. Rice cereal is low-fat, and marshmallows are fat-free, making this a lighter holiday dessert compared to most cookies or brownies. If you’re watching sugar, you can reduce the marshmallows or use sugar-free alternatives, though the texture will change a bit.
Potential allergens include dairy (in butter), gluten (in some cereals), and soy (in some decorations). I love that this recipe can be adapted for almost any dietary need—just check your ingredient labels. Personally, I appreciate how these treats let me indulge a little, while keeping portion sizes small and ingredients simple.
Conclusion
So, why should you make these Valentine’s Day Rice Krispie Treats? For starters, they’re the perfect blend of nostalgic comfort and festive fun. You get buttery, chewy, heart-shaped bites that look stunning on any dessert table—and you don’t need fancy skills or ingredients to pull it off. Plus, you can make them your own with endless variations.
If you ask me, there’s nothing better than a holiday recipe that brings people together (and doesn’t stress you out in the process). I love these treats because they’re easy, adorable, and always get smiles—whether you’re gifting, sharing, or sneaking a midnight snack. Go ahead, try them out, and let your creativity run wild!
Drop a comment below if you have your own twist, or if you tried this recipe! Share it with friends, pin it for later, and let me know how your Valentine’s Day Rice Krispie Treats turned out. Wishing you a sweet, happy holiday—may your kitchen smell amazing and your hearts be as full as your treat tin!
FAQs
Can I make these Valentine’s Day Rice Krispie Treats ahead of time?
Absolutely! They keep well for up to 4 days in an airtight container. You can even freeze them for up to a month—just thaw before serving.
What if I don’t have a heart-shaped cookie cutter?
No worries! You can use a sharp knife to cut hearts freehand, or trace a heart shape onto parchment and use it as a guide. Imperfect hearts are still festive and cute.
Are these treats gluten-free?
They can be! Just use certified gluten-free rice cereal and marshmallows. Always check labels on your decorations, too.
How do I keep the treats from sticking to the pan and cutter?
Grease your pan, spatula, and cookie cutter with butter or nonstick spray. Also, parchment or wax paper makes lifting and cutting a breeze.
Can I add chocolate or other flavors?
Definitely! Mix in mini chocolate chips, drizzle melted chocolate, or add a bit of almond extract for extra flavor. You can even use cocoa Rice Krispies for a chocolate version.
Pin This Recipe!
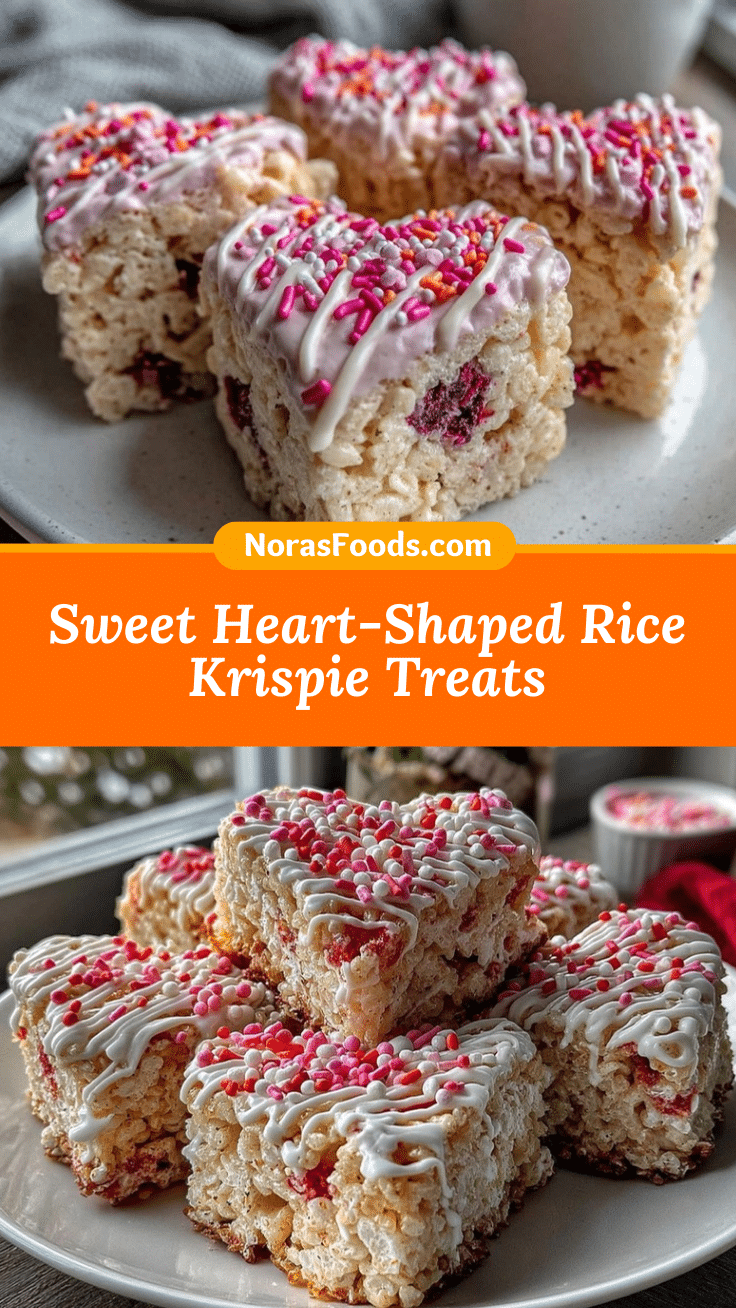
Valentine’s Day Rice Krispie Treats

These heart-shaped Rice Krispie Treats are a quick, no-bake dessert perfect for Valentine’s Day parties, gifting, or a sweet family treat. Buttery, chewy, and customizable with festive decorations, they’re a nostalgic favorite with a fun twist.
- Prep Time: 10 minutes
- Cook Time: 10 minutes
- Total Time: 20 minutes
- Yield: 24 heart-shaped treats 1x
- Category: Dessert
- Cuisine: American
Ingredients
- 6 cups Rice Krispies cereal (about 150g)
- 5 cups mini marshmallows (about 250g)
- 4 tablespoons unsalted butter (plus extra for greasing)
- 1 teaspoon vanilla extract
- Pinch of salt
- Heart-shaped sprinkles or nonpareils
- Red or pink food coloring (optional)
- White chocolate or candy melts (optional, for drizzling)
- Mini chocolate chips (optional)
Instructions
- Line a 9×13-inch pan with parchment or wax paper, leaving an overhang for easy lifting. Lightly grease with butter or nonstick spray.
- In a large saucepan over low heat, melt 4 tablespoons unsalted butter. Do not let it brown.
- Add 5 cups mini marshmallows and stir constantly over low heat until melted and smooth. If using food coloring, add it now.
- Remove pan from heat. Stir in 1 teaspoon vanilla extract and a pinch of salt.
- Quickly add 6 cups Rice Krispies cereal and fold until evenly coated.
- If using mini chocolate chips or freeze-dried strawberries, fold them in now (let mixture cool for a minute first).
- Pour mixture into prepared pan. Use a buttered spatula or wax paper to gently press into an even layer.
- While still warm, sprinkle on heart-shaped sprinkles or nonpareils and press lightly.
- Let pan sit at room temperature for at least 30 minutes to firm up, or refrigerate for 15 minutes.
- Use a heart-shaped cookie cutter to cut treats. Dip cutter in butter or spray if sticking. Gather scraps to make extra mini hearts.
- Melt white chocolate or candy melts in a microwave-safe bowl (30-second bursts, stirring in between). Drizzle over hearts and add more sprinkles if desired.
- Let chocolate set, then serve on a platter or pack in gift bags. Enjoy fresh or store for later.
Notes
For gluten-free treats, use certified gluten-free rice cereal and marshmallows. For dairy-free, swap in vegan butter and marshmallows. Don’t overpack the mixture into the pan for soft, chewy treats. Grease your pan, spatula, and cutter well to prevent sticking. Mix-ins like mini chocolate chips or freeze-dried strawberries add flavor and fun. Store in an airtight container for up to 4 days or freeze for up to 1 month.
Nutrition
- Serving Size: 1 heart-shaped treat
- Calories: 90
- Sugar: 8
- Sodium: 45
- Fat: 2.5
- Saturated Fat: 1.5
- Carbohydrates: 18
- Protein: 0.5
Keywords: Valentine's Day, Rice Krispie Treats, heart-shaped dessert, no-bake, kid-friendly, party treat, marshmallow, easy dessert, festive, holiday recipe


