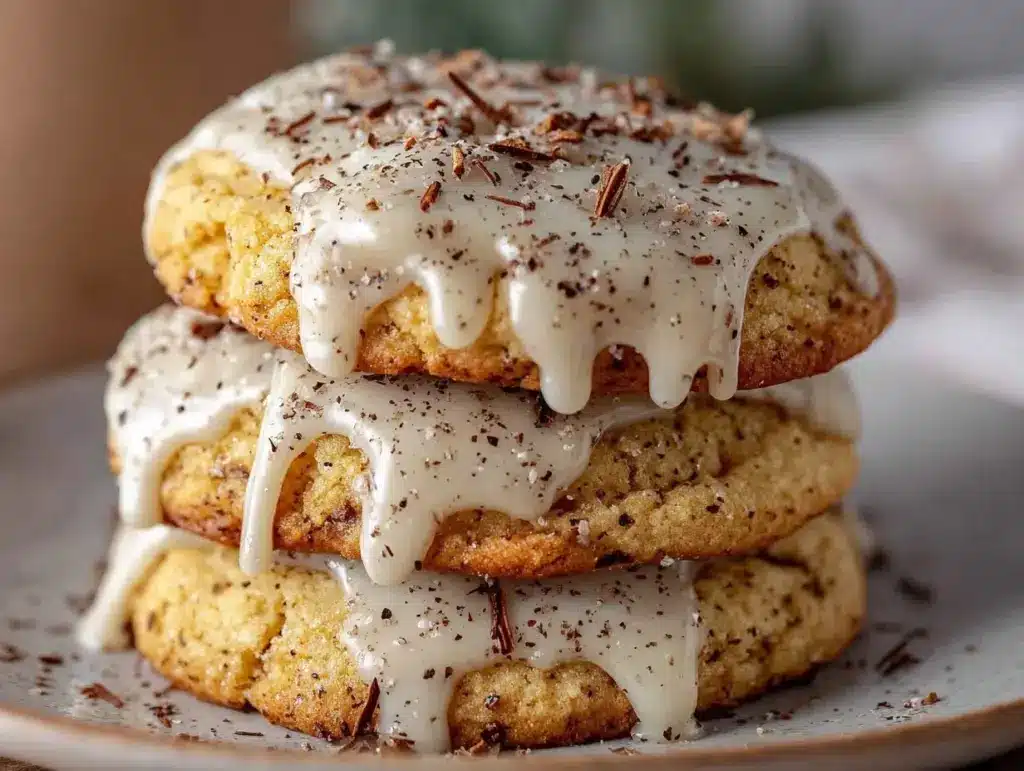
Imagine walking into your kitchen on a chilly December morning—the kind where frost dusts the windows and your slippers feel like absolute necessity. The scent of creamy eggnog, warm vanilla, and freshly grated nutmeg curling up from the oven is pure holiday magic. That’s exactly the moment I experienced the first time I baked these Fluffy Eggnog Cookies with Nutmeg Glaze. The aroma alone had me pausing mid-whisk, taking a deep breath, and just grinning because, honestly, you know you’ve hit upon something truly special.
Years ago, when I was knee-high to a grasshopper, eggnog was always the star of our Christmas gatherings. My grandma would make her famous homemade version, and we’d all sneak sips between bites of cookies (don’t tell her!). I tried recreating that feeling in cookie form, and let’s face it—these eggnog cookies are dangerously easy and packed with that nostalgic comfort. The first batch I made was on a rainy weekend when I needed a sweet treat to cheer up my kids. They couldn’t stop sneaking them off the cooling rack, and I can’t blame them. That melt-in-your-mouth texture paired with the sweet, spiced glaze is a total crowd-pleaser.
Honestly, I wish I’d discovered this recipe years ago. It’s perfect for potlucks, makes a sweet treat for your kids, and will brighten up any Pinterest holiday cookie board. Whether you’re looking for a festive addition to your Christmas dessert spread or just want something cozy to enjoy with a mug of cocoa, these fluffy eggnog cookies have become a staple for family gatherings and gifting (in the name of research, I’ve tested them more times than I can count!). Each bite feels like a warm hug—and you’re going to want to bookmark this one for every winter season.
Why You’ll Love This Recipe
After years of baking and holiday recipe testing, I can say with absolute confidence—these eggnog cookies stand out from the crowd. Here’s why you’ll be reaching for this recipe every December (and probably a few times in January, too):
- Quick & Easy: Comes together in under 40 minutes—ideal for busy holiday schedules or last-minute baking marathons.
- Simple Ingredients: Nothing fancy here! Most of what you need is already hiding in your pantry or fridge. No wild goose chases for specialty items.
- Perfect for Holiday Gatherings: Great for Christmas brunch, potlucks, office parties, or cozy evenings at home. They look festive and taste even better.
- Crowd-Pleaser: Kids, grandparents, and even picky eaters rave about these cookies. The eggnog flavor isn’t overpowering—it’s just right.
- Unbelievably Delicious: Soft, cake-like texture with a tender crumb and a nutmeg glaze that’s sweet but not cloying. It’s like the best part of eggnog in every bite.
Now, what really sets this eggnog cookies recipe apart is the little bit of cornstarch in the dough—it’s my secret for ultra-fluffy, pillowy cookies. Plus, using real eggnog (not just extract!) gives you authentic holiday flavor. I’ve tested this with both store-bought and homemade eggnog, and both work beautifully.
This is comfort food, reimagined—faster, lighter, and with all the soul-soothing satisfaction of a classic treat. No fussing with chilling dough for hours, no complicated steps. Just honest-to-goodness, holiday baking joy. If you want to impress guests without stressing out, or just make an ordinary winter day feel special, these cookies deliver every time. Trust me, you’ll want to make a double batch—once you try them, you’ll see why folks ask for the recipe every year.
What Ingredients You Will Need
This eggnog cookies recipe uses simple, wholesome ingredients to deliver bold flavor and that signature fluffy texture. Most are pantry staples, and a few are easy to swap if you need to adjust for allergies or preferences.
- For the Cookie Dough:
- 2 1/4 cups (270g) all-purpose flour
- 2 tablespoons (16g) cornstarch (makes cookies extra soft!)
- 1/2 teaspoon baking powder
- 1/2 teaspoon baking soda
- 3/4 teaspoon ground nutmeg (freshly grated if possible for max flavor)
- 1/2 teaspoon ground cinnamon
- 1/2 teaspoon salt
- 3/4 cup (170g) unsalted butter, softened
- 1 cup (200g) granulated sugar
- 1/4 cup (50g) light brown sugar, packed
- 1 large egg, room temperature
- 1/2 cup (120ml) real eggnog (store-bought or homemade)
- 1 teaspoon pure vanilla extract
- 1/2 teaspoon rum extract (optional, but adds true eggnog flavor)
- For the Nutmeg Glaze:
- 1 1/2 cups (180g) powdered sugar
- 3-4 tablespoons (45-60ml) eggnog
- 1/4 teaspoon ground nutmeg (for sprinkling, freshly grated is best)
- 1/4 teaspoon vanilla extract (optional)
- Ingredient Tips & Substitutions:
- Swap all-purpose flour for a 1:1 gluten-free blend if needed.
- Use dairy-free eggnog if you’re avoiding milk products—works just fine!
- If you don’t have rum extract, a splash of dark rum (1/2 teaspoon) will do, or just omit.
- Want less sugar? Reduce granulated sugar by up to 1/4 cup (keep in mind texture may change slightly).
- I recommend Challenge Butter or Kerrygold for best richness.
- For a stronger spice kick, add a pinch more cinnamon or nutmeg.
If you’re baking during the holiday season, don’t be afraid to try homemade eggnog (it’s worth it for the flavor!). In summer, swap the glaze for a lemon drizzle—trust me, it’s surprisingly tasty.
Equipment Needed
Let’s keep it simple—you don’t need a fancy kitchen setup for these eggnog cookies.
- Large mixing bowl (or stand mixer bowl for hands-free mixing)
- Medium bowl (for dry ingredients)
- Hand mixer or stand mixer (a sturdy whisk works, but electric is easier)
- Measuring cups and spoons (I use both US and metric for accuracy)
- Baking sheet (lined with parchment paper or silicone mat for easy cleanup)
- Cookie scoop (medium size, about 1.5 tablespoons—makes scooping a breeze)
- Wire cooling rack
- Small bowl (for glaze)
- Offset spatula or butter knife (for spreading glaze)
If you don’t have a cookie scoop, two spoons work just fine. For the baking sheet, I’ve found that heavy-duty aluminum sheets bake more evenly. Parchment paper saves you from stuck-on cookies (and scrubbing). If you use a stand mixer, make sure to scrape the bowl—those little bits hide at the bottom! And for budget-friendly options, I’ve baked these on my old, warped baking sheet—they still turn out delicious.
Maintenance tip: If you use silicone mats, rinse them well after each batch—nutmeg can leave a lingering scent. Trust me, learned that the hard way!
Preparation Method
- Prep the Oven and Pan: Preheat your oven to 350°F (175°C). Line a baking sheet with parchment paper or a silicone baking mat. This helps keep the cookies from sticking and makes cleanup a breeze.
- Mix Dry Ingredients: In a medium bowl, whisk together 2 1/4 cups (270g) flour, 2 tablespoons (16g) cornstarch, 1/2 teaspoon baking powder, 1/2 teaspoon baking soda, 3/4 teaspoon nutmeg, 1/2 teaspoon cinnamon, and 1/2 teaspoon salt. The cornstarch is key—don’t skip it! Your dough should smell spicy and warm at this point.
- Cream Butter and Sugars: In a large bowl, beat 3/4 cup (170g) unsalted butter, 1 cup (200g) sugar, and 1/4 cup (50g) brown sugar until light and fluffy—about 2-3 minutes. Scrape down the sides halfway. If using a stand mixer, use medium speed. The mixture should look pale and creamy.
- Add Egg and Extracts: Beat in 1 large egg, 1 teaspoon vanilla extract, and 1/2 teaspoon rum extract (if using). Mix until fully combined. You may need to scrape the bowl again—those extracts like to hide! At this point, the batter will smell like the holidays.
- Pour in Eggnog: Slowly mix in 1/2 cup (120ml) eggnog. The mixture might look a little curdled—don’t worry, that’s normal. It’ll smooth out once the flour goes in.
- Combine Wet and Dry: Add the flour mixture to the butter mixture in two additions, mixing on low speed until just combined. Don’t overmix—stop as soon as you don’t see dry flour. The dough will be soft and a little sticky.
- Scoop the Dough: Using a medium cookie scoop (about 1.5 tablespoons each), drop dough onto the prepared baking sheet, spacing about 2 inches (5cm) apart. If you don’t have a scoop, use two spoons to drop dollops of dough. The cookies will spread a bit, so give them room.
- Bake: Bake in preheated oven for 10-12 minutes. Cookies should be just set, edges barely golden, and centers still soft—don’t overbake! They’ll firm up as they cool. For even baking, rotate the pan halfway through. Sensory cue: tops should look matte, not shiny.
- Cool: Remove cookies from the oven and let them cool on the pan for 3-5 minutes, then transfer to a wire rack. They’re fragile when hot, so use a spatula and be gentle.
- Make the Glaze: In a small bowl, whisk together 1 1/2 cups (180g) powdered sugar, 3-4 tablespoons (45-60ml) eggnog, and 1/4 teaspoon vanilla extract (if using). Mix until smooth and drizzly. Add more eggnog for a thinner glaze, or more sugar for thickness. Taste and adjust nutmeg as desired.
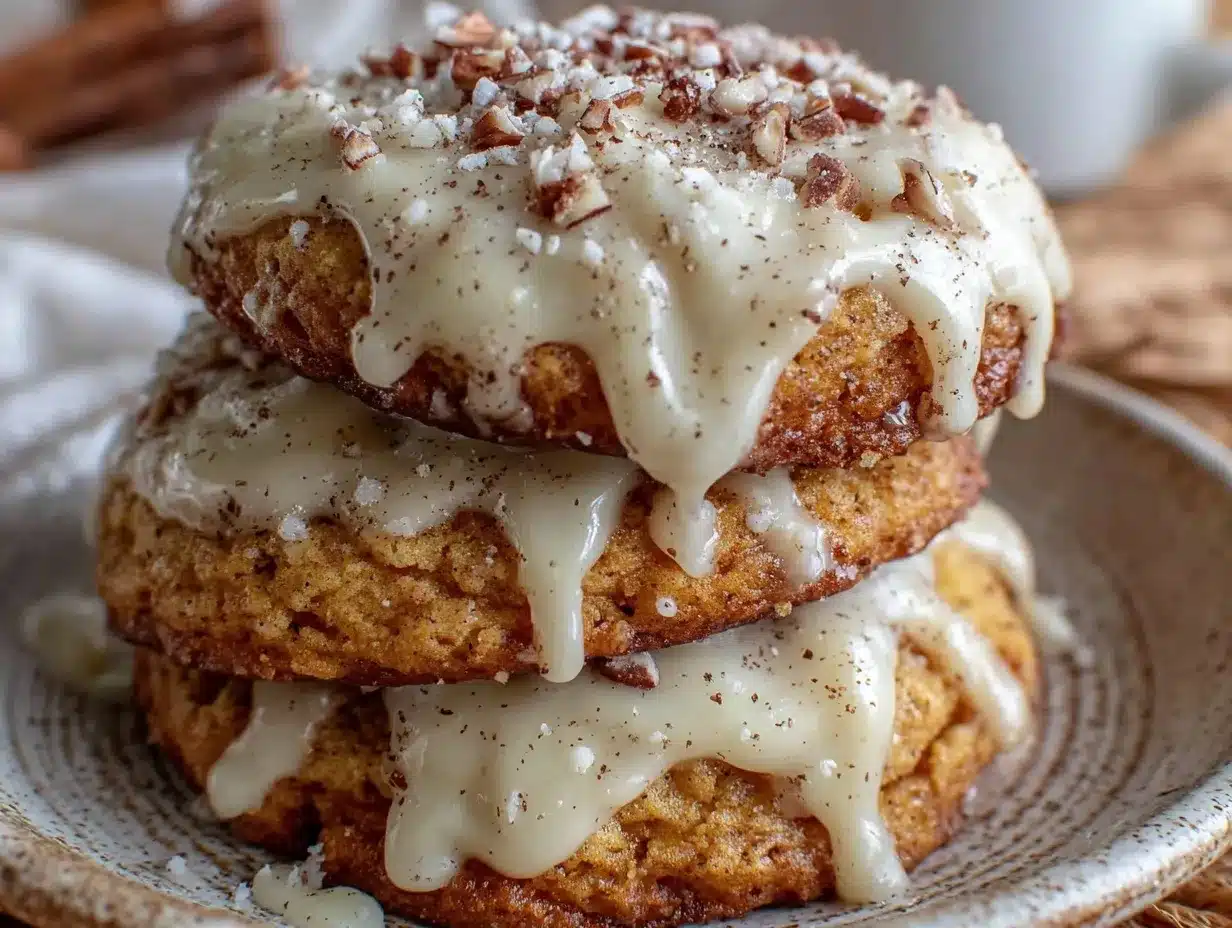
- Glaze Cookies: Once cookies are cool, spoon or spread glaze over each cookie. Sprinkle with a pinch of nutmeg (freshly grated for the best look and flavor). Let glaze set for 30 minutes before stacking or packaging.
- Enjoy: Serve cookies fresh, or store in an airtight container. The glaze will set up and the cookies stay soft for days!
Troubleshooting: If your cookies spread too much, chill dough for 20 minutes before baking. If glaze is too runny, add more powdered sugar. If cookies seem dry, reduce baking time by 1-2 minutes next batch. For extra fluffy cookies, make sure your baking powder and soda are fresh.
Personal Tips: I usually make a double batch and freeze half the dough. These cookies are best enjoyed within 3 days, but they rarely last that long at my house!
Cooking Tips & Techniques
Let’s talk about what really makes these eggnog cookies shine—and a few pitfalls I learned the hard way.
- Don’t Overmix: Once you add flour, mix just until combined. Overmixing leads to tough cookies, and let’s face it, nobody wants a holiday hockey puck.
- Use Room Temp Ingredients: Softened butter and room temperature egg blend best. Cold butter can cause lumps, while a cold egg can seize up the dough.
- Chill the Dough (If Needed): If your kitchen runs warm, pop the dough in the fridge for 20 minutes. It helps prevent cookies from spreading too much. Learned this on a hot afternoon—trust me, it’s worth it.
- Fresh Nutmeg for the Win: Grating nutmeg fresh makes a big difference in flavor. The pre-ground stuff works, but the real deal is a game changer.
- Consistent Size: Use a cookie scoop for even cookies that bake at the same rate. If you go by hand, try to keep dough balls close in size.
- Watch the Bake Time: Cookies go from perfect to dry in a flash. Pull them when the edges are just golden and the centers look set but soft. If you’re unsure, err on the side of underbaking.
- Glaze Timing: Wait until cookies are fully cool before glazing—otherwise, the glaze melts off. I got impatient once, and my glaze turned into a sticky puddle (still tasty, but not pretty!).
I’ve burned a batch or two, tried chilling vs not chilling, and experimented with glaze thickness. Multitasking is easy with this recipe—start the glaze while the cookies cool, and you’ll save time. For consistent results, weigh your flour if possible. And if you’re baking for a crowd, double the recipe—it scales up perfectly.
Variations & Adaptations
You can easily make these eggnog cookies your own—here are some of my favorite tweaks:
- Gluten-Free: Substitute a 1:1 gluten-free flour blend for all-purpose flour. The texture changes slightly, but they’re still fluffy and delicious.
- Dairy-Free: Use plant-based butter and dairy-free eggnog. I’ve tried oat nog and coconut nog—both work well and taste surprisingly creamy.
- Spiced Chocolate: Add 1/4 cup (40g) mini chocolate chips to the dough for a chocolatey twist. The combo of nutmeg and chocolate is so good!
- Lemon Glaze: Replace eggnog in the glaze with fresh lemon juice for a springy, bright finish (great for non-holiday baking).
- Nut-Free: There are no nuts in the base recipe, but always check your eggnog and extracts for allergens.
- Different Baking Methods: For crispier cookies, bake 2 minutes longer and flatten the dough balls slightly before baking.
- Personal Favorite: Last year, I added a pinch of cardamom to the dough and it was a hit—adds a subtle floral note that pairs beautifully with eggnog.
Customize the spice levels to suit your family’s taste. You can even add a splash of bourbon or whiskey to the glaze for adults (just a hint!). The basic dough is super forgiving, so don’t be afraid to experiment with different extracts or toppings.
Serving & Storage Suggestions
These fluffy eggnog cookies shine when served at room temperature, with the glaze set and a dusting of fresh nutmeg. For a festive look, arrange them on a holiday platter or stack them in a gift tin lined with wax paper. I love pairing them with hot cocoa, spiced tea, or a glass of (you guessed it) real eggnog.
They’re a perfect addition to a Christmas cookie exchange, and make fantastic edible gifts—just wrap in cellophane bags and tie with a ribbon. For brunch, serve alongside fresh fruit or a savory breakfast casserole.
To store, place cookies in an airtight container at room temperature for up to 4 days. For longer storage, freeze unglazed cookies in a zip-top bag for up to 2 months. Thaw and glaze before serving. You can also freeze shaped dough balls and bake straight from the freezer—just add 1-2 minutes to the bake time.
For reheating, microwave cookies for 10 seconds to restore softness. The flavors deepen after a day, so if you can wait, they’re even better on day two. Just don’t stack glazed cookies until the topping is fully set, or you’ll have a sticky mess (learned that one the hard way!).
Nutritional Information & Benefits
Each fluffy eggnog cookie (with glaze) contains approximately:
- Calories: 125
- Fat: 6g
- Carbohydrates: 17g
- Protein: 2g
- Sugar: 9g
The real eggnog adds a little calcium and vitamin D, while the spices like nutmeg and cinnamon offer antioxidants. If you use a dairy-free eggnog, you’ll lower cholesterol and saturated fat. For gluten-free or nut-free diets, substitutions are easy and effective.
Potential allergens include dairy, eggs, and gluten (unless adapted). From a wellness perspective, these cookies are all about mindful indulgence—enjoy one or two, savor the seasonal flavors, and remember that home baking is as much about joy as nutrition. For me, sharing these treats brings everyone together, and that’s the healthiest benefit of all.
Conclusion
So, why should you give these fluffy eggnog cookies with nutmeg glaze a try? They’re festive, easy, and totally irresistible—the best holiday treat for cookie swaps, gifting, or just cozy nights in. The recipe is flexible, forgiving, and packed with nostalgic flavor. You can customize it to suit your family’s tastes, dietary needs, or spice preferences.
Personally, I love how these cookies bring back all those childhood holiday memories—while still feeling like a fresh, new tradition. The soft texture, sweet glaze, and hint of spice make every bite special. If you’re searching for a new holiday favorite, this eggnog cookies recipe deserves a spot in your rotation.
Leave a comment below if you try them, share your adaptations, or pass the recipe along to your baking buddies. Bookmark this for your next cookie craving—and, most importantly, happy holidays and happy baking!
FAQs
Can I make eggnog cookies ahead of time?
Absolutely! You can bake the cookies up to two days in advance and store them in an airtight container. Glaze them on the day you plan to serve for best results.
What kind of eggnog works best?
Any thick, creamy eggnog will work—store-bought, homemade, or even dairy-free versions. Just avoid super thin eggnog, which can make the dough too runny.
How do I freeze eggnog cookies?
Freeze unglazed cookies in a zip-top bag for up to 2 months. Thaw, then glaze before serving. You can also freeze dough balls and bake straight from the freezer.
Can I make these cookies gluten-free?
Yes! Use a 1:1 gluten-free flour blend in place of all-purpose flour. The cookies will still be soft and fluffy.
Why are my cookies spreading too much?
This can happen if the butter is too warm or the dough is too soft. Chill the dough for 15-20 minutes before baking, and make sure your baking sheet isn’t hot from a previous batch.
Pin This Recipe!
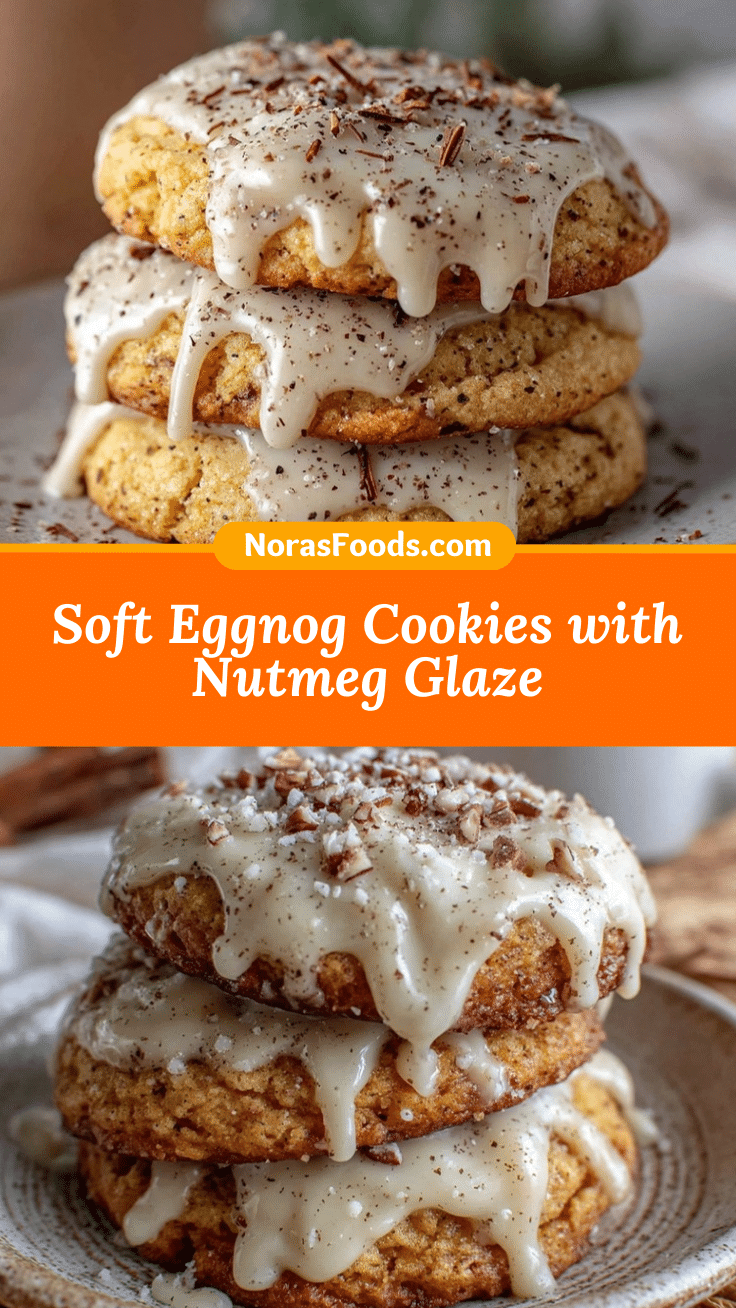
Eggnog Cookies Recipe – Best Fluffy Holiday Treat with Nutmeg Glaze
These fluffy eggnog cookies are a festive holiday treat, featuring a soft, cake-like texture and a sweet nutmeg glaze. Perfect for Christmas gatherings, gifting, or cozy winter nights, they deliver nostalgic eggnog flavor in every bite.
- Prep Time: 20 minutes
- Cook Time: 12 minutes
- Total Time: 32 minutes
- Yield: 24 cookies 1x
- Category: Dessert
- Cuisine: American
Ingredients
- 2 1/4 cups all-purpose flour
- 2 tablespoons cornstarch
- 1/2 teaspoon baking powder
- 1/2 teaspoon baking soda
- 3/4 teaspoon ground nutmeg (freshly grated if possible)
- 1/2 teaspoon ground cinnamon
- 1/2 teaspoon salt
- 3/4 cup unsalted butter, softened
- 1 cup granulated sugar
- 1/4 cup light brown sugar, packed
- 1 large egg, room temperature
- 1/2 cup real eggnog (store-bought or homemade)
- 1 teaspoon pure vanilla extract
- 1/2 teaspoon rum extract (optional)
- 1 1/2 cups powdered sugar
- 3–4 tablespoons eggnog
- 1/4 teaspoon ground nutmeg (for sprinkling, freshly grated is best)
- 1/4 teaspoon vanilla extract (optional)
Instructions
- Preheat oven to 350°F (175°C). Line a baking sheet with parchment paper or a silicone baking mat.
- In a medium bowl, whisk together flour, cornstarch, baking powder, baking soda, nutmeg, cinnamon, and salt.
- In a large bowl, beat unsalted butter, granulated sugar, and brown sugar until light and fluffy (2-3 minutes).
- Beat in egg, vanilla extract, and rum extract (if using) until fully combined.
- Slowly mix in eggnog. The mixture may look curdled; this is normal.
- Add the flour mixture to the butter mixture in two additions, mixing on low speed until just combined. Do not overmix.
- Using a medium cookie scoop (about 1.5 tablespoons), drop dough onto the prepared baking sheet, spacing about 2 inches apart.
- Bake for 10-12 minutes, until cookies are just set and edges are barely golden. Rotate pan halfway through baking.
- Let cookies cool on the pan for 3-5 minutes, then transfer to a wire rack.
- In a small bowl, whisk together powdered sugar, eggnog, and vanilla extract (if using) until smooth and drizzly.
- Once cookies are cool, spoon or spread glaze over each cookie. Sprinkle with a pinch of nutmeg.
- Let glaze set for 30 minutes before stacking or packaging. Serve fresh or store in an airtight container.
Notes
For extra fluffy cookies, ensure baking powder and soda are fresh. Chill dough for 20 minutes if cookies spread too much. Use freshly grated nutmeg for best flavor. Cookies are best enjoyed within 3 days. For gluten-free or dairy-free adaptations, substitute with 1:1 gluten-free flour blend and plant-based eggnog/butter.
Nutrition
- Serving Size: 1 cookie
- Calories: 125
- Sugar: 9
- Sodium: 70
- Fat: 6
- Saturated Fat: 3
- Carbohydrates: 17
- Fiber: 0.5
- Protein: 2
Keywords: eggnog cookies, holiday cookies, Christmas dessert, nutmeg glaze, fluffy cookies, festive baking, easy cookie recipe, winter treats


