“You have to try these truffles,” my neighbor said with a wink, sliding a small box across the fence. I was skeptical—homemade chocolate peanut butter Easter egg truffles? Honestly, I pictured some overly sweet, messy affair that would stick to my teeth and fingers alike. But curiosity got the better of me after a long, tiring day when the idea of a sweet little treat felt like a whispered promise of comfort.
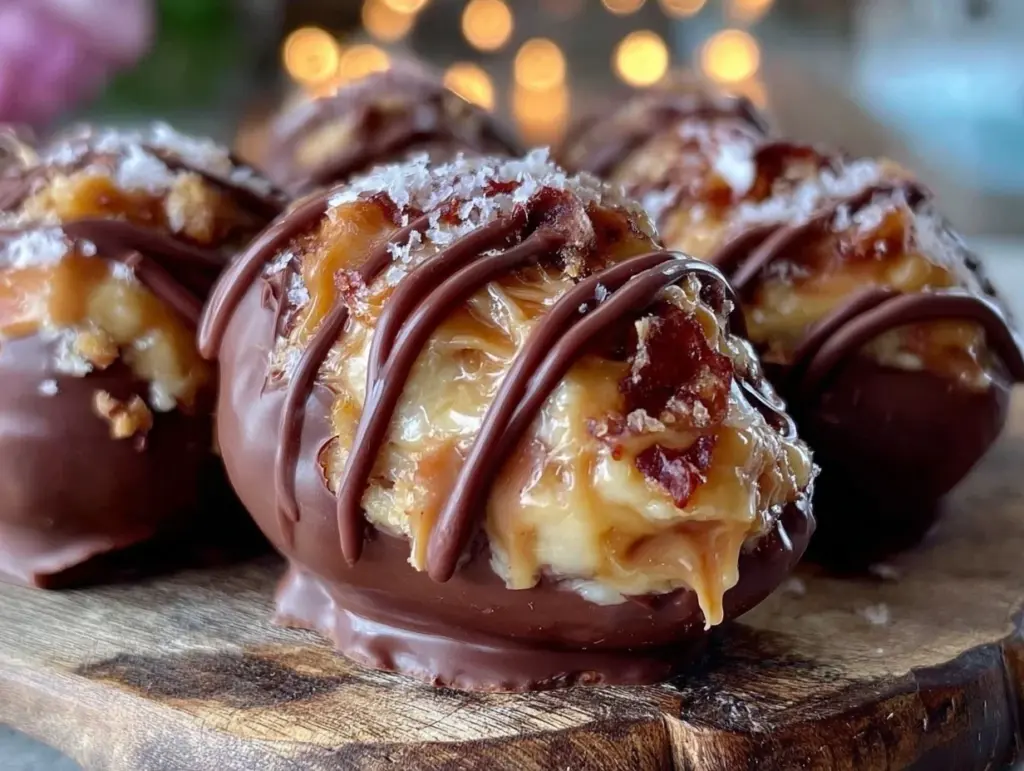
The moment I bit into one, the rich, velvety chocolate shell gave way to a creamy peanut butter center that wasn’t too heavy or overly sweet. It was like a tiny celebration of flavors in my mouth, perfectly balanced and just the right size to savor slowly while the evening quiet settled in. I found myself making these decadent chocolate peanut butter Easter egg truffles several times that week—each batch disappearing faster than the last.
No fancy equipment, no complicated steps, just a simple recipe with ingredients that felt familiar but somehow delivered a treat that felt special. I realized this wasn’t just a truffle recipe; it was the kind of sweet that made a regular day feel a little brighter, a bit more indulgent, without any fuss. And that’s why I keep coming back to it, especially around Easter when a little chocolate magic feels just right.
So here’s the thing: these truffles aren’t just candy. They’re a quiet moment, a small joy, and maybe, just maybe, a new tradition waiting to happen in your kitchen too.
Why You’ll Love This Recipe
Having made these truffles countless times (and yes, tested them thoroughly on friends and family), I can say this recipe hits the sweet spot for many reasons:
- Quick & Easy: From start to finish, these truffles take under 30 minutes, perfect for last-minute Easter preparations or spontaneous cravings.
- Simple Ingredients: You probably have everything in your pantry already—no need for specialty stores or obscure items.
- Perfect for Easter & Beyond: Shaped like Easter eggs, they’re ideal for holiday baskets but equally wonderful any time you want a bite-sized indulgence.
- Crowd-Pleaser: Both kids and adults rave about these—trust me, I’ve had to hide a batch or two to save some for later.
- Unbelievably Delicious: The creamy peanut butter paired with the smooth chocolate coating offers a texture and flavor combo that feels downright luxurious.
What sets this recipe apart is the subtle balance it strikes. Instead of a cloyingly sweet candy, these truffles feature a peanut butter filling that’s rich yet light, thanks to a little cream cheese addition that adds smoothness and a slight tang. The chocolate shell is thin but sturdy—enough to crack delightfully with each bite without overwhelming the filling.
Honestly, it’s the kind of recipe that makes you close your eyes after the first taste and think, “Okay, this is exactly how peanut butter and chocolate should be.” It’s comfort food with a touch of elegance, easy enough to whip up on a weekday but special enough for holiday celebrations or gifting. And if you want to expand your homemade treat repertoire, you might enjoy the healthy trail mix energy bites for a wholesome snack option.
What Ingredients You Will Need
This recipe keeps things straightforward with familiar, pantry-friendly ingredients that come together to create rich, satisfying truffles. Each component plays a key role in the texture and flavor:
- Chocolate Chips (semi-sweet or dark): About 12 oz (340 g) for coating. I prefer Ghirardelli chips for smooth melting and deep flavor.
- Peanut Butter: 1 cup (250 g), creamy style works best for a smooth filling. Natural peanut butter can be used but may alter texture slightly.
- Cream Cheese: 4 oz (115 g), softened. This adds a silky texture and subtle tang that balances the sweetness.
- Powdered Sugar: 1 cup (120 g), sifted. Sweetens and helps firm the filling.
- Vanilla Extract: 1 tsp (5 ml) for a warm, aromatic note.
- Salt: A pinch, enhances the peanut butter flavor and balances sweetness.
Optional but recommended:
- Chopped Peanuts: A handful for garnish or mixed into the filling for crunch.
- Sprinkles or edible glitter: For a festive Easter touch on the finished truffles.
These ingredients are easy to find year-round, but around Easter, you might spot festive peanut butters or specialty chocolates that add a seasonal twist. If you need a gluten-free option, this recipe is naturally free of gluten, and you can swap the powdered sugar with a superfine sugar blend if desired for smoother texture.
Equipment Needed
You’ll need only a few basic kitchen tools to make these chocolate peanut butter Easter egg truffles:
- Mixing Bowls: One medium for the filling and one heatproof for melting chocolate.
- Electric Mixer or Hand Mixer: Helpful for blending the filling to a smooth consistency, though a sturdy spoon works if you don’t have one.
- Baking Sheet: Lined with parchment paper for setting the truffles.
- Spoons or Small Cookie Scoop: For portioning the filling evenly.
- Fork or Dipping Tool: To dip the truffles into the melted chocolate.
- Microwave-safe Bowl or Double Boiler: For melting the chocolate gently without burning.
If you don’t have a cookie scoop, using two spoons works just fine for shaping. Also, if you want to get fancy, silicone molds shaped like Easter eggs can be used for a polished look, but I find the hand-shaped versions charming and rustic. For melting chocolate, a double boiler helps prevent scorching, but a microwave in short bursts with stirring in between works just as well. I’ve made these truffles many times with just what’s on hand — no special gadgets necessary.
Preparation Method
- Soften the cream cheese and peanut butter: Leave the cream cheese out at room temperature for about 30 minutes, or microwave gently for 10 seconds if short on time. This makes blending easier and smoother.
- Mix the filling: In a medium bowl, combine 1 cup (250 g) creamy peanut butter, 4 oz (115 g) softened cream cheese, 1 cup (120 g) powdered sugar, 1 tsp (5 ml) vanilla extract, and a pinch of salt. Beat with an electric mixer on medium speed for 2–3 minutes until smooth and creamy. The mixture should be firm enough to hold shape but soft enough to scoop easily.
- Shape the truffles: Using a small cookie scoop or two spoons, portion out about 1 tablespoon (15 g) of filling. Roll it gently between your palms to form an egg shape. Place each shaped truffle on a parchment-lined baking sheet. Refrigerate for at least 20 minutes or until firm.
- Melt the chocolate: Place 12 oz (340 g) chocolate chips in a microwave-safe bowl. Microwave in 30-second intervals, stirring well each time, until completely smooth. Alternatively, melt using a double boiler over simmering water, stirring frequently.
- Dip the truffles: Using a fork or dipping tool, dip each chilled peanut butter egg into the melted chocolate, letting excess drip off. Return to the parchment-lined baking sheet. If desired, sprinkle chopped peanuts or festive sprinkles on top before the chocolate sets.
- Chill to set: Refrigerate the dipped truffles for at least 30 minutes or until the chocolate shell hardens.
- Serve and enjoy: Store any leftovers in an airtight container in the fridge for up to a week. The truffles also freeze well for longer storage.
Quick tip: If the chocolate starts to thicken while dipping, gently rewarm it in short bursts. Also, keeping your hands cool helps when rolling the filling into shapes—otherwise, it can get sticky fast! I learned the hard way that rushing this step leads to frustration, so patience here really pays off.
Cooking Tips & Techniques
Making these chocolate peanut butter Easter egg truffles is straightforward, but a few tricks can really boost your success:
- Temperature matters: The cream cheese and peanut butter must be soft but not melted. Too cold and the filling is hard to mix; too warm and it becomes greasy.
- Use powdered sugar, not granulated: This keeps the filling silky smooth without graininess.
- Chill before dipping: Firm filling holds its shape better when dipped in chocolate, making the process less messy.
- Manage your chocolate’s temperature: Overheated chocolate can seize or become grainy. Stir often and melt gently.
- Work quickly but carefully: Chocolate sets fast once off heat, so dip in small batches. If chocolate hardens, rewarm briefly.
- Personal lesson: I once skipped chilling and ended up with a chocolate-coated blob instead of truffles—lesson learned!
- Multitask smartly: While chocolate is melting, shape your truffle centers to save time.
Following these techniques will make the process smoother and your treats more uniform and appealing. Plus, they’ll taste just like the ones I sneakily stash in my freezer for emergencies.
Variations & Adaptations
Want to mix things up? Here are some fun and tasty variations I’ve tried (and loved):
- Nut-free version: Swap peanut butter for sunflower seed butter to keep it allergy-friendly without losing creaminess.
- Dark chocolate twist: Use bittersweet chocolate for the coating to add a richer, less sweet contrast to the filling.
- Seasonal flavors: Add a pinch of cinnamon or pumpkin spice to the filling for a cozy, autumn-inspired treat.
- Vegan adaptation: Use dairy-free cream cheese and dark chocolate that’s dairy-free. The texture is slightly different but still delicious.
- Crunch factor: Fold in chopped roasted peanuts or pretzels into the filling for extra texture.
For those who prefer a different shape or presentation, try pressing the filling into mini silicone egg molds before freezing, then dipping. It’s a festive option that’s sure to impress guests. If you enjoy chicken dinners with a punch of flavor, you might appreciate the easy one-pan Greek chicken with vegetables for a savory complement to your sweet treats.
Serving & Storage Suggestions
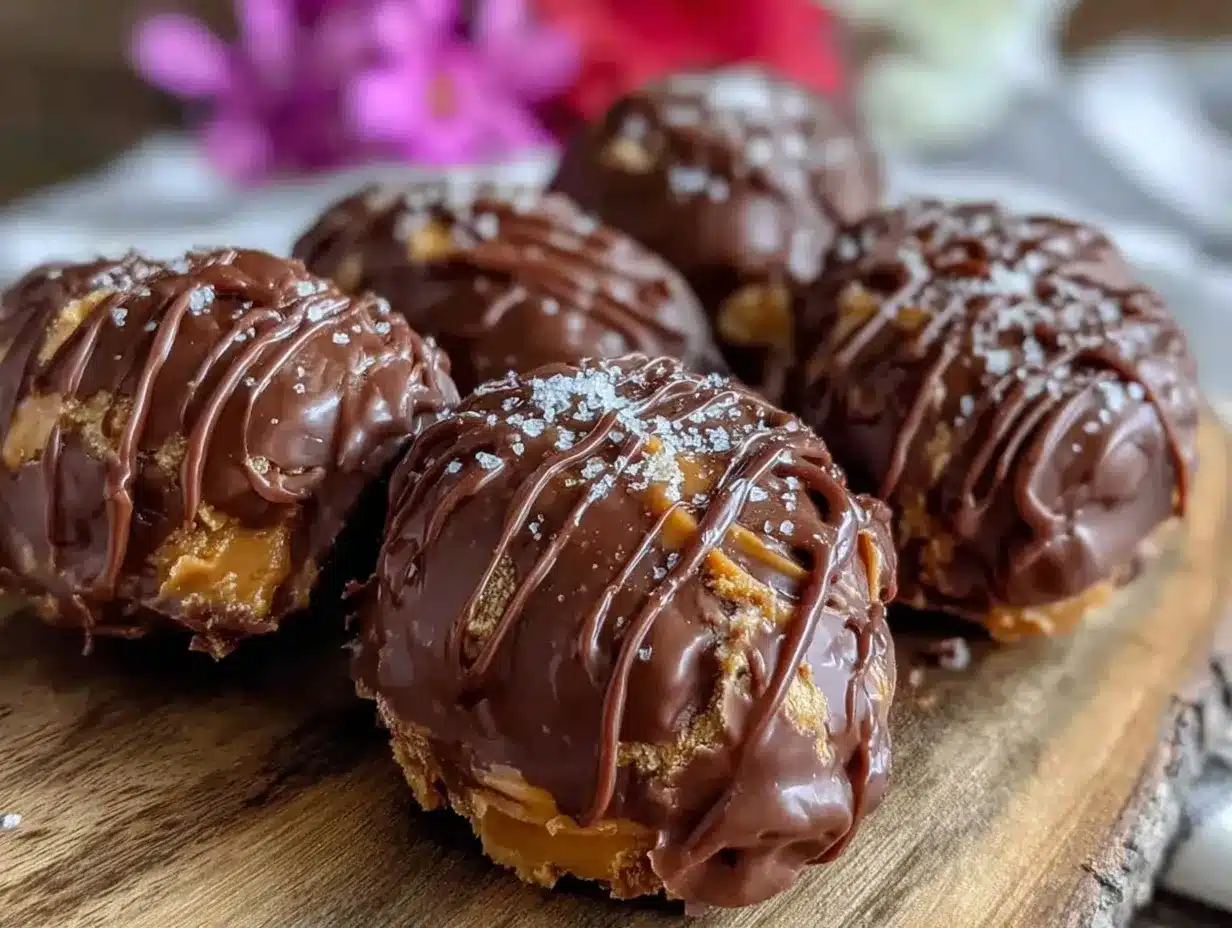
These truffles are best served chilled or at cool room temperature to keep the chocolate shell firm but not hard. They make perfect little bites for Easter baskets, dessert plates, or as a sweet finish to any meal.
Try pairing them with a cup of coffee, hot cocoa, or even a rich red wine for adult gatherings. For a festive brunch, they add a lovely sweet touch alongside other treats, like a cheesy breakfast burrito or fresh fruit salad.
Store leftover truffles in an airtight container in the refrigerator for up to one week. They freeze beautifully too—wrap them tightly and freeze for up to 3 months. Thaw in the fridge for a few hours before serving. Over time, the flavors meld and deepen, making them even more delightful.
Nutritional Information & Benefits
Each truffle (about 1 tablespoon or 20 g) contains approximately:
| Calories | 110 |
|---|---|
| Fat | 8 g |
| Protein | 3 g |
| Carbohydrates | 8 g |
| Sugar | 6 g |
Key benefits include protein and healthy fats from peanut butter, plus the calcium and probiotics from cream cheese. This recipe is naturally gluten-free and can be tailored for dairy-free diets with simple swaps.
While these truffles are indulgent, the inclusion of cream cheese cuts down on excessive sweetness and adds a tang that balances the richness—making them feel less like candy and more like a treat you can feel good about enjoying in moderation.
Conclusion
At the heart of these decadent chocolate peanut butter Easter egg truffles is a simple joy: a handmade treat that feels both indulgent and approachable. Whether you’re making them for Easter baskets, gifting friends, or just sneaking a bite after a long day, they’re a recipe that sticks with you.
Don’t be afraid to adjust the flavors or shapes to suit your style. After all, part of the fun is making them your own. For me, these truffles are a little pause—a moment’s delicious calm in a busy world.
I’d love to hear how your batch turns out or what creative twists you try. Drop a comment or share your photos—let’s keep this sweet conversation going!
Happy truffle-making!
FAQs
Can I use natural peanut butter instead of creamy?
Yes, but natural peanut butter is thinner and can make the filling a bit softer. You might need to add a little extra powdered sugar to firm it up.
How do I prevent chocolate from seizing when melting?
Heat the chocolate slowly in short bursts, stirring frequently. Avoid any water contact, and use a double boiler if possible for better temperature control.
Can I make these truffles ahead of time?
Absolutely! They keep well in the fridge for up to a week and freeze nicely for several months. Just thaw in the fridge before serving.
What’s the best way to shape the truffles evenly?
Using a small cookie scoop or teaspoon helps with uniform size. If you don’t have one, two spoons work fine—just take your time rolling between your palms.
Are these truffles suitable for kids?
Yes! They’re always a hit with kids, especially because of the peanut butter and chocolate combo. Just be mindful if anyone has nut allergies.
Pin This Recipe!

Decadent Chocolate Peanut Butter Easter Egg Truffles

These homemade chocolate peanut butter Easter egg truffles feature a creamy peanut butter and cream cheese filling coated in a smooth chocolate shell, perfect for a quick, indulgent treat.
- Prep Time: 10 minutes
- Cook Time: 15 minutes
- Total Time: 25 minutes
- Yield: 24 truffles 1x
- Category: Dessert
- Cuisine: American
Ingredients
- 12 oz (340 g) semi-sweet or dark chocolate chips
- 1 cup (250 g) creamy peanut butter
- 4 oz (115 g) cream cheese, softened
- 1 cup (120 g) powdered sugar, sifted
- 1 tsp (5 ml) vanilla extract
- Pinch of salt
- Optional: chopped peanuts for garnish or mixed into filling
- Optional: sprinkles or edible glitter for decoration
Instructions
- Soften the cream cheese and peanut butter by leaving cream cheese at room temperature for about 30 minutes or microwaving gently for 10 seconds.
- In a medium bowl, combine peanut butter, softened cream cheese, powdered sugar, vanilla extract, and salt. Beat with an electric mixer on medium speed for 2–3 minutes until smooth and creamy.
- Using a small cookie scoop or two spoons, portion about 1 tablespoon (15 g) of filling and roll gently between palms to form an egg shape. Place on a parchment-lined baking sheet and refrigerate for at least 20 minutes until firm.
- Melt the chocolate chips in a microwave-safe bowl in 30-second intervals, stirring well each time until smooth, or melt using a double boiler over simmering water.
- Dip each chilled peanut butter egg into the melted chocolate using a fork or dipping tool, letting excess drip off. Place back on the parchment-lined baking sheet. Sprinkle chopped peanuts or festive sprinkles if desired before the chocolate sets.
- Refrigerate the dipped truffles for at least 30 minutes or until the chocolate shell hardens.
- Store leftovers in an airtight container in the refrigerator for up to one week or freeze for up to 3 months. Thaw in the fridge before serving.
Notes
Keep cream cheese and peanut butter softened but not melted for best texture. Chill filling before dipping to prevent mess. Melt chocolate gently to avoid seizing. Work quickly when dipping to keep chocolate smooth. Store truffles chilled or frozen for longer shelf life.
Nutrition
- Serving Size: 1 truffle (about 1 t
- Calories: 110
- Sugar: 6
- Fat: 8
- Carbohydrates: 8
- Protein: 3
Keywords: chocolate truffles, peanut butter truffles, Easter treats, homemade candy, easy dessert, no bake, holiday sweets


