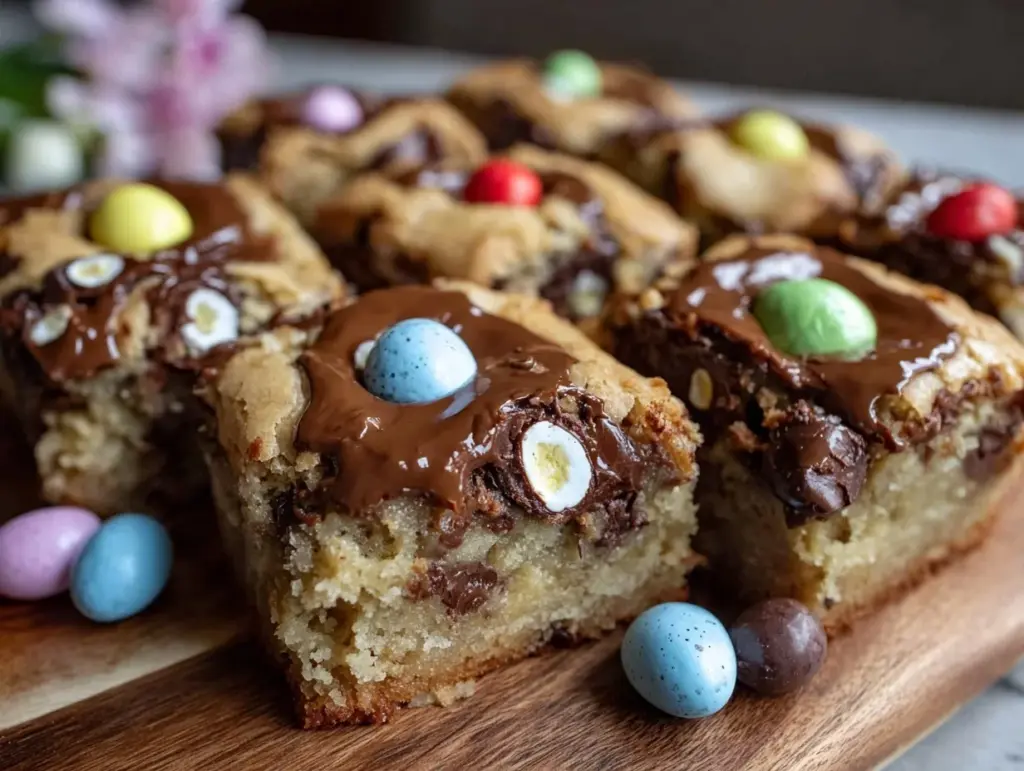
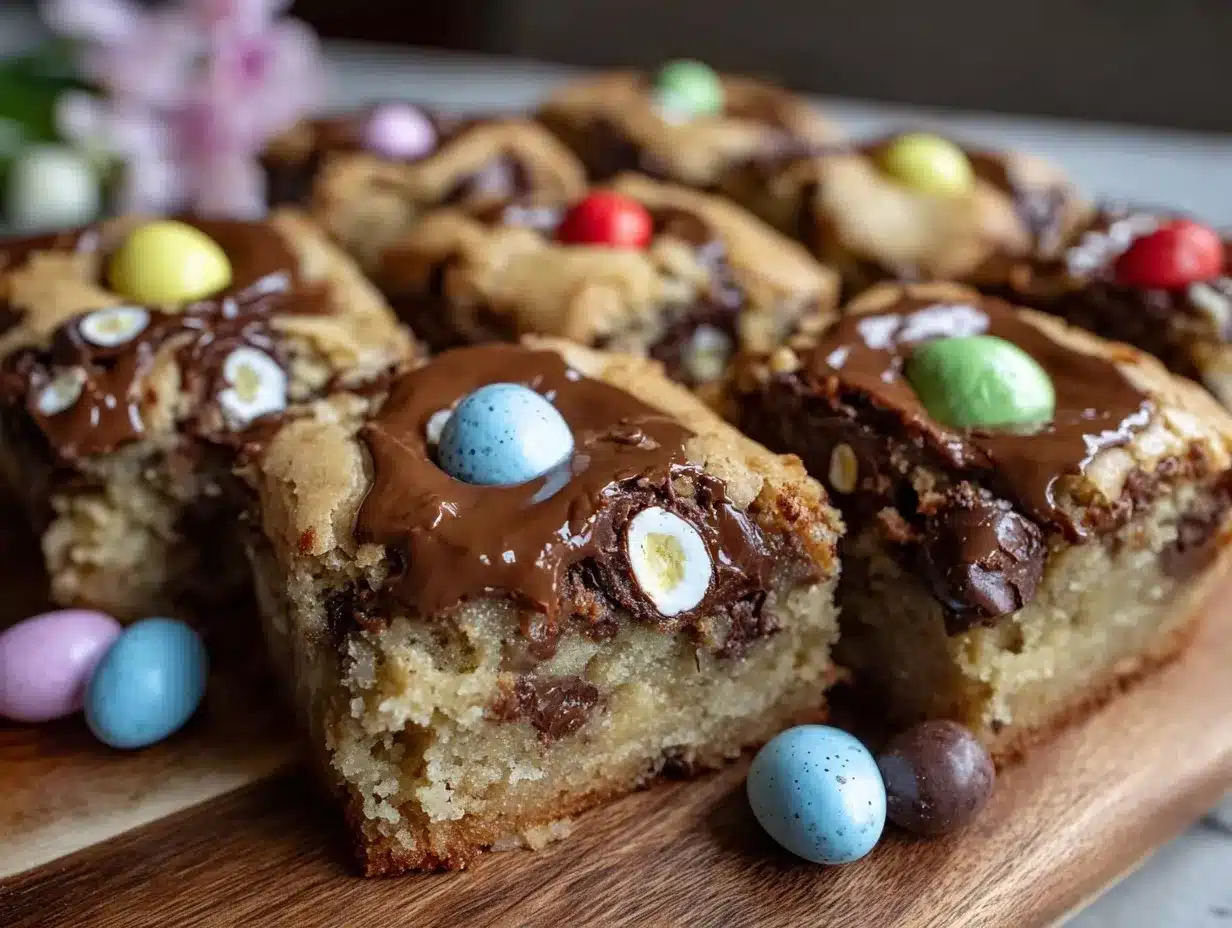
Let me tell you, the scent of vanilla and brown sugar mingling with warm, melty chocolate wafting from my oven is enough to make anyone’s mouth water. The first time I baked these Crispy Mini Egg Blondies with Melty Chocolate Chunks, I was instantly hooked. You know that kind of moment where you pause, take a deep breath, and just smile because you know you’re onto something truly special? That was it. Years ago, when I was knee-high to a grasshopper, my grandma used to make her own version of blondies, but these mini versions—crisp on the edges, chewy inside, and bursting with gooey chocolate chunks—are a modern twist I wish I’d discovered way sooner.
My family couldn’t stop sneaking them off the cooling rack (and honestly, I can’t really blame them). These little treats bring pure, nostalgic comfort while being dangerously easy to whip up. They’re perfect for springtime gatherings, Easter baskets, or just brightening up your Pinterest cookie board with something a little different. After testing this recipe multiple times—mostly in the name of research, of course—it’s become a staple for family gatherings and sweet gifting. Trust me, this recipe feels like a warm hug wrapped in buttery, chocolatey goodness, and you’re going to want to bookmark this one.
Why You’ll Love This Crispy Mini Egg Blondies Recipe
Honestly, these blondies hit all the right notes. I’ve tried plenty of blondie recipes before, but this one stands out for several reasons. Here’s why you’ll want to keep these crispy mini egg blondies in your baking repertoire:
- Quick & Easy: Comes together in under 30 minutes, perfect for those last-minute spring treat cravings.
- Simple Ingredients: No fancy grocery trips needed; you likely already have everything in your pantry.
- Perfect for Spring Celebrations: Great for Easter brunches, potlucks, or just a sunny afternoon snack.
- Crowd-Pleaser: Kids and adults alike rave about the crispy edges and that melty chocolate chunk surprise.
- Unbelievably Delicious: The texture combo of crispy outside and chewy inside is pure bliss.
What makes this recipe different? It’s all in the technique—and the chocolate chunks. Instead of finely chopping chocolate, I chunk it up big so each bite has pockets of melty chocolate that feel indulgent without being overwhelming. Plus, the mini size means you get that perfectly crispy edge on every single blondie—a little bite of heaven every time. This isn’t just another blondie recipe; it’s the best version you’ll make again and again. Honestly, after one taste, you’ll close your eyes and savor that buttery, sweet, and chocolatey goodness that feels like comfort food reimagined for spring.
What Ingredients You Will Need
This recipe uses simple, wholesome ingredients to deliver bold flavor and satisfying texture without the fuss. Most are pantry staples, and substitutions are easy if you want to tweak it a bit.
- Unsalted butter, melted (adds richness and helps achieve those crispy edges)
- Light brown sugar, packed (for that caramel-like sweetness and moisture)
- Granulated sugar (balances the brown sugar and adds crispness)
- Large eggs, room temperature (binds everything together and adds moisture)
- Pure vanilla extract (for deep, warm flavor)
- All-purpose flour (I recommend King Arthur for consistent texture)
- Baking powder (just a touch to give a slight lift)
- Salt (enhances the sweetness and balances flavor)
- Mini chocolate eggs, roughly chopped (the star of the show—use your favorite brand; I love Cadbury for that creamy melt)
Substitution notes: For a gluten-free option, swap all-purpose flour with a 1:1 gluten-free baking flour. Use dairy-free butter and chocolate chunks if you prefer a vegan version (though you’ll want to use flax eggs or a vegan egg replacer). In spring, feel free to swap mini chocolate eggs for colorful pastel M&Ms or other seasonal candies.
Equipment Needed
- Mini muffin tin (to create those perfectly sized mini blondies)
- Mixing bowls (one large and one medium)
- Whisk and rubber spatula (for mixing and folding ingredients gently)
- Measuring cups and spoons (for precise ingredient amounts)
- Cooling rack (to let your blondies cool and crisp up)
- Optional: non-stick spray or cupcake liners (to prevent sticking and for easy removal)
If you don’t have a mini muffin tin, a regular muffin tin will work—just expect larger blondies with slightly different baking times. I’ve tried these with silicone liners, and they make cleanup a breeze. For budget-friendly options, many stores carry affordable mini tins that make a world of difference in presentation and baking evenness. After a few batches, I recommend investing in a good quality non-stick tin—that crispy edge is worth it!
Preparation Method
- Preheat your oven to 350°F (175°C). Lightly grease your mini muffin tin or line with mini cupcake liners. This step ensures your blondies will come out clean and crispy.
- Melt the butter gently in a saucepan or microwave until just melted (about 1 minute). Pour it into a large mixing bowl and whisk in the light brown sugar and granulated sugar until combined and smooth.
- Add the eggs, one at a time, whisking well after each addition. Stir in the pure vanilla extract. The mixture should look glossy and slightly thickened.
- In a separate bowl, whisk together the all-purpose flour, baking powder, and salt. This dry mix ensures even distribution of leavening and flavor.
- Gradually fold the dry ingredients into the wet ingredients using a spatula, mixing just until combined. Overmixing can make the blondies tough, so be gentle here.
- Fold in the chopped mini chocolate eggs carefully, leaving plenty of chunks intact to melt during baking.
- Using a teaspoon or small cookie scoop, drop batter into each mini muffin cup, filling about 3/4 full. This helps achieve the crispy edges and chewy centers.
- Bake for 12-15 minutes, or until the edges are golden brown and a toothpick inserted near the center comes out with a few moist crumbs (not wet batter). The tops should look set but still soft.
- Cool in the pan for 5 minutes, then transfer to a cooling rack to crisp up fully. The cooling step is key for that perfect texture balance.
Tips: If your oven runs hot, start checking at 10 minutes to avoid overbaking. The blondies will continue to set as they cool, so err on the side of slightly underdone for chewy centers. Also, resist the urge to push them out of the tin while piping hot—they need a moment to firm up.
Cooking Tips & Techniques
One secret to these crispy mini egg blondies is the balance of sugars—brown sugar adds chewiness while granulated sugar creates crisp edges. Don’t skip using both! Also, melting the butter first (rather than creaming it) gives the batter a lovely moist texture that bakes up beautifully.
Watch your mixing. Overworking the batter activates gluten, leading to dense blondies. Folding the dry ingredients in gently keeps them tender. And chopping the chocolate eggs into chunky pieces means you get those pockets of melty chocolate that feel like little surprises in every bite.
Another thing I learned the hard way: don’t skip the cooling rack step. Letting them cool in the tin leads to soggy bottoms, but transferring them after a few minutes gives you that crisp finish. Multitasking tip? While the blondies bake, clean up your bowls and prep your serving tray. It saves time and keeps your kitchen manageable.
Variations & Adaptations
If you want to switch things up, here are some ideas I’ve tried and liked:
- Nutty Twist: Add chopped toasted pecans or walnuts for crunch and depth of flavor.
- Seasonal Fruit: Fold in dried cranberries or cherries for a tart contrast that’s perfect for spring.
- Chocolate Swap: Use white chocolate chunks or peanut butter chips instead of mini chocolate eggs.
For a gluten-free version, swapping in a 1:1 gluten-free flour blend works beautifully—just keep an eye on baking time, as it may vary slightly. If you’re dairy-free, use melted coconut oil or vegan butter and dairy-free chocolate chunks. I once tried these with a sprinkle of flaky sea salt on top before baking—a small touch that adds a lovely flavor pop.
Serving & Storage Suggestions
These mini egg blondies are best served at room temperature, allowing the chocolate chunks to be perfectly melty but not gooey. They’re adorable on a spring dessert table, paired with a cup of tea or a cold glass of milk for the kids.
Store leftover blondies in an airtight container at room temperature for up to 3 days. For longer storage, pop them in the fridge for up to a week or freeze them (wrapped tightly) for up to 3 months. When reheating, a quick 10-15 second zap in the microwave revives that melty chocolate magic. Just don’t overdo it or they’ll dry out.
Fun fact: the flavors actually deepen after a day, making these even more addictive as leftovers. So if you can resist, give them a day to rest (though let’s face it, that’s the hard part).
Nutritional Information & Benefits
Each mini egg blondie contains approximately 150-180 calories, with moderate sugar and fat levels typical for a treat. The use of butter provides some vitamin A, while eggs contribute protein and essential nutrients.
This recipe isn’t meant to be a health food, but it’s made with real, simple ingredients and no preservatives—perfect for homemade indulgence. For those with dietary needs, it’s easily adaptable to gluten-free or dairy-free versions, making it a versatile choice for many households.
From a wellness perspective, enjoying a small treat like this mindfully can bring a lot of joy, especially when shared with loved ones. Sometimes, that’s just as important as any nutrient!
Conclusion
In short, these Crispy Mini Egg Blondies with Melty Chocolate Chunks are a must-try if you want a sweet that’s quick, simple, and packed with that perfect crispy-chewy combo. Whether you’re baking for a springtime celebration or just craving something that feels like a cozy hug, this recipe delivers every time.
Feel free to customize with your favorite mix-ins or chocolate types—this recipe welcomes creativity. Honestly, I love it because it’s foolproof and always impresses, no matter who I share it with.
Give this recipe a whirl, and don’t forget to drop a comment below sharing your tweaks or how it went. You might just discover a new family favorite!
FAQs About Crispy Mini Egg Blondies with Melty Chocolate Chunks
Can I use regular chocolate chips instead of mini chocolate eggs?
Absolutely! Regular chocolate chips or chunks work just fine. Mini chocolate eggs give a fun springtime look and slightly different texture, but classic chips are delicious too.
What’s the best way to store these blondies?
Store them in an airtight container at room temperature for up to 3 days, or refrigerate for up to a week. Freeze for longer storage, wrapping tightly to prevent freezer burn.
Can I make these blondies gluten-free?
Yes! Swap all-purpose flour for a 1:1 gluten-free baking flour blend. Watch baking time closely, as it might vary by a minute or two.
How do I get the blondies crispy on the edges?
Using a mini muffin tin and baking at 350°F (175°C) helps create those crispy edges. Also, including granulated sugar along with brown sugar adds crispness.
Can I make these blondies vegan?
With some substitutions—like flax eggs, dairy-free butter, and vegan chocolate chunks—you can make a vegan version. Texture and flavor will be slightly different but still tasty!
Pin This Recipe!

Crispy Mini Egg Blondies Recipe with Melty Chocolate Chunks

These crispy mini egg blondies feature a perfect balance of crispy edges and chewy centers, bursting with melty chocolate chunks. Easy to make and ideal for spring treats, they are a nostalgic and crowd-pleasing dessert.
- Prep Time: 10 minutes
- Cook Time: 15 minutes
- Total Time: 25 minutes
- Yield: 24 mini blondies 1x
- Category: Dessert
- Cuisine: American
Ingredients
- 1/2 cup unsalted butter, melted
- 1/2 cup light brown sugar, packed
- 1/4 cup granulated sugar
- 2 large eggs, room temperature
- 1 teaspoon pure vanilla extract
- 1 cup all-purpose flour
- 1/2 teaspoon baking powder
- 1/4 teaspoon salt
- 1 cup mini chocolate eggs, roughly chopped
Instructions
- Preheat your oven to 350°F (175°C). Lightly grease your mini muffin tin or line with mini cupcake liners.
- Melt the butter gently in a saucepan or microwave until just melted (about 1 minute). Pour it into a large mixing bowl and whisk in the light brown sugar and granulated sugar until combined and smooth.
- Add the eggs, one at a time, whisking well after each addition. Stir in the pure vanilla extract until the mixture looks glossy and slightly thickened.
- In a separate bowl, whisk together the all-purpose flour, baking powder, and salt.
- Gradually fold the dry ingredients into the wet ingredients using a spatula, mixing just until combined. Be gentle to avoid overmixing.
- Fold in the chopped mini chocolate eggs carefully, leaving plenty of chunks intact.
- Using a teaspoon or small cookie scoop, drop batter into each mini muffin cup, filling about 3/4 full.
- Bake for 12-15 minutes, or until the edges are golden brown and a toothpick inserted near the center comes out with a few moist crumbs.
- Cool in the pan for 5 minutes, then transfer to a cooling rack to crisp up fully.
Notes
If your oven runs hot, start checking at 10 minutes to avoid overbaking. Blondies will continue to set as they cool, so err on the side of slightly underdone for chewy centers. Let blondies cool on a rack to avoid soggy bottoms. For gluten-free, substitute all-purpose flour with 1:1 gluten-free baking flour. For vegan, use flax eggs, dairy-free butter, and vegan chocolate chunks.
Nutrition
- Serving Size: 1 mini blondie
- Calories: 165
- Sugar: 15
- Sodium: 90
- Fat: 8
- Saturated Fat: 5
- Carbohydrates: 22
- Fiber: 1
- Protein: 2
Keywords: blondies, mini blondies, chocolate chunks, spring treats, Easter dessert, crispy edges, chewy blondies, easy blondie recipe


