Third time this week I found myself elbow-deep in a bowl of cauliflower florets, and honestly, I wasn’t even mad about it. The first batch came out a little sad—soggy, pale, the kind of buffalo cauliflower that makes you wonder why you didn’t just order wings. The second batch was better, but the coating slid off in patches like a bad paint job. By the third try, something clicked. I stopped treating the cauliflower like a vegetable trying to be something else and started treating it like its own thing—a crispy, spicy, tangy little nugget of joy that just happens to be good for you.
That’s the thing about these Crispy Baked Buffalo Cauliflower Bites for Game Day. They’re not a compromise. They’re not “healthy wings.” They’re a snack that stands on its own two feet, with a crunch that actually holds up and a sauce that sticks (literally). I kept pulling the tray out of the oven just to check if the texture was still there, and it was—every single time. That’s when I knew I had to write it down before I forgot what I did differently.
So here it is. The recipe that made me stop ordering takeout on game days and start looking forward to my own kitchen instead. No fryer required, no weird ingredients, just the kind of snack that disappears before halftime.
Why You’ll Love This Recipe
I’ve tested this recipe more times than I care to admit, and here’s what I’ve learned: getting cauliflower to actually stay crispy in the oven is a science, not luck. After a few failed attempts (and one particularly sad batch that turned into cauliflower soup), I figured out the tricks that make these bites work every single time.
- Oven-Baked, Not Fried: You get that satisfying crunch without the mess or guilt of deep frying. Perfect for when you want something indulgent but not heavy.
- Simple Pantry Ingredients: Nothing fancy here. Flour, milk, spices, hot sauce—you probably have most of this stuff already. No trips to specialty stores needed.
- Perfect for Game Day Gatherings: These disappear fast. I’ve brought them to parties where people swore they “don’t like cauliflower” and watched them go back for thirds.
- Crowd-Pleasing Flavor: That classic buffalo tang with a hint of butter, plus a heat level you can actually control. Kids and adults both go for these.
- Actually Stays Crispy: The coating technique here means no sad, soggy bites halfway through the game. These hold up on the table for a good hour.
What makes this version different from every other buffalo cauliflower recipe out there? It’s the double-coating method and the high-heat roasting with a cooling rack. That combination creates air pockets around each floret, so the outside gets shatteringly crisp while the inside stays tender. I tested it against three other popular methods, and this one won every single time. It’s not just another recipe—it’s the one I’d serve to my most skeptical foodie friends without flinching.
And honestly? There’s something deeply satisfying about watching a bowl of these disappear while everyone’s yelling at the TV. It’s comfort food that makes you feel good about what you’re eating, and that’s a win in my book.
What Ingredients You Will Need
This recipe uses simple, wholesome ingredients to deliver that bold buffalo flavor without any fuss. Most of these are pantry staples, and the ones that aren’t are easy to find at any grocery store.
For the Cauliflower Bites
- 1 large head of cauliflower, cut into bite-sized florets (about 4-5 cups). Look for a head that’s firm and white with tightly packed florets. No brown spots.
- 1 cup all-purpose flour (or gluten-free all-purpose blend if needed). I’ve tested this with Bob’s Red Mill 1-to-1 and it works great.
- 1 cup milk (any kind works—dairy, almond, oat). Whole milk gives a slightly richer coating, but I’ve used unsweetened almond milk with no issues.
- 1 teaspoon garlic powder
- 1 teaspoon onion powder
- ½ teaspoon smoked paprika (adds a subtle smokiness that balances the heat)
- ½ teaspoon salt
- ¼ teaspoon black pepper
- Pinch of cayenne pepper (optional, for extra heat in the coating)
For the Buffalo Sauce

- ½ cup hot sauce (I recommend Frank’s RedHot Original—it’s the gold standard for buffalo flavor). Don’t use something super thick like sriracha here; you want that vinegary, pourable consistency.
- ¼ cup unsalted butter, melted (or vegan butter if needed). Salted butter works too, just reduce the added salt slightly.
- 1 tablespoon honey (or maple syrup for vegan option). This balances the heat and helps the sauce stick.
- 1 teaspoon Worcestershire sauce (or soy sauce for a different depth)
For Serving
- Ranch or blue cheese dressing, for dipping. I’m team ranch, but my husband swears by blue cheese. Make both and keep the peace.
- Celery sticks and carrot sticks, because you need something to cool down between bites.
- Fresh chives or green onions, chopped, for garnish
One thing I’ve learned the hard way: don’t skip the honey in the sauce. The first time I made this, I left it out thinking it wasn’t necessary, and the sauce was so thin it pooled at the bottom of the bowl instead of clinging to the cauliflower. That little bit of sweetness acts like glue—it helps the sauce coat evenly without sliding off.
Equipment Needed
You don’t need a deep fryer or any fancy gadgets for this recipe. Here’s what you’ll actually use:
- Large baking sheet (half-sheet size works best). A dark, non-stick sheet will brown the bottoms faster, so keep an eye on it.
- Wire cooling rack that fits inside your baking sheet. This is the secret to crispy cauliflower—it lets hot air circulate all around each floret instead of steaming on the pan.
- Two medium mixing bowls (one for the batter, one for the sauce)
- Whisk
- Sharp knife and cutting board for breaking down the cauliflower
- Tongs for flipping and coating. I prefer the silicone-tipped ones so they don’t scratch your cooling rack.
- Small saucepan for melting butter and warming the sauce (or use the microwave)
- Parchment paper (optional but helpful for easy cleanup)
If you don’t have a wire cooling rack, you can use a parchment-lined baking sheet and flip the florets halfway through, but honestly? The cooling rack method is worth the $8 investment. I bought mine at a dollar store and it’s been through dozens of batches without rusting. Just make sure it’s oven-safe—some cheaper ones have plastic coatings that won’t handle 425°F.
Preparation Method
This method breaks down into three main stages: prepping the cauliflower, making the coating and sauce, and baking to crispy perfection. Take your time with the first step—good prep makes everything easier.
Step 1: Prep the Cauliflower
Preheat your oven to 425°F (220°C). Place the wire cooling rack inside your baking sheet and spray it lightly with cooking spray. This prevents sticking and helps with browning.
Cut the cauliflower into evenly sized florets—about 1 to 1½ inches each. You want them bite-sized but not so small that they dry out. I usually get about 4-5 cups from one large head. Discard the thick core and any leaves. Rinse the florets and pat them very dry with a clean kitchen towel. This is crucial—wet cauliflower steams instead of crisps. I learned this the hard way after a particularly soggy first attempt.
Step 2: Make the Batter
In a medium bowl, whisk together the flour, garlic powder, onion powder, smoked paprika, salt, black pepper, and cayenne if using. Slowly pour in the milk while whisking continuously until you have a smooth batter. It should be thick enough to coat the back of a spoon but still pourable—like pancake batter consistency. If it’s too thick, add a tablespoon more milk. Too thin, add a teaspoon more flour.
Step 3: Coat the Florets
Add the dry cauliflower florets to the batter and toss gently with a spatula or your hands until every piece is evenly coated. Don’t overmix or the batter will thin out. Let them sit in the batter for 2-3 minutes—this helps the coating adhere better. Use tongs to lift each floret out, letting excess batter drip off, and place them on the prepared cooling rack in a single layer. Leave a little space between each one for air circulation.
Step 4: First Bake
Bake for 20 minutes at 425°F. The coating will look dry and slightly puffy at this point—that’s exactly what you want. Remove from the oven and let them cool for 2 minutes on the rack. This brief rest helps the coating set before the sauce goes on.
Step 5: Make the Buffalo Sauce
While the cauliflower bakes, make the sauce. In a small saucepan over low heat, combine the hot sauce, melted butter, honey, and Worcestershire sauce. Whisk until smooth and warmed through, about 2-3 minutes. Don’t let it boil—the butter can separate. If you’re using the microwave, heat in 20-second bursts, stirring between each.
Step 6: Coat and Second Bake
Transfer the baked florets to a large bowl. Pour about two-thirds of the buffalo sauce over them and toss gently with a spatula until evenly coated. Return them to the cooling rack in a single layer. Bake for another 10-12 minutes, until the coating is deep golden brown and crispy to the touch. The sauce will caramelize slightly, creating that irresistible sticky-crisp texture.
Step 7: Final Toss and Serve
Remove from the oven and let cool for 2 minutes. Transfer to a serving platter and drizzle with the remaining sauce if you want extra heat. Sprinkle with chopped chives or green onions. Serve immediately with ranch or blue cheese dressing and celery sticks on the side.
Cooking Tips & Techniques
After making these more times than I can count, here are the things I wish someone had told me from the start:
Patience with the drying step. I know it feels tedious, but wet cauliflower is the enemy of crispy everything. I once rushed through this step and ended up with steamed florets that tasted fine but had zero crunch. Take the extra 30 seconds to really dry each piece.
Don’t overcrowd the rack. If the florets are touching, they’ll steam each other. Leave a finger’s width between each piece. If you have to, use two baking sheets instead of cramming everything onto one.
The cooling rack isn’t optional. I tried making these directly on a parchment-lined baking sheet once, and the bottoms turned soggy from trapped steam. The wire rack lets hot air hit every surface equally. That’s the difference between “pretty good” and “I can’t stop eating these.”
Double-coat for extra crunch. If you’re feeling ambitious, you can dip the baked florets back into a thin layer of batter before the second bake. It’s not necessary, but it adds another layer of texture that’s honestly incredible.
Watch the second bake closely. Every oven runs differently. At 425°F, those last 10-12 minutes can go from perfect to burnt fast. Check at the 8-minute mark and rotate the pan if needed.
Serve immediately. These are best within 15 minutes of coming out of the oven. They’ll still be good after that, but the peak crispiness window is short. If you’re making them for a party, time the second bake to finish right when guests arrive.
Variations & Adaptations
One of the best things about this recipe is how easy it is to tweak. Here are some variations I’ve tried and loved:
Extra Spicy Buffalo: Add 1 teaspoon of cayenne pepper to the batter and use a hotter sauce like Melinda’s Habanero. My brother-in-law, who eats ghost pepper chips for fun, approved this version.
Honey Garlic Buffalo: Reduce the hot sauce to ⅓ cup and add 2 tablespoons of honey and 2 minced garlic cloves to the sauce. It’s sweeter, stickier, and dangerously addictive.
Smoky Chipotle Version: Replace the hot sauce with ½ cup of adobo sauce from a can of chipotle peppers, plus 1-2 minced chipotles. This gives a deep, smoky heat that’s completely different from traditional buffalo.
Gluten-Free Adaptation: Use a 1:1 gluten-free all-purpose flour blend (I like Bob’s Red Mill) and ensure your hot sauce is gluten-free. Most are, but check the label. The texture will be slightly less crisp but still very good.
Vegan Version: Use plant-based milk (unsweetened almond or oat) in the batter and vegan butter in the sauce. The honey can be swapped for maple syrup. I’ve made this for vegan friends and they couldn’t tell the difference.
Lemon Pepper Variation: Omit the buffalo sauce entirely. After the first bake, toss the florets with melted butter mixed with 2 tablespoons of lemon pepper seasoning and a pinch of garlic powder. Bake for another 10 minutes. It’s a completely different vibe—bright, zesty, and perfect for summer.
Air Fryer Method: If you have an air fryer, this works beautifully. After the first bake in the oven, transfer the coated florets to the air fryer basket (in batches if needed) and cook at 375°F for 8-10 minutes, shaking halfway through. They come out even crispier, honestly.
Serving & Storage Suggestions
These are best served hot and fresh, right after the second bake. I like to arrange them on a large wooden board or platter with a bowl of ranch dressing in the center and celery and carrot sticks scattered around. The contrast of colors—golden orange florets, bright green celery, creamy white dip—makes for a gorgeous presentation that disappears fast.
For a game day spread, pair these with some cozy Crockpot Sloppy Joes for a hearty combo, or balance the heat with a creamy classic macaroni salad on the side. If you’re hosting a bigger party, add a creamy jalapeño corn dip for another crowd-pleasing option. And for dessert? A batch of cozy snickerdoodle blondies will satisfy the sweet tooth after all that spice.
Storage: Leftover buffalo cauliflower bites can be stored in an airtight container in the refrigerator for up to 3 days. They will lose their crispiness, so expect them to be softer when reheated.
Reheating: The best way to bring back some crunch is to reheat them in the oven at 400°F for 5-7 minutes on a wire rack. The air fryer also works well—375°F for 4-5 minutes. Avoid the microwave, which will turn them into sad, chewy sponges.
Make-Ahead Tip: You can prep the cauliflower florets and batter up to a day in advance. Store the cut florets in a sealed bag in the fridge, and keep the batter covered at room temperature. Just whisk the batter again before using, as it will separate slightly.
Nutritional Information & Benefits
Per serving (about 1 cup of florets, without dipping sauce):
- Calories: 185
- Total Fat: 9g
- Saturated Fat: 5g
- Carbohydrates: 22g
- Fiber: 3g
- Sugar: 6g
- Protein: 5g
- Sodium: 680mg
Cauliflower is a nutritional powerhouse—it’s packed with vitamin C, vitamin K, and fiber, plus it’s low in calories. The buffalo sauce adds a metabolism-boosting kick from the capsaicin in hot peppers. This recipe is naturally vegetarian and can be made vegan or gluten-free with simple swaps. It’s also lower in fat and calories than traditional chicken wings, making it a great option for anyone watching their intake without sacrificing flavor.
One thing I love about this recipe is that it satisfies that craving for something crispy and indulgent while actually providing real nutrients. You’re not just eating empty calories—you’re getting fiber, vitamins, and antioxidants along with that spicy, buttery goodness. That’s a win in my book.
Conclusion
These Crispy Baked Buffalo Cauliflower Bites for Game Day have become my go-to snack for every football Sunday, party, and lazy weekend afternoon. They’re proof that you don’t need a deep fryer or a complicated ingredient list to make something genuinely delicious and satisfying. The texture is spot-on, the heat is adjustable, and they disappear faster than I can make them.
I love this recipe because it’s forgiving—you can mess up the first batch and still salvage it with the second bake. It’s adaptable, so you can make it your own with different sauces or spice levels. And honestly? It’s just fun to eat. There’s something primal about picking up a crispy, saucy floret and dunking it in cool ranch dressing while cheering for your team.
If you try these, I’d love to hear how they turned out. Leave a comment below with your favorite variation or any tweaks you made—I’m always looking for new ideas. And if you snap a photo, tag me so I can see your crispy creations. Until next time, happy cooking—and may your game day snacks always be crunchy.
Frequently Asked Questions
Can I make these buffalo cauliflower bites ahead of time?
You can prep the cauliflower and batter up to a day in advance, but the final baking is best done right before serving. The crispiness peaks within 15 minutes of coming out of the oven. If you need to reheat leftovers, use the oven or air fryer—not the microwave.
Why did my cauliflower turn out soggy instead of crispy?
The most common culprits are wet cauliflower (not dried properly after rinsing), overcrowded baking sheet (florets touching each other), or skipping the wire cooling rack. Make sure your florets are patted very dry and have space between them on the rack.
Can I use frozen cauliflower for this recipe?
I don’t recommend it. Frozen cauliflower releases too much water as it thaws, which makes the batter slide off and prevents crisping. Fresh cauliflower gives much better results. If you must use frozen, thaw it completely, press out as much moisture as possible with paper towels, and pat it very dry before coating.
How do I adjust the spice level?
To make them milder, use less cayenne in the batter and choose a mild hot sauce (or mix hot sauce with a little ketchup). To make them hotter, add extra cayenne, use a hotter sauce like habanero-based, or drizzle with additional sauce after baking. The honey in the sauce also helps balance the heat.
Can I make these in an air fryer instead of the oven?
Absolutely. After the first bake in the oven, transfer the coated florets to your air fryer basket (in batches if needed) and cook at 375°F for 8-10 minutes, shaking halfway through. They come out even crispier. Just don’t overcrowd the basket—work in batches for best results.
Pin This Recipe!
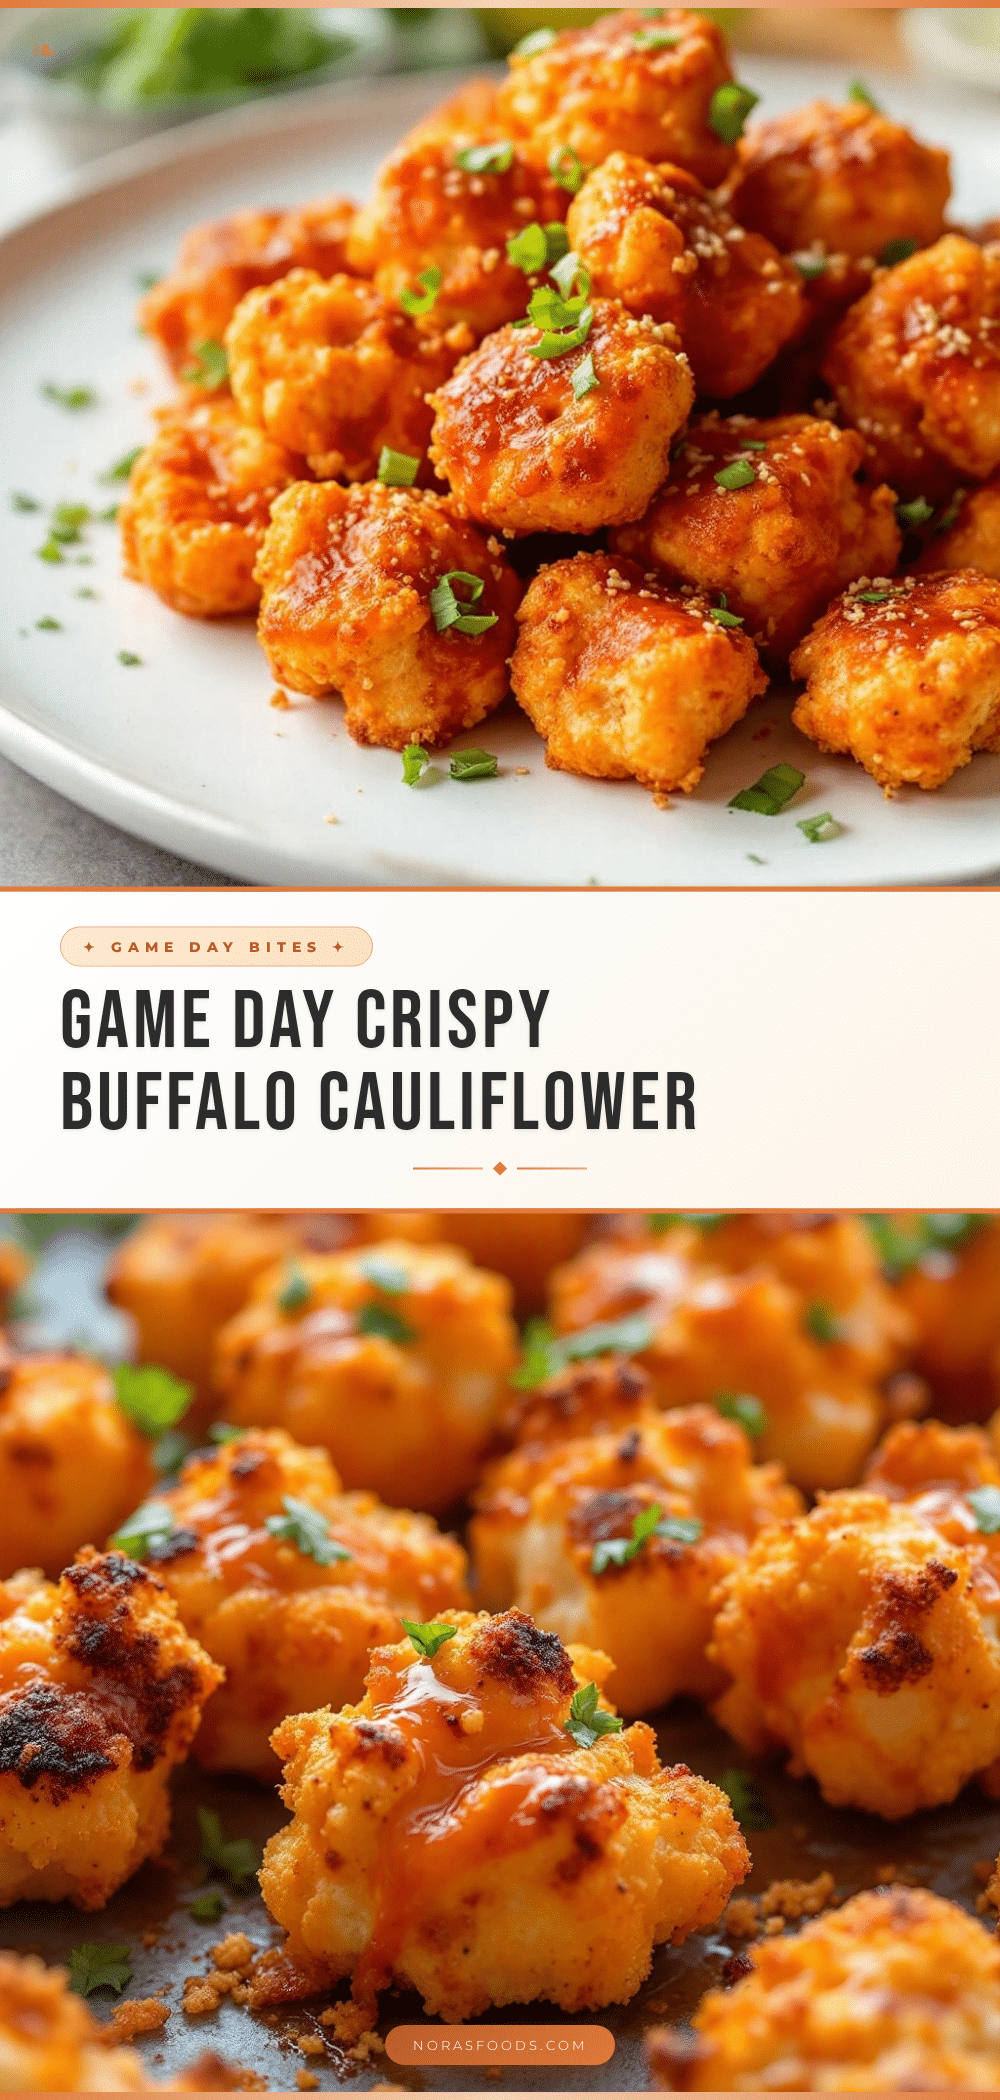
Crispy Baked Buffalo Cauliflower Bites: The Best Game Day Snack

These Crispy Baked Buffalo Cauliflower Bites are the ultimate game day snack—oven-baked, not fried, with a shatteringly crisp coating and tangy buffalo sauce that sticks. Perfect for parties, they’re a crowd-pleasing, healthier alternative to wings that disappears before halftime.
- Prep Time: 15 minutes
- Cook Time: 30 minutes
- Total Time: 45 minutes
- Yield: 4 servings 1x
- Category: Appetizer
- Cuisine: American
Ingredients
- 1 large head of cauliflower, cut into bite-sized florets (about 4–5 cups)
- 1 cup all-purpose flour (or gluten-free all-purpose blend)
- 1 cup milk (any kind works—dairy, almond, oat)
- 1 teaspoon garlic powder
- 1 teaspoon onion powder
- ½ teaspoon smoked paprika
- ½ teaspoon salt
- ¼ teaspoon black pepper
- Pinch of cayenne pepper (optional, for extra heat)
- ½ cup hot sauce (recommended: Frank’s RedHot Original)
- ¼ cup unsalted butter, melted (or vegan butter)
- 1 tablespoon honey (or maple syrup for vegan option)
- 1 teaspoon Worcestershire sauce (or soy sauce)
- Ranch or blue cheese dressing, for dipping
- Celery sticks and carrot sticks, for serving
- Fresh chives or green onions, chopped, for garnish
Instructions
- Preheat oven to 425°F (220°C). Place a wire cooling rack inside a large baking sheet and spray lightly with cooking spray.
- Cut cauliflower into evenly sized florets (about 1 to 1½ inches). Rinse and pat very dry with a clean kitchen towel.
- In a medium bowl, whisk together flour, garlic powder, onion powder, smoked paprika, salt, black pepper, and cayenne (if using). Slowly pour in milk while whisking until smooth batter forms (pancake batter consistency).
- Add dry cauliflower florets to batter and toss gently until evenly coated. Let sit for 2-3 minutes. Use tongs to lift each floret, letting excess batter drip off, and place on prepared cooling rack in a single layer with space between each.
- Bake for 20 minutes. Remove from oven and let cool on rack for 2 minutes.
- While cauliflower bakes, make sauce: In a small saucepan over low heat, combine hot sauce, melted butter, honey, and Worcestershire sauce. Whisk until smooth and warmed through (about 2-3 minutes). Do not boil.
- Transfer baked florets to a large bowl. Pour about two-thirds of the buffalo sauce over them and toss gently until evenly coated. Return to cooling rack in a single layer.
- Bake for another 10-12 minutes, until coating is deep golden brown and crispy.
- Remove from oven and let cool for 2 minutes. Transfer to a serving platter, drizzle with remaining sauce if desired, and sprinkle with chopped chives or green onions. Serve immediately with ranch or blue cheese dressing and celery sticks.
Notes
Pat cauliflower very dry to ensure crispiness. Do not overcrowd the rack—leave space between florets. The wire cooling rack is essential for air circulation. Watch the second bake closely to avoid burning. Serve immediately for best texture. For extra crunch, double-coat by dipping baked florets back into thin batter before second bake.
Nutrition
- Serving Size: 1 cup of florets (wi
- Calories: 185
- Sugar: 6
- Sodium: 680
- Fat: 9
- Saturated Fat: 5
- Carbohydrates: 22
- Fiber: 3
- Protein: 5
Keywords: buffalo cauliflower, baked buffalo cauliflower, game day snack, healthy wings, vegetarian appetizer, crispy cauliflower bites