Introduction
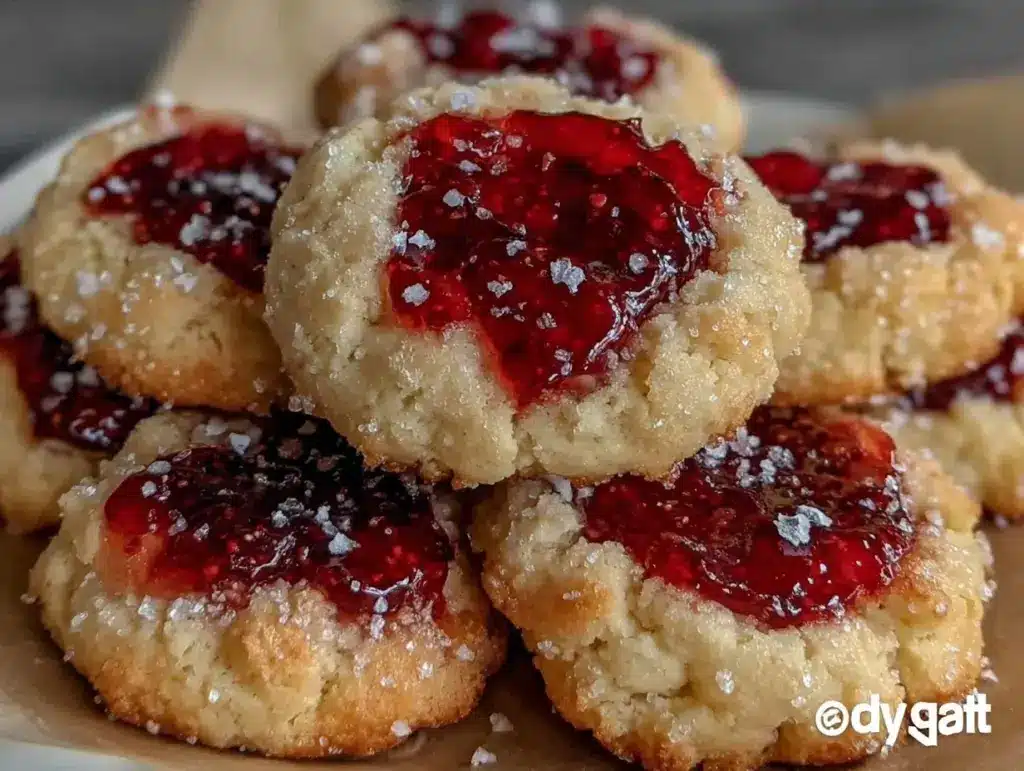
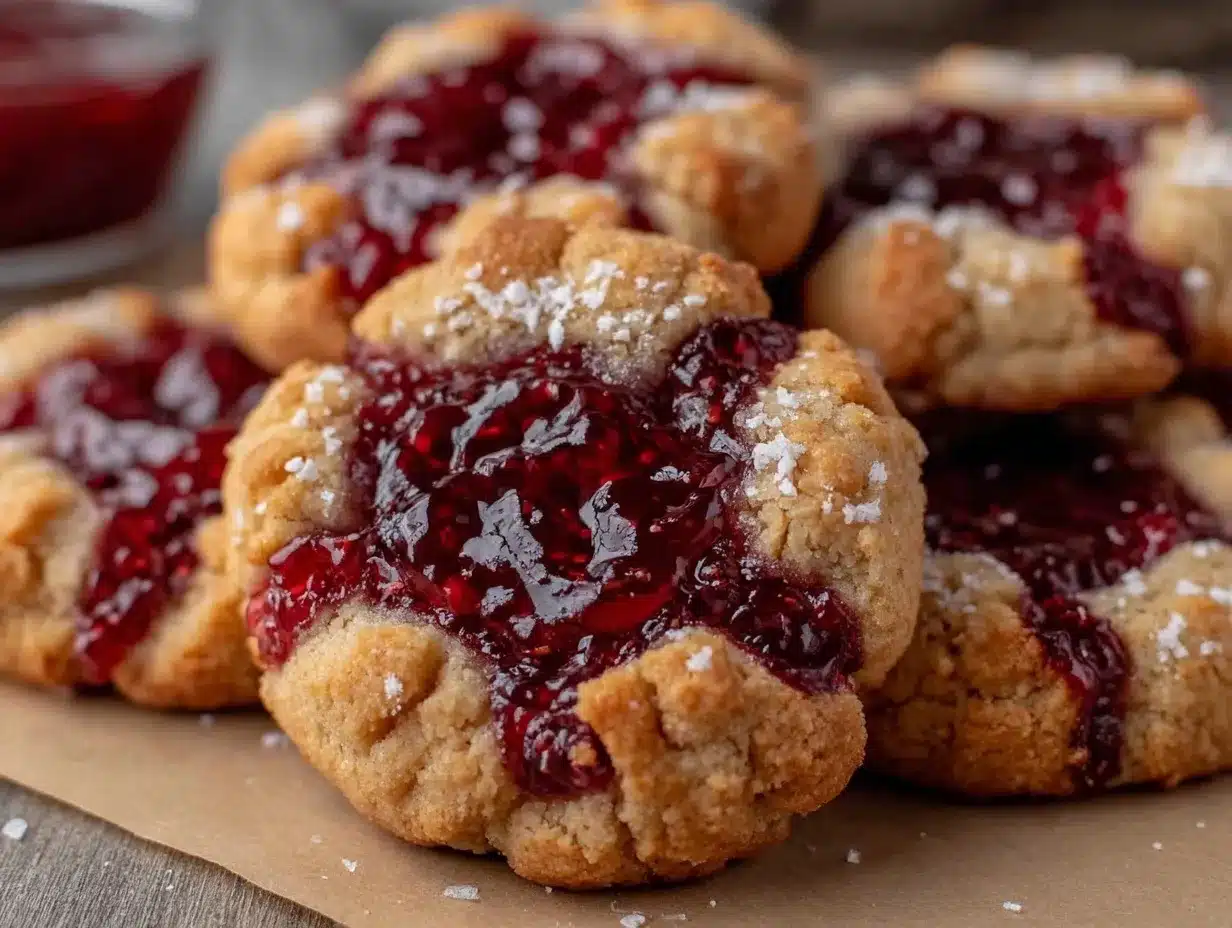
Let me paint you the picture: golden, buttery thumbprint cookies cooling on a wire rack, their sweet aroma filling the kitchen, and jewel-toned raspberry jam glistening in the center of each one. The scent of vanilla and toasted nuts floats through the air, and honestly, you can almost taste the warmth before you even take your first bite. The first time I made these thumbprint cookies, I was searching for something simple yet nostalgic for a chilly December afternoon—one of those days when you just want to curl up, bake, and forget about the world outside.
Back when I was knee-high to a grasshopper, my grandma used to make these thumbprint cookies every holiday season. She’d let me press my little thumb into each dough ball, laughing as I got jam everywhere (kids and sticky fingers—what a combo, right?). It was always the kind of moment where you pause, take a deep breath, and just smile because you know you’re onto something truly special. That memory stuck with me, and years later, I found myself trying to recreate her magic, tweaking the recipe until it delivered pure, nostalgic comfort.
My family couldn’t stop sneaking these off the cooling rack (and let’s face it, neither could I). Whether you’re baking for a cozy night in, prepping for a holiday cookie swap, or just looking to brighten up your Pinterest cookie board, these thumbprint cookies with raspberry jam are dangerously easy to make and absolutely irresistible. You know what? I wish I’d discovered just how simple and satisfying they are much earlier. After testing this recipe more times than I care to admit (in the name of research, of course), it’s become a staple for family gatherings, gifting, and those sweet moments when you need a pick-me-up. Feels like a warm hug, and you’re going to want to bookmark this one for every holiday season!
Why You’ll Love This Recipe
Years of baking (and a few kitchen mishaps) have taught me that thumbprint cookies are the true MVP of holiday treats. When I host family gatherings, these cookies always disappear first—sometimes before the pies even hit the table! Here’s exactly why you’ll love this thumbprint cookies recipe with raspberry jam:
- Quick & Easy: Comes together in under 40 minutes, which is perfect for busy weeknights or those last-minute cravings when you realize you need a sweet treat for tomorrow’s office party.
- Simple Ingredients: No fancy grocery trips needed—you probably already have everything on hand. Flour, butter, sugar, vanilla, and that classic raspberry jam.
- Perfect for Holidays & Special Occasions: These are a classic for Christmas, but honestly, they shine at baby showers, potlucks, and even cozy Sunday afternoons. Kids love them, and adults won’t stop at just one.
- Crowd-Pleaser: I’ve never met anyone who didn’t rave about these. The buttery cookie and tart jam combo is just unbeatable.
- Unbelievably Delicious: The texture is everything—soft, slightly crumbly, with that gooey jam center that makes you close your eyes and savor every bite.
What makes this thumbprint cookies recipe stand out? I use a pinch of salt and just enough vanilla to balance the sweetness. Plus, chilling the dough for a few minutes keeps the cookies tender and prevents spreading. You can swap in your favorite jam, but raspberry is classic for a reason—its bright flavor pops against the buttery base. I’ve tested different flour blends, and honestly, nothing beats all-purpose for that melt-in-your-mouth texture.
This isn’t just another thumbprint cookie—it’s the one you’ll want to make again and again. Comfort food reimagined: a little healthier, a lot faster, but with the same soul-soothing satisfaction. Impress guests without stress, or turn a simple moment into something memorable. That’s what these thumbprint cookies with raspberry jam are all about!
What Ingredients You Will Need
This thumbprint cookies recipe keeps things simple and wholesome, relying on classic pantry staples to deliver big flavor and that signature crumbly texture. Here’s what you’ll need (and don’t worry, you can easily swap a few things if needed):
- For the Cookie Dough:
- 2 cups (250g) all-purpose flour (King Arthur is my go-to for best texture)
- 1/2 teaspoon kosher salt (balances the sweetness)
- 1/2 cup (100g) granulated sugar
- 1/2 cup (115g) unsalted butter, softened (adds richness)
- 1 large egg, room temperature (for binding and tender crumb)
- 1 teaspoon pure vanilla extract (McCormick or Nielsen-Massey if you want top flavor)
- For the Filling:
- 1/2 cup (160g) raspberry jam (seedless is classic, but use what you love)
- Optional: 1 tablespoon lemon juice (for extra zing, especially if your jam is super sweet)
- For Rolling (Optional):
- 1/2 cup (50g) finely chopped nuts—try pecans or walnuts for a toasty edge
- 1/4 cup (30g) powdered sugar for dusting (adds beautiful finish)
Ingredient Tips & Substitutions:
- If you need a gluten-free version, swap in a good quality 1:1 gluten-free flour blend (Bob’s Red Mill works well).
- Dairy-free? Use vegan butter, and check that your jam is plant-based.
- No raspberry jam? Try apricot, strawberry, or even a homemade chia jam—honestly, you can get creative with whatever’s in your fridge.
- If you want less sugar, reduce the granulated sugar to 1/3 cup, but expect a more biscuit-like cookie.
Most of these ingredients are probably already in your pantry (I love recipes like this for that reason). If you’re using homemade jam, just make sure it’s not too runny; thicker jam works best for that classic thumbprint look. In summer, swap in fresh preserves or berry compote instead of store-bought jam for a seasonal upgrade.
Equipment Needed
You don’t need much to whip up these thumbprint cookies, which is part of what makes this recipe so easy for beginners and seasoned bakers alike. Here’s what I use every time:
- Mixing Bowl: A medium bowl (glass or stainless steel works great)
- Hand Mixer or Stand Mixer: Either works—if you’re mixing by hand, just make sure your butter is really soft
- Baking Sheet: Standard half-sheet pan (line with parchment for easy cleanup)
- Wire Rack: For cooling—makes all the difference for texture
- Measuring Cups & Spoons: Accurate measurements = perfect cookies
- Small Spoon or Your Thumb: For making the “thumbprint”—kids love helping with this step!
- Rubber Spatula: For scraping down the bowl
If you don’t have a stand mixer, don’t worry—these cookies come out just fine with a wooden spoon and some elbow grease. Parchment paper is your friend for easy cleanup, and if you want perfectly round cookies, a small cookie scoop is handy (though not essential). I still use my grandma’s old wire rack, and honestly, it’s seen more thumbprint cookies than I can count. If you’re on a budget, skip the fancy gadgets and just use what’s in your kitchen drawer.
Preparation Method
- Preheat & Prep: Preheat oven to 350°F (175°C). Line a baking sheet with parchment paper. Gather all ingredients and let butter soften to room temperature (about 30 minutes).
- Make the Dough: In a medium bowl, cream together 1/2 cup (115g) unsalted butter and 1/2 cup (100g) granulated sugar using a mixer or by hand until light and fluffy (about 2-3 minutes). Add 1 large egg and 1 teaspoon vanilla extract, mixing until just combined.
- Combine Dry Ingredients: Sift 2 cups (250g) all-purpose flour and 1/2 teaspoon kosher salt together in a separate bowl. Gradually add dry ingredients to wet mixture, mixing on low speed until a soft dough forms. If dough is sticky, chill for 10-15 minutes.
- Shape the Cookies: Scoop 1 tablespoon (about 20g) portions of dough and roll into balls. If desired, roll each ball in finely chopped nuts for an extra crunch. Place balls 2 inches apart on prepared baking sheet.
- Make the Thumbprint: Using your thumb (or the back of a small spoon), press a deep indentation into the center of each dough ball. Don’t press all the way through—just enough to hold the jam. If dough cracks, gently pinch edges to smooth.
- Fill with Jam: Spoon about 1/2 teaspoon (2g) raspberry jam into each indentation. Don’t overfill—the jam will spread as cookies bake. For extra zing, stir in a splash of lemon juice with your jam.
- Bake: Bake cookies for 12-15 minutes, or until edges are lightly golden and centers are set. Rotate pan halfway for even baking. (If jam bubbles over, it’s normal—just let it cool and scrape away any excess.)
- Cool: Remove from oven and let cookies cool on the baking sheet for 5 minutes before transferring to a wire rack. This helps them firm up and keeps the bottoms from getting soggy.
- Finishing Touch: Once cooled, dust with powdered sugar if desired. Enjoy warm or at room temperature!
Troubleshooting Tips: If cookies spread too much, try chilling the dough longer or using a little extra flour. If the jam sinks, make deeper indentations. For perfect texture, don’t over-bake—edges should be golden, not brown.
I like to prep a double batch and freeze half the dough for later. It makes holiday baking so much easier! If your kids are helping, just expect a little mess (that’s half the fun).
Cooking Tips & Techniques
Through plenty of trial and error (and more than a few “oops” moments), I’ve learned some tricks for thumbprint cookies that really work:
- Don’t Overmix: Once you add the flour, mix just until combined. Overmixing makes cookies tough instead of tender.
- Chill the Dough: Especially if your kitchen is warm, chilling for 10-15 minutes helps cookies hold their shape and prevents spreading. I skipped this once and ended up with flat, sad cookies—lesson learned!
- Even Indentations: Use a small spoon if your thumbs are big, or the handle of a wooden spoon (kids’ thumbs work great, too). Press gently and fix any cracks so jam stays put.
- Jam Consistency: If your jam is runny, simmer it for a few minutes to thicken or add a pinch of cornstarch. Thick jam means prettier cookies and less mess.
- Batch Baking: Bake one sheet at a time for even results. If you’re multitasking, rotate pans halfway through.
- Cookie Size: Smaller balls bake more evenly and look adorable. I use a tablespoon scoop for uniform size, but hand-rolling works fine.
Biggest mistake I made early on? Overfilling the jam. It bubbles over and makes a sticky mess—so less is more! If you want a crispier edge, try rolling in nuts or chilling dough a bit longer. For consistent results, always use room temperature ingredients and measure carefully (especially flour—spoon and level, don’t pack).
And when in doubt, taste test a “sacrificial” cookie while they’re still warm. That’s just good science, right?
Variations & Adaptations
Thumbprint cookies are kind of a blank canvas—you can switch things up and make them your own. Here are some of my favorite twists:
- Dietary Swaps: For gluten-free cookies, use a 1:1 gluten-free flour blend. For vegan, swap butter with Earth Balance and use a flax egg (1 tablespoon flax meal + 2.5 tablespoons water, let sit for 5 minutes).
- Seasonal Flavors: Try apricot, blackberry, or lemon curd instead of raspberry jam. In autumn, spiced apple butter is a cozy alternative.
- Nutty Crunch: Roll dough balls in finely chopped pecans, walnuts, or pistachios before baking. Adds flavor and a beautiful finish.
- Chocolate Center: Swap jam for a dollop of Nutella or chocolate ganache for a decadent twist.
- Allergen Adjustments: If you have nut allergies, skip the nuts and dust with powdered sugar or cocoa instead. Dairy-free butter works well for lactose-sensitive folks, and egg replacers like aquafaba (2 tablespoons per egg) can be used.
- Personal Favorite: I’ve tried swirling a bit of orange zest into the dough and using orange marmalade for the center—honestly, it’s sunshine in a cookie!
These cookies are easy to adapt, and everyone has their own favorite jam or filling. Don’t be afraid to experiment—sometimes the best flavor combos are the ones you create on a whim.
Serving & Storage Suggestions
Serve thumbprint cookies at room temperature, arranged on a festive platter or cake stand. They’re perfect with coffee, tea, or hot cocoa—especially on a chilly morning. If you’re gifting, stack them in a tin between layers of parchment paper.
For storing, keep cookies in an airtight container at room temperature for up to 5 days. For longer storage, freeze in a single layer on a baking sheet, then transfer to a zip-top bag (they’ll keep for up to 3 months). Thaw at room temperature before serving.
To reheat, pop cookies in a 300°F (150°C) oven for 3-4 minutes—just enough to refresh the texture without drying out. Over time, flavors meld and deepen, and honestly, they taste even better after a day or two. Just hide them from cookie thieves!
Nutritional Information & Benefits
Each thumbprint cookie (about 25g) provides roughly:
- Calories: 100
- Fat: 5g
- Carbs: 12g
- Sugar: 5g
- Protein: 1g
Raspberry jam is full of vitamin C and antioxidants, and nuts add healthy fats if you use them. For gluten-free or dairy-free diets, swaps work beautifully. These cookies do contain wheat, egg, and dairy (watch for allergies). I love that you can tweak the sugar and jam to fit your needs—baking should fit your lifestyle, not the other way around!
Conclusion
Thumbprint cookies with raspberry jam truly are a classic for a reason. They’re easy to make, endlessly adaptable, and always a crowd-pleaser—whether you’re baking for a holiday party or just craving something sweet. Honestly, there’s something so comforting about that buttery cookie and sweet jam combo, especially when you know you made them yourself.
Don’t be afraid to play around with fillings, nuts, or flours to create your own twist. This recipe is one of my favorites because it connects me to family memories and makes new ones every year. I’d love to hear how you make these your own—leave a comment, share your photos, or pass the recipe along to someone who could use a little cozy comfort.
Happy baking, and may your kitchen always smell like warm cookies!
Frequently Asked Questions
Can I use store-bought jam for thumbprint cookies?
Absolutely! Store-bought raspberry jam works perfectly, but homemade jam gives a richer flavor if you have it. Just aim for a thick consistency.
Why did my thumbprint cookies spread too much?
Usually, this means the dough was too warm or had too little flour. Try chilling it for 15 minutes or adding a tablespoon of flour next time.
How do I make these cookies gluten-free?
Just swap the all-purpose flour for a 1:1 gluten-free baking mix. Bob’s Red Mill makes a great one, and the cookies stay tender and delicious.
Can I freeze thumbprint cookies?
Yes! Freeze baked cookies in layers with parchment paper, or freeze dough balls and bake fresh when needed. Thaw cookies at room temperature before serving.
What other fillings can I use besides raspberry jam?
Try apricot, strawberry, blackberry, lemon curd, chocolate spread, or even a dollop of caramel. The possibilities are endless, so get creative!
Pin This Recipe!
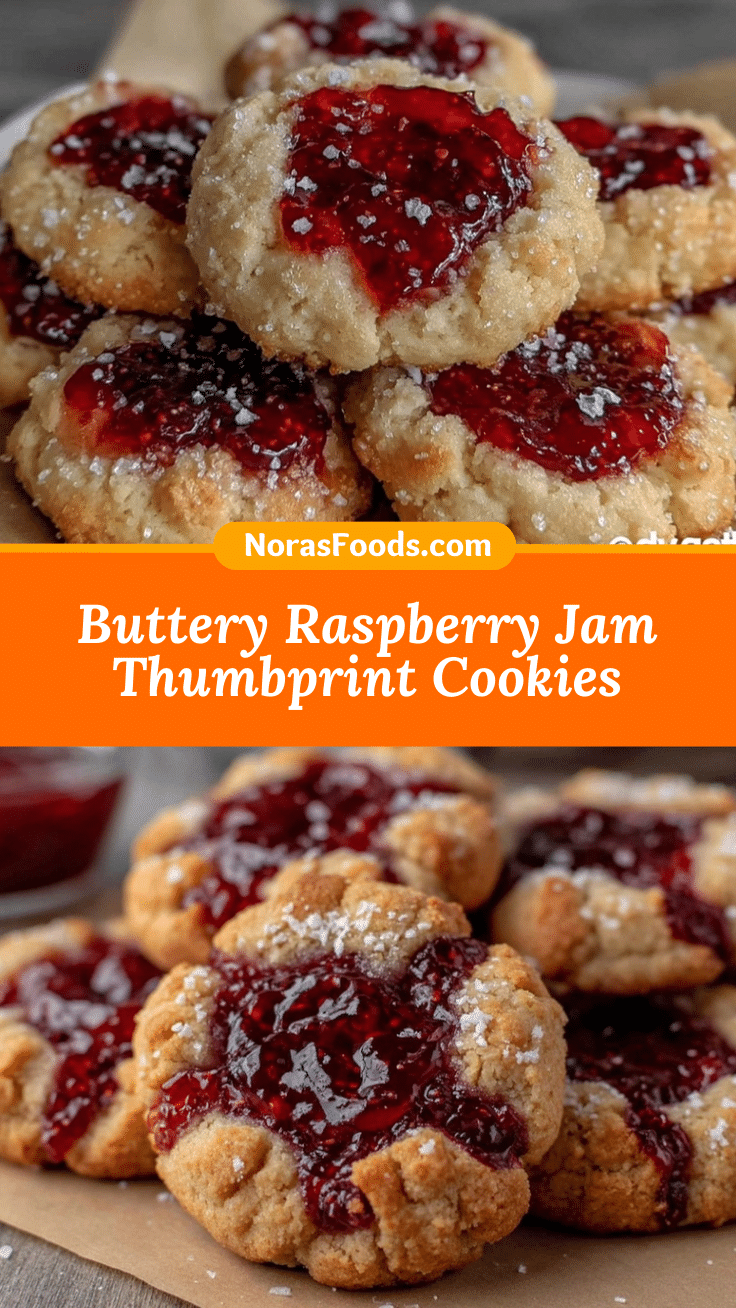
Easy Homemade Raspberry Jam Thumbprint Cookies
These golden, buttery thumbprint cookies are filled with jewel-toned raspberry jam and are a nostalgic, crowd-pleasing treat perfect for holidays or cozy afternoons. Quick to make and endlessly adaptable, they deliver pure comfort with every bite.
- Prep Time: 15 minutes
- Cook Time: 12-15 minutes
- Total Time: 30-35 minutes
- Yield: 24 cookies 1x
- Category: Dessert
- Cuisine: American
Ingredients
- 2 cups (250g) all-purpose flour
- 1/2 teaspoon kosher salt
- 1/2 cup (100g) granulated sugar
- 1/2 cup (115g) unsalted butter, softened
- 1 large egg, room temperature
- 1 teaspoon pure vanilla extract
- 1/2 cup (160g) raspberry jam (seedless preferred)
- Optional: 1 tablespoon lemon juice
- Optional: 1/2 cup (50g) finely chopped nuts (pecans or walnuts)
- Optional: 1/4 cup (30g) powdered sugar for dusting
Instructions
- Preheat oven to 350°F (175°C). Line a baking sheet with parchment paper. Let butter soften to room temperature.
- In a medium bowl, cream together butter and granulated sugar until light and fluffy (2-3 minutes). Add egg and vanilla extract, mixing until just combined.
- Sift flour and salt together in a separate bowl. Gradually add dry ingredients to wet mixture, mixing on low speed until a soft dough forms. If dough is sticky, chill for 10-15 minutes.
- Scoop 1 tablespoon portions of dough and roll into balls. If desired, roll each ball in finely chopped nuts. Place balls 2 inches apart on prepared baking sheet.
- Using your thumb or the back of a small spoon, press a deep indentation into the center of each dough ball. Smooth any cracks.
- Spoon about 1/2 teaspoon raspberry jam into each indentation. For extra zing, stir in lemon juice with your jam.
- Bake cookies for 12-15 minutes, or until edges are lightly golden and centers are set. Rotate pan halfway for even baking.
- Remove from oven and let cookies cool on the baking sheet for 5 minutes before transferring to a wire rack.
- Once cooled, dust with powdered sugar if desired. Enjoy warm or at room temperature.
Notes
Chill dough for 10-15 minutes to prevent spreading. Use thick jam for best results. For gluten-free, substitute a 1:1 gluten-free flour blend. For vegan, use vegan butter and a flax egg. Don’t overfill jam to avoid bubbling over. Cookies can be frozen for up to 3 months.
Nutrition
- Serving Size: 1 cookie (about 25g)
- Calories: 100
- Sugar: 5
- Sodium: 50
- Fat: 5
- Saturated Fat: 3
- Carbohydrates: 12
- Fiber: 0.5
- Protein: 1
Keywords: thumbprint cookies, raspberry jam cookies, holiday cookies, easy cookies, buttery cookies, classic cookies, Christmas cookies, jam cookies, homemade cookies


