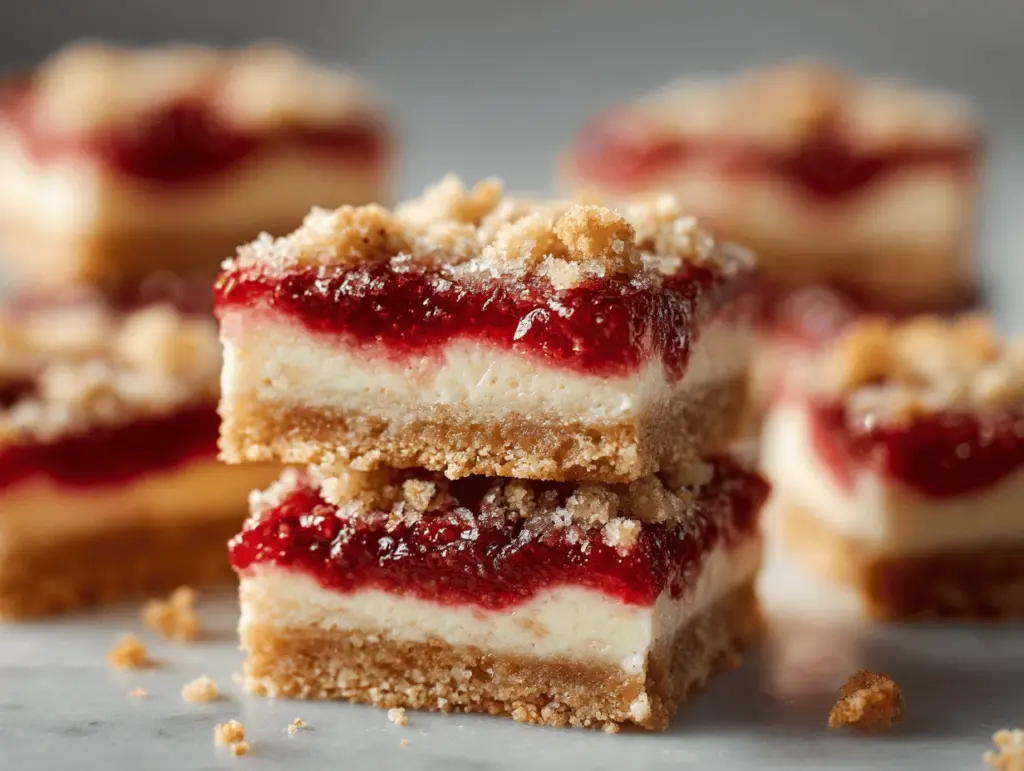
The sweet perfume of sun-ripened strawberries mingling with a buttery crumble crust—seriously, is there any dessert more tempting than strawberry cheesecake shortbread bars? I still remember the first batch I made: my kitchen filled with the scent of baking berries, the shortbread edges puffing up golden, and that creamy, tangy cheesecake layer in the middle just begging for a swoop of my spatula. If you’re craving something that’s part pie, part cheesecake, and all-out delicious (with a bit of nostalgic summer picnic thrown in), you’re in the right place.
I started tinkering with this recipe a few summers ago after a family strawberry-picking trip left us with way more berries than we could eat fresh. Cheesecake is my weakness, but I wanted something portable—something you could pack in a lunchbox or serve at a backyard BBQ without fuss. Enter these strawberry cheesecake shortbread bars: the ultimate marriage of creamy, fruity, and crumbly. They’ve become my go-to for any gathering, and I’ve lost count of the times I’ve scribbled the recipe on scraps of paper for friends.
You’ll love that these bars use easy-to-find ingredients, and you don’t need fancy baking skills to pull them off. Trust me, even if you’re not a seasoned baker, you’ll end up with a dessert that looks like it came straight from a bakery window. Plus, the layers make every bite a little adventure—crisp, creamy, jammy, and crumbly all at once. Whether you’re baking for a crowd, a family treat, or just to satisfy a personal sweet tooth, these strawberry cheesecake shortbread bars are about to become a staple in your kitchen. And yes, they’re just as good as they look on Pinterest (if not better!).
Why You’ll Love This Strawberry Cheesecake Shortbread Bars Recipe
- Quick & Easy: No tricky techniques or hard-to-find ingredients—these bars come together in just about an hour (not counting cooling time). Perfect for last-minute dessert needs or spontaneous baking vibes.
- Simple Ingredients: Everything in this recipe is probably already in your pantry or fridge. Butter, flour, sugar, cream cheese, fresh (or frozen) strawberries… You get the picture. No wild goose chase at the store.
- Perfect for Any Occasion: These bars are a total hit at potlucks, picnics, bake sales, brunches, and even as a sweet lunchbox surprise. They slice up neatly and travel well—no fork required unless you like to be fancy.
- Crowd-Pleaser: I’ve served these bars to kids, grandparents, fussy eaters, and self-proclaimed dessert snobs. Not once have I seen leftovers. If you want to impress without stress, this is your new secret weapon.
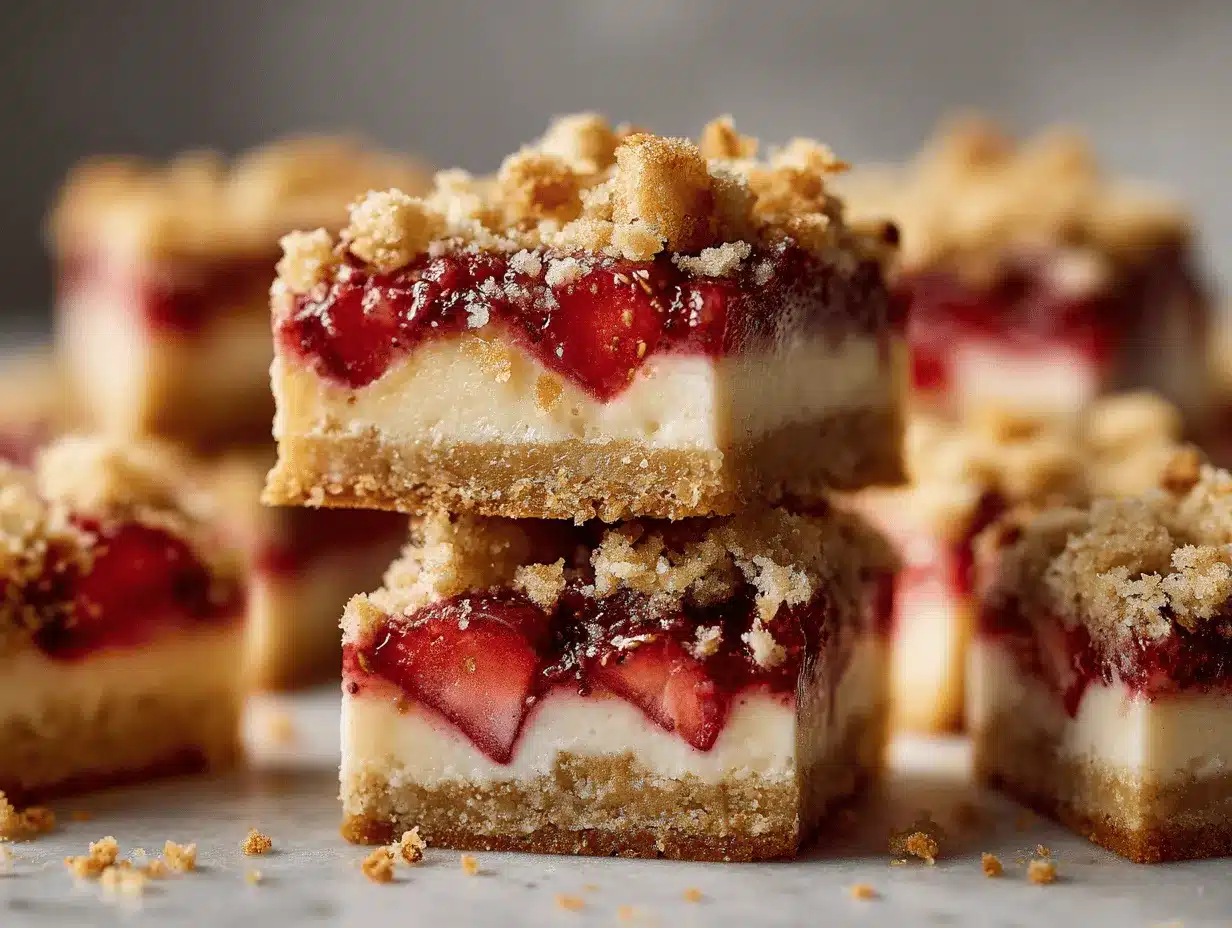
- Unbelievably Delicious: The buttery shortbread paired with tangy cheesecake and sweet-tart strawberries is the kind of combo that makes you close your eyes in bliss. It’s comfort food with a fruity, summery twist.
What sets these bars apart from the usual cheesecake or crumble? It’s all about the layers! Blending the cream cheese until smooth (no lumps, please) gives that classic cheesecake creaminess, while the shortbread crumble on top adds a crispy, golden edge that’s downright addictive. And the strawberry layer? It’s like homemade jam, but easier—just juicy berries tossed with a bit of sugar and lemon juice.
Honestly, this recipe is a result of dozens of tweaks: trying brown sugar in the crust, swapping in a splash of vanilla, even experimenting with almond flour for a nutty kick. It’s the best version because it’s been tried (and tasted) more times than I can count. I love how it can swing from a casual weekday treat to a showstopper at a summer party with zero fuss. If you love desserts that hit all the right notes—creamy, crispy, and fruity—you’re going to want to bookmark these strawberry cheesecake shortbread bars.
What Ingredients You Will Need
This strawberry cheesecake shortbread bars recipe keeps things simple, using everyday ingredients for a dessert that tastes anything but ordinary. Here’s what you’ll need and a few tips from my own kitchen adventures:
- For the Shortbread Crust & Crumble:
- All-purpose flour (2 cups/240g) – I’ve tried both bleached and unbleached; either works, but unbleached gives a slightly heartier bite.
- Granulated sugar (1/2 cup/100g) – For sweetness and structure.
- Salted butter (3/4 cup/170g), cold and cubed – Cold butter is non-negotiable for that classic crumbly texture. If you only have unsalted, add a pinch of salt.
- Vanilla extract (1 tsp/5ml) – Adds cozy warmth. Real vanilla makes a difference if you have it!
- For the Cheesecake Layer:
- Cream cheese (8 oz/225g), softened – Full-fat for the best creamy result. I’ve used light cream cheese in a pinch; it works, but the texture is slightly less rich.
- Granulated sugar (1/3 cup/67g) – Adjust to taste if you like things less sweet.
- Large egg (1) – Room temperature blends in more smoothly. If you forget, just place it in a bowl of warm water for 5 minutes.
- Vanilla extract (1 tsp/5ml) – For that classic cheesecake flavor.
- For the Strawberry Filling:
- Fresh strawberries (2 cups/300g), hulled and chopped – If using frozen, thaw and drain well first. I love using local berries in early summer.
- Granulated sugar (2-3 tbsp/25-38g) – Taste your berries! Sweeter berries need less sugar.
- Lemon juice (1 tbsp/15ml) – Brightens up the strawberry flavor.
- Cornstarch (1 tbsp/8g) – Thickens the filling so it’s not runny.
Ingredient Tips: If you’re out of fresh strawberries, frozen ones absolutely work—just let them thaw and drain any extra liquid. Gluten-free flour blends can swap in for the all-purpose flour; just check if your blend already has xanthan gum. For a dairy-free twist, I’ve had good luck with vegan cream cheese and plant-based butter, though the texture gets a bit softer. Want to mix things up? Swap in raspberries, blueberries, or even a combo for a “berry patch” twist. You really can’t go wrong.
Equipment Needed
- 8×8 inch (20x20cm) baking pan: This is the perfect size for thick, generous bars. I’ve also used a 9-inch square pan; the bars will be a bit thinner but still delicious.
- Mixing bowls: At least two—one for the crust/crumble, one for the cheesecake filling.
- Hand mixer or stand mixer: Makes whipping up the cheesecake layer a breeze. If you don’t have one, a sturdy whisk and some elbow grease will do.
- Pastry cutter or two forks: For cutting the cold butter into the flour. If you’re in a pinch, your fingertips work—just move quickly so the butter doesn’t melt.
- Measuring cups and spoons: Accurate measurements make a difference, especially for baking.
- Rubber spatula: Helps scrape every last bit of cheesecake filling out of the bowl (I never waste a drop).
- Parchment paper: Makes it easy to lift the bars out of the pan for neat slicing. If you don’t have any, grease the pan well.
If you’re looking to save some cash, most of these tools can be found at your local dollar store (honestly, my favorite spatula cost $1!). And if you bake often, investing in an inexpensive hand mixer is totally worth it. Just remember to clean your mixer beaters and bowls right away after mixing the cream cheese—dried-on cheesecake is a pain to scrub off!
Preparation Method
- Preheat and Prepare: Preheat your oven to 350°F (175°C). Line an 8×8 inch (20x20cm) baking pan with parchment paper, leaving an overhang on two sides for easy lifting. Trust me, this makes cleanup and serving so much easier.
- Make the Shortbread Crust and Crumble: In a large mixing bowl, combine 2 cups (240g) all-purpose flour, 1/2 cup (100g) granulated sugar, and a pinch of salt (if using unsalted butter). Add 3/4 cup (170g) cold, cubed butter. Using a pastry cutter, two forks, or your fingertips, cut the butter into the flour mixture until it resembles coarse crumbs—think damp sand with some pea-sized bits. Stir in 1 teaspoon (5ml) vanilla extract. Scoop out about 1 cup (100g) of the mixture and set aside for the crumble topping.
- Form the Base: Take the remaining shortbread mixture and press it firmly and evenly into the bottom of the prepared pan. I use the flat bottom of a measuring cup for this—works like a charm. Bake for 10-12 minutes, until just starting to turn golden around the edges. Remove from the oven and let cool slightly while you prep the other layers.
- Prepare the Strawberry Layer: In a medium bowl, toss 2 cups (300g) chopped strawberries with 2-3 tablespoons (25-38g) sugar (depending on sweetness), 1 tablespoon (15ml) lemon juice, and 1 tablespoon (8g) cornstarch. The cornstarch helps soak up all that lovely berry juice, so don’t skip it. Let the mixture sit while you prep the cheesecake layer—this draws out the juices and thickens things up a bit.
- Mix the Cheesecake Layer: In a separate bowl, beat 8 oz (225g) softened cream cheese with 1/3 cup (67g) granulated sugar until smooth and creamy—about 2 minutes with a hand mixer on medium. Scrape down the sides of the bowl a couple times; lumps are not our friend here. Beat in 1 egg and 1 teaspoon (5ml) vanilla extract until just combined.
- Layer the Bars: Pour the cheesecake mixture evenly over the cooled shortbread base. Smooth with a spatula. Spoon the strawberry mixture evenly over the cheesecake layer, making sure you get good coverage (no bald spots!).
- Add the Crumble Topping: Sprinkle the reserved shortbread mixture evenly over the strawberries. Don’t pack it down—crumbly clumps are what you want for that bakery-style top.
- Bake: Bake in the center of the oven for 35-40 minutes, or until the crumble topping is golden and the cheesecake is set (it may still jiggle a bit in the middle, but that’s normal). If your oven runs hot, start checking at 33 minutes—no one wants burnt crumble!
- Cool Completely: Here’s the hard part: let the bars cool completely in the pan on a wire rack (about 2 hours). Then refrigerate for at least 2 more hours, or overnight. This helps everything set and makes slicing a breeze. I know, it’s tough to wait, but patience pays off.
- Slice and Serve: Use the parchment paper overhang to lift the bars out of the pan. Slice into 12 squares (or 16 for smaller servings). Wipe your knife between cuts for those picture-perfect edges—especially if you’re sharing on Pinterest!
Prep Notes: If your strawberries are extra juicy, sprinkle in a little extra cornstarch to keep the bars from getting soggy. And if your kitchen is hot, keep your butter as cold as possible before starting the crust. I once made these during a heatwave, and the crumble got a little too soft—still tasty, just not as crisp.
Cooking Tips & Techniques
Baking is all about those little details that make a big difference. After a few (okay, quite a few) test runs of these strawberry cheesecake shortbread bars, here’s what I’ve learned:
- Keep Ingredients Cold: Especially the butter! Cold butter makes the shortbread crust crumbly and tender. If your kitchen runs warm, chill the flour mixture in the fridge for 10 minutes before pressing it into the pan.
- Don’t Overmix: When making the cheesecake layer, beat just until smooth. Overmixing can introduce too much air, which causes cracks or a weird texture. A few little swirls or streaks are okay—perfection isn’t the goal!
- Even Layering: Take time to spread the cheesecake and strawberry layers evenly. If the filling is all clumped in the middle, the bars won’t bake evenly (learned this the hard way—my first batch stuck in the center and over-browned at the edges).
- Let Them Cool: Seriously, don’t skip the chilling step. Warm bars fall apart. Chilled bars slice like a dream and the flavors meld together even better.
- Troubleshooting: If your strawberries are super juicy, you might see a little liquid bubbling up around the edges while baking. Don’t worry; it firms up as they cool. If the top browns too quickly, tent a piece of foil over the pan for the last 10 minutes of baking.
- Batch Baking: Making a double batch? Use a 9×13-inch pan and add 5-10 minutes to the baking time. Keep an eye on the color of the crumble.
And my favorite personal trick: line up all your ingredients before you start. It saves so much stress (and you won’t realize you’re out of eggs mid-recipe—that happened to me once, and let’s just say the bars were… interesting). Baking is supposed to be fun, not frantic!
Variations & Adaptations
One of the best things about these strawberry cheesecake shortbread bars is how easy they are to customize. Here are a few of my favorite spins:
- Make It Gluten-Free: Swap the all-purpose flour for your favorite 1:1 gluten-free baking blend. I’ve had great results with King Arthur Measure for Measure. The texture stays tender and the crumble is still buttery.
- Berry Medley Bars: Mix strawberries with raspberries or blueberries for a vibrant, multi-berry filling. I’ve even thrown in a few blackberries when I had some to use up.
- Lemon Cheesecake Bars: Add 1 teaspoon of finely grated lemon zest to the cheesecake layer for a citrusy kick. It pairs beautifully with the strawberries and adds a fresh twist.
- Dairy-Free Adaptation: Use vegan cream cheese and plant-based butter. The bars will be a bit softer, but still hold together nicely after chilling.
- Nutty Crumble: Stir 1/3 cup (30g) finely chopped almonds or pecans into the crumble topping for extra crunch and a toasty flavor.
I once made a version with a swirl of homemade strawberry jam in the cheesecake layer instead of fresh berries—absolutely delicious, especially in winter when fresh berries are scarce. You can also try swapping strawberries for peaches or cherries when they’re in season. Don’t be afraid to play around—baking is all about making a recipe your own!
Serving & Storage Suggestions
These strawberry cheesecake shortbread bars are best served chilled or at cool room temperature. I love piling them on a pretty platter, dusted with a little powdered sugar for that “bakery” look. They’re fantastic with a cup of coffee or a glass of cold milk—perfect for a mid-afternoon treat or a sweet finish to brunch.
For serving a crowd, slice the bars into smaller squares and arrange them in cupcake liners (makes them easy to grab and less messy for little hands). If you want to go all-out, add a dollop of whipped cream or a scoop of vanilla ice cream on the side.
Storage: Keep leftover bars covered in the refrigerator for up to 5 days. The flavors actually meld and improve after a day or two. For longer storage, freeze the bars (well-wrapped or in an airtight container) for up to 2 months. Thaw overnight in the fridge before serving. To re-crisp the crumble a bit, you can pop individual bars in a 300°F (150°C) oven for 5-7 minutes.
And here’s a fun tip: the bars taste even better on day two, once the strawberry and cheesecake layers have had time to mingle. If you’re prepping ahead for a party, you’re in luck!
Nutritional Information & Benefits
Each strawberry cheesecake shortbread bar (based on 12 servings) contains approximately:
- Calories: 250
- Fat: 14g
- Carbohydrates: 30g
- Protein: 3g
- Sugar: 16g
Health Highlights: Strawberries are loaded with vitamin C, fiber, and antioxidants—they’re one of my favorite ways to sneak in a little nutrition. The cream cheese adds protein and calcium, while the shortbread crust, well, that’s pure comfort. If you’re aiming for fewer carbs or less sugar, you can use a sugar substitute that measures cup-for-cup.
These bars are naturally egg-free if you skip the cheesecake layer, and easily gluten-free or dairy-free with the swaps above. Allergens to note: dairy, gluten (unless using substitutes), and eggs. I like to think of these bars as an occasional treat that brings a little joy and a lot of strawberry flavor to the table.
Conclusion
If you’re searching for a dessert that’s easy, impressive, and downright irresistible, these strawberry cheesecake shortbread bars are it. They’ve got that perfect trio of buttery crust, creamy cheesecake, and juicy strawberries—all with a crumble top that’s pure comfort. No wonder they’re my most-requested recipe for summer gatherings (and honestly, any time of year when I need a little pick-me-up).
Don’t be afraid to play with the recipe—switch up the berries, add a sprinkle of nuts, or make them gluten-free. That’s the beauty of these bars: they’re endlessly adaptable and always a hit. I’ve made them more times than I can count, and every batch disappears faster than the last.
So go ahead—give these strawberry cheesecake shortbread bars a try! Let me know your favorite twist or if you discover a flavor combo I need to try next. Drop a comment, share your photos, or pass along the recipe to a friend who loves a good dessert. Happy baking—and enjoy every crumb!
Frequently Asked Questions
How do I keep my shortbread crust from getting soggy?
Bake the crust for 10-12 minutes before adding the cheesecake and strawberry layers. This quick pre-bake creates a barrier that keeps things crisp. Also, drain extra juice from the strawberries if they’re super ripe.
Can I use frozen strawberries in this recipe?
Absolutely! Thaw and drain them well before tossing with sugar, lemon, and cornstarch. Too much liquid can make the bars soggy, so don’t skip this step.
How do I know when the bars are done baking?
The crumble topping should be golden brown, and the cheesecake layer should be just set—it might jiggle a bit in the center, but it firms up as it cools. If the top gets too brown, loosely cover with foil for the last 10 minutes.
Can I make these bars ahead of time?
Yes! The bars taste even better after a night in the fridge. Make them up to 2 days in advance, keep them covered in the refrigerator, and slice just before serving.
What’s the best way to cut the bars neatly?
Use a sharp knife and wipe it clean between cuts. Chilling the bars for at least two hours makes slicing easier and keeps the layers tidy—perfect for those Pinterest-worthy photos!
Pin This Recipe!
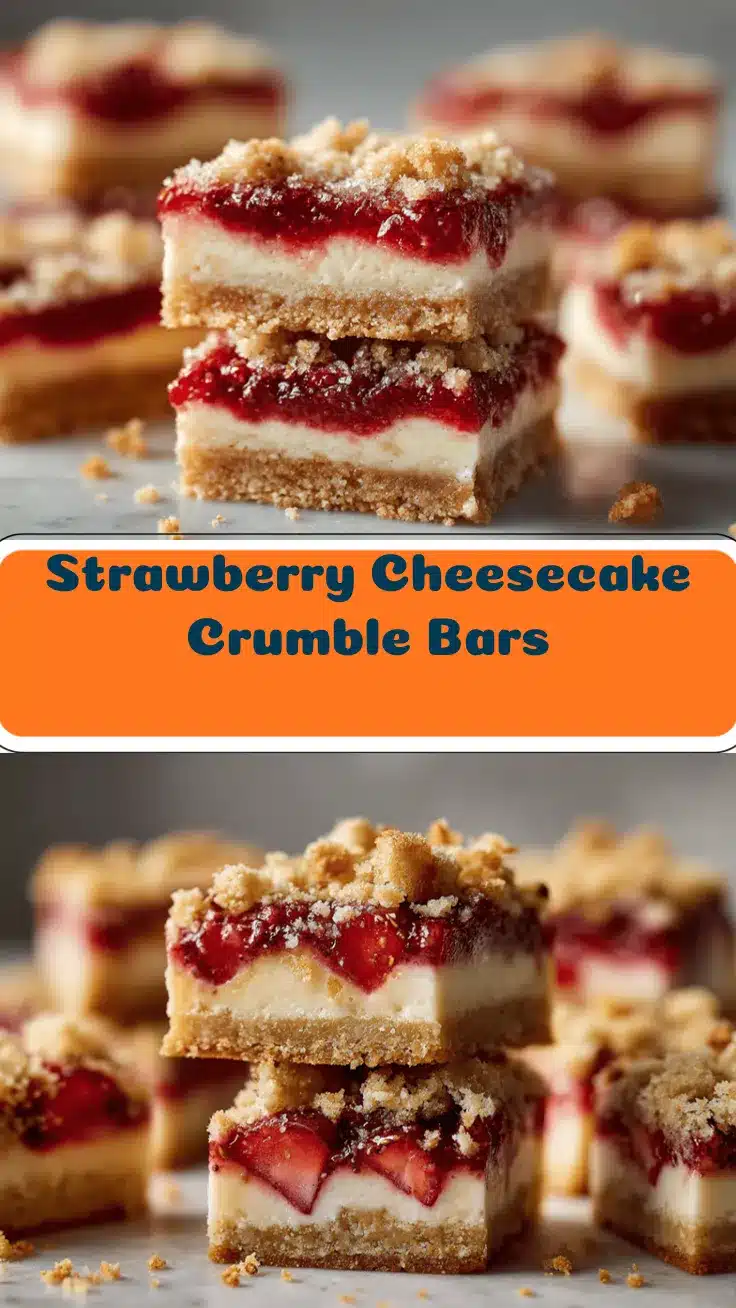
Strawberry Cheesecake Shortbread Bars
These Strawberry Cheesecake Shortbread Bars combine a buttery shortbread crust, creamy cheesecake filling, and juicy strawberries with a golden crumble topping. Perfect for picnics, potlucks, or any occasion, they’re easy to make and always a crowd-pleaser.
- Prep Time: 20 minutes
- Cook Time: 45 minutes
- Total Time: 1 hour 5 minutes (plus 4 hours cooling/chilling)
- Yield: 12 bars 1x
- Category: Dessert
- Cuisine: American
Ingredients
- 2 cups (240g) all-purpose flour
- 1/2 cup (100g) granulated sugar
- 3/4 cup (170g) salted butter, cold and cubed (or unsalted plus a pinch of salt)
- 1 teaspoon (5ml) vanilla extract
- 8 oz (225g) cream cheese, softened
- 1/3 cup (67g) granulated sugar
- 1 large egg
- 1 teaspoon (5ml) vanilla extract
- 2 cups (300g) fresh strawberries, hulled and chopped (or frozen, thawed and drained)
- 2–3 tablespoons (25-38g) granulated sugar (to taste, depending on berry sweetness)
- 1 tablespoon (15ml) lemon juice
- 1 tablespoon (8g) cornstarch
Instructions
- Preheat oven to 350°F (175°C). Line an 8×8 inch (20x20cm) baking pan with parchment paper, leaving an overhang on two sides.
- In a large mixing bowl, combine flour, 1/2 cup sugar, and a pinch of salt (if using unsalted butter). Add cold, cubed butter and cut in with a pastry cutter, two forks, or fingertips until mixture resembles coarse crumbs. Stir in 1 teaspoon vanilla extract.
- Scoop out about 1 cup of the mixture and set aside for the crumble topping.
- Press the remaining shortbread mixture firmly and evenly into the bottom of the prepared pan. Bake for 10-12 minutes, until just starting to turn golden around the edges. Remove and let cool slightly.
- In a medium bowl, toss chopped strawberries with 2-3 tablespoons sugar, lemon juice, and cornstarch. Let sit while preparing the cheesecake layer.
- In another bowl, beat softened cream cheese with 1/3 cup sugar until smooth and creamy (about 2 minutes). Beat in egg and 1 teaspoon vanilla extract until just combined.
- Pour cheesecake mixture evenly over the cooled shortbread base and smooth with a spatula.
- Spoon the strawberry mixture evenly over the cheesecake layer.
- Sprinkle the reserved shortbread mixture evenly over the strawberries for the crumble topping.
- Bake for 35-40 minutes, or until the crumble topping is golden and the cheesecake is set (it may jiggle slightly in the center).
- Cool completely in the pan on a wire rack (about 2 hours), then refrigerate for at least 2 more hours or overnight.
- Use the parchment overhang to lift the bars out of the pan. Slice into 12 squares (or 16 for smaller servings), wiping the knife between cuts for clean edges.
Notes
For best results, use cold butter for the shortbread and chill the bars thoroughly before slicing. If using frozen strawberries, thaw and drain well. Gluten-free flour blends and dairy-free substitutes work well for adaptations. Let bars cool completely and chill for clean slices. Store in the fridge for up to 5 days or freeze for up to 2 months.
Nutrition
- Serving Size: 1 bar (1/12 of recipe)
- Calories: 250
- Sugar: 16
- Sodium: 120
- Fat: 14
- Saturated Fat: 8
- Carbohydrates: 30
- Fiber: 1
- Protein: 3
Keywords: strawberry cheesecake bars, shortbread bars, easy dessert, summer dessert, picnic dessert, cheesecake bars, strawberry dessert, crumble bars


