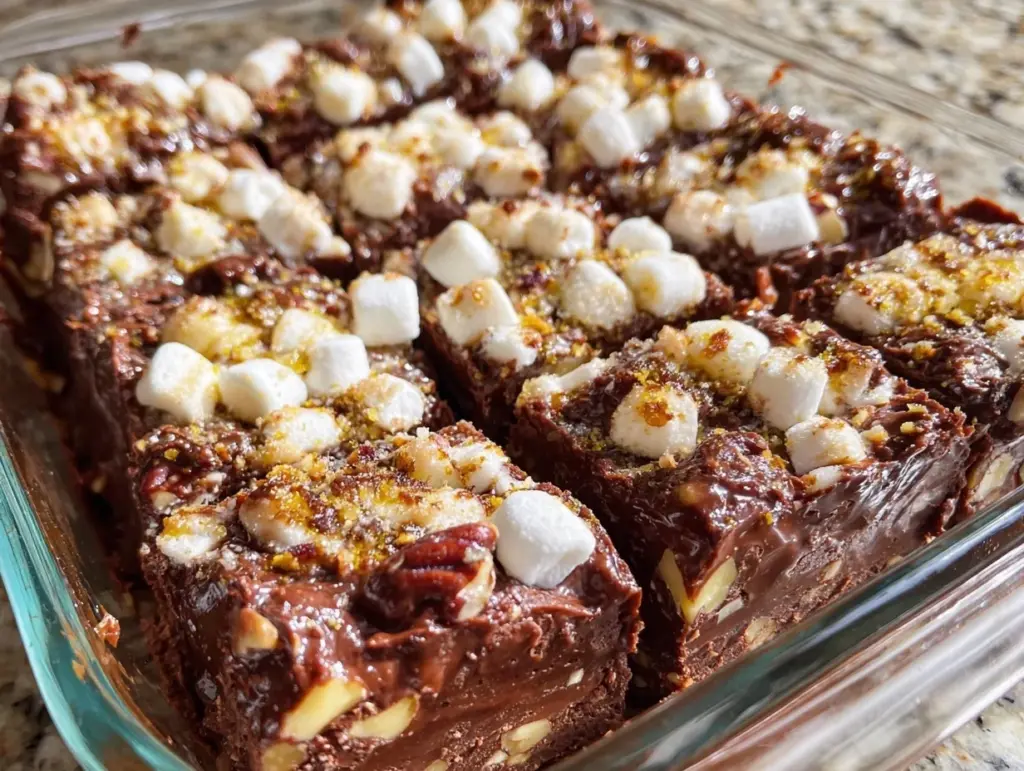
Let me tell you, the scent of melting chocolate swirling with toasted nuts and gooey marshmallows filling my kitchen is the kind of magic that stops you in your tracks. It’s sweet, nutty, and just a little bit mischievous—like you know you’re about to sneak something extra special. The first time I made this Rocky Road Fudge recipe, I caught myself grinning like a kid as the marshmallows sunk into the glossy fudge. I was instantly hooked—honestly, it was the kind of moment where you pause, take a deep breath, and just smile because you know you’re onto something truly special.
Years ago, when I was knee-high to a grasshopper, my grandma would whip up a pan of rocky road bars for every birthday and bake sale. The kitchen would fill with laughter and the sound of nuts clattering in the pan. It’s pure, nostalgic comfort, and I wish I’d discovered just how easy homemade Rocky Road Fudge could be ages ago. This recipe is dangerously easy—no candy thermometer, no fuss, just melt, stir, and pour. My family couldn’t stop sneaking bites off the cooling rack (and I can’t really blame them). Even the neighbor kids found excuses to pop by when they caught a whiff of chocolate.
Honestly, these homemade marshmallow nut bars are perfect for potlucks, gifting, or brightening up your Pinterest cookie board. Whether you’re after a sweet treat for your kids or a cozy snack for movie night, this Rocky Road Fudge recipe hits the spot every time. I’ve tested it more times than I’d like to admit (in the name of research, of course), and now it’s a staple for family gatherings. It feels like a warm hug—full of chocolatey richness, chewy marshmallow pockets, and a satisfying crunch. You’re going to want to bookmark this one!
Why You’ll Love This Recipe
After countless batches and a few messy kitchen adventures, I can promise this Rocky Road Fudge recipe is a keeper. Here’s why you’ll be reaching for it again and again (trust me, I’ve made it for holiday trays and last-minute cravings alike):
- Quick & Easy: Comes together in under 20 minutes, perfect for busy weeknights or when you need a treat in a pinch.
- Simple Ingredients: No fancy grocery trips—just classic pantry staples like chocolate chips, marshmallows, and nuts.
- Perfect for Gifting & Sharing: These homemade marshmallow nut bars slice up beautifully for potlucks, bake sales, or holiday cookie swaps.
- Crowd-Pleaser: Kids and adults alike rave about the rich chocolate fudge, gooey marshmallow bites, and crunchy nuts.
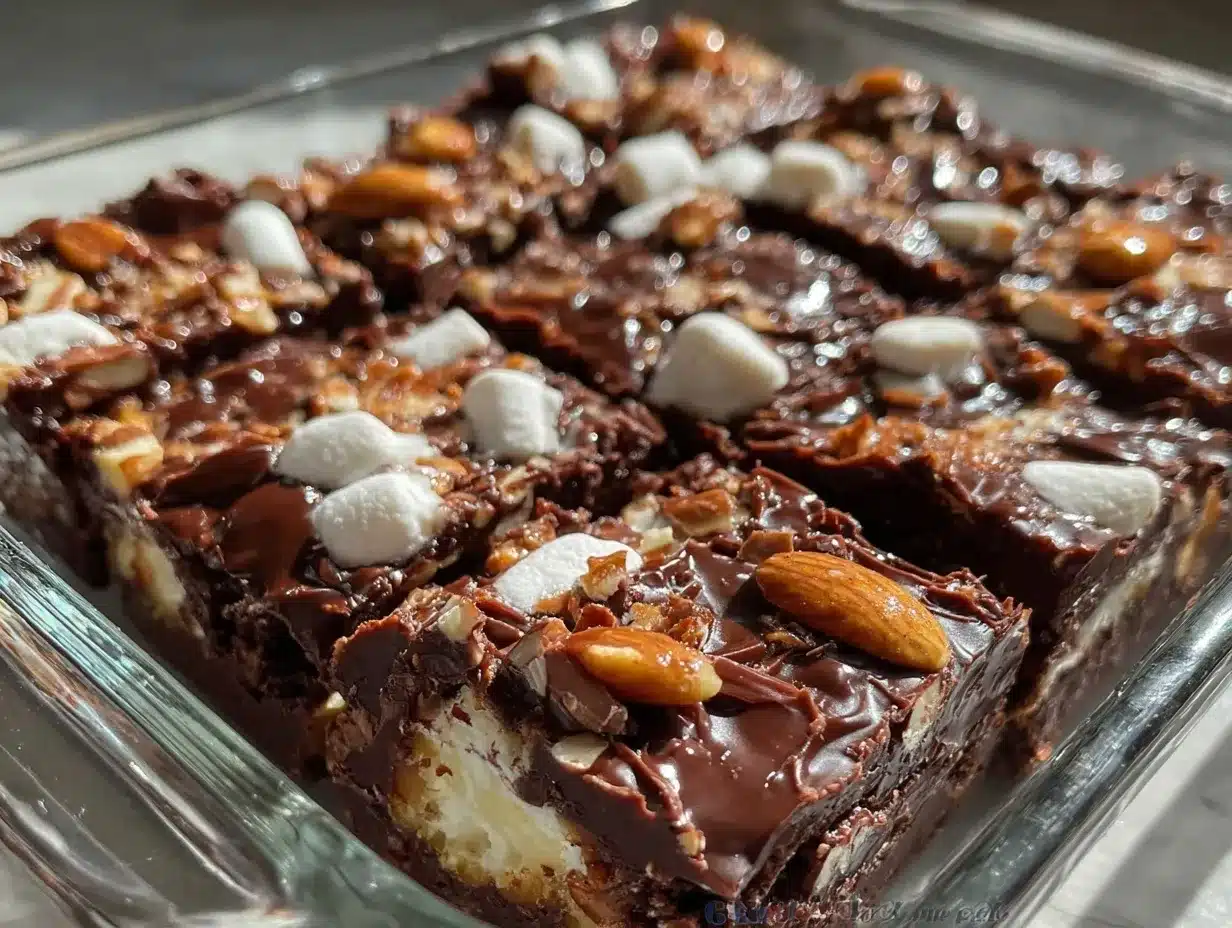
- Unbelievably Delicious: The texture is spot-on: creamy, chewy, and crunchy in every bite. It’s comfort food with a little twist.
What sets this Rocky Road Fudge apart? I always toast the nuts for extra flavor and use mini marshmallows for that perfect bite. Some folks just toss everything together, but trust me—taking the time to toast the nuts makes all the difference. Plus, a pinch of sea salt brings out the chocolate’s depth. It’s not just another fudge recipe; it’s my best version, tested and tweaked to perfection.
This fudge isn’t just good—it’s the kind that makes you close your eyes after the first bite. It’s comfort food reworked for today’s kitchen: healthier options, faster prep, but with the same soul-soothing satisfaction. Impress guests without stress, or turn a simple weeknight into a memorable treat. I love that it brings smiles every single time.
What Ingredients You Will Need
This Rocky Road Fudge recipe uses simple, wholesome ingredients to deliver bold flavor and a seriously satisfying texture—without any fancy tricks. Most of these are pantry staples, and you can swap things out to fit your taste or dietary needs (I’ve got tips below for easy substitutions).
- For the fudge base:
- 2 cups (340g) semi-sweet chocolate chips (I like Ghirardelli for extra smoothness)
- 1 can (14 oz / 396g) sweetened condensed milk
- 2 tablespoons (28g) unsalted butter (softened for easier mixing—adds richness)
- 1/2 teaspoon vanilla extract (pure vanilla, not imitation)
- 1/4 teaspoon fine sea salt (balances the sweetness; optional but recommended)
- For the mix-ins:
- 1 1/2 cups (90g) mini marshmallows (regular or vegan)
- 1 cup (120g) toasted nuts (walnuts, pecans, or almonds; roughly chopped)
Ingredient tips:
- Chocolate chips: Use dark chocolate chips for less sweetness, or milk chocolate for a more classic flavor. I sometimes do half and half!
- Sweetened condensed milk: Don’t substitute evaporated milk—it won’t set right.
- Butter: Can swap for coconut oil for a subtle tropical flavor and dairy-free option.
- Nuts: Toast in a dry skillet for 4-5 minutes or in the oven at 350°F (175°C) for 8 minutes until fragrant. This step is worth it!
- Marshmallows: Mini ones work best, but you can chop regular size if needed. Vegan marshmallows taste great here too.
Substitution ideas:
- Nut-free? Use sunflower seeds or leave out nuts entirely.
- Gluten-free? All ingredients are naturally gluten-free, but check marshmallow packaging just in case.
- Paleo? Use coconut milk sweetened condensed and coconut oil instead of butter, and dairy-free chocolate chips.
Honestly, this Rocky Road Fudge recipe is all about flexibility. Use what you’ve got, and don’t stress over perfection—the fudge will turn out delicious no matter what!
Equipment Needed
You don’t need a ton of fancy tools for this Rocky Road Fudge recipe. That’s part of why I love it—it’s as low-maintenance as homemade treats get! Here’s what you’ll need:
- Medium saucepan: For melting the chocolate and butter together. If you only have a microwave, that works too (see tips below).
- Wooden spoon or silicone spatula: For stirring the fudge mixture—make sure it’s sturdy!
- 8×8 inch (20x20cm) baking pan: For setting the fudge. You can use a glass dish, metal pan, or even a silicone mold.
- Parchment paper or foil: Line the pan for easy removal and clean-up. Trust me, it saves you from sticky fudge messes.
- Chef’s knife: For chopping nuts and slicing the finished bars. Serrated blades work best for clean cuts.
- Measuring cups and spoons: For precise ingredient amounts. A kitchen scale is handy if you want perfect results every time.
Don’t have a saucepan? Use a microwave-safe bowl and heat in 30-second intervals, stirring between each. I’ve tried both methods, and honestly, the microwave is just as quick (though you’ll want to watch closely to avoid scorching). For budget-friendly options, a basic glass baking dish and a sturdy spatula do the trick. Just remember to wash your tools right away—fudge loves to stick!
Preparation Method
Let’s break this Rocky Road Fudge recipe down step-by-step. You’ll be amazed how quickly it comes together (and how little cleanup you’ll need afterward). Here’s exactly how I make it every time:
- Prep your pan: Line an 8×8 inch (20x20cm) baking pan with parchment paper, leaving a 2-inch overhang on all sides for easy lifting later. Lightly grease the paper if your fudge tends to stick.
- Toast the nuts: In a dry skillet over medium heat, toast 1 cup (120g) of chopped nuts for 4-5 minutes, stirring often. When they smell fragrant and look golden, transfer to a plate to cool. You can also toast them in the oven at 350°F (175°C) for 8 minutes. (Don’t skip this—the flavor boost is worth it!)
- Melt the chocolate and butter: In a medium saucepan, combine 2 cups (340g) semi-sweet chocolate chips and 2 tablespoons (28g) unsalted butter. Heat over low, stirring constantly, until melted and smooth. (If using a microwave, melt in a large bowl at 50% power in 30-second bursts, stirring each time.)
- Add sweetened condensed milk: Pour in 1 can (14 oz / 396g) sweetened condensed milk and stir until fully combined and glossy. Remove from heat. The mixture should be thick and shiny.
- Stir in flavorings: Add 1/2 teaspoon vanilla extract and 1/4 teaspoon sea salt. Mix well. (I love adding a pinch more salt for extra pop!)
- Fold in mix-ins: Gently fold in 1 1/2 cups (90g) mini marshmallows and the cooled toasted nuts (reserve a handful for sprinkling on top, if you like). Don’t over-stir or the marshmallows may melt too much.
- Pour and spread: Pour the fudge mixture into your prepared pan. Use a spatula to spread it evenly. Sprinkle reserved nuts and marshmallows on top for a pretty finish.
- Chill: Refrigerate for at least 2 hours, or until firmly set. If you’re in a hurry, pop it in the freezer for 45 minutes. (But don’t let it freeze solid; the texture changes!)
- Slice and serve: Lift the fudge out using the parchment paper overhang and place on a cutting board. Slice into bars or squares using a sharp knife. Wipe the blade between cuts for neat edges.
- Troubleshooting: If the fudge seems too soft, chill longer. If it’s dry, check that you measured the sweetened condensed milk correctly. If the chocolate seizes, your heat may have been too high—start over and melt gently.
Prep notes: Fudge mixture will be thick, almost like brownie batter. If it’s too stiff, add 1 tablespoon (15ml) milk. The marshmallows should stay whole—if they dissolve, let your mixture cool a few minutes before folding them in. Honestly, don’t worry if it looks a little rustic; that’s part of the charm!
Cooking Tips & Techniques
Rocky Road Fudge sounds simple (and it is!), but there are a few tricks to get it just right. I’ve learned some lessons the hard way, so here’s what I always keep in mind:
- Low and slow melting: Chocolate burns fast. Melt gently over low heat or in short microwave bursts. I scorched a batch once—trust me, you don’t want to taste burnt fudge.
- Toast your nuts: Toasting isn’t just for fancy desserts. It brings out the natural oils and makes every bite more flavorful. Skip this and you’ll miss out.
- Don’t overmix: Fold in marshmallows and nuts gently. Overmixing can melt the marshmallows and break up the nuts too much. I used to stir with enthusiasm, but now I’m a gentle folder.
- Chill thoroughly: The fudge needs time to set. If you cut too soon, it’ll be gooey and messy. I’ve rushed this step (impatiently), but a couple of hours in the fridge makes all the difference.
- Use good chocolate: The better your chocolate chips, the better your fudge. Cheap chips can be waxy or bland. It’s worth spending a little extra if you can.
- Multitasking: While the nuts are toasting, measure out the other ingredients. That way, you’re ready to go as soon as the chocolate melts. Efficiency is key on busy days.
- Consistency: Measure accurately and use the same pan size for reliable results. If you swap pans, adjust your chill time.
If you end up with a lumpy mixture, don’t fret. It’ll taste great and the rustic look is part of the fun. Honestly, the more I make this Rocky Road Fudge recipe, the more I appreciate its forgiving nature. It’s almost impossible to mess up—and if you do, just call it “artisan fudge” and serve with confidence!
Variations & Adaptations
One of my favorite things about this Rocky Road Fudge recipe is how easy it is to customize. Here are a few tried-and-true variations (and a couple of my own creative spins):
- Dietary swaps: For a vegan version, use dairy-free chocolate chips, coconut oil instead of butter, and vegan marshmallows. Sweetened condensed coconut milk works great for the base.
- Seasonal flavors: Add 1/2 teaspoon cinnamon and a pinch of cayenne for a Mexican chocolate vibe. Or fold in dried cranberries and orange zest for a festive holiday treat.
- Nut-free option: Leave out the nuts or swap for sunflower seeds or pumpkin seeds. You’ll still get that nice crunch.
- Extra fudge-y: Stir in 1/2 cup mini chocolate chips right before pouring into the pan for double chocolate power.
- Other mix-ins: Chopped dried cherries, coconut flakes, or butterscotch chips are all fantastic add-ins.
If you want to use different cooking methods, try the microwave version (just melt in 30-second bursts; it’s mess-free and fast). For thinner bars, use a 9×13 inch (23x33cm) pan—just reduce the chill time.
Personally, my favorite twist is swirling in a spoonful of peanut butter before adding the mix-ins. It makes the fudge extra creamy and adds a salty kick. Feel free to experiment—this Rocky Road Fudge recipe is all about making it your own!
Serving & Storage Suggestions
Rocky Road Fudge is best served cold or at room temperature. I love slicing it into bite-sized squares and piling them onto a pretty plate for parties. If you’re feeling fancy, sprinkle with flaky sea salt or drizzle with melted white chocolate for a Pinterest-worthy finish.
Pair these homemade marshmallow nut bars with a glass of cold milk, hot coffee, or even rich hot chocolate for extra indulgence. They’re also amazing alongside fresh fruit or salty snacks.
Storage:
- Store in an airtight container in the fridge for up to 2 weeks. Layer with parchment paper to prevent sticking.
- Freeze for up to 2 months. Wrap tightly in foil and place in a zip-top bag. Thaw overnight in the fridge before serving.
- To reheat (if you want a gooey texture), microwave a square for 10-15 seconds. Don’t overdo it or the marshmallows will melt!
- Flavor deepens after a day or two, so leftovers are even better.
Honestly, I often make a double batch just to have extra in the freezer for surprise guests or late-night cravings. The fudge holds up great and tastes even richer over time.
Nutritional Information & Benefits
Here’s the scoop on what you’ll get from a serving of Rocky Road Fudge (about 1 square, 1/16th of the pan):
- Calories: ~175
- Fat: ~8g
- Carbohydrates: ~23g
- Protein: ~2g
- Sugar: ~18g
Health benefits: The toasted nuts add healthy fats, protein, and a bit of fiber. Dark chocolate chips offer antioxidants and magnesium. If you use coconut oil or swap in seeds, you can boost the recipe’s nutrition even more.
This Rocky Road Fudge recipe is naturally gluten-free and easy to make nut-free or dairy-free. Watch out for marshmallow and chocolate brand labels for allergen info. Personally, I love that you can tweak it to fit most diets—just don’t expect it to be low-calorie (it’s a treat, after all!).
Conclusion
If you’re searching for a sweet treat that’s easy, crowd-pleasing, and totally irresistible, this Rocky Road Fudge recipe is worth trying. It’s creamy, crunchy, chewy—everything you want in a homemade marshmallow nut bar! Customize it with your favorite mix-ins, swap out nuts or marshmallows, and make it your own.
I love how this fudge brings people together—whether it’s for a holiday tray, a movie night, or a simple afternoon snack. Honestly, it’s the recipe I keep coming back to because it’s just so darn dependable (and delicious). Give it a whirl, let me know your favorite twist, and don’t forget to share your batch on Pinterest or in the comments below!
Grab your ingredients, line your pan, and get ready to enjoy the kind of treat that feels like a warm hug. I can’t wait for you to experience the magic of homemade Rocky Road Fudge—happy snacking!
Frequently Asked Questions
Can I use regular marshmallows instead of mini ones?
Absolutely! Just chop regular marshmallows into small pieces—they work just as well and taste the same. Mini marshmallows are easier to stir in, but any size will do.
What nuts work best in Rocky Road Fudge?
Walnuts, pecans, and almonds are all great choices. Toasting them adds extra flavor. If you prefer a nut-free fudge, sunflower seeds or pumpkin seeds are a tasty swap.
Can I make this Rocky Road Fudge ahead of time?
Yes, you can! It keeps well in the fridge for up to 2 weeks or in the freezer for 2 months. The flavor actually improves after a day or two, so it’s perfect for prepping ahead.
How do I prevent the marshmallows from melting too much?
Let the fudge mixture cool for a couple of minutes before folding in the marshmallows. Stir gently and don’t overmix. This keeps them whole and chewy.
Is this Rocky Road Fudge gluten-free?
Yes! All the main ingredients are naturally gluten-free, but double-check your marshmallow packaging for additives, just in case. It’s easy to adapt for nut-free or dairy-free diets too.
Pin This Recipe!
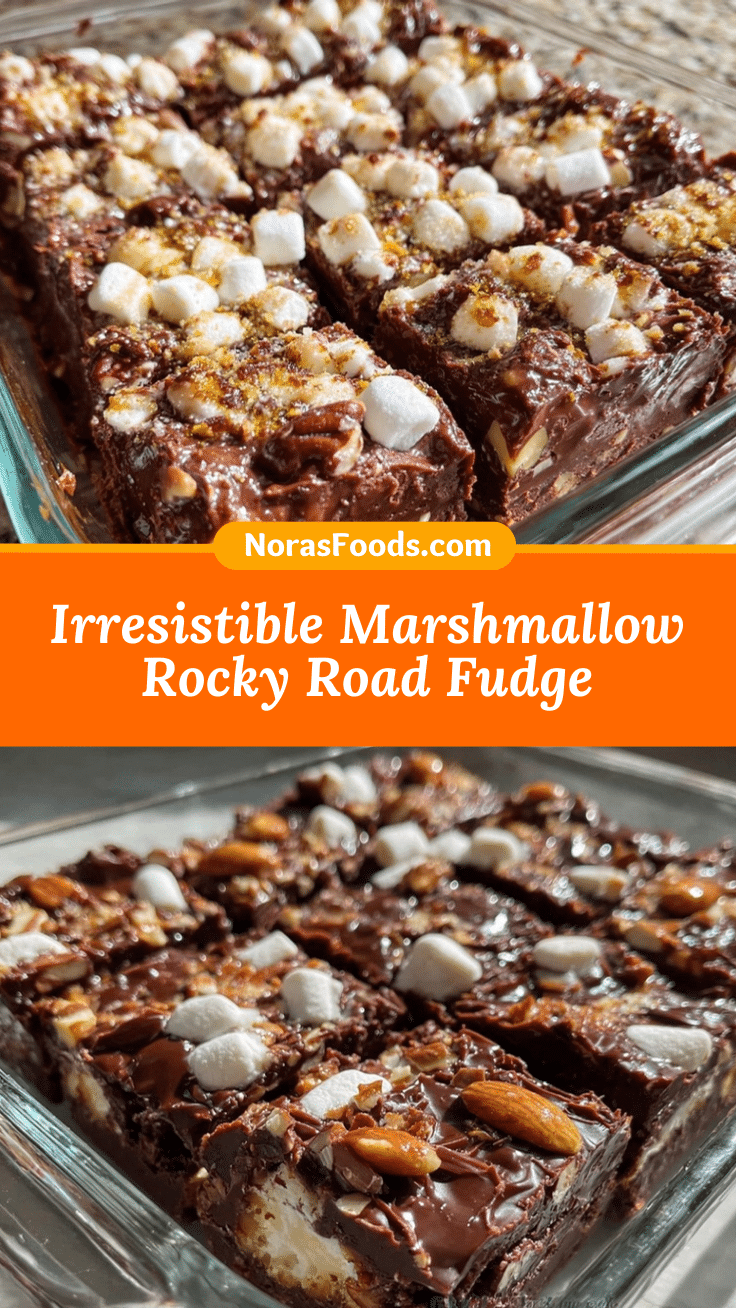
Rocky Road Fudge Recipe Easy Homemade Marshmallow Nut Bars

This easy Rocky Road Fudge recipe combines creamy chocolate, toasted nuts, and gooey marshmallows for a nostalgic, crowd-pleasing treat. Quick to make and perfect for gifting, potlucks, or snacking, these homemade marshmallow nut bars are sure to become a family favorite.
- Prep Time: 10 minutes
- Cook Time: 10 minutes
- Total Time: 2 hours 20 minutes
- Yield: 16 squares 1x
- Category: Dessert
- Cuisine: American
Ingredients
- 2 cups (12 oz) semi-sweet chocolate chips
- 1 can (14 oz) sweetened condensed milk
- 2 tablespoons unsalted butter, softened
- 1/2 teaspoon vanilla extract
- 1/4 teaspoon fine sea salt (optional, recommended)
- 1 1/2 cups mini marshmallows
- 1 cup toasted nuts (walnuts, pecans, or almonds; roughly chopped)
Instructions
- Line an 8×8 inch baking pan with parchment paper, leaving a 2-inch overhang on all sides for easy lifting. Lightly grease the paper if desired.
- Toast the nuts in a dry skillet over medium heat for 4-5 minutes, stirring often, until fragrant and golden. Alternatively, toast in the oven at 350°F for 8 minutes. Let cool.
- In a medium saucepan, melt chocolate chips and butter over low heat, stirring constantly, until smooth. (Alternatively, melt in a microwave-safe bowl at 50% power in 30-second bursts, stirring each time.)
- Add sweetened condensed milk to the melted chocolate and butter, stirring until fully combined and glossy. Remove from heat.
- Stir in vanilla extract and sea salt until well mixed.
- Gently fold in mini marshmallows and cooled toasted nuts, reserving a handful for topping if desired. Do not overmix.
- Pour the fudge mixture into the prepared pan and spread evenly. Sprinkle reserved nuts and marshmallows on top.
- Refrigerate for at least 2 hours, or until firmly set. For faster setting, freeze for 45 minutes (do not freeze solid).
- Lift the fudge out using the parchment paper overhang and place on a cutting board. Slice into bars or squares with a sharp knife, wiping the blade between cuts for neat edges.
- Store in an airtight container in the fridge for up to 2 weeks or freeze for up to 2 months.
Notes
For best flavor, toast the nuts before adding. Use high-quality chocolate chips for a smoother fudge. Let the mixture cool slightly before folding in marshmallows to prevent melting. Fudge can be customized with different nuts, seeds, or mix-ins. Store leftovers in the fridge or freezer for longer shelf life.
Nutrition
- Serving Size: 1 square (1/16th of
- Calories: 175
- Sugar: 18
- Sodium: 60
- Fat: 8
- Saturated Fat: 4
- Carbohydrates: 23
- Fiber: 1
- Protein: 2
Keywords: rocky road fudge, marshmallow nut bars, easy fudge, homemade fudge, chocolate dessert, gluten-free fudge, holiday treats, potluck dessert, kid-friendly, no bake fudge


