Introduction
The first time I sank my teeth into a warm Reeses cookie cup, the world honestly faded away for a second. The melty chocolate, salty-sweet peanut butter, and golden cookie edges—everything just clicked. It’s the kind of dessert that makes you sneak back for seconds, even if you promised yourself you’d stop at one. If you’re a fan of classic peanut butter cups or cookies, trust me, this mashup is about to become your new guilty pleasure.
I stumbled upon this recipe during a late-night baking session when I wanted something quick, gooey, and absolutely loaded with chocolate (you know how those cravings hit!). After tinkering with a few batches, I finally nailed that perfect ratio: chewy cookie cradle, a pool of chocolate, and the iconic Reeses cup in the center. Now, every time I bake these irresistible Reeses cookie cups, I’m instantly reminded of family movie nights and bringing trays of them to potlucks (where they disappear in minutes).
What I love most is how these cookie cups bring people together—kids go wild for them, grown-ups sneak extras, and they’re fancy enough for a special treat but simple enough for a Tuesday. As someone who’s baked hundreds of cookies over the years (sometimes for work, sometimes for therapy!), I promise this Reeses cookie cups recipe is as foolproof as it is addictive. Whether you’re baking for a holiday, a birthday, or just to treat yourself, these gooey chocolate delights hit every craving.
Let’s get baking—because honestly, life’s too short to miss out on Reeses cookie cups!
Why You’ll Love This Recipe
- Quick & Easy: You can whip up a batch of Reeses cookie cups in under 30 minutes—no need for chilling dough or fancy tricks. Perfect for last-minute dessert emergencies or when you want to impress without a sweat.
- Simple Ingredients: All you need are baking basics and a pack of Reeses peanut butter cups. Most of the time, I already have everything in my pantry—no wild goose chase at the store!
- Perfect for Any Occasion: These cookie cups shine at birthday parties, bake sales, holiday gatherings, or even just a cozy night in. They’re that versatile.
- Crowd-Pleaser: I’ve never seen anyone resist these. Kids and adults both reach for seconds, and even people who claim they’re “not dessert people” end up sneaking a bite.
- Unbelievably Delicious: The combo of soft, chewy cookie, melty chocolate, and creamy peanut butter is pure magic. It’s comfort food turned up to eleven.
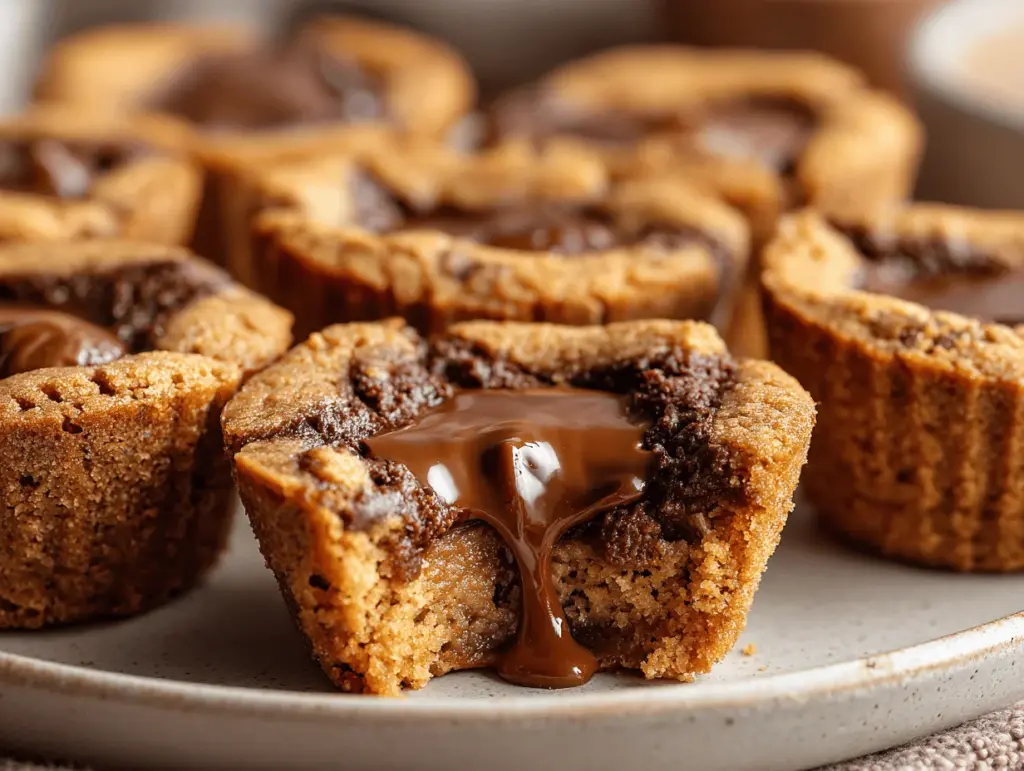
What sets this Reeses cookie cups recipe apart is the gooey chocolate center that stays soft, thanks to the cookie cup “shell.” Unlike some versions that just plop a candy on top, this one gets the peanut butter cup cozy inside the dough, so every bite is a flavor explosion. If you’re after a dessert that’s a little playful, a little nostalgic, and always impressive, this is it.
Let’s face it: sometimes, you’re just looking for something fun to bake. These cookie cups are my go-to for those moments—no stress, no fuss, just straight-up joy in every gooey, chocolatey bite. I’ve baked these for friends going through tough times, for kids’ soccer games, and even as a just-because treat after a long week. They never disappoint.
If you want a recipe that’s guaranteed to make you the hero of any gathering or simply brighten up a regular day, these Reeses cookie cups are the answer. Get ready to fall in love!
What Ingredients You Will Need
This recipe uses simple, familiar ingredients to create a treat that tastes way more special than the effort required. Most are pantry staples—just grab a pack of Reeses peanut butter cups and you’re basically set!
- For the Cookie Dough:
- 1/2 cup (115g) unsalted butter, softened (adds richness and chew)
- 1/2 cup (100g) packed light brown sugar (for that classic cookie flavor)
- 1/4 cup (50g) granulated sugar
- 1 large egg, room temperature (binds everything together)
- 1 teaspoon pure vanilla extract (use real vanilla for the best taste)
- 1 1/4 cups (160g) all-purpose flour (King Arthur Flour is my go-to for consistent results)
- 1/2 teaspoon baking soda (for just the right lift)
- 1/4 teaspoon salt (balances the sweetness)
- Mix-Ins:
- 1/2 cup (85g) semi-sweet chocolate chips (optional, but makes it extra chocolatey)
- For the Filling:
- 12 mini Reeses peanut butter cups, unwrapped (standard 0.75 oz each—try to use fresh ones for maximum gooeyness)
Ingredient Tips:
- If you want a gluten-free version, swap the all-purpose flour for a 1:1 gluten-free blend (I’ve had luck with Bob’s Red Mill).
- For a dairy-free option, use plant-based butter and dairy-free chocolate chips. The Reeses cups themselves do contain dairy, so swap with vegan peanut butter cups if needed.
- If you’re feeling fancy, you can add a sprinkle of flaky sea salt on top before baking for extra wow.
- Not a fan of semi-sweet? Use milk or dark chocolate chips, or skip them for a classic peanut butter cookie base.
Honestly, I’ve tried this recipe with almond butter cups and even stuffed them with caramel-filled chocolates in a pinch. The basic dough is super forgiving, so don’t be afraid to experiment!
Equipment Needed
You don’t need a lot of gadgets for this Reeses cookie cups recipe—just a few kitchen basics and you’re in business.
- 12-cup muffin tin: The standard size works perfectly. Nonstick is best, but I’ve used old-school metal pans with good results too—just make sure to grease them well.
- Mixing bowls: One large for the dough, and a second smaller one if you want to combine your dry ingredients separately.
- Electric hand mixer or stand mixer: Both work great for creaming the butter and sugars. If you’re mixing by hand, just be ready for a little arm workout!
- Measuring cups and spoons: Accuracy makes all the difference with cookies. I use my trusty stainless steel set, but even budget sets get the job done.
- Rubber spatula or wooden spoon: For scraping the bowl and folding in chocolate chips.
- Cookie scoop or tablespoon: Not essential, but a scoop makes it much easier to get even portions (and prettier cups).
- Wire rack: For cooling the cookie cups so they set up right.
Maintenance tip: If your muffin tin’s seen better days, line it with paper liners or parchment circles for easy release (especially important if you love gooey centers). I’ve made these with cheap pans from the dollar store and they still turn out great—just don’t forget that nonstick spray!
Preparation Method
-
Preheat and Prep:
Preheat your oven to 350°F (175°C). Lightly grease a standard 12-cup muffin tin with nonstick spray or line with paper liners. This step saves you from any sticky clean-ups later! -
Cream Butter and Sugars:
In a large mixing bowl, beat together 1/2 cup (115g) softened unsalted butter, 1/2 cup (100g) packed light brown sugar, and 1/4 cup (50g) granulated sugar until light and fluffy—about 2-3 minutes with an electric mixer on medium speed. The mixture should look creamy and pale. If mixing by hand, give it a good workout! -
Add Wet Ingredients:
Beat in 1 large egg and 1 teaspoon vanilla extract until well combined. Scrape down the sides of your bowl as needed. -
Mix Dry Ingredients:
In a separate bowl, whisk together 1 1/4 cups (160g) all-purpose flour, 1/2 teaspoon baking soda, and 1/4 teaspoon salt. Gradually add the dry ingredients to the wet, mixing on low speed just until incorporated. Overmixing can make the cookie cups tough, so stop as soon as you see no more dry streaks. -
Fold in Chocolate Chips (Optional):
Gently fold in 1/2 cup (85g) chocolate chips if using. The dough will be soft but not sticky. -
Portion and Shape:
Using a cookie scoop or tablespoon, portion the dough into 12 equal balls. Place one ball into each muffin cup. Press gently with your fingers or the back of a spoon to flatten just slightly—the dough will spread as it bakes. -
Bake:
Bake in the preheated oven for 10-12 minutes, or until the edges are golden and the centers look just set. Don’t overbake—these are best when a little gooey in the middle! -
Add Reeses Cups:
Remove the muffin tin from the oven. Immediately press one unwrapped mini Reeses peanut butter cup into the center of each cookie cup. The heat will start to melt the chocolate—this is exactly what you want for that gooey bite. -
Cool:
Let the cookie cups cool in the tin for at least 10-15 minutes before carefully lifting them out. If you try to pop them out too early, they might fall apart (been there, done that!). -
Set and Serve:
Transfer the cookie cups to a wire rack to cool completely. If you like them extra gooey, serve while still a little warm. For neater edges, let them set up fully.
Troubleshooting Tips:
- If the cups stick, run a thin knife around the edges to loosen them. Nonstick spray is your friend here.
- If your dough seems crumbly, add a tiny splash of milk—just a teaspoon at a time.
- For ultra-gooey centers, slightly underbake (closer to 10 minutes) and let them finish setting in the tin.
You’ll know they’re ready when the edges are golden and the centers puff up. Trust your nose—the smell of peanut butter and warm chocolate will fill your kitchen!
Cooking Tips & Techniques
Over the years, I’ve picked up a few tricks to guarantee your Reeses cookie cups turn out bakery-level every time.
- Use Room Temperature Ingredients: This helps the dough mix evenly. Cold butter or eggs can cause uneven baking or lumpy dough. If you’re in a rush, I microwave the butter for just 5 seconds—careful not to melt it!
- Don’t Overmix: Stir in the flour just until incorporated. Too much mixing makes the cookie cups dense instead of chewy.
- Press Reeses Cups Gently: If you push too hard, the cookie base might crack. A gentle press lets the chocolate settle in perfectly.
- Keep an Eye on Baking Time: Every oven’s a little different. Start checking at 10 minutes. The centers should look just set—don’t wait for a firm top or you’ll lose that gooey magic.
- Let Them Cool: I know, it’s tough. But letting the cookie cups cool in the pan helps them hold their shape. I’ve gotten impatient and ended up with cookie “craters”—still tasty, but not as pretty!
- Batch Baking Tip: If you’re doubling the recipe, rotate your muffin tins halfway through for even baking. And always let the tin cool between batches so the dough doesn’t melt before it bakes.
I once tried pulling them out of the pan too early (couldn’t wait!), and half the cups fell apart. Now, I always run a butter knife around the edges and let them sit a bit—patience pays off. For extra flair, a pinch of sea salt on top before baking really brings out the chocolate and peanut butter flavors.
Variations & Adaptations
One of my favorite things about this Reeses cookie cups recipe is how easily you can switch it up. Here are some tasty ideas:
- Gluten-Free: Swap the flour for your favorite 1:1 gluten-free baking blend. I use Bob’s Red Mill and the texture turns out almost identical.
- Chocolate Lovers: Add 2 tablespoons unsweetened cocoa powder to the dough for double chocolate cookie cups. Or use dark chocolate peanut butter cups for a richer flavor.
- Seasonal Twists: Around the holidays, add a sprinkle of crushed peppermint candies or swap in caramel-filled chocolates for a fun surprise.
- Nut-Free: Use SunButter cups or your favorite nut-free chocolate treat. The cookie dough itself is easy to make nut-free, too.
- Vegan Option: Substitute plant-based butter, flax egg (1 tablespoon ground flaxseed mixed with 2.5 tablespoons water), and vegan peanut butter cups.
Personally, I love adding a pinch of cinnamon to the dough for extra warmth, or swirling in a teaspoon of espresso powder to make the chocolate pop. I’ve even made a batch with chopped pretzels sprinkled on top for salty crunch—so good!
Serving & Storage Suggestions
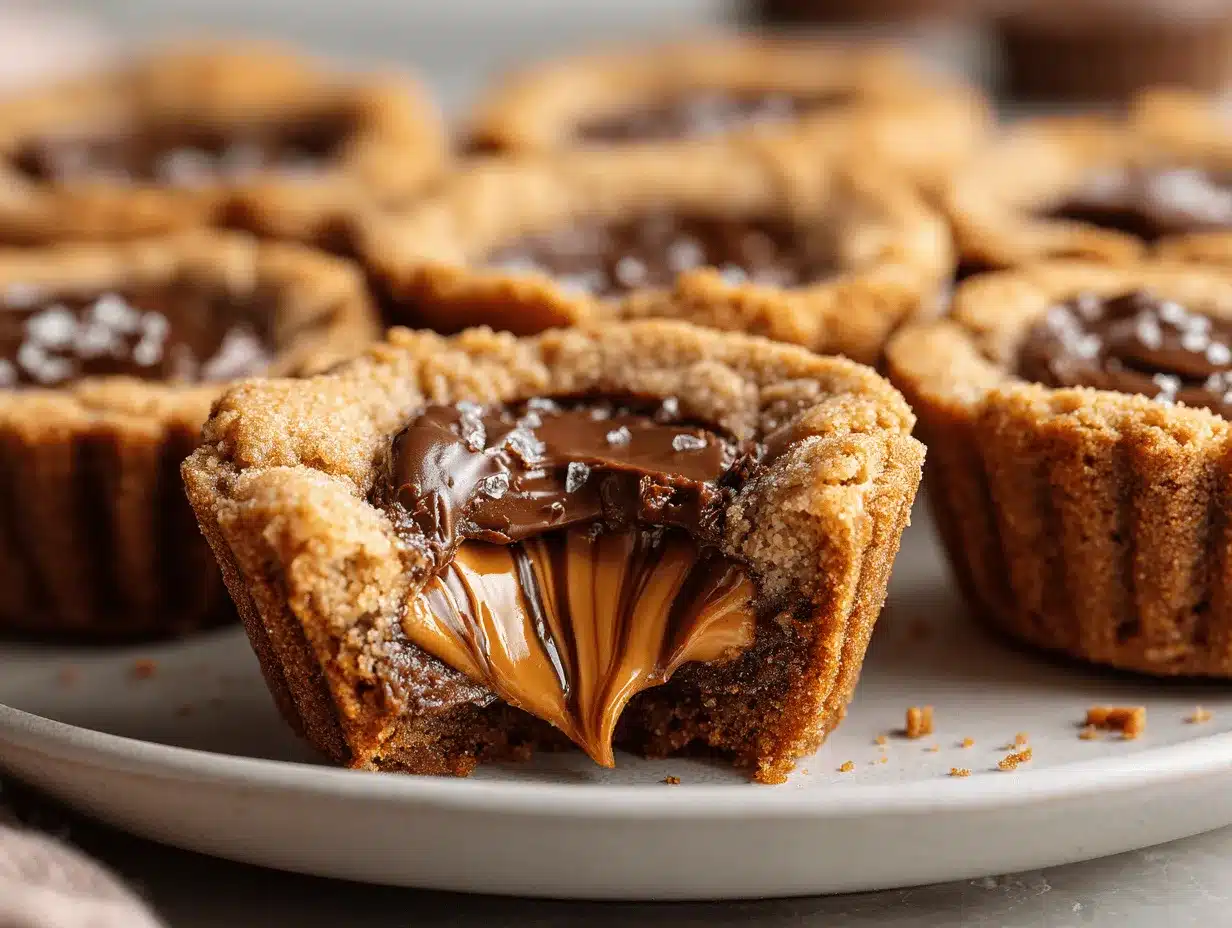
Serve your Reeses cookie cups slightly warm for maximum gooeyness—the chocolate and peanut butter melt together for the perfect bite. They look gorgeous stacked on a cake stand or arranged on a pretty plate for parties. If you’re feeling extra, dust with powdered sugar or drizzle with melted chocolate before serving.
Pair with cold milk, a hot cup of coffee, or even a scoop of vanilla ice cream for the ultimate treat. These cookie cups also make adorable edible gifts—just pop them in mini cupcake liners and tuck into a cute box.
Storage Tips:
- Store leftover cookie cups in an airtight container at room temperature for up to 3 days. They stay soft and chewy!
- For longer storage, refrigerate for up to a week—just let them come to room temp before serving.
- To freeze, wrap individually in plastic wrap and place in a freezer bag. They’ll keep for up to 2 months. Thaw at room temperature or microwave for a few seconds for that fresh-baked feel.
The flavors actually deepen after a day, making leftovers (if you ever have any!) even more delicious.
Nutritional Information & Benefits
Each Reeses cookie cup contains approximately 210 calories, 12g fat, 23g carbs, and 3g protein (estimate, will vary with ingredient brands and size). They’re definitely a treat, but the portion-controlled size makes it easy to indulge without going overboard.
Peanut butter adds a bit of plant-based protein and healthy fats, while the cookie base keeps things satisfying. If you use dark chocolate or a gluten-free flour, you can tailor the recipe to suit your dietary needs. Allergens to note: contains peanuts, dairy, eggs, and gluten (unless adapted).
From a wellness perspective, I believe treats like these belong in a balanced diet—they bring joy and sweet memories. Enjoying a Reeses cookie cup with friends or family is good for the soul!
Conclusion
If you’re after a dessert that’s easy, crowd-pleasing, and totally irresistible, this Reeses cookie cups recipe deserves a spot in your baking rotation. I love how it brings out everyone’s inner child—there’s just something magical about biting into that gooey chocolate center!
Don’t be afraid to play around with flavors, fillings, or presentation—make these cookie cups your own. Whether you’re baking for a party or just treating yourself after a long day, they’re guaranteed to make people smile.
If you try these, I’d love to hear how they turned out! Leave a comment, share your favorite twist, or tag your creations so we can all drool together. Happy baking, friends—go ahead, grab that extra cookie cup!
Frequently Asked Questions
How do I prevent my Reeses cookie cups from sticking to the pan?
Grease your muffin tin well with nonstick spray, or use paper liners for easy removal. If any cups stick, run a thin knife around the edge before lifting them out.
Can I use regular-size Reeses cups instead of mini?
Mini Reeses cups fit best in standard muffin tins. If you only have regular-size cups, try using a jumbo muffin tin or cut the candies in half to fit.
Can I freeze Reeses cookie cups?
Absolutely! Wrap them individually and freeze for up to 2 months. Thaw at room temperature or microwave for 10-15 seconds for a gooey treat.
What if I don’t have chocolate chips?
Chocolate chips are optional—skip them for a classic peanut butter cookie base, or substitute with chopped chocolate, M&Ms, or leave them out entirely.
Can I make these cookie cups gluten-free?
Yes! Use a 1:1 gluten-free flour blend. The texture is slightly different, but still delicious. Always check the labels on your Reeses cups and other ingredients for gluten content.
Pin This Recipe!

Reeses Cookie Cups
These gooey Reeses cookie cups combine chewy cookie dough with melty chocolate and a creamy peanut butter cup center for an easy, crowd-pleasing dessert. Perfect for parties, bake sales, or a cozy night in, they come together in under 30 minutes with simple pantry ingredients.
- Prep Time: 10 minutes
- Cook Time: 12 minutes
- Total Time: 25 minutes
- Yield: 12 cookie cups 1x
- Category: Dessert
- Cuisine: American
Ingredients
- 1/2 cup (115g) unsalted butter, softened
- 1/2 cup (100g) packed light brown sugar
- 1/4 cup (50g) granulated sugar
- 1 large egg, room temperature
- 1 teaspoon pure vanilla extract
- 1 1/4 cups (160g) all-purpose flour
- 1/2 teaspoon baking soda
- 1/4 teaspoon salt
- 1/2 cup (85g) semi-sweet chocolate chips (optional)
- 12 mini Reeses peanut butter cups, unwrapped (0.75 oz each)
Instructions
- Preheat your oven to 350°F (175°C). Lightly grease a standard 12-cup muffin tin with nonstick spray or line with paper liners.
- In a large mixing bowl, beat together the softened butter, brown sugar, and granulated sugar until light and fluffy (about 2-3 minutes with an electric mixer on medium speed).
- Beat in the egg and vanilla extract until well combined. Scrape down the sides of the bowl as needed.
- In a separate bowl, whisk together the flour, baking soda, and salt. Gradually add the dry ingredients to the wet, mixing on low speed just until incorporated.
- Gently fold in the chocolate chips, if using.
- Using a cookie scoop or tablespoon, portion the dough into 12 equal balls. Place one ball into each muffin cup and press gently to flatten slightly.
- Bake for 10-12 minutes, or until the edges are golden and the centers look just set.
- Remove the muffin tin from the oven. Immediately press one unwrapped mini Reeses peanut butter cup into the center of each cookie cup.
- Let the cookie cups cool in the tin for at least 10-15 minutes before carefully lifting them out.
- Transfer the cookie cups to a wire rack to cool completely. Serve warm for extra gooeyness or let them set for neater edges.
Notes
For gluten-free, use a 1:1 gluten-free flour blend. For dairy-free, use plant-based butter and vegan peanut butter cups. Add a sprinkle of flaky sea salt on top before baking for extra flavor. Let cookie cups cool in the pan before removing to prevent them from falling apart. Store in an airtight container at room temperature for up to 3 days, or freeze for up to 2 months.
Nutrition
- Serving Size: 1 cookie cup
- Calories: 210
- Sugar: 15
- Sodium: 110
- Fat: 12
- Saturated Fat: 5
- Carbohydrates: 23
- Fiber: 1
- Protein: 3
Keywords: Reeses cookie cups, peanut butter cup cookies, chocolate dessert, easy cookie cups, gooey cookies, party dessert, bake sale, kid-friendly, quick dessert, muffin tin cookies


