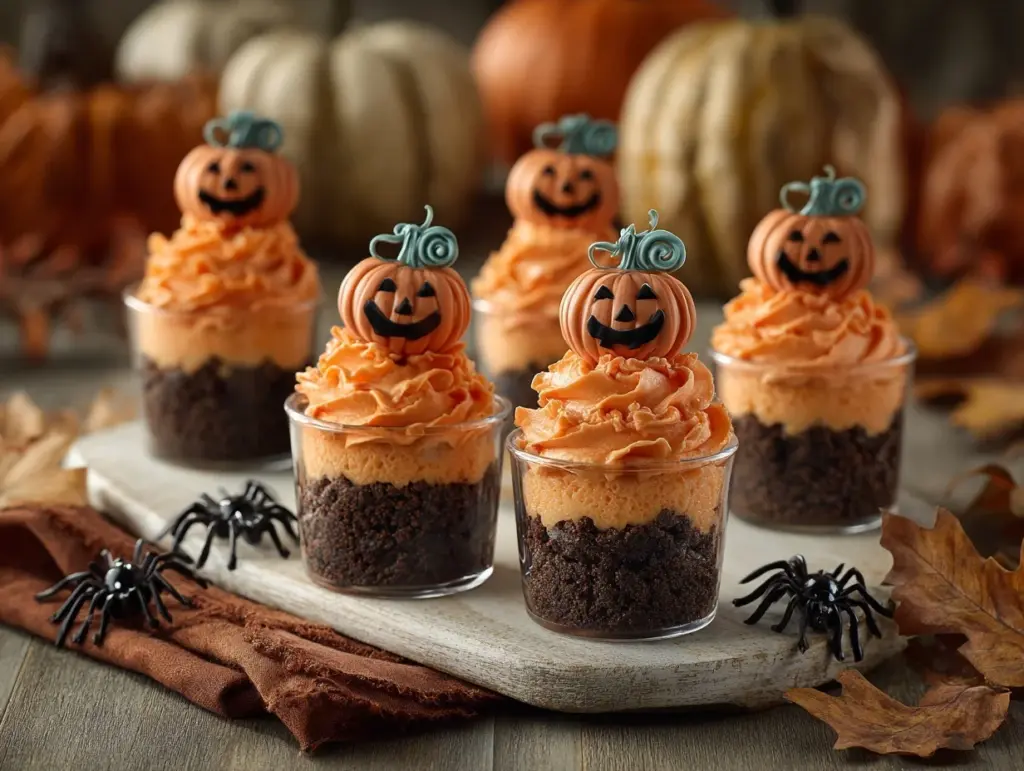
The crunch of chocolate cookie crumbs, the creamy sweetness of pudding, and the playful pumpkin patch theme—these dirt cups are everything Halloween treats should be! I first whipped up these adorable desserts for my kids’ Halloween party, and they stole the show. Not only are they ridiculously cute, but they’re also ridiculously easy to make. Whether you’re hosting a spooky bash or just want some festive fun in your kitchen, these Pumpkin Patch Dirt Cups are the way to go!
What makes them even better? You don’t need fancy baking skills or hours of prep. It’s a no-bake recipe, so you can focus on decorating and delighting your guests. Plus, it’s customizable! You can add gummy worms, candy pumpkins, or even chocolate tombstones to make them your own. Trust me, these little cups of joy will be the highlight of your Halloween spread!
Why You’ll Love This Recipe
- Quick & Easy: These dirt cups come together in just 20 minutes. Perfect for busy parents or last-minute party prep.
- No-Bake: No oven required! It’s all about assembling, which means less mess and stress.
- Festively Fun: The pumpkin patch theme is perfect for Halloween, and kids absolutely love the spooky-cute look.
- Customizable: Add gummy worms, candy pumpkins, or even edible glitter for your personal twist.
- Crowd-Pleaser: These dirt cups are a hit with adults and kids alike—sweet and chocolatey with a creative twist.
What sets this recipe apart? The combination of textures! The creamy pudding pairs perfectly with the crunchy cookie crumbs, while the candy decorations bring a playful Halloween vibe. And let’s face it, it’s impossible to resist that first scoop when your spoon dives into the “dirt.” It’s the kind of treat that brings smiles all around—and who doesn’t want that?
What Ingredients You Will Need
This easy recipe relies on simple ingredients you can find at any grocery store. You might even have some of them in your pantry already!
- Chocolate sandwich cookies: Crushed to make the “dirt” layer (Oreos work perfectly).
- Chocolate pudding mix: You’ll need one package. You can use instant pudding for a quicker prep.
- Milk: To make the pudding. Whole milk gives the creamiest texture, but you can use any milk you prefer.
- Candy pumpkins: For decoration—these make the pumpkin patch come to life!
- Green sprinkles: They mimic grass and add a pop of color. You can also use shredded coconut dyed green.
- Gummy worms: Optional, but they add a fun, creepy-crawly vibe.
- Clear cups: Transparent cups are ideal to show off the layered dirt cup effect.
Feel free to substitute ingredients to fit your dietary needs. For example, use gluten-free cookies or dairy-free milk for allergy-friendly options.
Equipment Needed
- Food processor: For crushing the cookies into fine crumbs. If you don’t have one, you can crush them in a zip-top bag using a rolling pin.
- Mixing bowl: To prepare the pudding.
- Whisk: For smooth and creamy pudding.
- Clear plastic cups: These make the layers visible and add that Insta-worthy appeal.
- Spoon: For layering the pudding and cookie crumbs neatly.
If you’re on a budget, no worries! You can use regular glasses or even small mason jars instead of clear cups. And if you don’t have a food processor, just crush the cookies manually—it’s a good stress reliever!
How to Make Pumpkin Patch Dirt Cups
- Prepare the pudding: In a mixing bowl, whisk together the chocolate pudding mix and milk according to the package instructions. Let the pudding set for about 5 minutes until thickened.
- Crush the cookies: Place the chocolate sandwich cookies in a food processor and pulse until they resemble fine crumbs. If you don’t have a processor, place the cookies in a zip-top bag and crush them with a rolling pin.
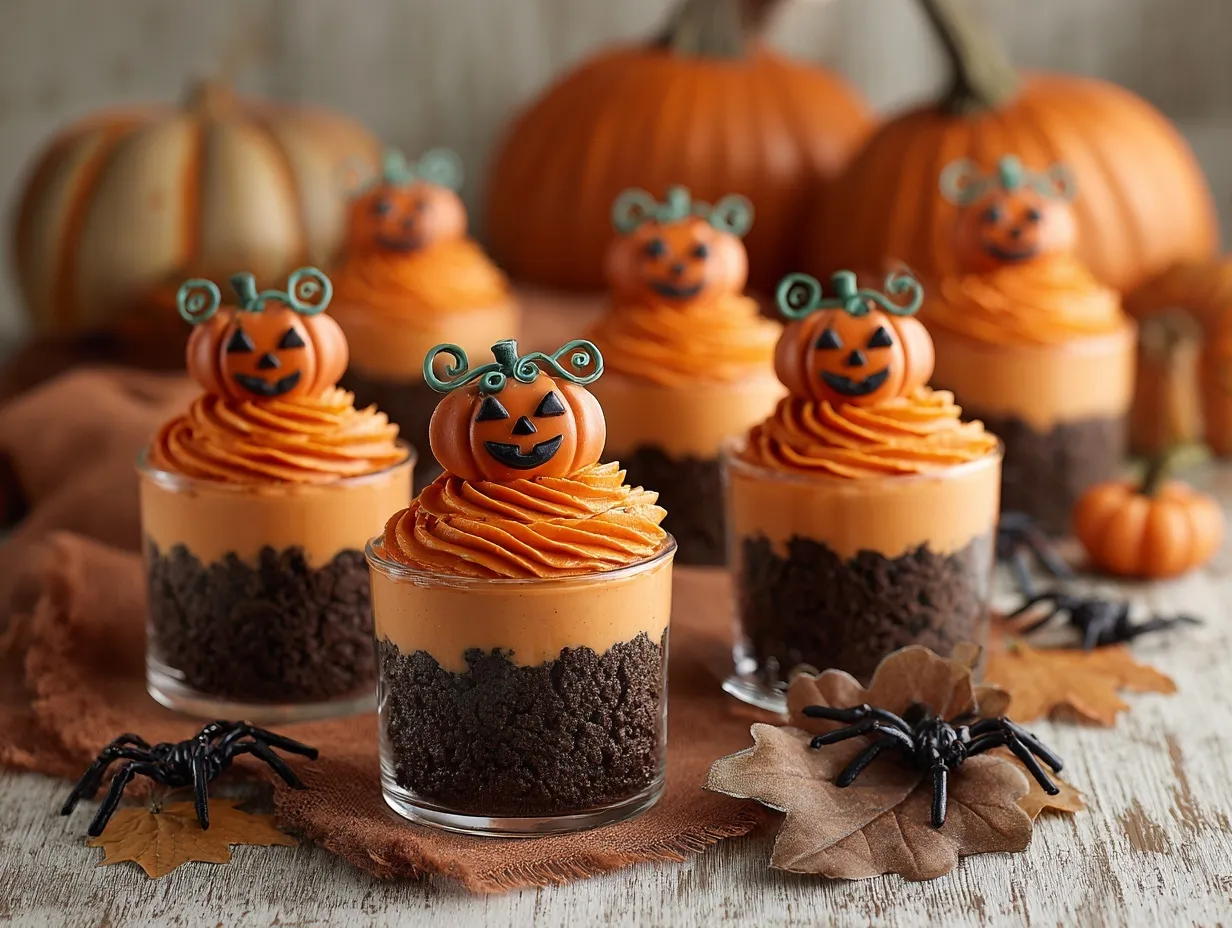
- Layer the dirt cups: Start by adding a layer of crushed cookies to the bottom of each clear cup. Then, spoon a layer of chocolate pudding over the cookie crumbs. Repeat the process until the cup is full, finishing with a layer of cookie crumbs.
- Decorate: Add candy pumpkins on top to create a “pumpkin patch.” Sprinkle green sprinkles or dyed coconut to mimic grass. Place gummy worms on top for a spooky touch.
- Chill: Refrigerate the dirt cups for at least 30 minutes before serving to let the flavors meld together.
And that’s it! You’ve got yourself the cutest Halloween treat with minimal effort. If the crumbs aren’t sticking well, try pressing them down with the back of a spoon. And don’t forget to taste-test the pudding—it’s worth it!
Cooking Tips & Techniques
Here are some tried-and-true tips to make your Pumpkin Patch Dirt Cups truly spectacular:
- Don’t skip chilling: The pudding and cookie layers meld together beautifully when given time to rest in the fridge.
- Crush cookies finely: The finer the crumbs, the more realistic the “dirt” will look. Large chunks can make layering tricky.
- Use clear cups: Transparent cups really show off the layers and make the dessert visually stunning—perfect for that Instagram-worthy shot!
- Customize decorations: Mix and match your toppings. Try edible spiders, chocolate tombstones, or even candy corn for a festive twist.
- Serve cold: These are best enjoyed chilled, straight from the fridge. The texture is creamier and the flavors are more intense.
If you’re making these with kids, let them have fun decorating their own cups. It’s a great way to get them involved and keep them entertained!
Variations & Adaptations
This recipe is incredibly versatile! Here are some fun ways to switch things up:
- Allergy-Friendly: Use gluten-free cookies and dairy-free milk to make these cups suitable for guests with dietary restrictions.
- Seasonal Twist: Swap the candy pumpkins for candy canes and make “Santa’s Snowy Dirt Cups” for Christmas!
- Flavor Boost: Add a layer of peanut butter mousse or whipped cream between the pudding and cookie crumbs for extra indulgence.
- Adult Version: Add a splash of coffee liqueur to the pudding for a grown-up treat.
I once tried adding crushed peppermint candies instead of green sprinkles to make a winter-themed version—it was a huge hit!
Serving & Storage Suggestions
Here’s how to serve and store your Pumpkin Patch Dirt Cups for maximum enjoyment:
- Serving: Serve these chilled for the best flavor and texture. Add festive spoons or toothpicks with Halloween toppers for extra flair.
- Pairings: These cups go perfectly with hot cider, pumpkin spice lattes, or a spooky Halloween punch!
- Storage: Store the dirt cups in the fridge for up to 3 days. Cover them tightly to prevent the cookie crumbs from getting soggy.
- Reheating: No reheating necessary! Just eat them straight from the fridge. If they’ve been stored for a while, you can top them with a fresh layer of cookie crumbs for added crunch.
Pro tip: The flavors deepen over time, so making them a day ahead can actually make them taste even better!
Nutritional Information & Benefits
Here’s the breakdown of what you’re enjoying with these dirt cups:
- Calories: Approximately 250 per cup.
- Protein: A small boost from the milk and pudding mix.
- Key Nutrients: Calcium from the milk and pudding.
- Dietary Considerations: This dish can easily be made gluten-free or dairy-free with simple swaps.
- Allergens: Contains dairy and gluten—make substitutions as needed for allergies.
While these dirt cups are a treat, they’re a fun way to enjoy some portion-controlled indulgence. And let’s be honest, they make Halloween even more fun!
Conclusion
If you’re looking for an easy, adorable Halloween dessert, these Pumpkin Patch Dirt Cups are a must-try. They’re fun to make, even more fun to eat, and guaranteed to be a hit with kids and adults alike. Plus, you can put your own creative spin on the decorations and make them uniquely yours.
When I see how much joy these little cups bring, it reminds me why I love making festive treats. So go ahead—grab your ingredients, invite the kids into the kitchen, and start creating your very own pumpkin patch magic!
I’d love to hear how you made these your own! Did you add gummy worms or go wild with the sprinkles? Drop a comment below and let’s share some Halloween fun. And don’t forget to share this recipe with friends—it’s too cute to keep to yourself!
FAQs
Can I make these dirt cups ahead of time?
Yes, you can! Prepare them up to a day in advance and store them in the fridge. Just keep them covered to maintain freshness.
What can I use instead of candy pumpkins?
If you can’t find candy pumpkins, try using orange gummy bears or shaping fondant into little pumpkins. Both work beautifully!
How do I make this recipe gluten-free?
Use gluten-free chocolate sandwich cookies and ensure your pudding mix is also gluten-free. Easy peasy!
Can I use homemade pudding instead of store-bought mix?
Absolutely! Homemade pudding adds a richer flavor, but it will require extra prep time. Just make sure it’s thick enough to hold its layers.
What’s the best way to crush cookies without a food processor?
Place the cookies in a zip-top bag and crush them with a rolling pin. It’s simple and works like a charm!
Pin This Recipe!

Pumpkin Patch Dirt Cups Recipe Easy Halloween Treat Idea

These no-bake Pumpkin Patch Dirt Cups are a quick and easy Halloween treat featuring layers of chocolate pudding, cookie crumbs, and festive candy decorations. Perfect for kids and adults alike!
- Prep Time: 15 minutes
- Cook Time: 5 minutes
- Total Time: 20 minutes
- Yield: 6 servings 1x
- Category: Dessert
- Cuisine: American
Ingredients
- Chocolate sandwich cookies (e.g., Oreos), crushed
- 1 package chocolate pudding mix (instant preferred)
- 2 cups milk (whole milk recommended, but any milk works)
- Candy pumpkins for decoration
- Green sprinkles or shredded coconut dyed green
- Gummy worms (optional)
- Clear cups for serving
Instructions
- Prepare the pudding: In a mixing bowl, whisk together the chocolate pudding mix and milk according to the package instructions. Let the pudding set for about 5 minutes until thickened.
- Crush the cookies: Place the chocolate sandwich cookies in a food processor and pulse until they resemble fine crumbs. Alternatively, place the cookies in a zip-top bag and crush them with a rolling pin.
- Layer the dirt cups: Start by adding a layer of crushed cookies to the bottom of each clear cup. Then, spoon a layer of chocolate pudding over the cookie crumbs. Repeat the process until the cup is full, finishing with a layer of cookie crumbs.
- Decorate: Add candy pumpkins on top to create a ‘pumpkin patch.’ Sprinkle green sprinkles or dyed coconut to mimic grass. Place gummy worms on top for a spooky touch.
- Chill: Refrigerate the dirt cups for at least 30 minutes before serving to let the flavors meld together.
Notes
[‘Chill the dirt cups for at least 30 minutes to allow the flavors to meld together.’, “Crush cookies finely for a more realistic ‘dirt’ look.”, ‘Use clear cups to showcase the layers for a visually appealing dessert.’, ‘Customize decorations with edible spiders, chocolate tombstones, or candy corn for a unique twist.’, ‘These dirt cups are best served chilled and can be made a day ahead for convenience.’]
Nutrition
- Serving Size: 1 cup
- Calories: 250
- Sugar: 25
- Sodium: 200
- Fat: 8
- Saturated Fat: 3
- Carbohydrates: 40
- Fiber: 1
- Protein: 4
Keywords: Halloween dessert, no-bake dessert, dirt cups, pumpkin patch dessert, Halloween treats


