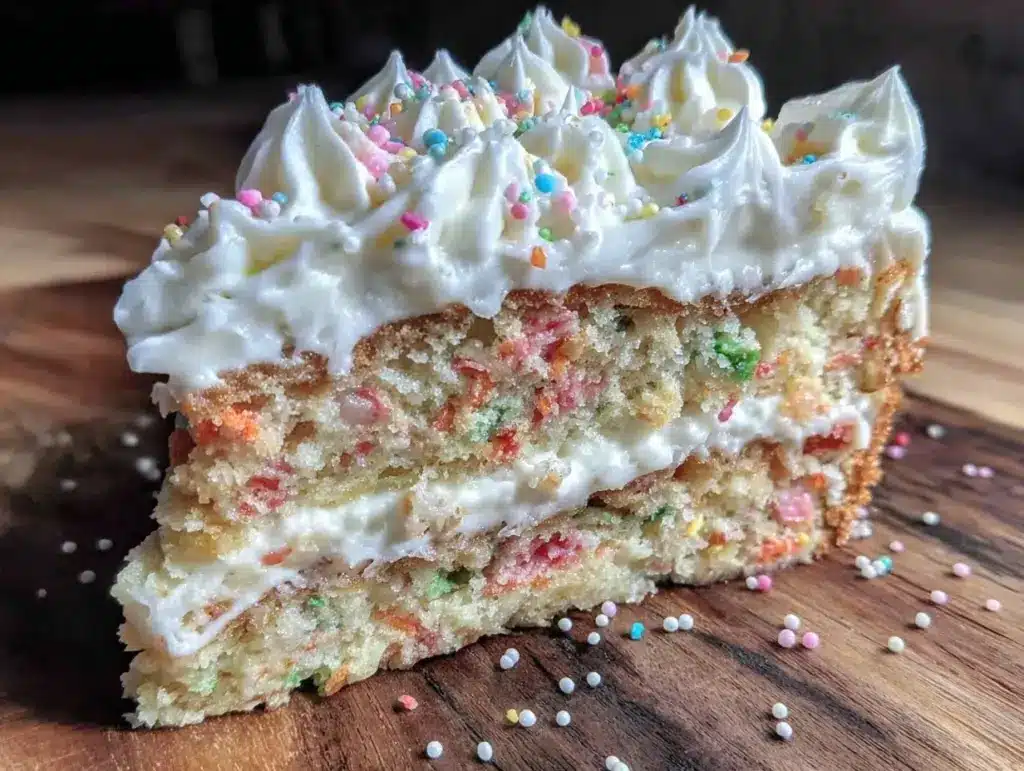
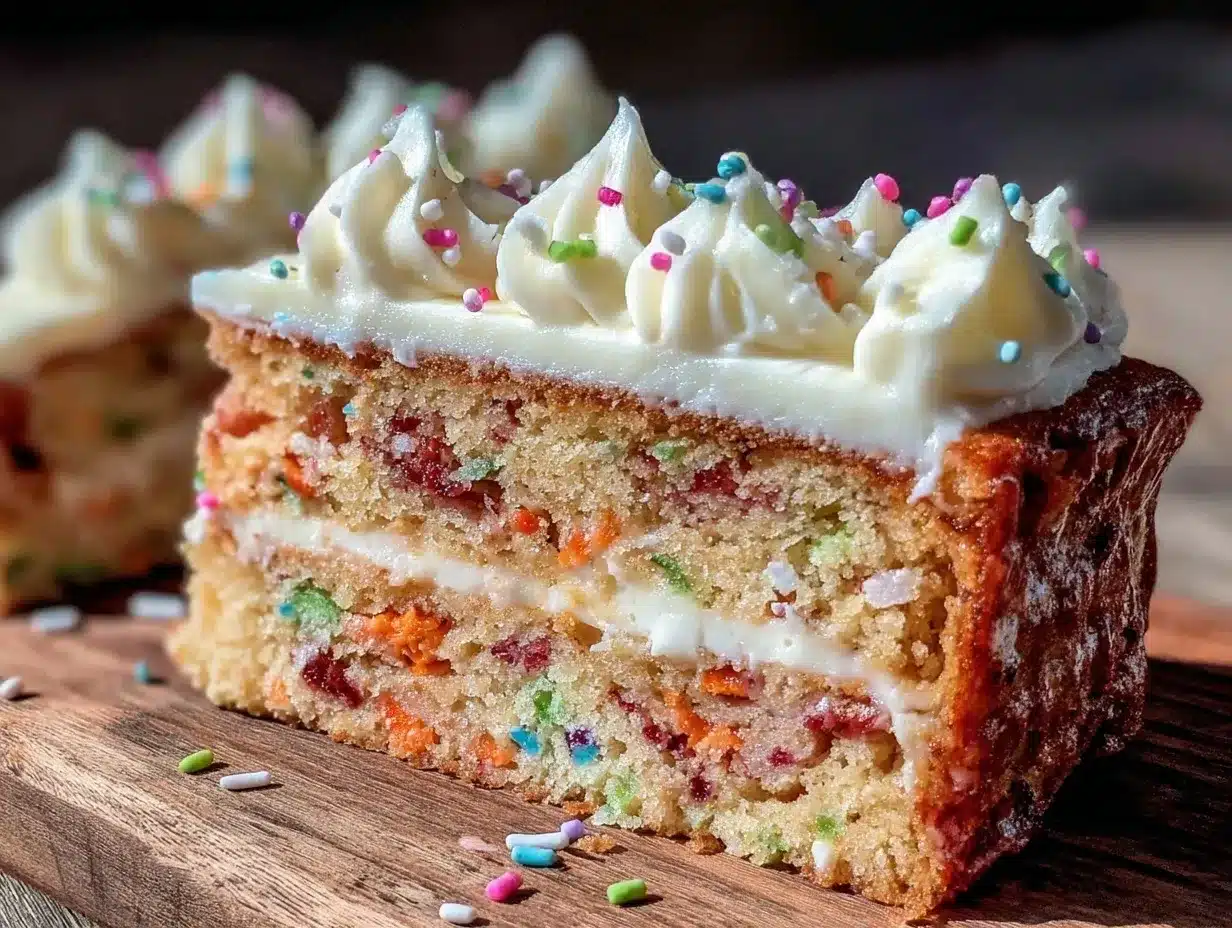
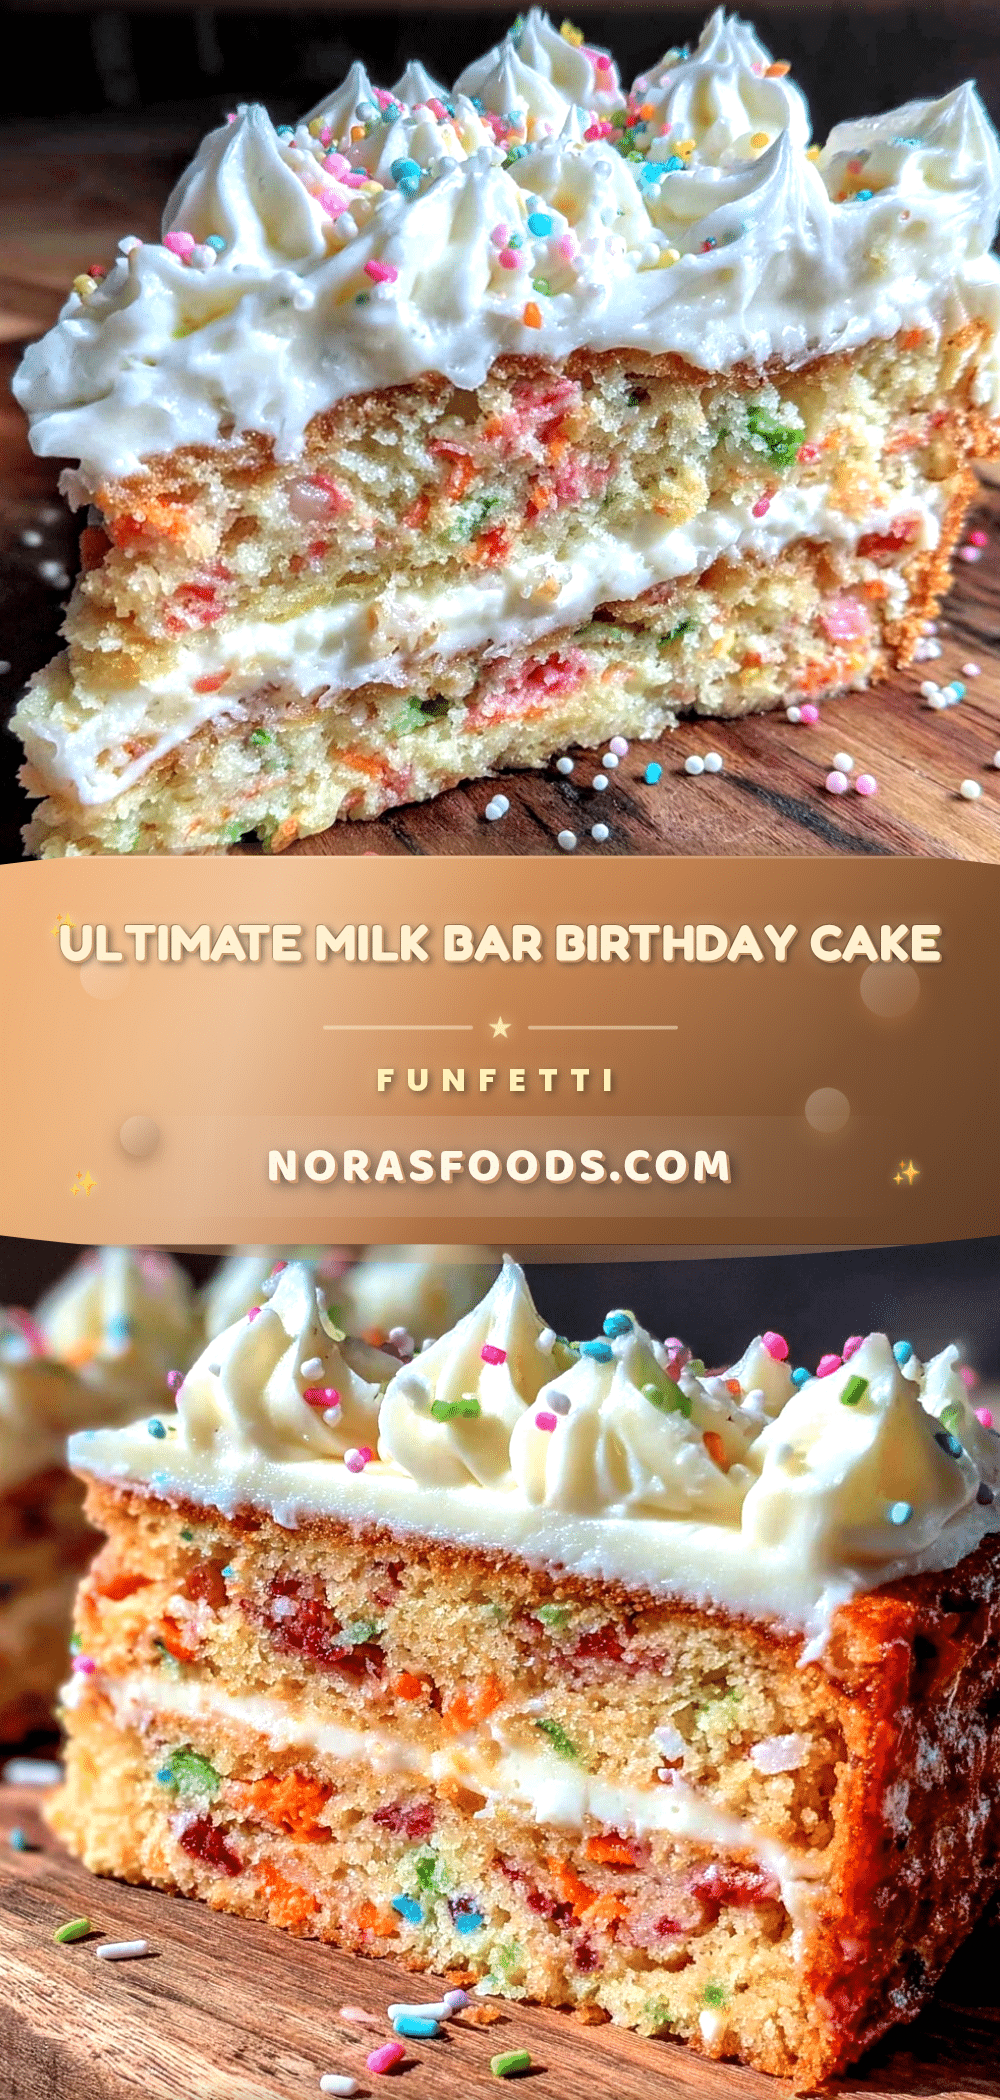
“You really think you can pull off a Milk Bar-style birthday cake at home?” my friend joked as I nervously pulled out my mixing bowls one Saturday afternoon. Honestly, I wasn’t sure myself. Milk Bar cakes always looked so intricate and fancy, like something only a professional baker could nail. But I’d been craving that buttery, funfetti-packed magic that’s part nostalgia, part pure joy—the kind of cake that makes you want to close your eyes and savor every bite.
It all started when I stumbled upon a dusty box of sprinkles in the back of my pantry, half-forgotten but still full of promise. I figured, why not try to recreate that famous Milk Bar-style birthday cake with its playful, confetti-speckled crumb and that insanely smooth frosting? The first attempt was a bit of a mess, with batter splattering across the counter and my mixer sounding like it might give up on me, but the flavors? Spot on.
Now, weeks later, I find myself making this cake more often than I’d admit, tweaking the frosting here and adjusting the sprinkle ratio there. It’s become my go-to when I want to impress without stressing—perfect for those last-minute celebrations or sweet moments when you just need a little happy on a plate. There’s something about the creamy, whimsical frosting paired with the moist, tender crumb dotted with rainbow sprinkles that just hits differently.
So here’s the thing: this isn’t just another birthday cake recipe. It’s a little slice of fun, comfort, and a sprinkle of surprise all baked into one. I’m sharing it with you because, well, sometimes you want to bring that Milk Bar vibe home without the fancy price tag or hours of fuss. And honestly? Once you try it, you might just find yourself reaching for the funfetti more often than you planned.
Why You’ll Love This Recipe
This Perfect Milk Bar-Style Birthday Cake with Funfetti and Frosting isn’t your average birthday cake. After making it multiple times (sometimes back-to-back, I won’t lie), I can confidently say it hits all the right notes. Here’s why it’s a keeper:
- Quick & Easy: The cake comes together in under 90 minutes, including baking and frosting. That’s a lifesaver when you’re juggling a busy schedule but still want something impressive.
- Simple Ingredients: No need to hunt down fancy or obscure items. Most are pantry staples—you probably have flour, sugar, and sprinkles already on hand.
- Perfect for Celebrations: Whether it’s a birthday, special brunch, or an impromptu party, this cake’s festive vibe instantly lifts the mood.
- Crowd-Pleaser: Kids and adults alike adore the colorful funfetti crumb and that luscious frosting. It’s been the star of many gatherings, including my friend’s last-minute birthday bash.
- Unbelievably Delicious: The cake’s buttery crumb contrasts beautifully with the creamy, slightly tangy frosting. Plus, the sprinkles add that nostalgic crunch and pop of color.
What sets this recipe apart is the little tricks I picked up from testing—like folding the funfetti gently to avoid melting the sprinkles, or chilling the frosting for just the right creaminess. The frosting itself is a dream: silky smooth, not too sweet, and with a hint of vanilla that’s just right. If you’ve tried other funfetti cakes and found them dry or overly sugary, this one’s going to surprise you.
Plus, it’s a recipe that invites you to make it your own. I’ve played around with adding a touch of browned butter to the frosting or swapping classic rainbow sprinkles for pastel ones in spring. It’s comfort food with a bit of whimsy—and that’s why it sticks around in my rotation.
What Ingredients You Will Need
This recipe relies on straightforward, wholesome ingredients to build that perfect cake texture and frosting flavor. Nothing fancy, just good stuff that works together to create magic. Here’s what you’ll gather:
- For the Cake Batter:
- All-purpose flour (2 ½ cups / 315g) – the base for a tender crumb
- Baking powder (2 ½ tsp) – for that gentle rise
- Baking soda (½ tsp) – helps with leavening and texture
- Salt (½ tsp) – balances sweetness
- Unsalted butter, softened (1 cup / 226g) – adds richness and moisture; I prefer Plugrá for the best texture
- Granulated sugar (1 ¾ cups / 350g) – for sweetness and structure
- Large eggs (3, room temperature) – helps bind and add moisture
- Whole milk (1 cup / 240ml), room temperature – keeps the crumb soft and tender
- Pure vanilla extract (2 tsp) – the key to deep flavor
- Rainbow nonpareil sprinkles (¾ cup / 120g) – the whimsical “funfetti” element; choose sturdy sprinkles to avoid color bleed
- For the Frosting:
- Unsalted butter, softened (1 cup / 226g) – for that creamy base
- Powdered sugar (4 cups / 480g), sifted – ensures smooth frosting without lumps
- Whole milk or heavy cream (2-4 tbsp / 30-60ml) – adjust for desired consistency
- Pure vanilla extract (1 ½ tsp) – adds warmth and aroma
- Salt (a pinch) – balances the sweetness
- Rainbow sprinkles (2 tbsp) – folded gently into the frosting for fun, subtle bursts of color
For best results, use room temperature eggs and milk so the batter mixes evenly. If you’re dairy-free, swap the butter with a quality plant-based alternative and use almond or oat milk. I’ve also found that Wilton’s nonpareil sprinkles hold up nicely without bleeding into the batter or frosting, which keeps that pretty confetti look intact.
Equipment Needed
This recipe calls for some basic kitchen tools you probably already own. Here’s what I use and recommend:
- Stand mixer or hand mixer – makes creaming the butter and sugar a breeze. I use a KitchenAid stand mixer, but a sturdy hand mixer works just fine.
- Mixing bowls – at least two: one for dry ingredients, one for wet.
- Measuring cups and spoons – accurate measurements matter here!
- Rubber spatula – great for folding in sprinkles without overmixing.
- 8-inch round cake pans (two) – nonstick or well-greased and floured. If you don’t have two pans, bake in batches.
- Cooling rack – essential for letting the cake cool evenly without sogginess.
- Offset spatula or butter knife – for spreading the frosting smoothly.
If you don’t have 8-inch pans, 9-inch pans can work but the cake layers will be slightly thinner. I’ve also used parchment paper rounds to line pans for easy release. And a simple kitchen scale can be a game-changer for baking accuracy, though it’s not a must.
Preparation Method
- Preheat your oven to 350°F (175°C). Grease and flour two 8-inch round cake pans, or line with parchment paper. This keeps the cakes from sticking and helps them release easily.
- Whisk together the dry ingredients: In a medium bowl, sift or whisk 2 ½ cups (315g) all-purpose flour, 2 ½ teaspoons baking powder, ½ teaspoon baking soda, and ½ teaspoon salt. Set aside.
- Cream the butter and sugar: In your mixer bowl, beat 1 cup (226g) softened unsalted butter with 1 ¾ cups (350g) granulated sugar on medium-high speed for about 3-4 minutes until light and fluffy. This step is key for a tender crumb and good rise.
- Add eggs one at a time: With the mixer running on medium speed, add 3 large eggs (room temperature), one at a time, scraping the bowl between additions to keep the mixture smooth and emulsified.
- Mix in vanilla extract: Add 2 teaspoons pure vanilla extract for that classic flavor base.
- Alternate adding dry ingredients and milk: Reduce mixer speed to low. Add the dry ingredients in three parts, alternating with 1 cup (240ml) whole milk, starting and ending with the dry mixture. Mix just until combined—overmixing can toughen the cake.
- Fold in the sprinkles: Gently fold ¾ cup (120g) rainbow nonpareil sprinkles into the batter using a rubber spatula. Be careful not to overmix to avoid color bleed.
- Divide batter evenly: Pour the batter into the prepared pans, smoothing the tops with a spatula. Tap the pans gently on the counter to release air bubbles.
- Bake: Place pans in the oven and bake for 25-30 minutes, or until a toothpick inserted into the center comes out clean and the tops spring back when lightly pressed.
- Cool completely: Let the cakes cool in the pans for 10 minutes, then transfer to a cooling rack. Cooling fully is important before frosting to avoid melting.
- Make the frosting: Beat 1 cup (226g) softened unsalted butter on medium speed until creamy, about 2 minutes. Gradually add 4 cups (480g) sifted powdered sugar, mixing on low. Add 2-4 tablespoons (30-60ml) whole milk or heavy cream, 1 ½ teaspoons vanilla extract, and a pinch of salt. Beat on medium-high for 3-4 minutes until light and fluffy. Adjust milk for spreadability.
- Fold in sprinkles: Stir in 2 tablespoons rainbow sprinkles gently for bursts of color and texture.
- Assemble the cake: Place one cake layer on your serving plate. Spread an even layer of frosting on top. Add the second cake layer, then frost the top and sides evenly. For a clean finish, chill the cake for 20 minutes, then do a second thin layer (crumb coat) if desired.
Tip: If your frosting feels too soft, pop it in the fridge for 10 minutes to firm up before frosting. And keep a bowl of warm water handy to dip your spatula in between smoothing for cleaner edges.
Cooking Tips & Techniques
Getting this Milk Bar-style birthday cake just right isn’t rocket science, but there are a few tricks I’ve learned after a handful of experiments (and some frosting mishaps).
- Don’t overmix the batter: Once you add the flour, mix just until combined. Overmixing develops gluten and can make the cake dense.
- Choose sturdy sprinkles: I’ve tried those delicate jimmies, but they tend to melt and bleed color into the batter and frosting. Nonpareils hold their shape and color much better.
- Room temperature ingredients: Butter, eggs, and milk at room temp mix better and produce a smoother batter and frosting.
- Cream the butter and sugar well: This aerates the mixture, helping the cake rise and giving it a tender texture.
- Chill the frosting if too soft: Especially in warm kitchens, chilling helps it firm up for easier spreading and cleaner cake edges.
- Use an offset spatula: It gives you more control when frosting, letting you create smooth, even layers.
- Multitasking tip: While the cakes bake, start making the frosting to save time. Just keep an eye on the oven!
Personally, I once tried to whip this frosting too fast and ended up with powdered sugar clouds everywhere—lesson learned: slow and steady wins the frosting race. Also, I like to let the assembled cake rest in the fridge for an hour before serving. It helps the flavors meld and makes slicing cleaner.
Variations & Adaptations
This birthday cake is a fantastic base to customize depending on your mood, dietary needs, or the occasion. Here are a few ways I’ve switched it up:
- Gluten-Free Version: Swap the all-purpose flour for a 1:1 gluten-free baking blend. I recommend brands like King Arthur for reliable results. The texture stays surprisingly close to the original.
- Dairy-Free Adaptation: Use vegan butter and almond or oat milk. The frosting will still be creamy and delicious, just slightly lighter.
- Flavor Twists: Add lemon zest to the batter and swap vanilla in the frosting for lemon extract for a bright, citrusy cake. Or try folding mini chocolate chips with the sprinkles for a fun double treat.
- Seasonal Sprinkles: In winter, I use red and green sprinkles for a festive look. You could even sprinkle edible glitter on the frosting for a party-ready sparkle.
- Frosting Variations: Sometimes I swap half the butter for cream cheese for a tangier frosting that pairs beautifully with the sweet cake.
One version I adore is swapping the milk in the batter for buttermilk for a richer tang and even more tender crumb. I paired that with a browned butter frosting once, and it was a game-changer for a more grown-up twist on the funfetti vibe.
Serving & Storage Suggestions
This cake is best served at room temperature so the frosting is silky and soft, and the crumb is tender. If refrigerated, take it out 30 minutes before serving for the best texture.
It pairs wonderfully with a simple glass of cold milk or a cup of rich coffee. For a brunch party, I’ve served it alongside fresh fruit salad to balance the sweetness. If you want to add a touch of elegance, a drizzle of homemade vanilla bean caramel on the plate looks stunning.
To store, wrap the cake tightly with plastic wrap and keep it refrigerated for up to 4 days. The sprinkles stay colorful, and the frosting maintains its creaminess. For longer storage, this cake freezes well either as whole layers wrapped individually or fully assembled slices, wrapped in freezer-safe paper or containers. Thaw overnight in the fridge before serving.
Reheating? Just let slices sit at room temp or warm gently in the microwave for about 10-15 seconds—watch closely to avoid melting the frosting.
Interestingly, the flavors mellow and meld beautifully after a day, making leftovers even more delicious. I sometimes find myself sneaking bites the next morning, frosting and all!
Nutritional Information & Benefits
Each slice (assuming 12 slices per cake) has approximately 350-400 calories, with a balance of carbohydrates, fats, and protein. The butter and eggs provide healthy fats and essential nutrients like vitamins A and D, while the milk adds calcium and protein.
This cake isn’t exactly health food, but the ingredients are straightforward and free from artificial additives. Using real vanilla and quality butter means better flavor without fillers. For those mindful of allergens, the recipe contains gluten, dairy, and eggs, but as mentioned earlier, substitutions can accommodate many dietary needs.
From my perspective, this cake is a treat worth savoring—perfect for special moments without guilt, especially when homemade with love and quality ingredients. It’s a reminder that comfort and joy can be found in simple, well-made food.
Conclusion
If you’re looking for a birthday cake that brings smiles, bursts of color, and that unmistakable Milk Bar-style charm, this recipe is a winner. It’s approachable, playful, and honestly, a lot of fun to make. You can tweak it to your taste and dietary needs, making it truly yours.
I’ve loved seeing how sharing this cake at gatherings lights up faces, and how it’s become a little tradition for me when I want to mark a moment with something sweet and special. Give it a try, experiment with your favorite sprinkles or frosting twists, and let it bring a slice of joy to your table.
Feel free to drop a comment below with your own funfetti adventures or any tweaks you’ve tried—I’d love to hear from you! Here’s to many happy celebrations with cake that tastes like a party in every bite.
Frequently Asked Questions
What sprinkles work best for funfetti cakes?
Nonpareil sprinkles are your best bet—they hold their shape and color better during baking and in the frosting, preventing color bleed and sogginess.
Can I make this cake ahead of time?
Absolutely! You can bake the layers a day in advance and keep them wrapped tightly at room temperature or in the fridge. Frost the day you plan to serve for fresh results.
How do I prevent the frosting from being too runny?
Use chilled butter and gradually add milk or cream. If it gets too soft, chill the frosting in the fridge for about 10 minutes before spreading.
Is this recipe suitable for gluten-free diets?
Yes! Swap the all-purpose flour for a gluten-free baking blend with a 1:1 substitution, and you should get great results with minimal texture change.
Can I use this frosting recipe for other cakes?
Definitely. This vanilla buttercream frosting is versatile and pairs well with many cakes, including classic chocolate or vanilla layers.
By the way, if you enjoy recipes that combine simple ingredients with big flavor, you might appreciate the easy one pan Greek chicken with vegetables for dinner or the creamy lemon blueberry icebox cake for a refreshing dessert alternative. Both are favorites in my kitchen when I want fuss-free meals or sweets that still feel special.
Pin This Recipe!
Perfect Milk Bar-Style Birthday Cake Recipe With Easy Funfetti Frosting
A playful and nostalgic Milk Bar-style birthday cake featuring a moist, tender crumb dotted with rainbow sprinkles and a silky smooth, slightly tangy funfetti frosting. Perfect for celebrations and easy to make at home.
- Prep Time: 20 minutes
- Cook Time: 30 minutes
- Total Time: 50 minutes
- Yield: 12 servings 1x
- Category: Dessert
- Cuisine: American
Ingredients
- 2 ½ cups (315g) all-purpose flour
- 2 ½ teaspoons baking powder
- ½ teaspoon baking soda
- ½ teaspoon salt
- 1 cup (226g) unsalted butter, softened
- 1 ¾ cups (350g) granulated sugar
- 3 large eggs, room temperature
- 1 cup (240ml) whole milk, room temperature
- 2 teaspoons pure vanilla extract
- ¾ cup (120g) rainbow nonpareil sprinkles
- For the Frosting:
- 1 cup (226g) unsalted butter, softened
- 4 cups (480g) powdered sugar, sifted
- 2–4 tablespoons (30-60ml) whole milk or heavy cream
- 1 ½ teaspoons pure vanilla extract
- A pinch of salt
- 2 tablespoons rainbow sprinkles
Instructions
- Preheat your oven to 350°F (175°C). Grease and flour two 8-inch round cake pans, or line with parchment paper.
- Whisk together the dry ingredients: sift or whisk 2 ½ cups all-purpose flour, 2 ½ teaspoons baking powder, ½ teaspoon baking soda, and ½ teaspoon salt in a medium bowl. Set aside.
- Cream the butter and sugar: beat 1 cup softened unsalted butter with 1 ¾ cups granulated sugar on medium-high speed for about 3-4 minutes until light and fluffy.
- Add eggs one at a time: with the mixer running on medium speed, add 3 large eggs one at a time, scraping the bowl between additions.
- Mix in vanilla extract: add 2 teaspoons pure vanilla extract.
- Alternate adding dry ingredients and milk: reduce mixer speed to low. Add dry ingredients in three parts, alternating with 1 cup whole milk, starting and ending with dry ingredients. Mix just until combined.
- Fold in the sprinkles: gently fold ¾ cup rainbow nonpareil sprinkles into the batter using a rubber spatula.
- Divide batter evenly into prepared pans and smooth tops. Tap pans gently to release air bubbles.
- Bake for 25-30 minutes, or until a toothpick inserted into the center comes out clean and tops spring back when lightly pressed.
- Cool cakes in pans for 10 minutes, then transfer to a cooling rack to cool completely.
- Make the frosting: beat 1 cup softened unsalted butter on medium speed until creamy, about 2 minutes. Gradually add 4 cups sifted powdered sugar, mixing on low.
- Add 2-4 tablespoons whole milk or heavy cream, 1 ½ teaspoons vanilla extract, and a pinch of salt. Beat on medium-high for 3-4 minutes until light and fluffy. Adjust milk for desired consistency.
- Fold in 2 tablespoons rainbow sprinkles gently.
- Assemble the cake: place one cake layer on serving plate, spread an even layer of frosting on top. Add second cake layer, then frost top and sides evenly.
- Chill cake for 20 minutes, then optionally apply a second thin crumb coat layer for a clean finish.
- Tip: If frosting is too soft, chill in fridge for 10 minutes before frosting. Use an offset spatula dipped in warm water for smooth edges.
Notes
Use room temperature eggs and milk for best batter consistency. Fold sprinkles gently to avoid color bleed. Chill frosting if too soft for easier spreading. Nonpareil sprinkles are recommended to prevent melting and color bleed. Cake can be made gluten-free by substituting flour with a 1:1 gluten-free baking blend. Dairy-free adaptations possible with vegan butter and plant milk. For a richer flavor, try browned butter frosting or add lemon zest for a citrus twist.
Nutrition
- Serving Size: 1 slice (1/12th of c
- Calories: 375
- Sugar: 38
- Sodium: 210
- Fat: 18
- Saturated Fat: 11
- Carbohydrates: 52
- Fiber: 1
- Protein: 4
Keywords: Milk Bar birthday cake, funfetti cake, easy birthday cake, funfetti frosting, homemade birthday cake, sprinkles cake, vanilla buttercream frosting


