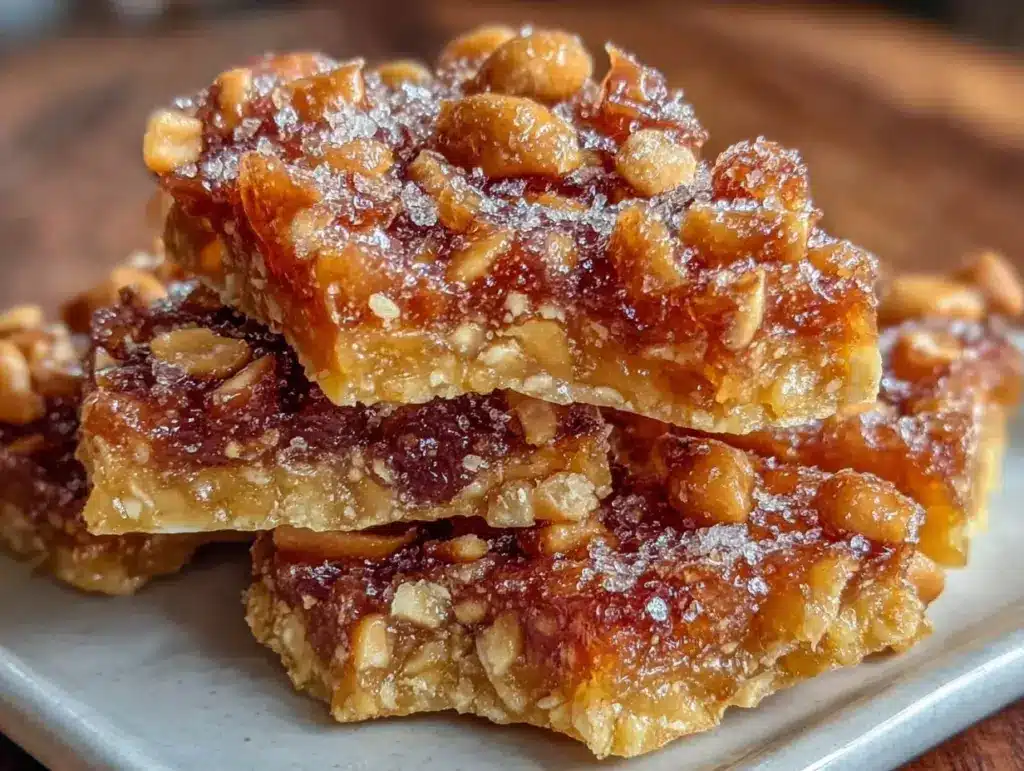
Let me paint you a picture: the scent of toasted peanuts and bubbling caramel sugar swirling through my kitchen, instantly making it feel like the holidays—even in the middle of July. The first time I made this classic old fashioned peanut brittle, the moment I broke that glossy slab with a satisfying snap, I just grinned. You know the kind of moment where you pause, take a deep breath, and smile because you realize you’ve stumbled onto something truly special.
Years ago, when I was knee-high to a grasshopper, my grandma would hand me a piece of her homemade peanut brittle—dangerously crunchy, sweet, and buttery. She told me it was a candy “for sharing, but only if you’re feeling generous.” Honestly, I always wanted the biggest piece. I tried to recreate her recipe on a rainy Saturday, determined to bottle that nostalgic comfort. It took a few tries (my first batch was basically peanut soup), but when I finally nailed that signature crunch, my family couldn’t stop sneaking shards off the cooling rack. And I can’t really blame them!
This recipe for old fashioned peanut brittle is pure, golden perfection—perfect for potlucks, gifting, or just brightening up your Pinterest treats board. It’s the kind of candy that brings folks together, makes kids giggle, and adults reminisce. The crunch is irresistible, and every bite feels like a warm hug. I’ve tested it more times than I care to admit (all in the name of research, of course), and now it’s a staple for family gatherings and holiday tins. If you love classic, easy homemade candy with serious crunch, you’re going to want to bookmark this one!
Why You’ll Love This Old Fashioned Peanut Brittle Recipe
Honestly, there are so many reasons you’ll fall head over heels for this old fashioned peanut brittle. I’ve made dozens of candy recipes, and this one stands out every time. Here’s why:
- Quick & Easy: Comes together in under 30 minutes—no fancy thermometers required if you know just a few tricks. Perfect for spontaneous cravings or last-minute gift ideas!
- Simple Ingredients: Just pantry staples: sugar, corn syrup, peanuts, butter, baking soda, and vanilla. No need for weird specialty items—chances are you already have everything.
- Perfect for Any Occasion: Great for holiday cookie swaps, birthday parties, or even as a sweet treat for your coworkers. I’ve brought it to potlucks and watched it disappear before the main dish even hit the table.
- Crowd-Pleaser: Kids love it for the crunch, adults for the nostalgia. It gets rave reviews every time—seriously, be prepared for requests!
- Unbelievably Delicious: The buttery caramel flavor paired with roasted peanuts is a combo that never gets old. The texture is next-level: crisp, crunchy, never sticky.
What makes this peanut brittle different? For starters, the careful timing and baking soda technique gives it those signature airy pockets (so it doesn’t break your teeth). I use lightly salted roasted peanuts for a flavor pop, but you can switch things up for your own twist. This isn’t just another brittle—it’s my best version, and every batch is packed with soul-soothing satisfaction.
If you’re after comfort food that’s easy, nostalgic, and guaranteed to impress—this is it. Whether you’re sharing with guests or sneaking a piece for yourself at midnight, this old fashioned peanut brittle is a recipe you’ll come back to again and again.
What Ingredients You Will Need
This old fashioned peanut brittle recipe uses simple, wholesome ingredients to deliver bold flavor and unbeatable crunch. Most are pantry staples, and you can swap a few items to fit your preferences or what you have on hand. Here’s what you’ll need:
- Granulated sugar (2 cups / 400g) – The base for the candy, creates that classic caramel snap.
- Light corn syrup (1 cup / 240ml) – Helps prevent crystallization and keeps the brittle smooth.
- Water (1/2 cup / 120ml) – Needed to dissolve the sugar and kickstart the candy process.
- Unsalted butter (2 tbsp / 28g) – Adds richness and a buttery finish. (Use dairy-free margarine if needed.)
- Roasted peanuts (2 cups / 300g) – I prefer lightly salted for a flavor boost. Use dry-roasted if you like a deeper flavor. (You can swap with cashews or almonds, but peanuts are classic!)
- Baking soda (1 1/2 tsp / 7g) – This is what creates those tiny bubbles and light, crisp texture. Don’t skip it!
- Vanilla extract (1 tsp / 5ml) – Rounds out the flavor and gives a subtle warmth. (Use pure vanilla for best results.)
- Salt (1/4 tsp / 1g, optional) – Only if your peanuts are unsalted. Adds balance and makes the sweetness pop.
Ingredient Tips:
- Peanut choice: Go for fresh, quality peanuts. I recommend Planters or Trader Joe’s for reliable crunch.
- Corn syrup: Light syrup gives a classic texture. You can use golden syrup or honey, but it changes the flavor.
- Butter: Unsalted is best. If using salted butter, skip the extra salt.
- Baking soda: Fresh soda is a must—old baking soda can ruin the texture. I learned this the hard way after one batch turned out dense and chewy.
- Substitutions: For a gluten-free version, all ingredients are naturally gluten-free (just double-check your peanuts).
In summer, I sometimes swap peanuts for roasted pecans or pumpkin seeds for a twist. For a spicy kick, you can add a pinch of cayenne with the vanilla. Honestly, this recipe is flexible—just don’t forget the baking soda for that signature crunch!
Equipment Needed
You don’t need much to make old fashioned peanut brittle, which is part of its charm. Here’s what you’ll want on hand:
- Large heavy-bottomed saucepan – Essential for even heating. I use my trusty stainless steel pot (avoid thin pans—they can scorch the sugar fast).
- Wooden spoon or heatproof silicone spatula – For stirring. Silicone spatulas are easy to clean and don’t get sticky.
- Candy thermometer (optional but recommended) – Helps nail the perfect temperature (300°F / 149°C). If you don’t have one, watch for color and texture cues.
- Baking sheet – Line with parchment paper or a silicone baking mat for easy release.
- Oven mitts – Trust me, sugar syrup is hot stuff. Don’t risk burns!
- Measuring cups and spoons – For accuracy.
- Butter knife or metal spatula – To spread the brittle quickly once it’s poured.
If you’re just starting out, don’t worry about fancy candy thermometers. I made this brittle for years watching for that deep golden color and the “hard crack” stage. For cleaning up, soak your saucepan with hot water—the sugar dissolves easily. If your spatula is sticky, rub a little oil before use. Budget tip: Dollar store baking sheets work fine for brittle—just line with parchment!
Preparation Method

Ready to whip up a batch of crunchy, golden peanut brittle? Follow these steps for foolproof results every time:
- Prep the baking sheet: Line a large baking sheet (about 10×15 inches / 25×38 cm) with parchment paper or a silicone baking mat. Set aside near your stove for quick pouring.
- Combine sugar, corn syrup, and water: In your heavy-bottomed saucepan, add 2 cups (400g) granulated sugar, 1 cup (240ml) light corn syrup, and 1/2 cup (120ml) water. Stir gently to combine. Place over medium heat.
- Heat until boiling: Bring the mixture to a gentle boil while stirring occasionally. Once boiling, stop stirring—let the mixture cook undisturbed so crystals don’t form. Attach a candy thermometer to the pan if using.
- Cook to hard crack stage: Continue boiling until the temperature reaches 300°F (149°C) or the syrup turns a deep golden amber (about 10-15 minutes). If you’re not using a thermometer, drop a little syrup into cold water—it should crack and snap easily.
- Add butter and peanuts: Quickly stir in 2 tbsp (28g) unsalted butter and 2 cups (300g) roasted peanuts. Mix well. The mixture may bubble—don’t worry, that’s normal!
- Finish with vanilla and baking soda: Remove from heat. Immediately add 1 tsp (5ml) vanilla extract and 1 1/2 tsp (7g) baking soda. Stir quickly and thoroughly—the mixture will foam and lighten in color. This is the secret to airy, crisp brittle!
- Pour onto the pan: Working fast, pour the foamy mixture onto your prepared baking sheet. Use a butter knife or spatula to spread into a thin, even layer (about 1/4 inch / 6mm thick).
- Cool completely: Let the brittle sit undisturbed at room temperature for 30-45 minutes, until fully set and hard. Don’t refrigerate—humidity causes stickiness.
- Break into pieces: Once cool, gently lift the slab and use your hands (or the back of a spoon) to break into bite-sized shards. Kids love helping with this part!
Troubleshooting Tips: If your brittle is sticky, it was undercooked—aim for a darker amber next time. If it’s too hard, reduce the cooking time by a minute. If peanuts float to the top, stir vigorously as you add them. (I’ve made every mistake in the book—trust me, you’ll get the hang of it!)
Sensory Cues: The syrup should smell caramel-y and look glossy. When you add baking soda, it will foam up—don’t be alarmed, that’s exactly what you want for crunch.
Pro tip: Have all ingredients measured and ready before you start. Once that syrup hits temperature, things move fast!
Cooking Tips & Techniques
Making old fashioned peanut brittle is easy once you know a few insider tricks. Here are some tips I’ve learned after more than a dozen batches (and a few sticky disasters):
- Timing is everything: Don’t walk away once the syrup starts boiling. Watch the color closely—it should be a rich amber, not pale yellow.
- Use fresh baking soda: Old soda won’t foam as much, leading to a dense, hard candy. I replace mine every six months.
- Don’t stir once boiling: Stirring after the syrup boils can cause sugar crystals; let it bubble undisturbed and resist the urge to fiddle.
- Work quickly: As soon as you add baking soda and vanilla, pour and spread the mixture fast. It sets up in seconds, so have your pan ready and move with purpose.
- Multitasking: Measure all ingredients before you start. Candy moves quickly, and you don’t want to scramble for butter mid-pour.
- Consistency: If your kitchen is humid, brittle can get sticky. Make it on a dry day or store with a silica packet.
- Personal lesson: My first few batches were chewy because I was nervous about burning the sugar and pulled it early. Trust the process—wait for that “hard crack” stage!
With these tips, you’ll get that irresistible crunch every time. Honestly, making candy can feel intimidating, but peanut brittle is forgiving once you know what to look for. Relax, enjoy the process, and don’t be afraid to experiment with flavors or nuts.
Variations & Adaptations
This old fashioned peanut brittle recipe is a classic, but there’s plenty of room to make it your own. Here are a few fun ideas:
- Dietary Variations: For a vegan version, swap butter for vegan margarine and check that your sugar is vegan-friendly. All other ingredients are naturally vegan!
- Flavor Adaptations: Add 1/2 tsp cinnamon or a pinch of cayenne pepper with the vanilla for a spicy-sweet twist. I’ve tried a dash of espresso powder for mocha brittle—surprisingly delicious!
- Nut Variations: Swap peanuts for roasted cashews, almonds, pecans, or even pumpkin seeds. Each gives a different flavor and crunch.
- Cooking Methods: If you have an induction cooktop, lower the heat a bit to avoid scorching. For microwave brittle, use a large microwave-safe bowl and follow similar steps, stirring every few minutes.
- Allergen Substitutions: For peanut allergies, use sunflower seeds or pepitas. The brittle will still set up beautifully.
One variation I love is stirring in a handful of toasted coconut flakes with the peanuts—adds a little tropical flair. Whatever your taste, this recipe is easy to customize. Just stick with the basic sugar-syrup-baking soda method for that irresistible crunch!
Serving & Storage Suggestions
Old fashioned peanut brittle is best enjoyed at room temperature, where its crunch really shines. Here’s how I like to serve and store it:
- Serving: Pile brittle shards on a cute platter, fill mason jars for gifting, or add to a holiday cookie tin. It’s perfect as a sweet snack after dinner or alongside a cup of coffee.
- Pairings: Serve with vanilla ice cream, hot cocoa, or even a cheese board for a salty-sweet combo.
- Storage: Store in an airtight container at room temperature for up to 3 weeks. Add a sheet of parchment between layers to prevent sticking.
- Freezing: Peanut brittle freezes well! Place in a freezer-safe bag and freeze for up to 3 months. Thaw at room temperature before serving.
- Reheating: If brittle softens, pop in a low oven (200°F / 93°C) for 5 minutes to crisp it up. Let cool before eating.
- Flavor Development: The flavor deepens after a day or two—so if you can wait, it gets even better!
Honestly, this candy is so good it rarely lasts long enough to worry about storage. Just keep it dry and airtight, and you’re golden!
Nutritional Information & Benefits
Here’s a quick look at the nutritional profile for classic old fashioned peanut brittle (per 1 oz / 28g serving):
| Calories | 140 |
|---|---|
| Fat | 7g |
| Carbohydrates | 18g |
| Sugar | 15g |
| Protein | 2g |
Health Benefits: Peanuts are packed with plant-based protein, heart-healthy fats, and vitamins like E and B3. The recipe is naturally gluten-free and can be made dairy-free with a simple swap.
Dietary Notes: Contains peanuts (major allergen). If you’re watching sugar intake, brittle is a treat best enjoyed occasionally. For a lower-carb version, try swapping some sugar with allulose or monk fruit (results may vary).
Personally, I love that this recipe offers a satisfying sweet crunch without artificial ingredients. Just simple, real food that brings a little joy!
Conclusion
There’s just something special about classic old fashioned peanut brittle. The crunch, the buttery caramel, the perfect balance of sweet and salty—it’s comfort food in candy form. This recipe is easy, reliable, and endlessly customizable. Whether you’re new to homemade candy or a seasoned pro, you’ll love how quickly it comes together and how much joy it brings.
Make it your own: swap nuts, add a spice, or gift it in pretty jars. Honestly, it’s one of my favorite treats to share (or keep all to myself on a cozy night in). If you try this recipe, let me know in the comments—share your tweaks, your stories, or your kitchen victories. Pin it, share it, and pass on the tradition!
Here’s to more moments of pure, nostalgic comfort. Happy crunching!
FAQs: Old Fashioned Peanut Brittle Recipe
Can I make peanut brittle without a candy thermometer?
Yes! Watch for a deep amber color and use the “hard crack” test: drop a bit of syrup in cold water—it should crack instantly. Works great for this easy homemade candy.
Why did my peanut brittle turn out chewy instead of crunchy?
Usually, it means the syrup didn’t reach the hard crack stage (300°F / 149°C). Cook a little longer next time, and make sure to stir in the baking soda quickly.
Can I use other nuts besides peanuts?
Absolutely! Try cashews, almonds, pecans, or even pumpkin seeds for a different flavor. Just keep the ratios the same for the perfect crunch.
How do I keep my peanut brittle from sticking together?
Store in an airtight container with parchment paper between layers. Avoid humid conditions—moisture is brittle’s enemy!
Is peanut brittle gluten-free?
Yes, classic peanut brittle uses only gluten-free ingredients. Double-check your peanuts and any add-ins to be safe.
Pin This Recipe!
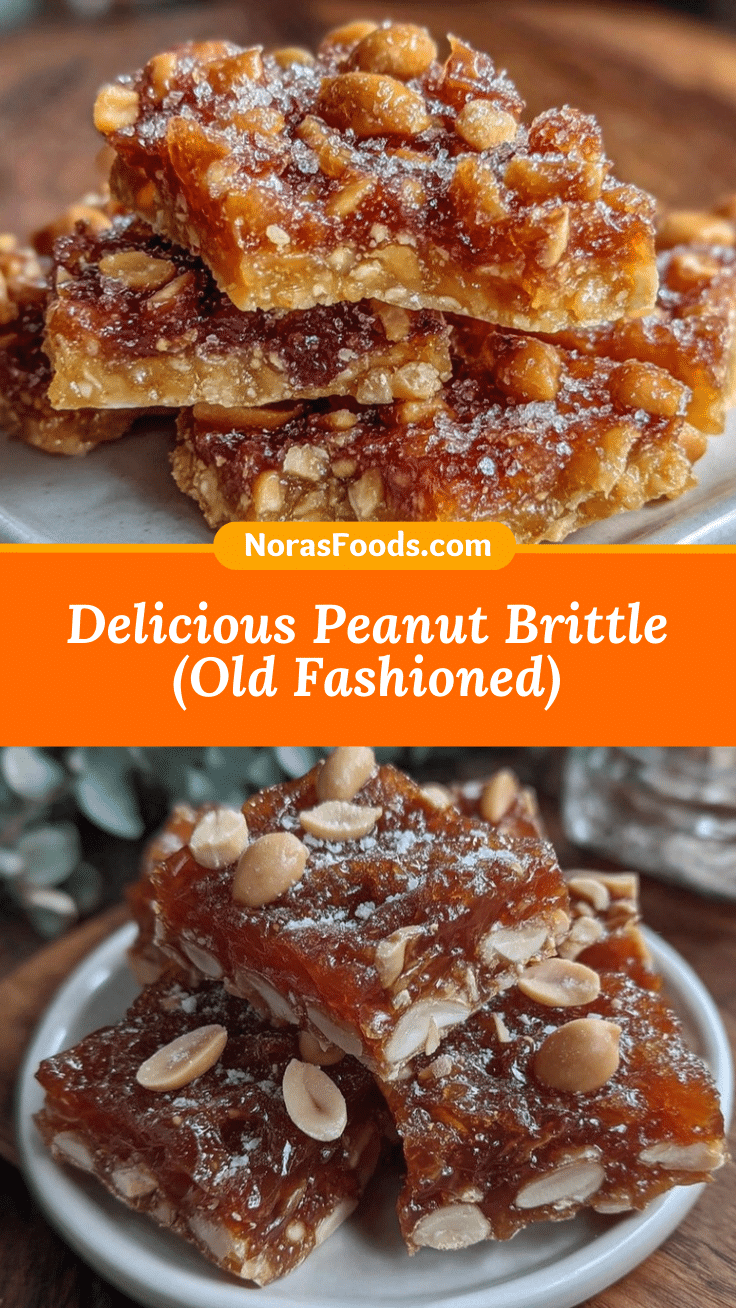
Old Fashioned Peanut Brittle Recipe Easy Homemade Candy with Crunch
This classic old fashioned peanut brittle is irresistibly crunchy, sweet, and buttery, just like grandma used to make. Perfect for holidays, gifting, or a nostalgic treat, it comes together quickly with simple pantry ingredients.
- Prep Time: 10 minutes
- Cook Time: 15 minutes
- Total Time: 25 minutes
- Yield: 16 servings 1x
- Category: Dessert
- Cuisine: American
Ingredients
- 2 cups granulated sugar
- 1 cup light corn syrup
- 1/2 cup water
- 2 tablespoons unsalted butter
- 2 cups roasted peanuts (lightly salted preferred)
- 1 1/2 teaspoons baking soda
- 1 teaspoon vanilla extract
- 1/4 teaspoon salt (optional, if peanuts are unsalted)
Instructions
- Line a large baking sheet (about 10×15 inches) with parchment paper or a silicone baking mat and set aside near your stove.
- In a large heavy-bottomed saucepan, combine granulated sugar, light corn syrup, and water. Stir gently to combine and place over medium heat.
- Bring the mixture to a gentle boil, stirring occasionally. Once boiling, stop stirring and let cook undisturbed. Attach a candy thermometer if using.
- Continue boiling until the temperature reaches 300°F (hard crack stage) or the syrup turns a deep golden amber, about 10-15 minutes. If not using a thermometer, drop a little syrup into cold water—it should crack and snap easily.
- Quickly stir in unsalted butter and roasted peanuts. Mix well; the mixture may bubble.
- Remove from heat and immediately add vanilla extract and baking soda. Stir quickly and thoroughly—the mixture will foam and lighten in color.
- Working fast, pour the foamy mixture onto your prepared baking sheet. Use a butter knife or spatula to spread into a thin, even layer (about 1/4 inch thick).
- Let the brittle sit undisturbed at room temperature for 30-45 minutes, until fully set and hard. Do not refrigerate.
- Once cool, gently lift the slab and break into bite-sized shards.
Notes
Use fresh baking soda for best texture. Measure all ingredients before starting, as candy moves quickly. For vegan or dairy-free, substitute butter with vegan margarine. Store brittle in an airtight container with parchment between layers to prevent sticking. Avoid making on humid days for best crunch.
Nutrition
- Serving Size: 1 oz (28g) piece
- Calories: 140
- Sugar: 15
- Sodium: 60
- Fat: 7
- Saturated Fat: 1.5
- Carbohydrates: 18
- Fiber: 1
- Protein: 2
Keywords: peanut brittle, homemade candy, old fashioned, crunchy, holiday treat, easy dessert, gluten-free, nostalgic, giftable, classic candy


