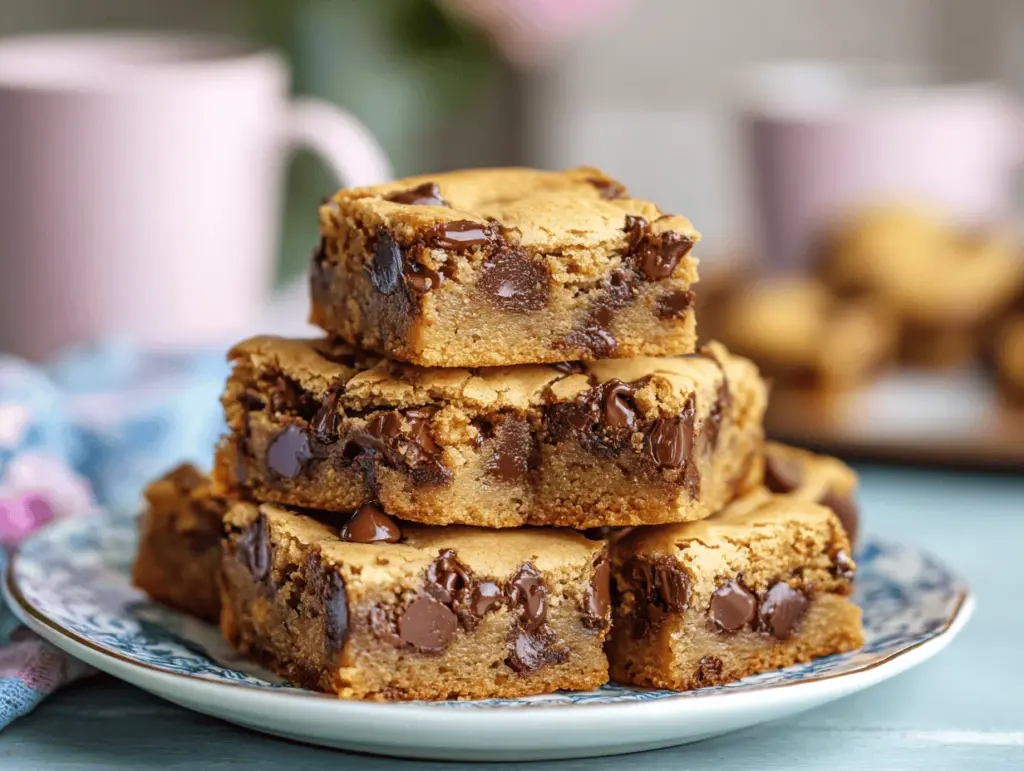
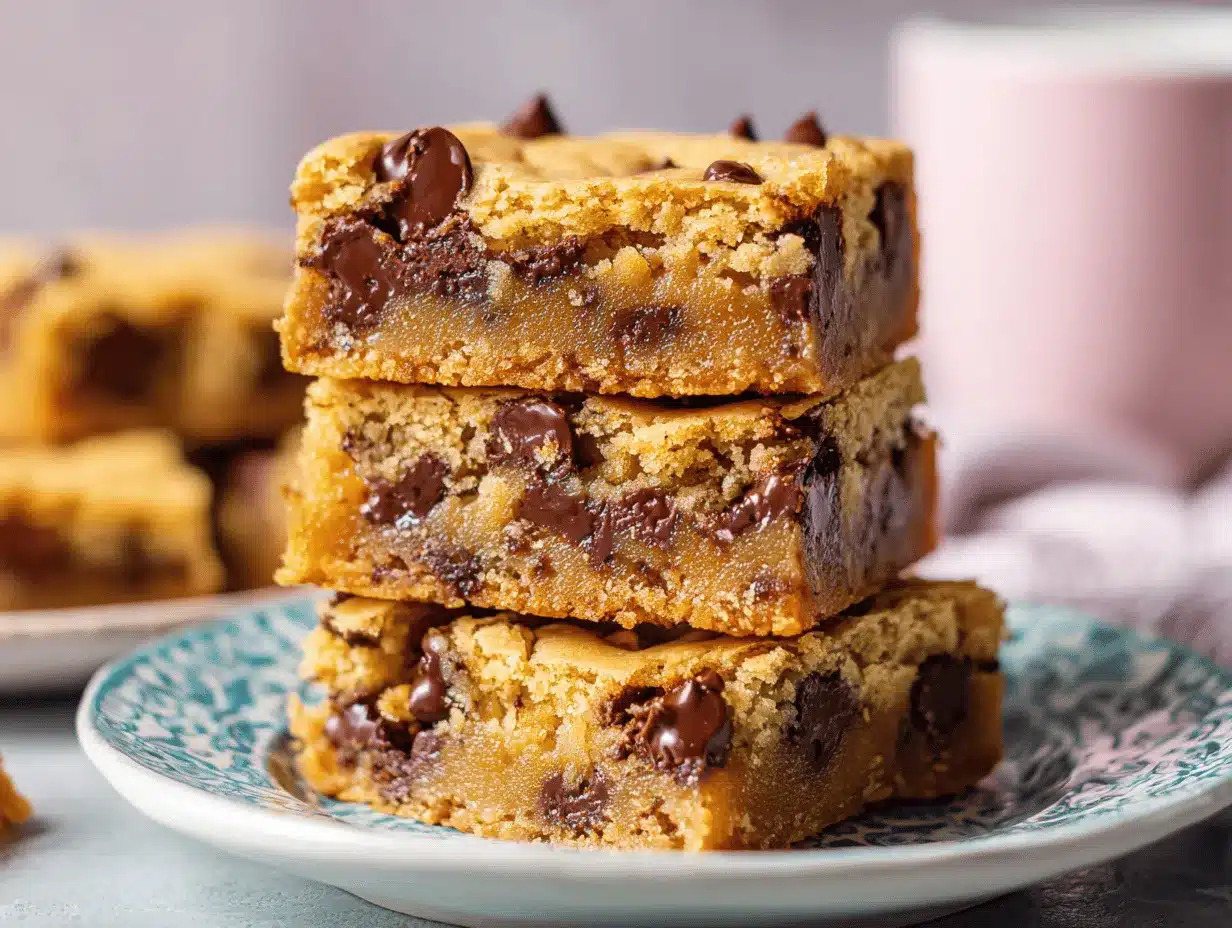
The first time I pulled a pan of these lazy chocolate chip cookie bars from the oven, my kitchen smelled like every childhood birthday party and cozy snow day rolled into one. Gooey chocolate, buttery edges, and that golden, crackly top—honestly, it’s the kind of treat that makes you pause mid-bite and just… sigh happily. I stumbled onto this easy dessert squares recipe during a late-night craving (you know those nights when you want cookies but can’t deal with scooping dough and washing a million bowls?). One bowl, no mixer, and minimal cleanup—these bars became my go-to for lazy weekends and impromptu get-togethers. They’re the definition of “effortless baking,” and let’s face it, sometimes you need a shortcut without sacrificing flavor.
I’ve baked these lazy chocolate chip cookie bars more times than I can count—sometimes swapping in peanut butter chips, tossing in walnuts, or even swirling Nutella on top when I’m feeling wild. What I love most? The freedom. This recipe is forgiving, flexible, and always hits the spot. Whether you’re a seasoned baker or just starting out, these dessert squares deliver the classic cookie experience with half the work. Plus, they’re practically made for sharing—hello, potlucks and movie nights! If you’re ready for a treat that’s as foolproof as it is delicious, you’ve just found your new favorite. Trust me, your friends and family will ask for the recipe every single time.
So grab your favorite mixing bowl, preheat the oven, and let’s make some lazy chocolate chip cookie bars. You’ll wonder why you ever bothered with regular cookies (or at least, you’ll keep this recipe stashed for those “need dessert now” moments!).
Why You’ll Love This Recipe
- Quick & Easy: You’ll have these lazy chocolate chip cookie bars in the oven within 10 minutes—no softening butter, no chilling dough, barely any patience required! Perfect for last-minute cravings or when you need dessert in a snap.
- Simple Ingredients: No fancy stuff here. Just the staples you probably have tucked in your pantry right now—flour, sugar, eggs, butter, chocolate chips. That’s it!
- Perfect for Any Occasion: Bake a batch for birthday parties, family movie nights, bake sales, or midnight snacking. These easy dessert squares are the ultimate crowd-pleaser (trust me, I’ve fed them to everyone from picky toddlers to skeptical grandpas!).
- Crowd-Pleaser: I’ve yet to meet someone who didn’t fall in love with these bars. The crispy edges, gooey center, and melty chocolate make them irresistible. They vanish fast—be ready for requests for seconds!
- Unbelievably Delicious: Somehow, these bars taste even better on day two (if they last that long). The flavor is pure nostalgia—like the best parts of a cookie, but in bar form. You get that buttery, caramelly chew without all the fuss of scooping individual cookies.
What makes these dessert squares stand out? For me, it’s the no-stress process. You melt the butter, stir it all together in one bowl, and press it in the pan. That’s it! No stand mixer, no chilling, no drama. And if you’re like me and have a habit of “tasting” the dough, you’ll be happy to know the batter is just as tempting as the finished bars.
This isn’t just another cookie bar recipe. It’s the cozy, chocolate-studded treat you can whip up anytime. I’ve brought these to potlucks and watched them disappear before the main course even hit the table. They’re comfort food at its best—simple, satisfying, and full of sweet memories. Whether you need a treat for a big gathering or just want something special with your afternoon coffee, these lazy chocolate chip cookie bars always deliver. That’s why they’re a staple in my kitchen—and soon, maybe in yours too.
What Ingredients You Will Need
This recipe uses simple, wholesome ingredients to deliver bold flavor and the perfect mix of crispy edges and chewy centers. Most of these are pantry basics, so you won’t need to hunt down anything fancy. Here’s what you’ll need for your lazy chocolate chip cookie bars:
- All-Purpose Flour (1 1/2 cups / 190g) – The classic base for chewy cookie bars. I usually stick with King Arthur flour for its consistency, but any reliable brand works.
- Baking Powder (1/2 teaspoon) – Helps the bars rise slightly, giving you that soft, cake-like bite without being too fluffy.
- Baking Soda (1/4 teaspoon) – Adds a bit of lift and helps with browning—don’t skip it!
- Salt (1/2 teaspoon) – Balances the sweetness. Kosher salt is my pick, but table salt works too.
- Unsalted Butter (1/2 cup / 113g, melted and cooled) – Using melted butter makes mixing a breeze. If you only have salted butter, just cut back a bit on added salt.
- Brown Sugar (3/4 cup / 150g, packed) – For a deeper, caramel flavor and extra chewy texture. Light or dark brown sugar both work.
- Granulated Sugar (1/4 cup / 50g) – Gives the bars a crisp edge and just the right sweetness.
- Large Eggs (2, room temperature) – They bind everything together. If you forgot to take them out of the fridge, set them in a bowl of warm water for 5 minutes.
- Vanilla Extract (2 teaspoons) – For that cozy, classic cookie flavor. I love Nielsen-Massey for a splurge, but store-brand works fine too.
- Semi-Sweet Chocolate Chips (1 cup / 170g) – The star of the show! You can use mini chips for extra chocolate in every bite, or chop up a chocolate bar for rustic chunks.
- Optional Add-Ins:
- Chopped Walnuts or Pecans (1/2 cup / 60g) – For a nutty crunch. Totally optional, but highly recommended!
- Sprinkle of Flaky Sea Salt – For that trendy, bakery-style finish.
- Peanut Butter Chips or White Chocolate Chips – Swap out half the chocolate chips for a fun twist.
Ingredient Substitutions:
- For gluten-free dessert squares, use a 1:1 gluten-free baking flour blend.
- Swap in coconut sugar for brown sugar if you want a different sweetness profile.
- Dairy-free? Try vegan butter and allergy-friendly chocolate chips.
Honestly, the best part is how flexible these bars are. You can toss in leftover candies, swirl in some Nutella, or sprinkle coconut on top. Make these lazy chocolate chip cookie bars your own—no fancy stuff needed!
Equipment Needed
- Large Mixing Bowl: For combining all your ingredients. I love my old glass bowl—easy to clean and just the right size.
- Whisk and Spatula: A sturdy whisk for blending the wet stuff, and a silicone spatula for folding in the chocolate chips and scraping every last bit of batter.
- 8×8-inch (20x20cm) Baking Pan: This gives you thick, bakery-style bars. If you only have a 9×9-inch pan, just check for doneness a few minutes early—they’ll be a little thinner.
- Parchment Paper: Makes lifting out the bars a breeze. If you don’t have any, a light greasing with butter or spray will do.
- Measuring Cups & Spoons: For accuracy, especially with the flour and sugars.
- Wire Rack: For cooling the bars evenly—totally worth it for that perfect texture.
If you’re short on equipment, don’t stress! You can mix everything with a wooden spoon if you don’t have a whisk. Even a foil-lined pan works in a pinch. For cleaning, I always rinse my mixing tools right away—nothing gets stuck, and you’ll thank yourself later. My budget tip: Dollar store spatulas and pans work just fine for cookie bars. No need to splurge!
How to Make Lazy Chocolate Chip Cookie Bars – Step-by-Step
-
Preheat and Prep:
- Preheat your oven to 350°F (175°C). Line your 8×8-inch (20x20cm) pan with parchment, leaving a little overhang for easy lifting.
- If you don’t have parchment, lightly grease the pan with butter or nonstick spray.
Tip: Lining helps prevent sticking and makes for clean, Instagram-worthy slices!
-
Melt the Butter:
- Melt 1/2 cup (113g) unsalted butter in the microwave or on the stove. Let it cool for 2-3 minutes so it doesn’t scramble the eggs.
Watch for: Butter should be warm, not hot to the touch.
-
Mix Wet Ingredients:
- In your large bowl, whisk together the melted butter, 3/4 cup (150g) brown sugar, and 1/4 cup (50g) granulated sugar until smooth and glossy (about 1 minute).
- Add 2 large eggs and 2 teaspoons vanilla extract. Whisk until fully combined and the mixture lightens slightly in color.
Note: Mixing well here gives you that shiny, crackly top.
-
Add Dry Ingredients:
- Sprinkle 1 1/2 cups (190g) all-purpose flour, 1/2 teaspoon baking powder, 1/4 teaspoon baking soda, and 1/2 teaspoon salt over the wet mixture.
- Gently fold with a spatula until just combined—don’t overmix or the bars may be tough!
Sensory cue: The batter should be thick but easily spreadable.
-
Add Chocolate Chips and Mix-ins:
- Fold in 1 cup (170g) chocolate chips and any optional nuts or extra chips. Save a handful to sprinkle on top, if you like that bakery-style finish.
-
Spread and Bake:
- Scrape the batter into your prepared pan, smoothing the top with a spatula. Sprinkle extra chips or sea salt on top if desired.
- Bake on the center rack for 22-28 minutes, until the edges are golden and a toothpick in the center comes out with just a few moist crumbs.
Check early! The bars keep baking a bit as they cool—better a little gooey than dry.
-
Cool and Slice:
- Let the bars cool in the pan on a wire rack for 20-30 minutes. Use the parchment overhang to lift them out, then slice into squares.
Personal tip: The bars slice cleanest when just barely warm—not piping hot.
If you find the bars are too soft, pop them in the fridge for 30 minutes before slicing. And if you’re like me and can’t wait, a warm, messy square with a scoop of ice cream is pure bliss!
Cooking Tips & Techniques
- Melted Butter Magic: Melting the butter instead of creaming it with sugar makes this recipe super easy and gives you that dense, chewy cookie bar texture. But let the butter cool a bit before mixing with eggs—hot butter can scramble them (I’ve made that mistake more than once!).
- Don’t Overmix: I know it’s tempting to keep stirring, but stop as soon as the flour disappears. Overmixing = tough, dry bars.
- Baking Time Matters: Ovens are quirky. Start checking at 22 minutes—edges should look set and golden, but the center might jiggle just a bit. That’s perfect. Overbaked bars lose their gooey charm.
- Chill for Cleaner Slices: If you want those perfect Pinterest-worthy squares, chill the pan for 30 minutes before slicing. Otherwise, dig in while they’re warm and gooey—no judgment!
- Mix-Ins Galore: Don’t be afraid to get creative. Swirl in raspberry jam, top with mini marshmallows, or add a handful of shredded coconut. These bars are forgiving, so experiment!
- Batch Size: Doubling the recipe? Use a 9×13-inch (23x33cm) pan and add a few minutes to the baking time. Keep an eye on the center—it should still be a little soft for best results.
I’ve burned my fair share of cookie bars by forgetting how quickly they finish—so I always set a timer for 3 minutes early. And if the top looks pale but the edges are done, just trust the process. They’ll firm up as they cool.
Variations & Adaptations
One of the joys of lazy chocolate chip cookie bars is how adaptable they are. Here are some of my favorite ways to switch things up:
- Gluten-Free: Replace the all-purpose flour with a 1:1 gluten-free baking blend. I’ve done this for friends with gluten sensitivity, and the bars are just as chewy and delicious.
- Peanut Butter Swirl: Drop spoonfuls of creamy peanut butter on top before baking, then swirl with a knife for a marbled effect. This adds a salty-sweet layer that’s completely addictive.
- Oatmeal Cookie Bars: Swap 1/2 cup (65g) of the flour for old-fashioned oats, and add a dash of cinnamon. It gives the bars a heartier, homey vibe—so good for fall or winter!
- Vegan Version: Use melted vegan butter and replace the eggs with flax eggs (2 tablespoons ground flaxseed mixed with 5 tablespoons water). Use dairy-free chocolate chips to keep it plant-based.
- Seasonal Twists: For summer, fold in fresh raspberries or blueberries. In winter, add white chocolate chips and crushed peppermint candies for a festive treat.
- Nut-Free Adaptation: Omit nuts entirely, and be sure to use allergy-friendly chocolate chips if needed. The bars are still packed with flavor!
Personally, my favorite twist is to add a generous sprinkle of flaky sea salt before baking. It brings out the chocolate and makes every bite feel extra special. Don’t be afraid to try your own mix-ins—this recipe is meant to be fun and fuss-free!
Serving & Storage Suggestions
These lazy chocolate chip cookie bars are best served slightly warm, when the chocolate chips are still a little melty and the centers are soft. For a dreamy dessert, add a scoop of vanilla ice cream or a drizzle of caramel sauce. If you’re hosting, cut them into mini squares and pile them on a platter—they look so inviting!
Pairing ideas:
- Serve with cold milk, hot coffee, or spiced chai for the ultimate comfort pairing.
- On the fancier side, top with whipped cream and fresh berries for a spring brunch spread.
How to Store:
- Once cooled, store bars in an airtight container at room temperature for up to 4 days. They stay soft and chewy!
- For longer storage, freeze tightly wrapped bars for up to 2 months. Thaw at room temp or zap in the microwave for 10-15 seconds.
Honestly, the flavors deepen after a day or two—the brown sugar gets all caramelly and the texture becomes even more satisfying. If you’re prepping ahead, these dessert squares are a dream for make-ahead entertaining or lunchbox treats.
Nutritional Information & Benefits
Each lazy chocolate chip cookie bar (1 of 16 squares) is approximately 180-200 calories, with about 3g protein, 8g fat, and 26g carbohydrates (values may vary based on mix-ins and size).
Health Highlights:
- Brown sugar and eggs provide a touch of protein and energy.
- Adding nuts or swapping some flour for oats boosts fiber and healthy fats.
These easy dessert squares are naturally nut-free (unless you add nuts) and can be made gluten-free or dairy-free with simple swaps. Potential allergens include eggs, dairy, and wheat—always double-check for your needs.
From a wellness perspective, I see these bars as the perfect “treat yourself” moment—sweet, satisfying, and made with real ingredients you can pronounce. Enjoy in moderation (or don’t, I won’t judge!).
Conclusion
If you’ve ever craved homemade cookies but didn’t want the hassle, these lazy chocolate chip cookie bars are your new secret weapon. They’re fast, flexible, and just plain fun to bake. I love them for their simplicity and the way they bring everyone together—whether it’s a spontaneous sleepover or a potluck at work.
Feel free to riff on the recipe—add your favorite mix-ins, swap in seasonal flavors, or make them gluten-free. The best part is seeing how each batch turns out just a little bit different (in the best way!).
Baking these dessert squares always reminds me why I love simple, homemade treats. They’re the kind of recipe that brings a smile to your face with every bite. If you try them, let me know how you make them your own! Drop a comment, share your photo, or tell me your favorite twist. Happy baking—and don’t forget to save a square for yourself!
Frequently Asked Questions
Can I double this recipe for a larger crowd?
Absolutely! Just use a 9×13-inch (23x33cm) pan and bake for 26-32 minutes. Check for doneness around the 25-minute mark—the edges should be golden and the center just set.
What’s the best way to get clean slices?
Let the bars cool until just barely warm, then use a sharp knife (wipe it between cuts for extra neat edges). For super clean squares, chill the pan for 30 minutes before slicing.
Can I use different kinds of chocolate?
Definitely! Try milk chocolate, dark chocolate, or even a mix of chips and chunks. You can also add peanut butter or butterscotch chips for variety.
How do I store leftover cookie bars?
Store in an airtight container at room temperature for up to 4 days, or freeze for up to 2 months. They stay soft and chewy either way.
Are these bars gluten-free?
The original recipe uses all-purpose flour, but you can easily make them gluten-free with a 1:1 gluten-free baking blend. They’re just as delicious—promise!
Pin This Recipe!
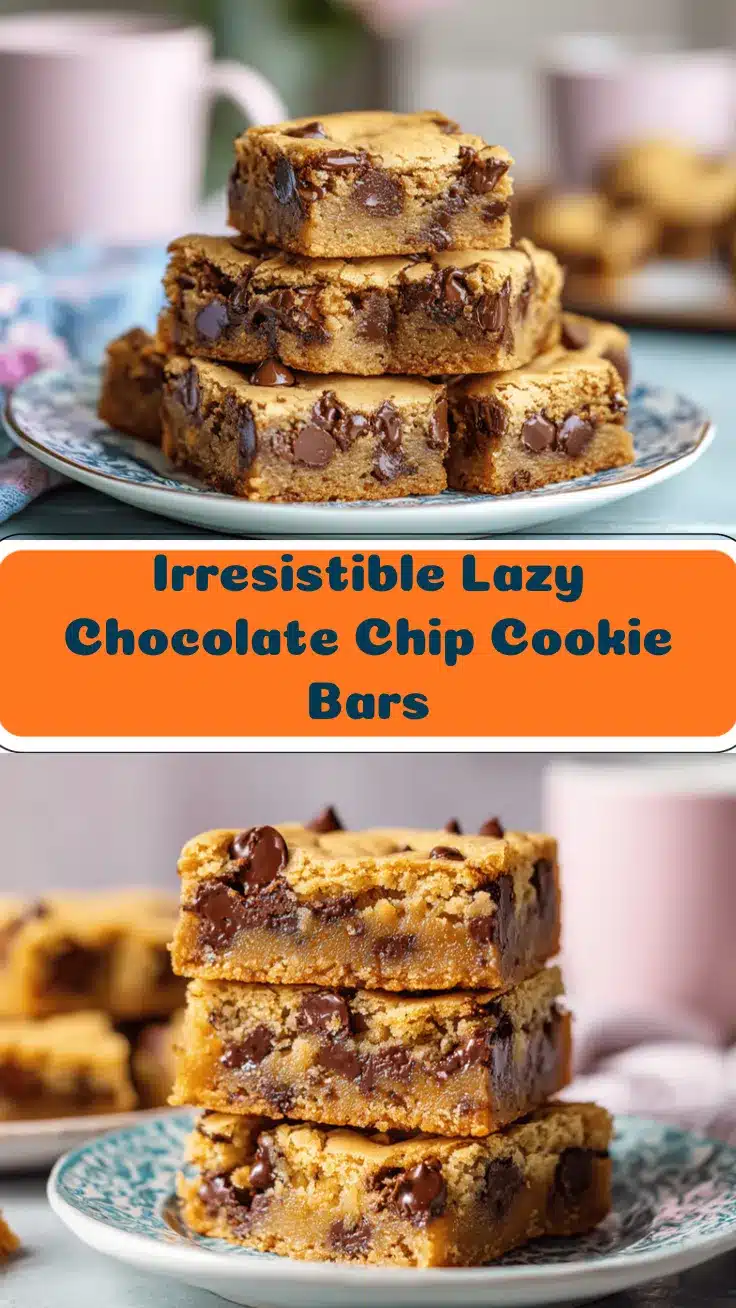
Lazy Chocolate Chip Cookie Bars
These lazy chocolate chip cookie bars are gooey, buttery, and packed with chocolate chips. Made in one bowl with pantry staples, they’re the ultimate easy dessert squares for any occasion—no mixer or chilling required.
- Prep Time: 10 minutes
- Cook Time: 22-28 minutes
- Total Time: 32-38 minutes
- Yield: 16 squares 1x
- Category: Dessert
- Cuisine: American
Ingredients
- 1 1/2 cups all-purpose flour (190g)
- 1/2 teaspoon baking powder
- 1/4 teaspoon baking soda
- 1/2 teaspoon salt
- 1/2 cup unsalted butter (113g), melted and cooled
- 3/4 cup brown sugar (150g), packed
- 1/4 cup granulated sugar (50g)
- 2 large eggs, room temperature
- 2 teaspoons vanilla extract
- 1 cup semi-sweet chocolate chips (170g)
- Optional: 1/2 cup chopped walnuts or pecans (60g)
- Optional: Sprinkle of flaky sea salt
- Optional: Peanut butter chips or white chocolate chips (swap out half the chocolate chips)
Instructions
- Preheat your oven to 350°F (175°C). Line an 8×8-inch (20x20cm) baking pan with parchment paper, leaving an overhang for easy lifting, or lightly grease the pan.
- Melt 1/2 cup unsalted butter in the microwave or on the stove. Let it cool for 2-3 minutes until just warm.
- In a large mixing bowl, whisk together the melted butter, brown sugar, and granulated sugar until smooth and glossy (about 1 minute).
- Add the eggs and vanilla extract. Whisk until fully combined and the mixture lightens slightly in color.
- Sprinkle the flour, baking powder, baking soda, and salt over the wet mixture. Gently fold with a spatula until just combined—do not overmix.
- Fold in the chocolate chips and any optional nuts or extra chips. Save a handful to sprinkle on top if desired.
- Scrape the batter into the prepared pan, smoothing the top with a spatula. Sprinkle extra chips or sea salt on top if desired.
- Bake on the center rack for 22-28 minutes, until the edges are golden and a toothpick in the center comes out with just a few moist crumbs.
- Let the bars cool in the pan on a wire rack for 20-30 minutes. Use the parchment overhang to lift them out, then slice into squares. For cleaner slices, chill for 30 minutes before cutting.
Notes
Let the melted butter cool before mixing with eggs to avoid scrambling. Don’t overmix the batter for the best chewy texture. Start checking for doneness at 22 minutes—bars should be golden at the edges and just set in the center. For perfect squares, chill before slicing. Feel free to customize with your favorite mix-ins like nuts, peanut butter chips, or a swirl of Nutella.
Nutrition
- Serving Size: 1 square (1/16 of pan)
- Calories: 190
- Sugar: 16
- Sodium: 110
- Fat: 8
- Saturated Fat: 5
- Carbohydrates: 26
- Fiber: 1
- Protein: 3
Keywords: chocolate chip cookie bars, dessert squares, easy cookie bars, lazy cookie bars, one bowl dessert, chocolate chip bars, potluck dessert, quick dessert, chewy cookie bars


