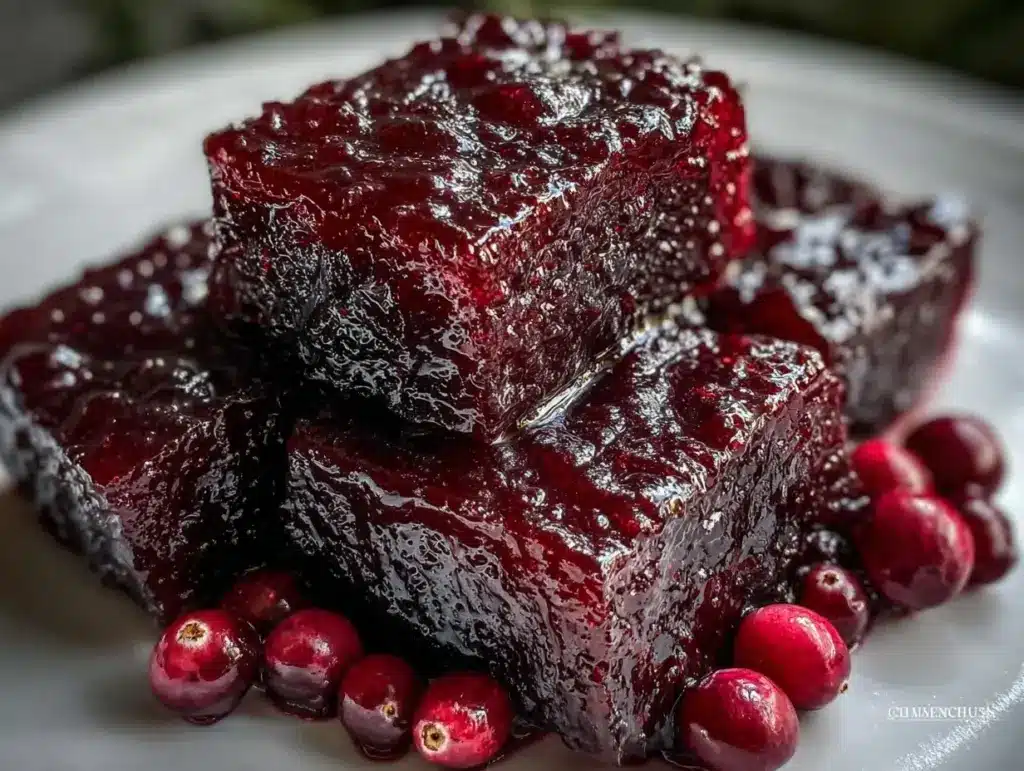
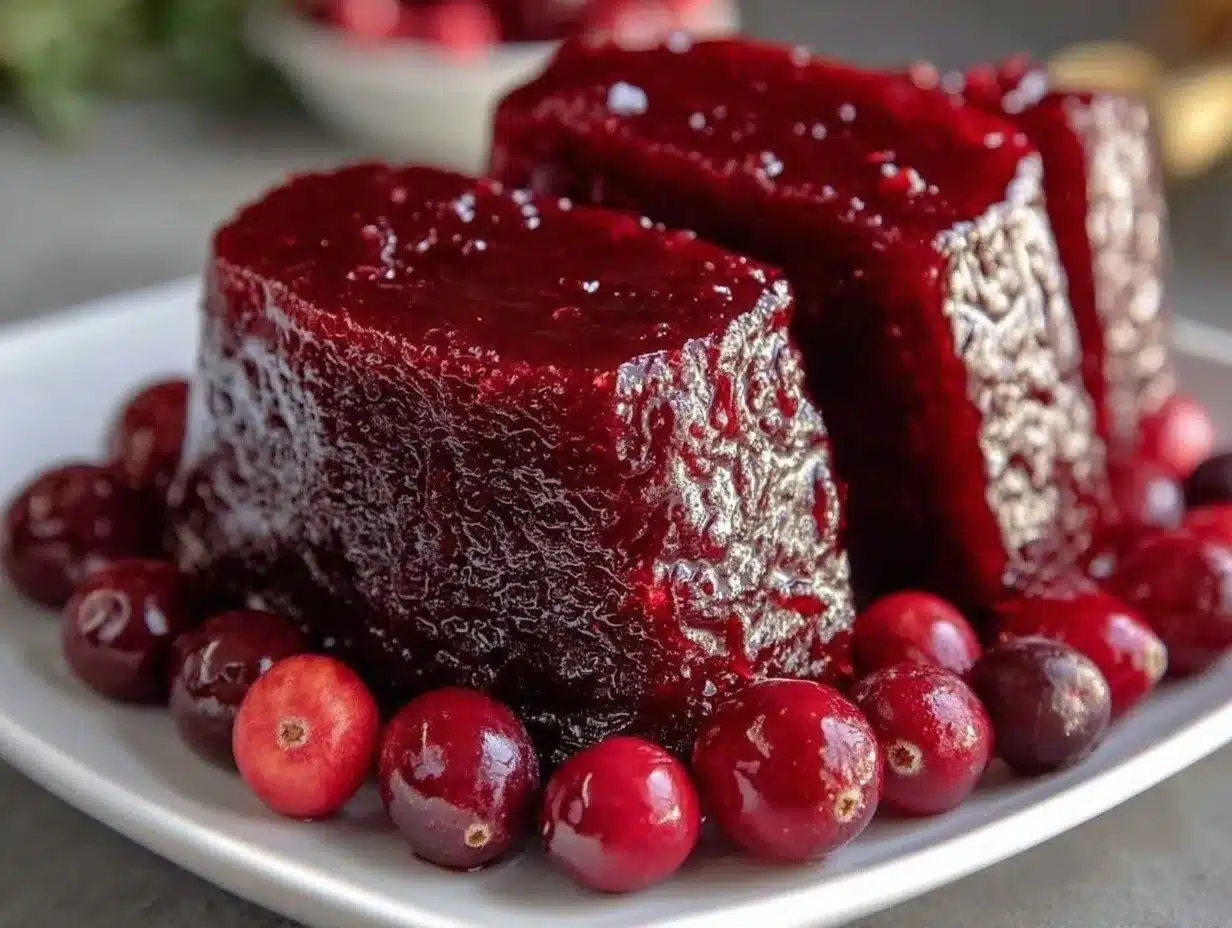
Let me tell you, the moment that ruby-red jellied cranberry sauce slides out of its mold and catches the light, it’s like instant holiday cheer in edible form. The sweet-tart aroma of simmering cranberries filling my kitchen—it’s the kind of scent that drifts through every room, making even the most stubborn family member wander in, curiosity piqued. You know, there’s just something about seeing that glossy, jewel-toned slice nestled next to turkey and stuffing that makes the whole meal feel complete.
The first time I made homemade jellied cranberry sauce, I was skeptical. I grew up on the canned stuff—my grandma swore by it and, honestly, so did I. But one rainy November afternoon (I was knee-high to a grasshopper), I decided to try making it from scratch for a potluck. I remember holding my breath as I flipped the chilled sauce out of its mold, half-expecting disaster. Instead, it came out perfectly—a gentle wobble, a smooth sheen, and that gorgeous, deep color. It was the kind of moment where you pause, take a deep breath, and smile because you know you’re onto something truly special.
That first batch was gone in minutes. My family couldn’t stop sneaking slices off the platter (and I can’t really blame them). Even my cousin, who claimed to loathe cranberry sauce, asked for seconds. Since then, it’s become a staple for family gatherings, gifting, and, yes—even canning for later. Honestly, it’s dangerously easy, and the comfort it brings is pure, nostalgic. If you’re looking for a showstopper for your holiday table, or a canning project that’ll brighten up your pantry all year, this jellied cranberry sauce recipe is just the ticket. In the name of research (of course), I’ve tested it every which way, and it never fails to deliver that warm, festive feeling. You’re going to want to bookmark this one.
Why You’ll Love This Jellied Cranberry Sauce Recipe
After years of holiday feasts and canning escapades, I can honestly say this jellied cranberry sauce recipe stands out for all the right reasons. It’s not just about tradition—it’s about flavor, simplicity, and that little bit of kitchen magic you get when everything comes together perfectly. Here’s why you’ll find yourself making it again and again:
- Quick & Easy: Comes together in under 30 minutes—no fuss, no fancy equipment, perfect for last-minute holiday prep.
- Simple Ingredients: You don’t need anything wild; chances are you’ve got everything but the cranberries already waiting in your pantry.
- Perfect for Every Occasion: Whether you’re prepping for Thanksgiving, Christmas, or just want a sweet-tart condiment for sandwiches, this sauce fits right in.
- Crowd-Pleaser: Kids love its jelly-like texture, adults swoon over its burst of flavor, and picky eaters? Well, let’s just say I’ve converted more than a few.
- Unbelievably Delicious: The smooth, sliceable texture and tangy-sweet flavor are pure comfort food—good enough to make you close your eyes after the first bite.
What makes this jellied cranberry sauce different from the rest? Unlike store-bought versions or overly complicated recipes, mine uses a simple simmer-and-strain technique for perfect consistency every time. No guesswork, no artificial thickeners—just good old-fashioned fruit, sugar, and a splash of citrus. If you’re after a recipe that’s reliable, beautifully set, and packed with real cranberry flavor, you’re in the right place.
Honestly, this sauce is a little bit of kitchen magic. It’s comfort food reimagined—healthier, fresher, and faster, but with all the soul-soothing satisfaction you remember. Whether you want to impress guests without breaking a sweat or just turn an ordinary meal into something memorable, this jellied cranberry sauce recipe is your secret weapon. Trust me, once you make it, you’ll never go back to the can.
What Ingredients You Will Need
This recipe uses simple, wholesome ingredients to deliver bold flavor and satisfying texture without the fuss. You can find everything you need at your local grocery store, and most of it is probably already in your kitchen. Here’s what you’ll need to make the perfect jellied cranberry sauce for holidays and canning:
- Fresh Cranberries (12 oz / 340 g): The star of the show—look for firm, bright red berries. I prefer Ocean Spray for consistent results.
- Granulated Sugar (1 cup / 200 g): Sweetens and helps the sauce set. You can use organic cane sugar if you want a less processed option.
- Water (1 cup / 240 ml): Just enough to let the cranberries pop and soften without thinning out the sauce.
- Fresh Orange Juice (1/4 cup / 60 ml): Adds a citrusy brightness that makes the sauce sing. I squeeze mine fresh for best flavor.
- Orange Zest (from 1 orange): Optional, but it gives a burst of aroma and extra depth—totally worth the extra minute.
- Salt (a pinch): Balances the sweetness and brings out the cranberry flavor. Don’t skip it!
- Optional Flavor Boosts:
- Ground Cinnamon (1/4 tsp): For a warm, holiday vibe.
- Star Anise (1 whole): Adds a subtle licorice note—remove before straining.
- Vanilla Extract (1/2 tsp): For a mellow, dessert-like finish.
Ingredient Tips:
- If fresh cranberries aren’t available, frozen ones work just fine—no need to thaw.
- For a lower-sugar version, swap half the sugar for honey or maple syrup. Just note it might set a bit softer.
- Want it vegan? Stick to cane sugar and skip honey.
- If you’re canning, make sure your ingredients are as fresh as possible for best shelf life.
- For a twist, try adding a splash of lemon juice or substituting lime zest.
Honestly, the best part is how forgiving this recipe is. You can adjust sweetness, add spices, or play with citrus to suit your taste. In summer, swap in fresh berries for a mixed fruit jelly. For gluten-free needs, all ingredients here are naturally safe. If you’re feeling adventurous, add a few chopped apples for extra texture (I’ve tried it—delicious!).
Equipment Needed
You don’t need a fancy kitchen or expensive gadgets for jellied cranberry sauce. Here’s what to gather:
- Medium Saucepan: Stainless steel or enameled works best for even heating.
- Fine Mesh Sieve or Strainer: For getting that silky, seedless jelly texture. Cheesecloth works in a pinch.
- Wooden Spoon or Silicone Spatula: For stirring and mashing the cranberries. Wooden is classic, but silicone is easier to clean.
- Measuring Cups and Spoons: Accuracy counts, especially for sugar and liquid.
- Mold or Loaf Pan: Glass, ceramic, or metal—whatever you have. Even a silicone muffin pan works for cute, individual servings.
- Jar Funnel (for canning): Makes pouring hot jelly into jars way less messy.
- Canning Jars and Lids: If you plan to store or gift, use sterilized jars (Ball or Kerr are classic).
If you don’t have a fine mesh sieve, a regular colander lined with cheesecloth does the trick. I’ve also used coffee filters in a pinch—just be patient! For molds, I’ve used everything from vintage Tupperware to recycled yogurt containers. Maintenance tip: Rinse your sieve right after use to avoid sticky residue. And if you’re on a budget, skip the specialty molds—any small pan or bowl works. Honestly, the only must-have here is something to strain with and something to set in.
Preparation Method
Ready to make the perfect jellied cranberry sauce? Follow these steps for foolproof results every time. Here’s the step-by-step:
- Combine Ingredients: In a medium saucepan, add 12 oz (340 g) cranberries, 1 cup (200 g) sugar, 1 cup (240 ml) water, 1/4 cup (60 ml) orange juice, orange zest (if using), and a pinch of salt.
- Simmer the Mixture: Heat over medium-high until the mixture comes to a gentle boil. Stir occasionally. You’ll hear the cranberries start to pop—this takes about 5 minutes.
- Cook Until Thickened: Reduce the heat to medium-low and let it simmer for 10-12 minutes. Mash the cranberries gently with your spoon as they soften. The mixture should look glossy and thick, with no watery spots.
- Add Optional Flavors: Stir in cinnamon, star anise, or vanilla if you’re using them. Taste and tweak if desired.
- Strain for Jelly Texture: Remove from heat. Set a fine mesh sieve over a large bowl. Carefully pour the hot mixture into the sieve, pressing gently with a spoon to extract all the juice. (Warning: The mixture will be hot! Use oven mitts and go slowly.)
- Discard Solids: Scrape the strained pulp into compost or save for adding to oatmeal. The liquid in the bowl is your jelly base.
- Pour into Mold: Pour strained liquid into your mold, loaf pan, or canning jars. Let it cool for 15 minutes at room temperature, then transfer to the refrigerator.
- Chill Until Set: Refrigerate for at least 4 hours, or overnight if you have time. You’ll know it’s ready when it wobbles gently and pulls away from the sides.
- Unmold and Slice: To unmold, run a thin spatula or knife around the edge, then invert onto a plate. Slice and serve cold.
Time Estimates:
- Active Prep: 10 minutes
- Cooking: 15 minutes
- Setting: 4 hours minimum
Preparation Notes & Tips:
- If the jelly seems runny after chilling, don’t panic! Cranberries naturally contain pectin, so it will firm up as it cools further.
- For extra clarity, strain twice or use cheesecloth to remove every last bit of pulp.
- If canning, pour hot jelly into sterilized jars and process in a boiling water bath for 10 minutes (adjust for altitude if needed).
- Sensory cues: The finished jelly should be deep red, glossy, and slightly translucent. It smells sweet-tart and tastes bright, with a gentle citrus finish.
- Efficiency tip: Wash your sieve and saucepan right away—dried cranberry is a beast to scrub off!
I’ve had batches set softer when I rushed the chilling, so give it plenty of time. If you want a firmer jelly, let it simmer an extra 5 minutes. And, honestly, don’t fret if it’s a little rustic—homemade always wins!
Cooking Tips & Techniques
There are a few tricks I’ve learned over years of making jellied cranberry sauce—some the hard way, some passed down from my grandma. Here’s what I wish I’d known sooner:
- Don’t Overcook: Cranberries have natural pectin, so simmer just until thickened. Overcooking can make the jelly tough or rubbery.
- Strain While Hot: The mixture strains much easier while it’s warm—wait too long, and it gets sticky and stubborn.
- Test for Set: Place a spoonful of jelly on a cold plate. If it wrinkles when you push, you’re good to go.
- Multitasking Strategy: While the sauce simmers, prep your mold and clean up. You’ll thank yourself later.
- Common Mistake: Not straining thoroughly—you want a silky, seedless jelly, not a chunky sauce. Don’t skip this step!
- Personal Failures: Once, I tried to unmold too soon and ended up with cranberry puddle. Lesson learned: Patience pays off.
- Consistency Tip: Measure your ingredients carefully, especially the sugar and water. Too much liquid and your jelly won’t set.
- For Canning: Fill jars while jelly is hot, wipe rims clean, and process immediately to avoid cloudiness or spoilage.
Honestly, the beauty of this recipe is its reliability, but a few tweaks make all the difference. Trust your senses—look for that deep red color, listen for the satisfying “plop” as the jelly unmolds, and taste for balance. It’s all about a little practice, a dash of patience, and, let’s face it, a willingness to have fun in the kitchen!
Variations & Adaptations
One of my favorite things about jellied cranberry sauce is how easily you can make it your own. Here’s how to switch things up:
- Low-Sugar Version: Replace half the sugar with honey or maple syrup. It’ll be slightly softer, but the flavor is lovely for those watching their sugar.
- Spiced Cranberry Jelly: Add ground ginger, cardamom, or cloves along with the cinnamon. Perfect for Christmas brunch or pairing with rich meats.
- Citrus Twist: Substitute lime zest and juice for orange, or add chopped candied citrus peel for a zingy, sophisticated jelly.
- Mixed Berry Jelly: Replace half the cranberries with raspberries or blueberries for a summer version. (I’ve done this for July 4th—huge hit!)
- Vegan/Allergen-Friendly: All ingredients here are naturally vegan and gluten-free, but double-check if you’re using flavorings like vanilla.
- Different Cooking Methods: If you don’t have a stove, you can simmer the mixture in a slow cooker on high for 2 hours—just keep the lid slightly ajar for evaporation.
Personally, my go-to adaptation is adding a splash of bourbon or brandy for grown-up holiday parties. It’s subtle, but adds a warm, festive note. For those with citrus allergies, skip the orange and add apple juice instead—it still sets beautifully. And honestly, if you want to make it extra special, set the jelly in small ramekins for individual servings. So much fun for kids!
Serving & Storage Suggestions
For serving, jellied cranberry sauce is best chilled and sliced—it holds its shape beautifully. I like to present it in neat slices or cut into festive shapes with cookie cutters for holiday tables. Serve cold, straight from the fridge, for best texture and flavor.
Pair it with classic roast turkey, ham, or even chicken. It’s also fantastic spread on leftover sandwiches, dolloped on pancakes, or swirled into yogurt. For beverages, it goes great with sparkling cider or a crisp white wine.
To store, keep the jelly in an airtight container in the refrigerator—it’ll last up to 2 weeks. For longer storage, process in sterilized canning jars and keep in a cool, dark pantry for up to 1 year. If freezing, wrap tightly and use within 3 months (thaw overnight in the fridge).
For reheating, gently warm slices in the microwave for 10 seconds, or let come to room temperature. (Honestly, though, cold is best—flavors deepen and the texture stays perfect.) You’ll notice the flavors mellow and meld after a day or two, so it’s great to make ahead!
Nutritional Information & Benefits
A slice of homemade jellied cranberry sauce (about 2 tablespoons) offers roughly 60 calories, 0g fat, 16g carbs, and 1g fiber. It’s naturally fat-free and gluten-free. Cranberries are loaded with vitamin C, antioxidants, and are known for supporting urinary tract health.
Using fresh fruit means you get more nutrients than the canned version, and the orange juice adds a little extra vitamin boost. If you go low-sugar or use honey, you’ll cut down on refined sugar. No artificial additives here—just pure, simple ingredients. Watch out for potential allergens in any added spices or flavorings, but otherwise, it’s a safe bet for most diets.
From a wellness perspective, I love that this recipe lets you enjoy a holiday classic without unnecessary preservatives. It’s a treat you can feel good about sharing (and eating) all season long!
Conclusion
If you’re craving a holiday classic that’s as beautiful as it is delicious, this jellied cranberry sauce recipe is totally worth trying. It’s quick, easy, and packed with real fruit flavor—no mystery ingredients, just pure nostalgia in every slice.
Feel free to customize it with your favorite spices, swap in different citrus, or play with the sugar level. That’s half the fun! Personally, I love it for its versatility—it brightens up any meal, makes great gifts, and always brings a smile around the table.
So go ahead and give it a whirl—leave a comment with your favorite twist, share with friends, or pin it to your holiday board for next time. Homemade cranberry jelly really does feel like a warm hug. Here’s to making new traditions, one slice at a time!
FAQs
Can I use frozen cranberries for jellied cranberry sauce?
Absolutely! Frozen cranberries work just as well—no need to thaw, just use them straight from the freezer.
How do I know when the jelly is set?
After chilling for at least 4 hours, it should wobble gently and pull away from the sides of the mold. A spoon pressed to the surface should leave a slight indentation.
Can I make this sauce ahead of time?
Yes! It’s actually better when made a day or two in advance—the flavors deepen and the texture gets smoother.
Is this recipe safe for canning?
It sure is. Pour hot jelly into sterilized jars, seal, and process in a boiling water bath for 10 minutes. Store in a cool, dark pantry for up to a year.
What if my jelly is too runny or too firm?
If it’s runny, give it more time to chill—it will firm up. If it’s too firm, try adding a bit more liquid next time. Homemade jelly is forgiving!
Pin This Recipe!
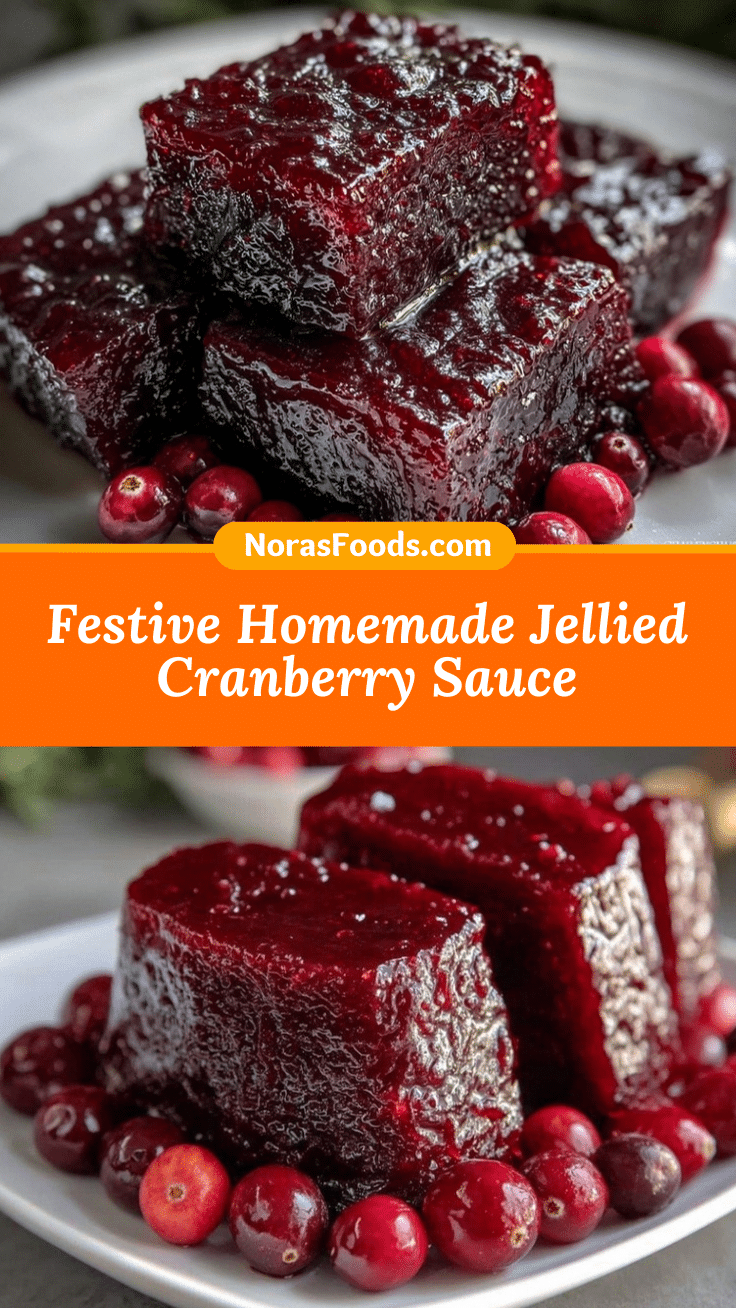
Jellied Cranberry Sauce

This easy, homemade jellied cranberry sauce is a festive holiday classic with a sweet-tart flavor and smooth, sliceable texture. Perfect for Thanksgiving, Christmas, or canning to enjoy all year long.
- Prep Time: 10 minutes
- Cook Time: 15 minutes
- Total Time: 4 hours 25 minutes
- Yield: 8 servings 1x
- Category: Side Dish
- Cuisine: American
Ingredients
- 12 oz fresh cranberries (about 3 cups)
- 1 cup granulated sugar
- 1 cup water
- 1/4 cup fresh orange juice
- Zest from 1 orange (optional)
- Pinch of salt
- 1/4 tsp ground cinnamon (optional)
- 1 whole star anise (optional, remove before straining)
- 1/2 tsp vanilla extract (optional)
Instructions
- In a medium saucepan, combine cranberries, sugar, water, orange juice, orange zest (if using), and a pinch of salt.
- Heat over medium-high until the mixture comes to a gentle boil, stirring occasionally. Cranberries will start to pop (about 5 minutes).
- Reduce heat to medium-low and simmer for 10-12 minutes, mashing cranberries gently as they soften. Mixture should be glossy and thick.
- Stir in cinnamon, star anise, or vanilla if using. Taste and adjust flavors as desired.
- Remove from heat. Set a fine mesh sieve over a large bowl and carefully pour the hot mixture into the sieve, pressing gently to extract all juice.
- Discard solids or save for another use. The strained liquid is your jelly base.
- Pour strained liquid into a mold, loaf pan, or canning jars. Cool for 15 minutes at room temperature, then refrigerate.
- Chill for at least 4 hours, or overnight, until set and wobbly.
- To unmold, run a thin spatula or knife around the edge, invert onto a plate, slice, and serve cold.
Notes
For firmer jelly, simmer an extra 5 minutes. Strain while hot for best texture. If canning, process in boiling water bath for 10 minutes. Jelly sets best when chilled overnight. Frozen cranberries work just as well as fresh. For a lower-sugar version, replace half the sugar with honey or maple syrup. All ingredients are naturally gluten-free and vegan.
Nutrition
- Serving Size: About 2 tablespoons
- Calories: 60
- Sugar: 15
- Sodium: 10
- Carbohydrates: 16
- Fiber: 1
Keywords: cranberry sauce, jellied cranberry, holiday, Thanksgiving, Christmas, canning, homemade, jelly, fruit sauce, gluten-free, vegan


