
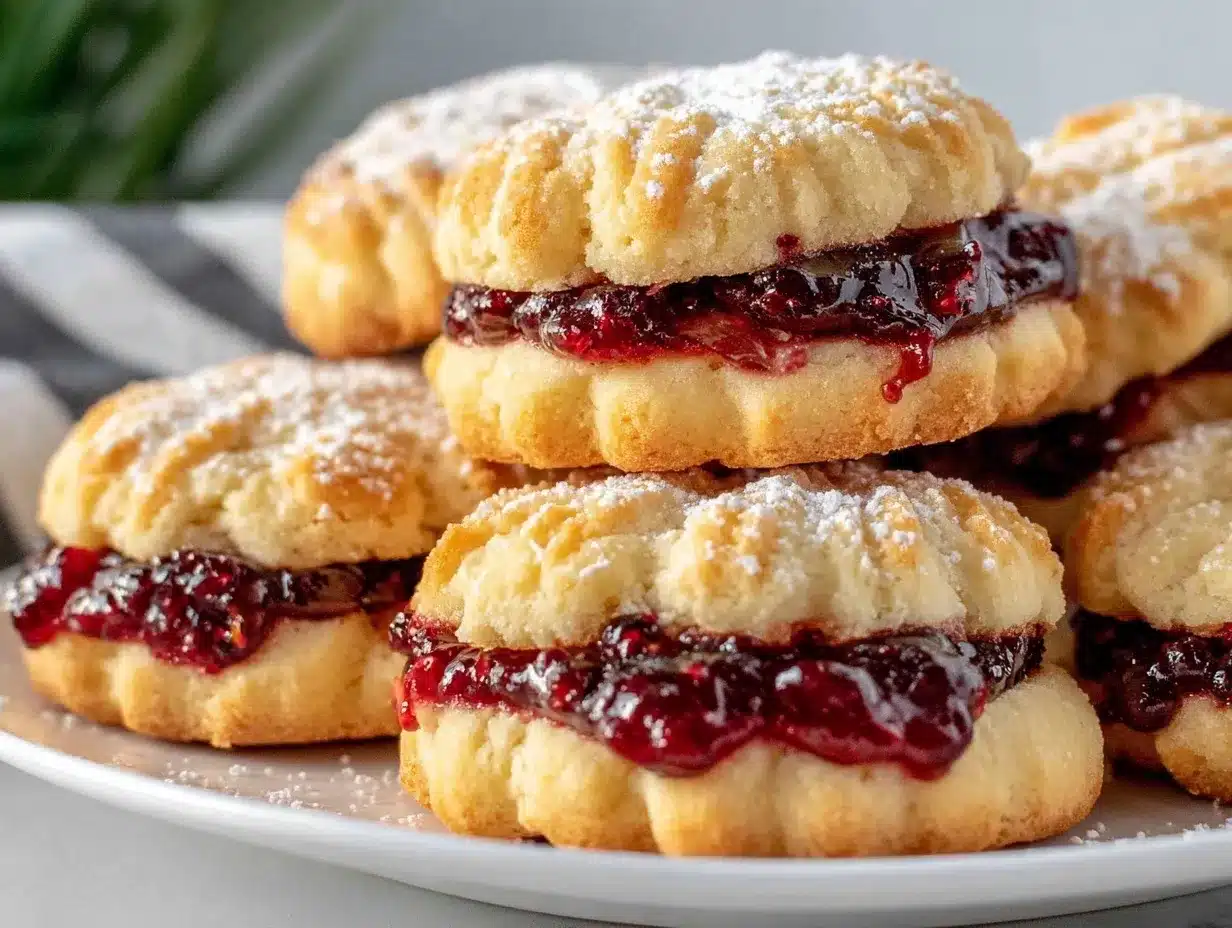
Imagine stepping into a kitchen where the sweet aroma of bubbling fruit jam mingles with the rich, buttery scent of freshly baked biscuits. That’s exactly what hits you when these jam filled sandwich cookies are in the oven—like a hug in dessert form, honestly. The first time I made these, it was a blustery autumn afternoon. I’d just found an old family recipe card tucked inside my grandma’s battered recipe box. The edges were smudged with flour, and her handwriting was as lovely as ever. I was instantly hooked by the nostalgia and excitement of recreating something that felt like pure, cozy baking magic.
Back in the day, when I was knee-high to a grasshopper, my mom would let me help with baking (mostly stirring, and sneaking tastes of jam). There’s something about sandwich cookies—the way the jam peeks out between two soft biscuits—that always felt a little special. I remember the first batch I made: the kind of moment where you pause, take a deep breath, and just smile because you know you’re onto something truly special. My family couldn’t stop sneaking them off the cooling rack (and I can’t really blame them). They disappeared faster than I could dust them with powdered sugar.
Honestly, these jam filled sandwich cookies are dangerously easy. They deliver pure, nostalgic comfort and are perfect for potlucks, gifting, or brightening up your Pinterest cookie board. I wish I’d stumbled on this recipe years ago—it’s become a staple for family gatherings and cozy evenings. You’re going to want to bookmark this one, I promise. I’ve tested it more times than I care to admit (in the name of research, of course), and every batch feels like home.
Why You’ll Love This Recipe
I’ve made heaps of sandwich cookies over the years, but these jam filled sandwich cookies stand out for a bunch of reasons. After plenty of trial and error (and a few epic kitchen fails), I can say with confidence: you’ll fall head over heels for these. Here’s why:
- Quick & Easy: Comes together in under 45 minutes—no complicated steps, just straightforward, cozy baking.
- Simple Ingredients: You probably already have everything you need in your pantry. No fancy grocery runs required.
- Perfect for Any Occasion: Whether it’s brunch, a birthday party, holiday mornings, or just a rainy day, these are always a hit.
- Crowd-Pleaser: Trust me, both kids and adults gobble these up. Even my picky nephew asks for seconds!
- Unbelievably Delicious: The combination of buttery biscuits and sweet, tangy jam is next-level comfort food. It’s the kind of treat that makes you close your eyes after the first bite.
What makes these jam filled sandwich cookies different from the rest? It’s the perfectly balanced biscuit—rich but not too sweet, with a tender crumb that melts in your mouth. The trick is in chilling the dough, which gives the biscuits a dreamy texture. And the jam? You can use your favorite flavor, but I love a mix of raspberry and apricot for a sweet-tart kick.
This isn’t just another cookie recipe—it’s my best version, fine-tuned for maximum coziness and minimal fuss. It’s comfort food reinvented: healthier, faster, yet just as satisfying. You won’t need to fuss over fancy techniques, but you’ll impress anyone who gets a taste. These cookies turn a simple afternoon into something memorable. Let’s face it, there’s nothing like the feeling of pulling a tray of golden biscuits from the oven and knowing you’ve made something special.
What Ingredients You Will Need
This recipe uses simple, wholesome ingredients to deliver bold flavor and satisfying texture without extra fuss. Most are pantry staples, and there’s plenty of room for swaps if you need them.
- For the biscuits:
- 2 cups (250g) all-purpose flour (unbleached is best for texture)
- 1/2 cup (100g) granulated sugar (adds a subtle sweetness)
- 1/4 teaspoon fine sea salt (balances the flavors)
- 1 teaspoon baking powder (for lift and tenderness)
- 3/4 cup (170g) unsalted butter, softened (the key to that rich, buttery flavor)
- 1 large egg (room temperature, for binding and richness)
- 1 teaspoon pure vanilla extract (for aromatic warmth)
- 1-2 tablespoons milk, as needed (whole or 2%—use dairy-free milk if preferred)
- For the filling:
- 3/4 cup (240g) fruit jam or preserves (raspberry, apricot, strawberry, or your favorite)
- (Choose a jam with real fruit chunks for extra texture, or go ultra-smooth for classic style)
- For finishing:
- Powdered sugar, for dusting (optional but highly recommended for that bakery-style vibe)
If you’re gluten-free, swap in a trusted 1:1 gluten-free flour blend (I’ve had good luck with King Arthur). For dairy-free, use vegan butter and non-dairy milk—the biscuits might spread a smidge more, but the flavor stays dreamy. For jam, I recommend Bonne Maman or homemade if you have it. In summer, try fresh berry preserves for a seasonal twist. If you’re out of vanilla, almond extract works too (just use half the amount).
It’s all about flexibility. These jam filled sandwich cookies don’t demand perfection. If you don’t have powdered sugar, skip it, or drizzle with a simple icing. Got a favorite local jam? Use it. Every batch can be a bit different, depending on what you have on hand. Honestly, they’re forgiving and delicious with whatever you throw at them.
Equipment Needed
You don’t need fancy gadgets for these jam filled sandwich cookies—just trusty kitchen basics. Here’s what you’ll want to have ready:
- Mixing bowls (one large, one small—easy cleanup is key)
- Hand mixer or stand mixer (if you don’t have one, a sturdy wooden spoon works for creaming butter)
- Measuring cups and spoons (accuracy matters for biscuits)
- Rolling pin (or a clean wine bottle in a pinch—I’ve been there!)
- Cookie cutters (2-inch round is traditional, but any shape works—try hearts or stars for fun)
- Baking sheet(s) (lined with parchment paper for easy removal)
- Wire cooling rack (helps keep the cookies crisp)
- Small spoon or offset spatula (for spreading jam)
If you’re missing a rolling pin, a sturdy glass or bottle does the trick. For cookie cutters, use a drinking glass or freehand with a knife if you’re feeling crafty. I usually go budget-friendly with basic aluminum sheets—they heat evenly and clean up fast. If you use nonstick pans, just skip the parchment. Maintenance tip: always wipe your rolling pin dry after washing to avoid sticky dough buildup.
Honestly, these cookies are as easy as it gets when it comes to equipment. The only thing you really need? A bit of patience, and maybe a kitchen playlist to set the mood.
Preparation Method
- Prep your ingredients: Let the butter and egg come to room temperature (about 30 minutes). Measure out all ingredients. Preheat your oven to 350°F (175°C). Line baking sheets with parchment paper.
- Make the biscuit dough: In a large mixing bowl, cream together the softened butter and sugar using a hand mixer or stand mixer (medium speed, 2-3 minutes) until light and fluffy. Scrape down the sides once or twice.
- Add the wet ingredients: Beat in the egg and vanilla extract until fully incorporated. The mixture should be creamy and pale—if it’s a little lumpy, don’t worry, it’ll smooth out soon.
- Combine dry ingredients: In a separate bowl, whisk together flour, baking powder, and salt. Slowly add this to the butter mixture, mixing on low until just combined. If the dough is dry, add 1-2 tablespoons of milk until it comes together. It’ll be soft but not sticky.
- Chill the dough: Shape dough into a flat disk, wrap in plastic, and refrigerate for 20-30 minutes. Chilling keeps the biscuits tender and helps with rolling. If you skip this step, the cookies may spread more (learned that one the hard way).
- Roll and cut: On a lightly floured surface, roll out the dough to 1/4 inch (6 mm) thickness. Use your favorite cookie cutter to cut even rounds. Re-roll scraps as needed. Transfer to prepared baking sheets, spacing cookies about 1 inch apart.
- Bake: Bake in preheated oven for 10-12 minutes, until edges are just golden—not browned. Watch closely! If your oven runs hot, check at 9 minutes. The cookies should smell buttery and look pale with a faint golden edge.
- Cool: Allow cookies to cool on the baking sheet for 5 minutes, then transfer to wire racks. Warm cookies will be fragile, so be gentle.
- Fill and assemble: Once completely cool, flip half of the cookies upside down. Spoon about 1 teaspoon (5g) of jam onto each, then gently sandwich with remaining cookies. Press lightly until the jam peeks out the sides.
- Finish: Dust with powdered sugar if desired. Let them sit for 10 minutes to set—the jam will slightly soak into the biscuit, making them extra tender.
Notes: If the dough sticks while rolling, chill it a bit longer. If biscuits spread too much, check oven temperature and chill dough next time. For a crispier cookie, bake an extra minute; for softer, pull them at the first sign of color. Efficiency tip: Roll and cut while the next batch bakes to save time.
These jam filled sandwich cookies are forgiving, but if you run into trouble (like sticky dough or jam oozing out), don’t sweat it—less-than-perfect cookies still taste amazing. I’ve learned that sometimes the “ugly” ones disappear first!
Cooking Tips & Techniques
After baking more batches of jam filled sandwich cookies than I can count, here are a few tricks and lessons learned:
- Chill Out: Chilling the dough is the secret to thick, tender biscuits. If you’re impatient, pop it in the freezer for 10 minutes—it works in a pinch.
- Don’t Overmix: Mix just until the flour disappears. Overworking makes tough cookies, and no one wants that.
- Jam Matters: Use thick, high-quality jam. Thin jam will run out the sides and make a mess (been there, got the sticky fingers to prove it).
- Cookie Cutter Choices: Sharp cutters make clean edges. If yours is dull, press firmly and wiggle a little.
- Uniformity: Try to roll dough evenly—uneven thickness leads to uneven baking. A simple trick: use two wooden spoons as “guides” on either side of your rolling pin.
Common mistakes? Skipping the chill (leads to spreading), using warm butter (makes greasy dough), or overfilling with jam (messy but still delicious). I’ve learned the hard way—sometimes you just need to laugh and eat the “wonky” cookies!
Multitasking tip: While one batch bakes, prep the next. Clean as you go (or delegate—my kids are pros at dish duty). For consistency, weigh your dough balls if you want picture-perfect cookies. But honestly, a little imperfection never hurt anyone.
These tips will help make every batch of jam filled sandwich cookies a success. Trust me, even if you “mess up,” they’ll still taste like a cozy afternoon.
Variations & Adaptations
One of the best things about jam filled sandwich cookies? You can switch things up in dozens of ways. Here are some of my favorites:
- Dietary Variations: Use gluten-free flour for celiac-friendly cookies, or swap in vegan butter and plant milk for dairy-free. Almond flour adds a nutty note (just watch texture).
- Seasonal Twists: In summer, go with blueberry or peach preserves. Around the holidays, cranberry or spiced apple jam is amazing. For extra festivity, add a pinch of cinnamon or nutmeg to the dough.
- Flavor Swaps: Try lemon curd instead of jam for a tangy surprise. Mix in a few drops of almond extract for a bakery-style twist. Chocolate hazelnut spread works if you want something decadent.
If you don’t have an oven, these biscuits bake up well in a toaster oven (just watch the time). For a no-bake idea, use store-bought shortbread and fill with your favorite jam. If you’re allergic to eggs, use a flaxseed egg (1 tablespoon ground flax + 2.5 tablespoons water, mixed and rested) for good results.
My personal favorite? Raspberry jam with a hint of lemon zest in the dough. It’s bright, tangy, and absolutely addictive. Don’t be afraid to get creative—these jam filled sandwich cookies are all about making them your own.
Serving & Storage Suggestions
Serve these jam filled sandwich cookies at room temperature for the best flavor and texture. I like to stack them on a pretty plate and sprinkle with extra powdered sugar (looks great for photos!). Pair with hot tea, coffee, or even cold milk for that classic cozy vibe.
For parties, arrange them in cupcake liners or small boxes for gifting. They’re a sweet addition to brunch spreads, dessert tables, or after-school snacks. If you want to go fancy, add a few fresh berries or edible flowers for color.
To store, keep cookies in an airtight container at room temperature for up to 4 days. The biscuits soften a bit over time as they soak up jam—honestly, some say they’re even better on day two. For longer storage, freeze assembled cookies in layers separated by wax paper for up to 1 month. Thaw at room temp and dust with powdered sugar before serving.
To reheat, pop in a low oven (250°F/120°C) for 3-4 minutes, just until warmed through. The jam will get extra gooey! These cookies travel well, too—perfect for lunchboxes or road trips.
Nutritional Information & Benefits
Each jam filled sandwich cookie (about 38g) contains roughly:
- Calories: 165
- Carbohydrates: 22g
- Fat: 7g
- Protein: 2g
- Sugar: 10g
The main health benefit comes from real fruit jam—packed with vitamin C and antioxidants, especially if you use berry preserves. The biscuits themselves are higher in protein and healthy fats if you swap in almond flour or use nut butters. These cookies are naturally nut-free unless you add almond extract, and can be made gluten-free or dairy-free for special diets.
Potential allergens include gluten, dairy, and eggs, so check your swaps. From a wellness perspective, I love that these jam filled sandwich cookies are portion-friendly—easy to enjoy as a sweet treat without going overboard. They’re a feel-good dessert for all ages.
Conclusion
If you’re searching for a new cozy baking tradition, these jam filled sandwich cookies with buttery biscuits are a must-try. They’re simple enough for beginners, yet delicious enough to impress any cookie lover. The flexibility in ingredients and flavors means you can always make them your own—no two batches are ever exactly alike.
I love this recipe because it just feels like home (and my family agrees). There’s something so satisfying about sandwiching sweet jam between two soft biscuits and sharing them with people you care about. It’s a little gesture with big comfort.
Give these cookies a go, and let me know how yours turn out! Drop a comment, share your favorite jam combo, or tag me if you adapt the recipe. Cozy baking is all about sharing—so let’s keep the warmth going, one sweet bite at a time.
FAQs
Can I use store-bought jam for these cookies?
Absolutely! Any good quality jam works—raspberry, apricot, strawberry, or even homemade. Just make sure it’s thick enough to stay put between the biscuits.
Can the dough be made ahead of time?
Yes! You can make the biscuit dough up to 2 days in advance. Keep it wrapped in the fridge, then roll, cut, and bake when you’re ready.
How do I prevent the jam from leaking out?
Use a thicker jam, and don’t overfill. Press the cookies gently together—if a little leaks, it’s still delicious!
Are these cookies suitable for freezing?
Definitely. Freeze assembled cookies in layers separated by wax paper. Thaw at room temperature before serving, and dust with powdered sugar for freshness.
Can I make these cookies gluten-free?
Yes! Use a 1:1 gluten-free flour blend. The texture is slightly different but still tender and tasty.
Pin This Recipe!
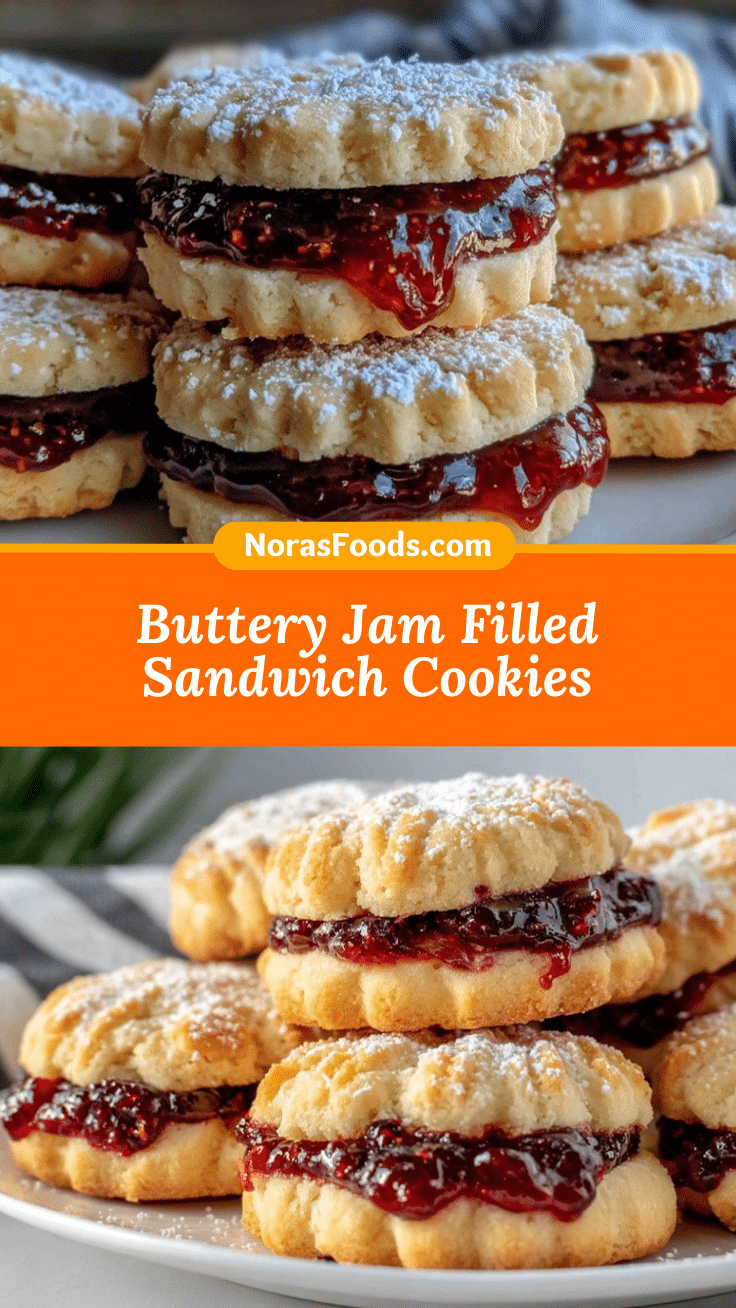
Jam Filled Sandwich Cookies Easy Homemade Biscuits for Cozy Baking
These jam filled sandwich cookies feature tender, buttery biscuits sandwiched with sweet fruit jam. Perfect for cozy baking, they’re easy to make and ideal for sharing at gatherings or enjoying with a cup of tea.
- Prep Time: 20 minutes
- Cook Time: 12 minutes
- Total Time: 45 minutes
- Yield: 20 sandwich cookies 1x
- Category: Dessert
- Cuisine: American
Ingredients
- 2 cups all-purpose flour (unbleached preferred)
- 1/2 cup granulated sugar
- 1/4 teaspoon fine sea salt
- 1 teaspoon baking powder
- 3/4 cup unsalted butter, softened
- 1 large egg, room temperature
- 1 teaspoon pure vanilla extract
- 1–2 tablespoons milk (whole or 2%, or dairy-free alternative)
- 3/4 cup fruit jam or preserves (raspberry, apricot, strawberry, or your favorite)
- Powdered sugar, for dusting (optional)
Instructions
- Let the butter and egg come to room temperature (about 30 minutes). Measure out all ingredients. Preheat oven to 350°F (175°C). Line baking sheets with parchment paper.
- In a large mixing bowl, cream together softened butter and sugar using a hand mixer or stand mixer (medium speed, 2-3 minutes) until light and fluffy. Scrape down the sides as needed.
- Beat in the egg and vanilla extract until fully incorporated. The mixture should be creamy and pale.
- In a separate bowl, whisk together flour, baking powder, and salt. Slowly add to the butter mixture, mixing on low until just combined. If the dough is dry, add 1-2 tablespoons of milk until it comes together. Dough should be soft but not sticky.
- Shape dough into a flat disk, wrap in plastic, and refrigerate for 20-30 minutes.
- On a lightly floured surface, roll out dough to 1/4 inch thickness. Use cookie cutters to cut rounds. Re-roll scraps as needed. Transfer to prepared baking sheets, spacing cookies about 1 inch apart.
- Bake in preheated oven for 10-12 minutes, until edges are just golden. Watch closely and check at 9 minutes if your oven runs hot.
- Allow cookies to cool on the baking sheet for 5 minutes, then transfer to wire racks.
- Once completely cool, flip half of the cookies upside down. Spoon about 1 teaspoon of jam onto each, then gently sandwich with remaining cookies. Press lightly until the jam peeks out the sides.
- Dust with powdered sugar if desired. Let cookies sit for 10 minutes to set.
Notes
Chilling the dough is key for tender biscuits and prevents spreading. Use thick, high-quality jam for best results. For gluten-free or dairy-free adaptations, substitute with 1:1 gluten-free flour and vegan butter/milk. If dough sticks while rolling, chill longer. Cookies can be frozen for up to 1 month. Dust with powdered sugar before serving for a bakery-style finish.
Nutrition
- Serving Size: 1 sandwich cookie (a
- Calories: 165
- Sugar: 10
- Sodium: 60
- Fat: 7
- Saturated Fat: 4
- Carbohydrates: 22
- Fiber: 0.5
- Protein: 2
Keywords: jam filled cookies, sandwich cookies, homemade biscuits, cozy baking, fruit jam cookies, easy dessert, holiday cookies, tea cookies


