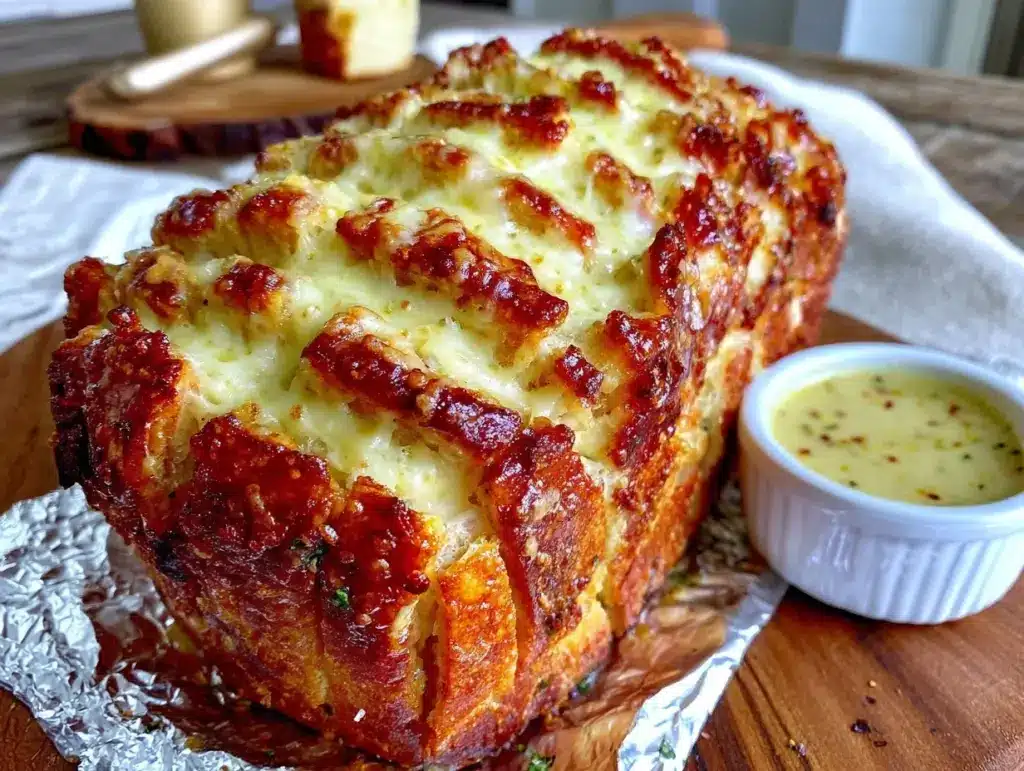
The smell of buttery, golden-brown bread and gooey melted cheese wafting through the kitchen is an instant mood booster. Grilled ham and cheese pull-apart sandwiches are more than just a meal—they’re a warm hug in food form. I first started making this dish for casual get-togethers, and it quickly became a family favorite. There’s something magical about the way the crispy edges and gooey center combine to create the ultimate comfort food. Whether you’re hosting a game night or craving an indulgent snack, this recipe is guaranteed to please.
With simple ingredients and a quick prep, these sandwiches are perfect for feeding a crowd or treating yourself to a cozy weekend meal. What makes this recipe special is the pull-apart design—it’s interactive, fun, and brings people together as everyone grabs a cheesy, savory bite straight from the pan. Trust me, once you try this, you’ll be making it on repeat.
Why You’ll Love This Recipe
- Quick & Easy: These sandwiches come together in less than 30 minutes, making them ideal for busy days or last-minute cravings.
- Simple Ingredients: No fancy shopping trips required—you probably have everything you need in your kitchen already.
- Perfect for Any Occasion: Whether it’s a casual family dinner, game day, or a party appetizer, this recipe fits right in.
- Crowd-Pleaser: Everyone from kids to adults loves the combination of melty cheese and savory ham nestled between crispy bread slices.
- Unbelievably Delicious: The buttery crust and gooey filling make every bite irresistible—it’s comfort food at its finest.
What sets this recipe apart is the clever pull-apart design that transforms a classic sandwich into something interactive and fun. The buttery glaze on top adds a layer of indulgence, and the combination of flavors will have everyone reaching for seconds. It’s the kind of dish that creates memories, whether you’re enjoying it with friends or sneaking an extra piece straight from the pan.
What Ingredients You Will Need
This recipe uses simple, wholesome ingredients to deliver bold flavor and a satisfying texture without any fuss. Plus, there’s plenty of room for customization!
- Sliced bread: Use a sturdy sandwich bread, preferably one that’s slightly thick-cut. Brioche or sourdough works wonderfully for extra flavor.
- Deli ham: Thinly sliced ham is perfect for layering. Choose your favorite variety—honey ham, smoked ham, or even Black Forest.
- Cheese: Swiss cheese, cheddar, or mozzarella are all excellent options. Feel free to mix and match for a more complex flavor.
- Butter: Unsalted butter, melted, for brushing the bread and creating that golden, crispy crust.
- Dijon mustard: Adds a tangy kick to balance out the richness of the cheese and ham.
- Mayonnaise: Helps bind the ingredients together and adds creaminess to each bite.
- Garlic powder: Optional, but adds a subtle savory depth to the butter glaze.
- Poppy seeds: A sprinkle on top adds a delightful crunch and visual appeal.
If you’re missing an ingredient, don’t worry! You can easily swap out items to suit your taste. For instance, turkey or roast beef can replace ham, and you can use whole wheat bread for a healthier option. Want a vegetarian version? Skip the meat altogether and load up on veggies like spinach, tomatoes, or sautéed mushrooms.
Equipment Needed
- Large skillet or griddle: For achieving that perfect golden crust.
- Pastry brush: To evenly apply the butter glaze to the bread slices.
- Sharp knife: For cutting the sandwiches into smaller sections for the pull-apart effect.
- Mixing bowl: To combine the butter, mustard, and seasoning.
- Spatula: Handy for flipping and serving.
If you don’t have a large skillet, you can use a regular frying pan and cook the sandwiches in batches. A silicone brush works just as well as a pastry brush, and if you don’t have a mixing bowl, you can stir the butter glaze in a mug. This recipe is all about simplicity!
Preparation Method
- Preheat your skillet or griddle over medium heat. If using an oven, preheat to 375°F (190°C).
- In a small mixing bowl, combine 4 tablespoons (56g) of melted butter, 1 teaspoon of Dijon mustard, and ½ teaspoon of garlic powder. Stir until well blended.
- Lay out your slices of bread on a clean surface. Spread a thin layer of mayonnaise on one side of each slice.
- Add a layer of deli ham (about 2-3 slices per sandwich) and top with a slice of cheese. Place another slice of bread on top, mayonnaise side down, to form a sandwich.
- Brush the butter mixture generously over the top of each sandwich. Sprinkle poppy seeds if desired.
- If using a skillet, place the sandwiches onto the hot surface. Cook for 2-3 minutes per side until the bread is golden brown and crispy, and the cheese has melted.
- If baking, arrange the sandwiches in a baking dish, cover with foil, and bake for 10 minutes. Remove the foil and bake for an additional 5 minutes to crisp up the tops.
- Once done, use a sharp knife to cut the sandwiches into smaller, easy-to-pull-apart sections. Serve warm and enjoy!
Cooking Tips & Techniques
Here are some tried-and-true tips to make sure your grilled ham and cheese pull-apart sandwiches turn out perfectly every time:
- Don’t skimp on the butter: The buttery glaze is what gives these sandwiches their irresistible crispy exterior.
- Pick quality cheese: Choose a cheese that melts smoothly for that gooey, stretchy texture.
- Preheat your skillet: A hot pan ensures a golden, crispy crust without overcooking the inside.
- Avoid overloading: While it’s tempting to pile on the fillings, too much can make the sandwich soggy and hard to handle.
- Let it rest: After cooking, allow the sandwiches to cool for 2-3 minutes to help the cheese set slightly and make cutting easier.
From my own experience, I’ve learned that flipping the sandwiches gently with a wide spatula prevents any filling from spilling out. Also, if you’re baking them, make sure to line your baking dish with parchment paper—it makes cleanup a breeze!
Variations & Adaptations
Here’s how you can customize this recipe to suit your preferences or dietary needs:
- Vegetarian Version: Replace ham with sautéed mushrooms, spinach, or roasted red peppers for a veggie-packed alternative.
- Gluten-Free Option: Use gluten-free bread to make the recipe suitable for those with gluten sensitivities.
- Seasonal Twist: Add thin slices of apple or pear for a sweet and savory combination that’s perfect for fall.
- Spicy Kick: Include a layer of pickled jalapeños or spread some spicy mustard for added heat.
- Cheese Variety: Mix and match different cheeses like Gruyère, Havarti, or pepper jack for unique flavor profiles.
One variation I tried recently was adding caramelized onions to the filling. It added an extra layer of sweetness that paired beautifully with the smoky ham and melted cheese. Try it—you won’t regret it!
Serving & Storage Suggestions
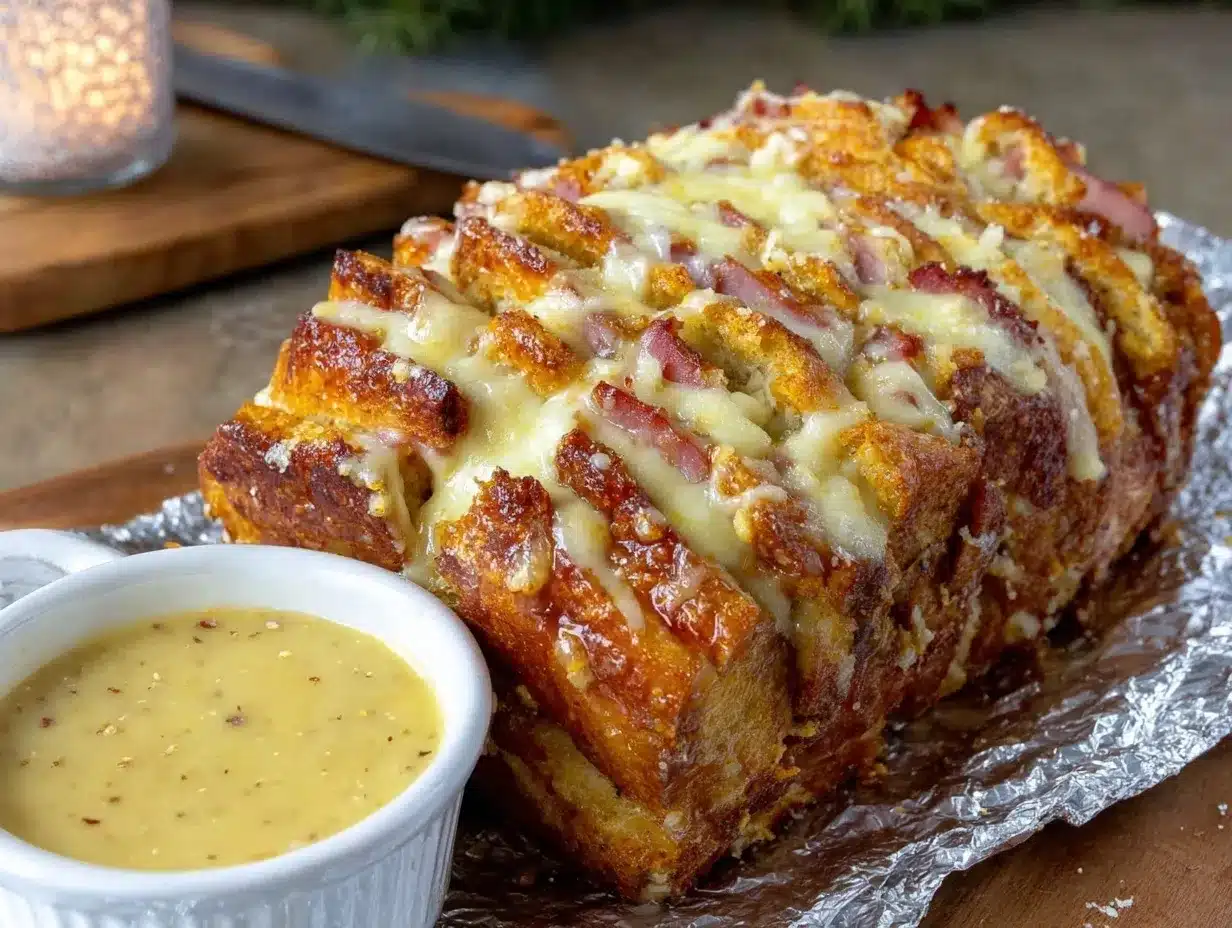
These sandwiches are best served hot and fresh, straight off the skillet or out of the oven. Arrange them on a large platter and let everyone pull apart their portion—it’s interactive and fun!
- Pair with: Serve with a side of tomato soup or a crisp green salad for a complete meal.
- Refrigerate: Wrap leftovers in foil and store in the refrigerator for up to 3 days.
- Reheat: Warm in a toaster oven or skillet for a few minutes to regain the crispy, gooey goodness.
- Freeze: You can freeze the sandwiches before cooking for up to 1 month. Simply bake straight from frozen, adding a few extra minutes to the cooking time.
Keep in mind that the flavors develop even further as they sit, so leftovers can be just as delicious as the fresh batch!
Nutritional Information & Benefits
Here’s a rough nutritional breakdown per serving (based on one sandwich):
- Calories: 350
- Protein: 15g
- Carbohydrates: 28g
- Fat: 18g
- Fiber: 2g
The combination of ham and cheese provides a good dose of protein, while using whole-grain bread adds fiber to keep you satisfied. If you’re watching your sodium intake, opt for low-sodium deli ham and cheese varieties.
Conclusion
Grilled ham and cheese pull-apart sandwiches are the ultimate comfort food that’s easy to make and even easier to love. Whether you’re hosting friends or enjoying a cozy night in, this recipe is guaranteed to be a hit. With endless variations and simple preparation, you can customize it to suit your taste and dietary needs.
Honestly, this recipe has become a staple in my home, and I bet it’ll be the same for you. Give it a try, and don’t forget to share your experience in the comments below. I love hearing how you’ve made it your own!
So grab your skillet and get ready to create something truly special—happy cooking!
FAQs
Can I make this recipe ahead of time?
Yes! You can assemble the sandwiches and refrigerate them for up to a day before cooking. Just brush the butter glaze on right before cooking.
What’s the best cheese for this recipe?
Swiss, cheddar, and mozzarella all work well. For a gourmet touch, try Gruyère or Havarti.
Can I bake these instead of grilling?
Absolutely! Arrange the sandwiches in a baking dish, cover with foil, and bake at 375°F (190°C) for 10 minutes, then uncover and bake for 5 more minutes.
How do I prevent the sandwiches from becoming soggy?
Use sturdy bread and avoid overloading the filling. Cooking on a preheated skillet also helps keep the bread crispy.
Are there gluten-free options?
Yes, you can use gluten-free bread to make this recipe suitable for those with gluten sensitivities.
Pin This Recipe!

Irresistible Grilled Ham and Cheese Pull-Apart Sandwiches Recipe

Grilled ham and cheese pull-apart sandwiches are the ultimate comfort food with a buttery crust and gooey filling, perfect for casual gatherings or indulgent snacks.
- Prep Time: 10 minutes
- Cook Time: 15 minutes
- Total Time: 25 minutes
- Yield: 4 servings
- Category: Main Course
- Cuisine: American
Ingredients
- Sliced bread (preferably thick-cut, such as brioche or sourdough)
- Thinly sliced deli ham (e.g., honey ham, smoked ham, or Black Forest)
- Cheese (Swiss, cheddar, or mozzarella)
- Unsalted butter, melted
- Dijon mustard
- Mayonnaise
- Garlic powder (optional)
- Poppy seeds (optional)
Instructions
- Preheat your skillet or griddle over medium heat. If using an oven, preheat to 375°F (190°C).
- In a small mixing bowl, combine 4 tablespoons (56g) of melted butter, 1 teaspoon of Dijon mustard, and ½ teaspoon of garlic powder. Stir until well blended.
- Lay out your slices of bread on a clean surface. Spread a thin layer of mayonnaise on one side of each slice.
- Add a layer of deli ham (about 2-3 slices per sandwich) and top with a slice of cheese. Place another slice of bread on top, mayonnaise side down, to form a sandwich.
- Brush the butter mixture generously over the top of each sandwich. Sprinkle poppy seeds if desired.
- If using a skillet, place the sandwiches onto the hot surface. Cook for 2-3 minutes per side until the bread is golden brown and crispy, and the cheese has melted.
- If baking, arrange the sandwiches in a baking dish, cover with foil, and bake for 10 minutes. Remove the foil and bake for an additional 5 minutes to crisp up the tops.
- Once done, use a sharp knife to cut the sandwiches into smaller, easy-to-pull-apart sections. Serve warm and enjoy!
Notes
[‘Don’t skimp on the butter for a crispy exterior.’, ‘Choose quality cheese for a gooey texture.’, ‘Preheat your skillet for even cooking.’, ‘Avoid overloading the filling to prevent sogginess.’, ‘Let the sandwiches rest for 2-3 minutes after cooking for easier cutting.’]
Nutrition
- Serving Size: 1 sandwich
- Calories: 350
- Fat: 18
- Carbohydrates: 28
- Fiber: 2
- Protein: 15
Keywords: grilled cheese, ham and cheese, pull-apart sandwiches, comfort food, easy recipe


