The aroma of bubbling butter and brown sugar drifting through my kitchen is pure magic—like the sweetest promise that something wonderful is about to happen. That first whiff, warm and rich, instantly reminds me of cozy winter afternoons at grandma’s house, where homemade caramels were always a labor of love (and a little mischief if you snuck one before dinner). The first time I made these tender homemade caramels wrapped in wax paper, I thought, “This is exactly what nostalgia tastes like.” The kind of moment where you pause, take a deep breath, and just smile because you know you’re onto something truly special.
I remember being knee-high to a grasshopper, watching my grandma swirl the golden syrup in her heavy-bottomed pan, waiting for just the right shade of amber. She’d always let me help wrap the finished caramels in wax paper, twisting the ends like tiny candy presents. Those sticky fingers and giggles—honestly, I wish I’d discovered how easy it was to make caramels years ago. There’s something almost magical about transforming simple pantry staples into classic candy treats that make everyone’s eyes light up.
When I first tested this homemade caramels recipe (in the name of research, of course), my family couldn’t stop sneaking them off the cooling rack. Let’s face it: these caramels are dangerously easy to devour. They’re perfect for potlucks, sweet treats for your kids, or even just to brighten up your Pinterest candy board. You know what? They’ve become a staple for family gatherings, gifting, and those moments when you just need a taste of pure, nostalgic comfort. Get ready—because you’re going to want to bookmark this one!
Why You’ll Love This Recipe
If you’re searching for a homemade caramels recipe that’s easy, foolproof, and delivers every time, let me share why this is the one I make again and again. I’ve tested dozens over the years—from old church cookbooks to modern chef tips. These tender homemade caramels wrapped in wax paper are the result of all those kitchen experiments (and a few sticky mishaps). Here’s why you’ll fall for this recipe just like I did:
- Quick & Easy: Ready in about an hour, with just 15 minutes of hands-on stirring. Perfect for busy weeknights, last-minute gifts, or when a sweet craving strikes.
- Simple Ingredients: You probably have everything you need in your pantry already. No trips to specialty stores, no fancy gadgets.
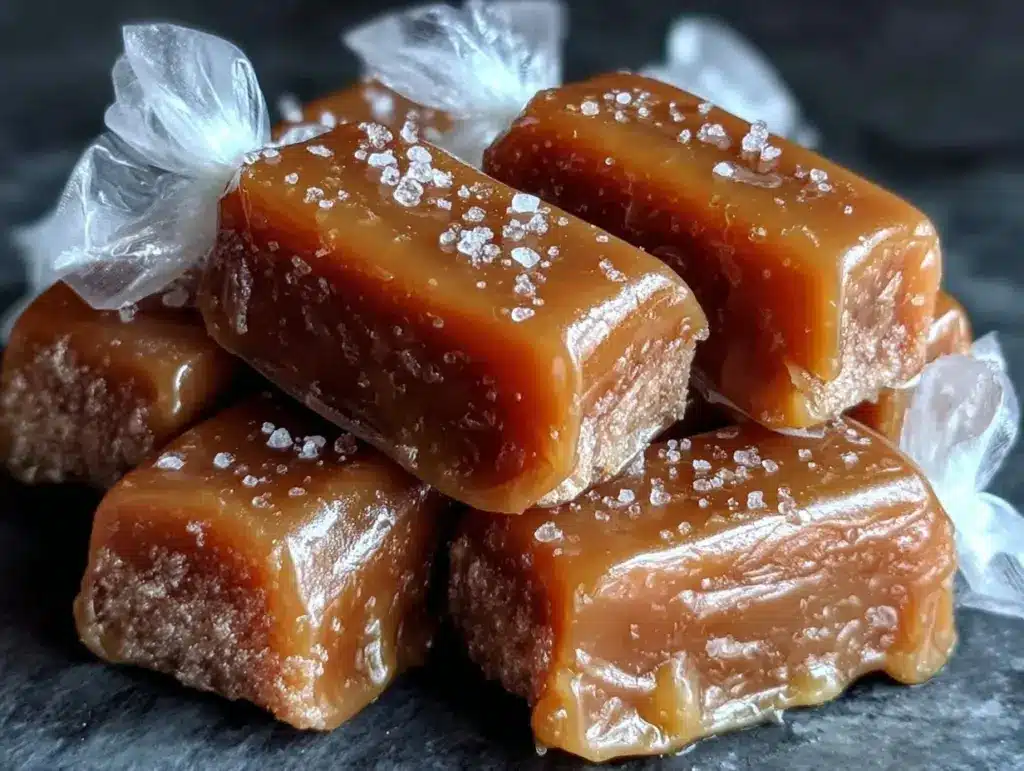
- Classic Comfort: Each caramel is soft, chewy, and perfectly buttery—just like the ones grandma used to make (but honestly, maybe even better).
- Crowd-Pleaser: These are always the first to disappear at parties, bake sales, and holiday gatherings. Kids beg for them in lunchboxes, and grown-ups sneak them from the candy jar.
- Perfectly Wrapped: The wax paper wrapping not only keeps them fresh, but makes each piece feel like a little gift. They’re ideal for gifting, party favors, or stashing in your purse for a midday pick-me-up.
What sets this homemade caramels recipe apart? It’s all about the gentle simmer and precise timing—no guesswork, just smooth, creamy perfection every time. I use a splash of vanilla and a pinch of flaky sea salt to give these caramels a flavor that’s deeper and richer than anything store-bought. Plus, wrapping them in wax paper keeps them tender and fresh for days (if they last that long).
This isn’t just good candy—it’s the kind that makes you close your eyes after the first bite. It’s comfort food, but with a touch of old-fashioned magic and a lot less fuss than you’d expect. Whether you’re impressing guests, sharing with friends, or treating yourself, these caramels turn any moment into something memorable. From my kitchen to yours, this classic candy treat is a keeper.
What Ingredients You Will Need
This homemade caramels recipe uses simple, wholesome ingredients to deliver bold flavor and that melt-in-your-mouth texture we all crave. Most of these are pantry staples, and you can easily tweak a few things if you’re out of something or want to experiment. Let’s break it down:
- For the caramel base:
- Unsalted butter (1 cup / 227g, cut into pieces) – Adds richness and that classic buttery flavor. I always reach for high-quality butter like Kerrygold for best results.
- Granulated sugar (2 cups / 400g) – Gives sweetness and structure.
- Light corn syrup (1 cup / 240ml) – Prevents crystallization and keeps the caramels chewy.
- Sweetened condensed milk (1 cup / 306g) – Creates a smooth, creamy texture. I use Eagle Brand for consistency.
- Heavy cream (1/2 cup / 120ml) – Boosts richness and softness. You can substitute half-and-half in a pinch.
- Vanilla extract (2 teaspoons / 10ml) – Rounds out the flavor. Use pure vanilla for best taste.
- Fine sea salt (1 teaspoon / 6g) – Balances sweetness and enhances flavor.
- For finishing/wrapping:
- Flaky sea salt (optional, for sprinkling) – Adds a crave-worthy salty crunch on top. Maldon is my go-to.
- Wax paper squares (about 50 pieces, 4×4 inches) – For wrapping each caramel. Parchment works too, but wax paper twists easier.
Ingredient tips and swaps:
- If you’re out of corn syrup, you can try golden syrup (flavor will be slightly different, but still yummy).
- For dairy-free, swap butter for vegan margarine and use coconut cream instead of heavy cream.
- If you like a deeper caramel flavor, swap half the granulated sugar for brown sugar—it’s a little less traditional, but oh-so delicious!
- In summer, toss in a handful of toasted nuts (pecans, walnuts) for extra crunch.
- Want gluten-free? Good news—this recipe is naturally gluten-free as written.
Honestly, the ingredient list is so simple, you’ll probably wonder why you haven’t made homemade caramels before. Just be sure to measure everything out before you start, because once the sugar’s bubbling, things move fast!
Equipment Needed
Making tender homemade caramels doesn’t require fancy gadgets, but a few key tools will make the process smoother (and safer!). Here’s what I use every time:
- Heavy-bottomed saucepan (at least 3-quart) – Helps distribute heat evenly and prevents scorching. I’ve tried thin pans, but trust me, it’s worth investing in a sturdy one.
- Wooden spoon or silicone spatula – Won’t react with caramel and makes stirring easy. Silicone spatulas are my favorite for scraping every last bit out.
- Candy thermometer – Essential for accurate temperature. I’ve used both analog and digital; just make sure it’s calibrated and easy to read. If you don’t have one, you can use the cold water “soft ball” test, but it’s trickier.
- 8×8-inch (20x20cm) baking pan – Lined with parchment or greased and lined with wax paper for easy removal. Glass pans work, but metal cools caramels faster.
- Sharp knife or bench scraper – For cutting caramels into neat squares. Plastic knives stick, so go with metal.
- Wax paper or parchment paper squares – For wrapping. If you’re short, you can cut your own from a roll.
If you don’t have a candy thermometer, I’ve gotten by with the “soft ball” method (drop a bit of caramel into cold water—it should form a soft, pliable ball). It’s old-school and works in a pinch, but for consistent results, a thermometer is your best friend. Oh, and don’t forget to soak your pan overnight for easy cleanup—I learned that the hard way!
Budget tip: Most of these tools are probably already in your kitchen. If you need a thermometer, basic models are under $10 at most stores.
Preparation Method

Ready to make classic homemade caramels? I’ll walk you through each step so you get perfect, tender caramels every time. (Don’t worry, I’ll share all my best troubleshooting tips along the way!)
- Prep your pan: Line an 8×8-inch (20x20cm) baking pan with parchment or wax paper, leaving an overhang for easy removal. Lightly grease with butter or nonstick spray.
- Gather ingredients: Measure out all ingredients and keep them close by. Once you start cooking, things move quickly!
- Melt the butter: In your heavy-bottomed saucepan, melt 1 cup (227g) unsalted butter over medium heat. Let it get foamy, but don’t let it brown.
- Add sugars and syrup: Stir in 2 cups (400g) granulated sugar, 1 cup (240ml) light corn syrup, and 1 cup (306g) sweetened condensed milk. Mix until combined and smooth.
- Pour in cream and salt: Add 1/2 cup (120ml) heavy cream and 1 teaspoon (6g) fine sea salt. Stir gently—don’t splash!
- Cook the caramel: Attach your candy thermometer to the side of the pan. Bring mixture to a gentle boil over medium heat, stirring constantly with a wooden spoon or silicone spatula. (It’ll bubble and thicken, and the color will deepen to a gorgeous golden tan—watch for these cues.)
- Monitor temperature: Keep stirring as caramel cooks. You’re aiming for 240°F (115°C)—the “soft ball” stage. This usually takes 15-20 minutes, depending on your stove. If you notice any burning or dark spots, lower the heat slightly and keep stirring. Tip: If the caramel rises too quickly or splatters, reduce heat and stir more slowly.
- Test for doneness: When the thermometer hits 240°F (115°C), remove pan from heat immediately. If you don’t have a thermometer, drop a small spoonful into cold water—it should form a soft ball you can squish between your fingers.
- Add vanilla: Quickly stir in 2 teaspoons (10ml) vanilla extract. The mixture will bubble up a bit—don’t worry, just stir until incorporated.
- Pour and cool: Pour hot caramel into prepared pan, tilting to spread evenly. (Careful—it’s very hot!) If you like, sprinkle flaky sea salt on top for extra flavor.
- Let set: Cool at room temperature for 2-3 hours, or until firm but still pliable. If impatient, pop it in the fridge for an hour—just don’t let it get too hard.
- Cut and wrap: Lift caramel out of pan using paper overhang. Using a sharp knife or bench scraper, cut into 1-inch (2.5cm) squares. Wrap each piece in wax paper, twisting ends to seal.
Troubleshooting tips:
- If caramels are too soft, they may not have reached the right temperature—try refrigerating to firm up.
- Too hard? They likely went above 245°F (118°C). Lower heat next time and watch thermometer closely.
- If mixture separates, keep stirring and don’t panic—it usually comes back together as it heats.
Personal tip: I set a timer for 3-minute stirring intervals just to keep myself on track. And don’t forget to use a sturdy spoon—plastic ones can melt! The smell as it cooks is your best indicator; when it’s rich and caramel-like, you’re nearly there.
Cooking Tips & Techniques
Getting perfect homemade caramels is all about technique. I’ve had my fair share of sticky pans and rock-hard candy—so let me share what really works (and what doesn’t):
- Stir constantly: Don’t walk away! The mixture can scorch or separate quickly. A steady, gentle stir is key.
- Watch the thermometer: Caramels are fussy about temperature. I always double-check my thermometer calibration with boiling water before starting. If you’re unsure, use the cold water “soft ball” test for backup.
- Use fresh ingredients: Old butter or stale cream can affect taste and texture. Fresh is best—trust me, I learned the hard way when my caramels tasted “off.”
- Don’t overcook: Going past 240°F (115°C) turns caramels from tender to tooth-breaking in seconds. I pull mine off heat at exactly 240°F.
- Multitasking tip: While the caramel is cooking, cut your wax paper squares and clear your workspace. You’ll need to move quickly once the caramel is set.
- Consistency is king: Use the same pan and thermometer each time for best results. My grandma swore by her old copper pot—mine’s stainless steel, but the principle holds.
Common mistake: Not lining the pan well enough. If you skip the parchment/wax paper, you’ll be scraping caramel out with a spoon (not pretty). Also, don’t skimp on the wrapping—unwrapped caramels stick together and turn into one big blob.
Personal lesson: One time I let the caramel go while answering the door—came back to a pan of caramel “bricks.” So keep your eye on the prize and don’t get distracted. With a bit of care, you’ll get perfectly chewy, tender homemade caramels every single time.
Variations & Adaptations
One of the best things about classic homemade caramels is how easy they are to tweak. Here are some of my favorite ways to make them your own:
- Salted Caramels: Sprinkle flaky sea salt on top before wrapping. The salty crunch is addictive!
- Nutty Caramels: Stir in 1/2 cup (60g) toasted chopped pecans, walnuts, or almonds before pouring into the pan. Adds great texture and flavor.
- Chocolate-Dipped: After cutting, dip half of each caramel square in melted dark chocolate and let set on parchment. Perfect for holiday platters!
- Flavor Swaps: Try swapping vanilla for almond or maple extract for a fun twist.
- Dairy-Free: Use vegan butter and coconut cream. The caramels will have a subtle coconut flavor, which is honestly delicious.
- Seasonal: In fall, add 1 teaspoon cinnamon and a pinch of nutmeg for autumn spice caramels.
If you prefer a softer caramel (great for spreading on apples), cook to just 235°F (113°C) and skip the wrapping. For firmer, chewy caramels, stick with 240°F (115°C).
I once made these with a splash of bourbon stirred in with the vanilla—wow, what a grown-up treat! They disappeared at our last friendsgiving. Whether you’re adapting for allergies or just looking to change things up, homemade caramels are super forgiving. Get creative!
Serving & Storage Suggestions
For the ultimate candy experience, serve these homemade caramels at room temperature so they’re perfectly soft and chewy. I love stacking them in a pretty candy dish (makes your kitchen look Pinterest-worthy, I promise) or packaging them in little boxes for gifts.
Pairing ideas: Caramels go beautifully with coffee, hot chocolate, or even a glass of milk. They make a sweet finish to a holiday meal or a delightful addition to your dessert tray.
Storage tips:
- Keep wrapped caramels in an airtight container at room temperature for up to 2 weeks.
- For longer storage, refrigerate for up to 1 month (bring to room temp before serving—they’ll soften right up).
- Freeze for up to 3 months. Thaw overnight in the fridge, then let sit at room temp before eating.
Reheating isn’t usually needed, but if your caramels get too firm, a few seconds in the microwave softens them up. Over time, the flavors meld and deepen—day-old caramels are even more flavorful (if you can wait that long!).
Nutritional Information & Benefits
Each piece of homemade caramel (about 20g) contains roughly:
- Calories: 70
- Fat: 3g
- Carbohydrates: 11g
- Sugar: 10g
- Protein: 0.5g
Health benefits: The key ingredients—cream and butter—provide a bit of calcium and vitamin A. Plus, making candy at home means you control the ingredients (no preservatives or artificial flavors). This recipe is naturally gluten-free and can be adapted for dairy-free diets. Just watch for allergens if using nuts or swapping dairy.
Honestly, homemade caramels are a treat, not a health food—but sharing sweets with family and friends is good for the soul. I always say, a little indulgence now and then is part of a happy, balanced life!
Conclusion
If you’ve ever wanted to make classic candy at home, this homemade caramels recipe is about as rewarding as it gets. It’s easy, reliable, and yields caramels that taste like pure, buttery nostalgia. The wax paper wrapping adds a sweet, old-fashioned touch that’s as fun to make as it is to share.
Don’t be afraid to customize these caramels with your favorite flavors or add-ins. That’s half the fun—experimenting and making the recipe your own. I love this recipe because it brings back memories, makes for perfect gifts, and (let’s be honest) is dangerously easy to snack on.
Try it out, leave a comment below, or tag me with your homemade caramel creations! I’d love to hear your twists and tips. Here’s to sweet moments, sticky fingers, and treats that make you smile.
FAQs
How do I know when my caramels are done cooking?
Once the mixture reaches 240°F (115°C) on a candy thermometer, it’s ready. If you don’t have a thermometer, use the “soft ball” test—drop a bit into cold water and it should form a soft, squishable ball.
Can I make homemade caramels without corn syrup?
Yes! Substitute golden syrup or honey, though the flavor and texture will be a bit different. Corn syrup helps prevent crystallization, making caramels smoother.
Why did my caramels turn out hard?
Most likely, the mixture overcooked past 245°F (118°C). Try pulling it off the heat earlier next time. Refrigeration can help soften slightly hard caramels.
How do I wrap caramels in wax paper?
Cut wax paper into 4×4-inch squares. Place a caramel in the center, fold over, and twist the ends like a candy wrapper. It keeps them fresh and prevents sticking.
Can I add nuts or chocolate to this recipe?
Absolutely! Stir in chopped nuts before pouring into the pan, or dip cooled caramels in melted chocolate for an extra-special treat.
Pin This Recipe!
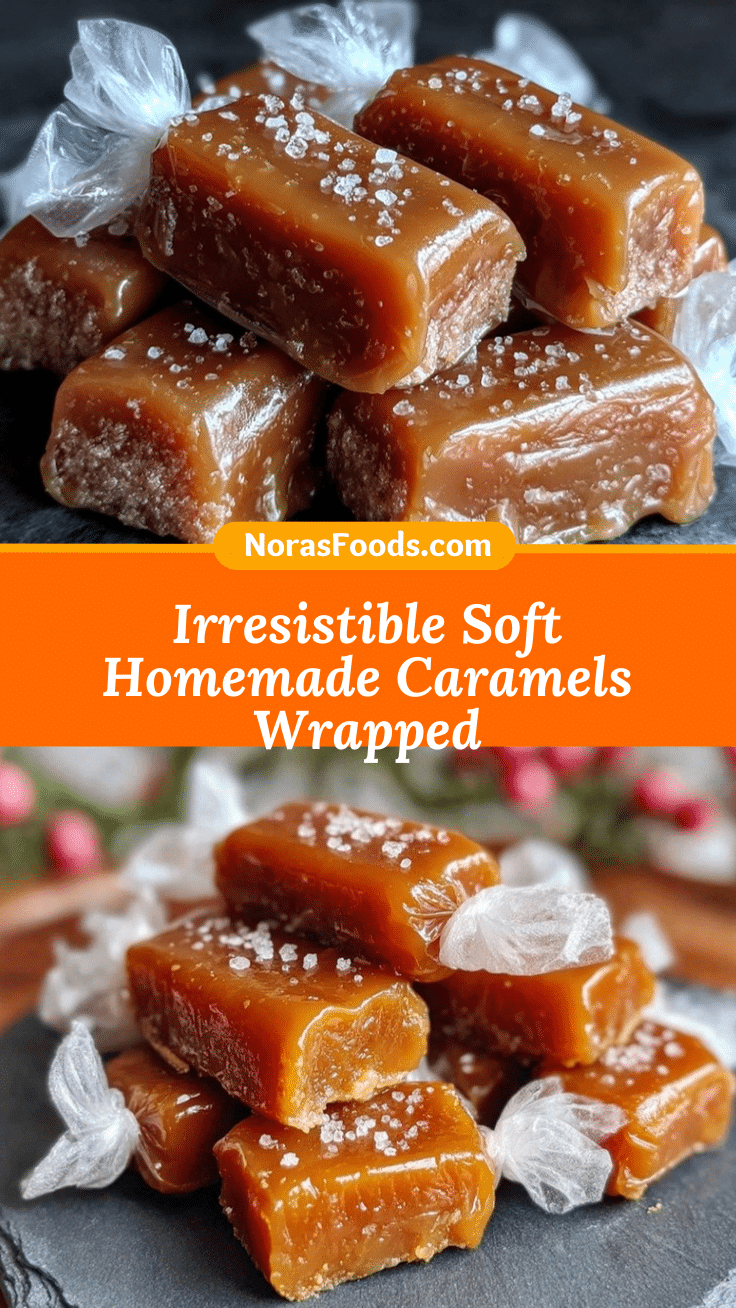
Homemade Caramels Recipe – Easy Classic Candy Wrapped Perfectly
These classic homemade caramels are soft, chewy, and buttery, wrapped in wax paper for a nostalgic treat. Perfect for gifting, parties, or a sweet snack, they come together with simple pantry ingredients and a foolproof method.
- Prep Time: 15 minutes
- Cook Time: 20 minutes
- Total Time: 2 hours 35 minutes
- Yield: 50 caramels 1x
- Category: Dessert
- Cuisine: American
Ingredients
- 1 cup unsalted butter (227g), cut into pieces
- 2 cups granulated sugar (400g)
- 1 cup light corn syrup (240ml)
- 1 cup sweetened condensed milk (306g)
- 1/2 cup heavy cream (120ml)
- 2 teaspoons vanilla extract (10ml)
- 1 teaspoon fine sea salt (6g)
- Flaky sea salt (optional, for sprinkling)
- Wax paper squares (about 50 pieces, 4×4 inches) for wrapping
Instructions
- Line an 8×8-inch baking pan with parchment or wax paper, leaving an overhang for easy removal. Lightly grease with butter or nonstick spray.
- Measure out all ingredients and keep them close by.
- In a heavy-bottomed saucepan, melt butter over medium heat until foamy but not browned.
- Stir in granulated sugar, light corn syrup, and sweetened condensed milk. Mix until combined and smooth.
- Add heavy cream and fine sea salt. Stir gently.
- Attach a candy thermometer to the pan. Bring mixture to a gentle boil over medium heat, stirring constantly.
- Continue stirring and cook until the mixture reaches 240°F (115°C) on the thermometer (soft ball stage), about 15-20 minutes.
- Remove pan from heat immediately. Stir in vanilla extract.
- Pour hot caramel into prepared pan, tilting to spread evenly. Sprinkle flaky sea salt on top if desired.
- Cool at room temperature for 2-3 hours, or until firm but still pliable. Refrigerate for 1 hour if needed.
- Lift caramel out of pan using paper overhang. Cut into 1-inch squares with a sharp knife or bench scraper.
- Wrap each piece in wax paper, twisting ends to seal.
Notes
Stir constantly to prevent scorching. Use a candy thermometer for best results; the cold water ‘soft ball’ test works in a pinch. For variations, add nuts, dip in chocolate, or sprinkle with flaky sea salt. Store wrapped caramels in an airtight container at room temperature for up to 2 weeks, refrigerate for 1 month, or freeze for 3 months. This recipe is naturally gluten-free and can be adapted for dairy-free diets.
Nutrition
- Serving Size: 1 caramel (about 20g
- Calories: 70
- Sugar: 10
- Sodium: 30
- Fat: 3
- Saturated Fat: 2
- Carbohydrates: 11
- Protein: 0.5
Keywords: caramels, homemade candy, classic caramel, soft caramels, chewy caramels, holiday candy, gift candy, wax paper wrapped, easy caramel recipe, gluten-free candy


