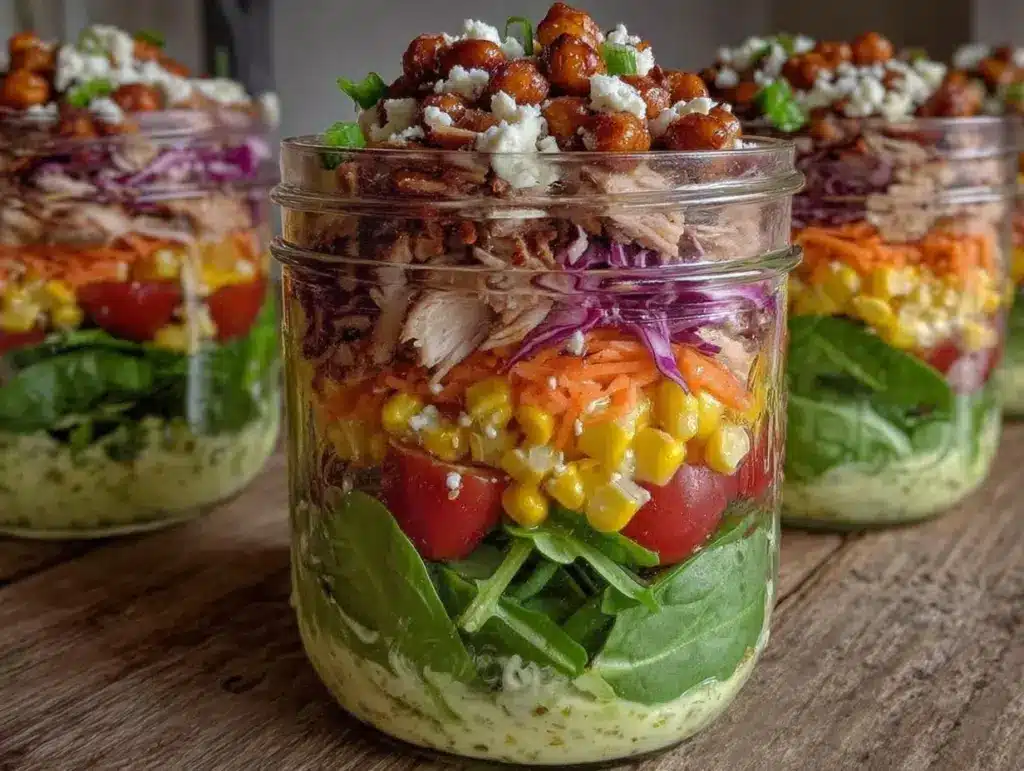
Picture this: you crack open a perfectly chilled mason jar and watch as layers of crisp greens, juicy cherry tomatoes, and tangy vinaigrette tumble out, looking just as vibrant as the day you packed them. The first time I tried making Fresh Mason Jar Salads for healthy meal prep, I was skeptical (it seemed almost too easy). But as soon as I popped the lid and forked up a bite, I was instantly hooked—the crunch, the flavors, the convenience! It’s the kind of moment where you pause, take a deep breath, and just smile because you know you’re onto something truly special.
Years ago, when I was knee-high to a grasshopper, my grandma used to pack salad in old jam jars for family picnics. She’d say, “A salad in a jar keeps the crunch in your lunch.” I rediscovered this idea on a rainy weekend, scrolling Pinterest for healthy meal prep inspiration. It’s honestly the best thing I wish I’d known about back in my college days—would’ve saved me from so many limp, sad desk salads!
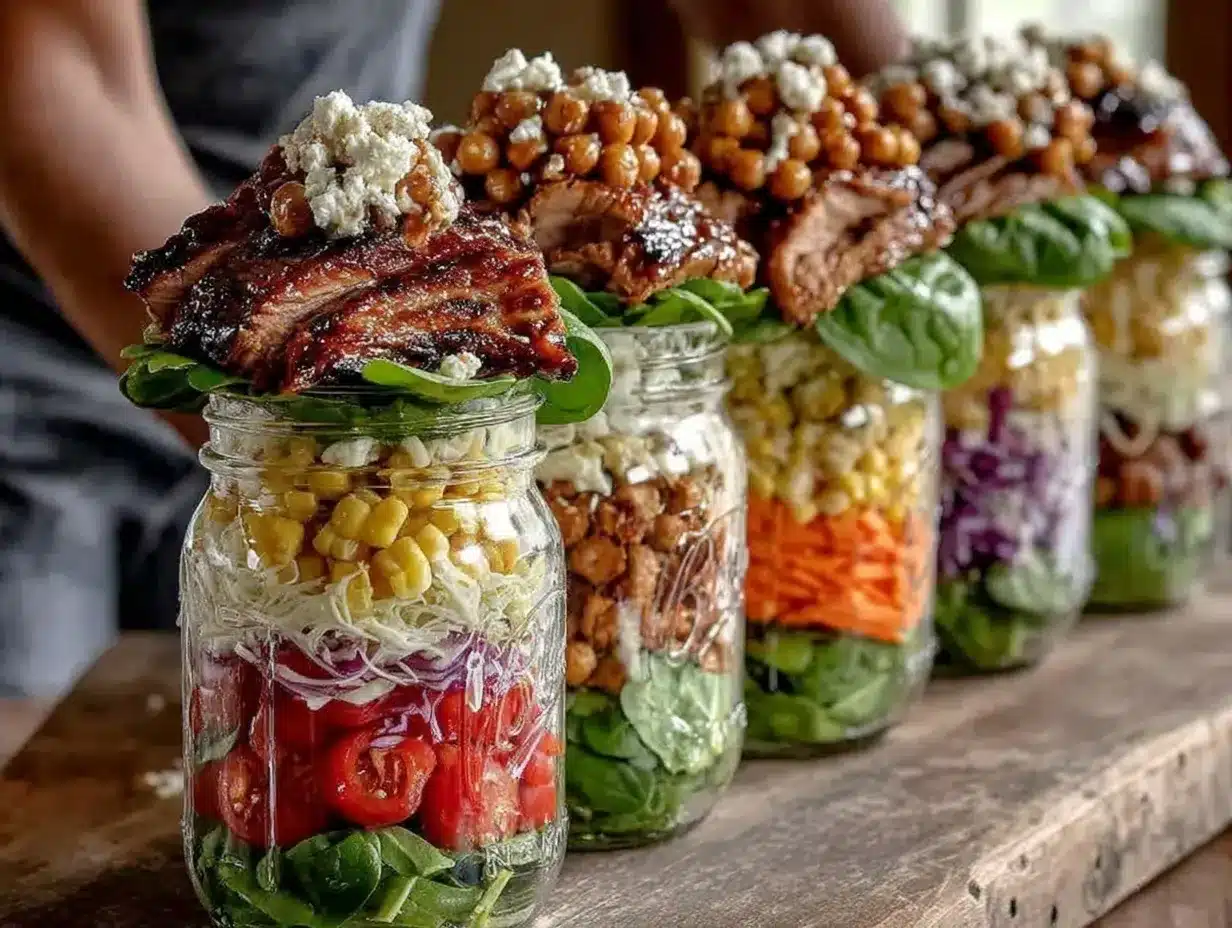
My family couldn’t stop sneaking them off the fridge shelf (and I can’t really blame them). My kids love picking their favorite ingredients, and my partner swears these jar salads make weekday lunches feel like a special treat. Let’s face it, there’s something downright comforting about seeing a rainbow of veggies stacked up in a glass jar, ready to go. These Fresh Mason Jar Salads are dangerously easy, bursting with pure, nostalgic comfort, and the perfect fix for anyone who wants healthy meal prep without sacrificing flavor or fun.
I’ve tested the method every which way, in the name of research, of course—even for picnic potlucks, road trips, and last-minute guests. Now, it’s a staple for family gatherings, gifting, and brightening up my Pinterest board. It feels like a warm hug in a jar, and you’re going to want to bookmark this one for sure!
Why You’ll Love This Recipe
Let me tell you, after years of kitchen experiments and more mason jars than I care to count, these Fresh Mason Jar Salads are my go-to for healthy meal prep. They’re not just easy—they’re life-saving on busy weeks when you’re tempted to grab takeout. Here’s why I keep coming back to this recipe (and why you’ll love it too):
- Quick & Easy: You can prep a week’s worth of salads in under 30 minutes. No fuss, no mess—just stack, seal, and chill.
- Simple Ingredients: No fancy grocery trips required. You probably have most things in your pantry or fridge right now.
- Perfect for Any Occasion: Great for work lunches, school snacks, road trips, potlucks, or even as a light dinner. Honestly, I’ve even packed them for movie nights!
- Crowd-Pleaser: My kids (who are suspicious of anything green) ask for these by name. Adults love the freshness and crunch. You know what? Even picky eaters can customize their jars.
- Unbelievably Delicious: The layering technique keeps everything crisp. Mixing at the last minute gives you that “just made” taste every time.
What makes these Fresh Mason Jar Salads different? It’s all about layering—dressing at the bottom, hearty veggies next, then proteins, grains, and finally delicate greens at the top. This keeps everything fresh and prevents sogginess (I learned this after one too many limp salads). Plus, you can swap ingredients to fit any diet—vegan, gluten-free, low-carb, you name it. It’s not just a salad; it’s a fresh, colorful, portable meal that feels like you’re treating yourself every single day.
This recipe isn’t just good—it’s the kind that makes you close your eyes after the first bite and think, “Now that’s what lunch should taste like.” It’s comfort food reimagined for busy lives, but with all the soul-soothing satisfaction you crave. Perfect for impressing guests with zero stress, or just turning lunch into something you’ll actually look forward to. Try it once and you’ll see why I call these jars little miracles for healthy meal prep!
What Ingredients You Will Need
This recipe uses simple, wholesome ingredients to deliver bold flavor and satisfying texture without the fuss. Most are pantry staples or easy to swap for whatever you have on hand. Here’s my favorite combination for classic Fresh Mason Jar Salads, but you can mix and match to suit your taste or season.
- For the Dressing (Bottom Layer):
- 3 tbsp olive oil (I love California Olive Ranch)
- 2 tbsp apple cider vinegar or balsamic vinegar
- 1 tsp honey or maple syrup (for a touch of sweetness)
- ½ tsp Dijon mustard (adds tang)
- Salt & pepper, to taste
- Hearty Veggies (Second Layer):
- ½ cup chopped cucumber (English cucumber stays crisp)
- ½ cup cherry tomatoes, halved
- ¼ cup shredded carrots
- ¼ cup bell pepper, diced (red or yellow for color)
- ¼ cup radishes, sliced thin (optional but adds crunch)
- Proteins & Grains (Third Layer):
- ½ cup cooked chicken breast, chopped (or chickpeas for plant-based)
- ¼ cup cooked quinoa or brown rice
- ¼ cup feta cheese, crumbled (swap with vegan feta if needed)
- 2 tbsp nuts or seeds (almonds, sunflower seeds, or pumpkin seeds)
- Leafy Greens (Top Layer):
- 1 cup baby spinach or mixed greens
- ½ cup arugula (for peppery flavor)
- Fresh herbs, like parsley or basil (optional, but makes it pop)
- Optional Add-ins:
- ½ avocado, diced (add just before eating)
- ¼ cup roasted chickpeas for crunch
- Seasonal fruits, like berries or apple slices (especially great in summer!)
If you’re gluten-free, swap grains with cooked millet or cauliflower rice. Dairy-free? Use vegan cheese or skip it altogether. For meal prep, I use canned chickpeas (drained and rinsed) or rotisserie chicken to save time. Honestly, you can riff on these jars any way you like—just keep the dressing at the bottom and greens at the top for best results. If you’re prepping for a whole week, buy veggies that stay crisp, like carrots and peppers, and wash greens right before packing so they don’t wilt. A little planning goes a long way, trust me!
Equipment Needed
- Mason Jars (16 oz/475 ml): Wide-mouth jars work best for layering and eating. I prefer Ball or Kerr jars—they’re sturdy and affordable.
- Cutting Board & Sharp Knife: For chopping veggies and proteins. If you’re prepping a lot, a mandoline slicer is handy for thin slices (just watch your fingers—I learned that the hard way!).
- Small Mixing Bowl: For whisking up the dressing. If you’re in a hurry, shake the dressing in a jar with a tight lid.
- Measuring Cups & Spoons: For accuracy—makes meal prep consistent every time.
- Salad Spinner: Optional but keeps greens dry and crispy. If you don’t have one, just pat greens dry with paper towels.
- Storage Containers: For extra toppings or leftovers. Any airtight container will do.
If you’re on a budget, you can reuse old jam or pasta sauce jars—just scrub them well and check for chips. Wide-mouth jars are easier to fill and clean, but the regular kind works in a pinch. I’ve tried plastic containers, but glass keeps everything fresher and is better for the environment (plus, it looks prettier on your fridge shelf!).
Maintenance tip: Wash jars with hot soapy water and let them air dry fully. If you use them for dressings, a bottle brush helps with the corners. Honestly, these jars last for ages if you treat them right!
Preparation Method
- Prepare Your Ingredients:
Wash and dry all vegetables thoroughly. Chop cucumbers, tomatoes, peppers, and carrots into bite-sized pieces. Cook your protein (grill or bake chicken, or rinse canned chickpeas). Cook grains like quinoa or rice and allow them to cool. Crumble feta cheese and chop nuts or seeds if using. Pat greens dry—this is crucial for crisp salads! - Mix the Dressing:
In a small bowl, whisk together olive oil, vinegar, honey, Dijon mustard, and a pinch of salt and pepper. Taste and adjust as needed. If you’re making multiple jars, double or triple the recipe. Pour about 2-3 tablespoons of dressing into the bottom of each mason jar (the bottom layer keeps greens from getting soggy). - Add Hearty Veggies:
Layer chopped cucumbers, tomatoes, carrots, peppers, and radishes directly onto the dressing. Press lightly to compact, but don’t crush. These veggies act as a barrier and will absorb some flavor from the dressing. Tip: If using juicy tomatoes, place them right above the dressing for extra flavor. - Layer Proteins & Grains:
Add your choice of protein (chicken or chickpeas), then grains (quinoa or rice), followed by cheese and nuts/seeds. This layer adds substance and keeps the salad filling. If you’re prepping for the week, mix up your proteins for variety. Personal tip: If you love crunch, add roasted chickpeas now—they hold up well in the jar. - Top with Leafy Greens:
Finish with baby spinach, arugula, and any fresh herbs. Pack lightly so greens aren’t squished—they need room to breathe. Seal jars tightly with lids. Refrigerate for up to 5 days. - Serving:
When ready to eat, shake the jar to loosen ingredients (or tip upside down for a few seconds). Pour into a bowl or eat straight from the jar, mixing well so the dressing coats everything. If you want extra crunch, add sliced avocado or roasted chickpeas just before serving.
Troubleshooting Tips: If the dressing separates, give the jar a good shake. If greens wilt, swap for heartier greens like kale or romaine. For extra color, add a handful of berries or seeds. If jars are hard to open, use a silicone grip or wrap a rubber band around the lid for traction (learned that trick from my grandma!). Efficiency hack: Pre-chop all veggies and proteins, then set up a salad assembly line—makes batch prep a breeze!
Cooking Tips & Techniques
Over the years, I’ve tested every trick to keep Fresh Mason Jar Salads crisp and tasty. Here are my top tips (learned from a few messy, soggy salads along the way):
- Layering Matters: Always start with dressing at the bottom, followed by sturdy veggies, proteins, grains, and greens on top. This keeps everything fresh and stops delicate greens from wilting.
- Dry Ingredients Thoroughly: Moisture is the enemy of crisp salads. Use a salad spinner or paper towels to dry greens and veggies before packing.
- Cut Ingredients Evenly: Uniform pieces mix better and make each bite balanced. If you want a fancy look for Pinterest, stack colors for a rainbow effect!
- Don’t Overpack: Leave a little space at the top—jamming jars too full compresses greens and leads to sogginess.
- Use Glass Jars: I’ve tried plastic, but glass keeps flavors pure and ingredients crisp. Plus, it’s reusable.
- Timing Is Everything: If you’re making salads for the week, pack avocados and other soft ingredients separately. Add them just before eating for best texture.
- Multitasking: Set up a veggie chopping station and prep multiple jars at once. It’s faster and less messy than making one at a time.
- Consistency Hack: Measure out dressing and grains with a small measuring cup for each jar. Makes meal prep predictable and easy to scale up.
I’ve botched a few jars by ignoring these steps—especially by packing wet greens or skipping the layering order. Trust me, a little patience and attention to detail go a long way for perfect mason jar salads every time!
Variations & Adaptations
The beauty of Fresh Mason Jar Salads is how easy they are to customize for any taste, diet, or season. Here are a few of my favorite twists:
- Dietary Adaptations:
- Vegan: Skip cheese, add roasted chickpeas, and use a maple vinaigrette. Try tofu for protein.
- Gluten-Free: Use quinoa, millet, or cauliflower rice instead of grains.
- Low-Carb: Load up on non-starchy veggies and swap grains for extra greens.
- Seasonal Flavors:
- Summer: Add strawberries, blueberries, or grilled corn. Swap dressing for a simple lemon vinaigrette.
- Fall: Use roasted sweet potatoes, apples, and pecans. Try a honey-mustard dressing.
- Cooking Methods:
- Grilled Proteins: Add grilled chicken, shrimp, or tofu for smoky flavor.
- Oven-Roasted Veggies: Layer in roasted cauliflower, carrots, or squash for extra depth.
- Personal Favorite: I love a Mediterranean twist—chickpeas, cucumber, feta, olives, and a lemon-oregano dressing. My family goes wild for it, and it’s perfect for summer picnics!
- Allergen Substitutions: Use sunflower seeds instead of nuts for nut-free jars. Skip cheese for dairy-free. Always check labels on store-bought dressings for hidden allergens.
Don’t be afraid to experiment. If you’re craving something spicy, add jalapeños or a chipotle dressing. For picky eaters, let everyone layer their own jars. Honestly, the sky’s the limit with these salads!
Serving & Storage Suggestions
For best results, serve Fresh Mason Jar Salads chilled. I love popping a jar into my lunch bag with an ice pack—keeps everything fresh until noon (and makes you the envy of your coworkers!).
Presentation matters, especially if you’re sharing on Pinterest: tip the jar upside down onto a plate or bowl, letting the dressing coat everything. Garnish with extra herbs, seeds, or a squeeze of lemon for a fresh look.
Complementary dishes: Pair with whole grain crackers, a cup of soup, or grilled chicken for a more filling meal. For beverages, try iced tea or sparkling water with citrus.
Storage: Store sealed jars in the fridge for up to 5 days. Greens stay crisp, and veggies keep their crunch. For best texture, add soft ingredients (avocado, berries) just before serving. If you’re freezing grains or proteins, keep them separate and mix in when ready.
Reheating: Not needed for salads, but if you add cooked grains or proteins, microwave them separately before adding to your salad.
Flavor notes: The flavors actually get better after a day—the dressing soaks into veggies for a deeper taste. Just don’t wait too long, or the greens will start to droop. If you notice condensation inside the jar, dry greens more thoroughly next time!
Nutritional Information & Benefits
Each Fresh Mason Jar Salad (about 16 oz/475 ml) contains roughly:
- Calories: 350-400
- Protein: 15-20g
- Carbs: 30-40g
- Fat: 15-20g
- Fiber: 8-10g
The health benefits are pretty fantastic—loads of vitamins from the veggies, protein for fullness, and healthy fats from olive oil and nuts. It’s gluten-free if you use quinoa or cauliflower rice, and easily dairy-free or vegan with a few swaps.
Potential allergens: dairy (feta), nuts/seeds. Always check ingredients if you have sensitivities. From a personal wellness perspective, these salads help me stay on track, eat more veggies, and feel satisfied all afternoon (no 3pm snack attacks!).
Conclusion
If you’ve ever wished healthy meal prep could be as easy as grab-and-go, these Fresh Mason Jar Salads are the answer. They’re crisp, colorful, and crazy convenient—plus, they make eating veggies fun again. Customize them for your family, your schedule, or your cravings. Honestly, this recipe has saved me from so many boring lunches and last-minute dinner scrambles.
I love these salads because they fit any occasion, any diet, and any mood. They’re a staple in my kitchen, and I bet they’ll become one in yours too. If you try them, let me know your favorite combos—share your jars on Pinterest, drop a comment below, or send me your creative twists!
Here’s to easy, healthy meal prep and happier lunches ahead. Go ahead, give these Fresh Mason Jar Salads a whirl… you’ll thank yourself later!
FAQs
How long do Fresh Mason Jar Salads stay fresh in the fridge?
If packed correctly (dressing at the bottom, greens at the top), they’ll stay crisp for up to 5 days. Just make sure your greens are dry before layering.
Can I use plastic containers instead of mason jars?
Yes, you can use any airtight container. Glass jars keep ingredients fresher and don’t absorb flavors, but plastic works in a pinch.
What’s the best way to keep avocados fresh in mason jar salads?
Add avocado right before eating, or toss slices in lemon juice before packing them separately. This prevents browning and mushiness.
Can I make these salads vegan or gluten-free?
Absolutely! Use chickpeas or tofu for protein, and swap grains for gluten-free options like quinoa or cauliflower rice. Skip cheese or use vegan cheese for dairy-free jars.
What’s the secret to keeping salads from getting soggy?
Layering is key: dressing on the bottom, then sturdy veggies, followed by proteins/grains, and greens at the top. Dry ingredients thoroughly and don’t overpack jars.
Pin This Recipe!
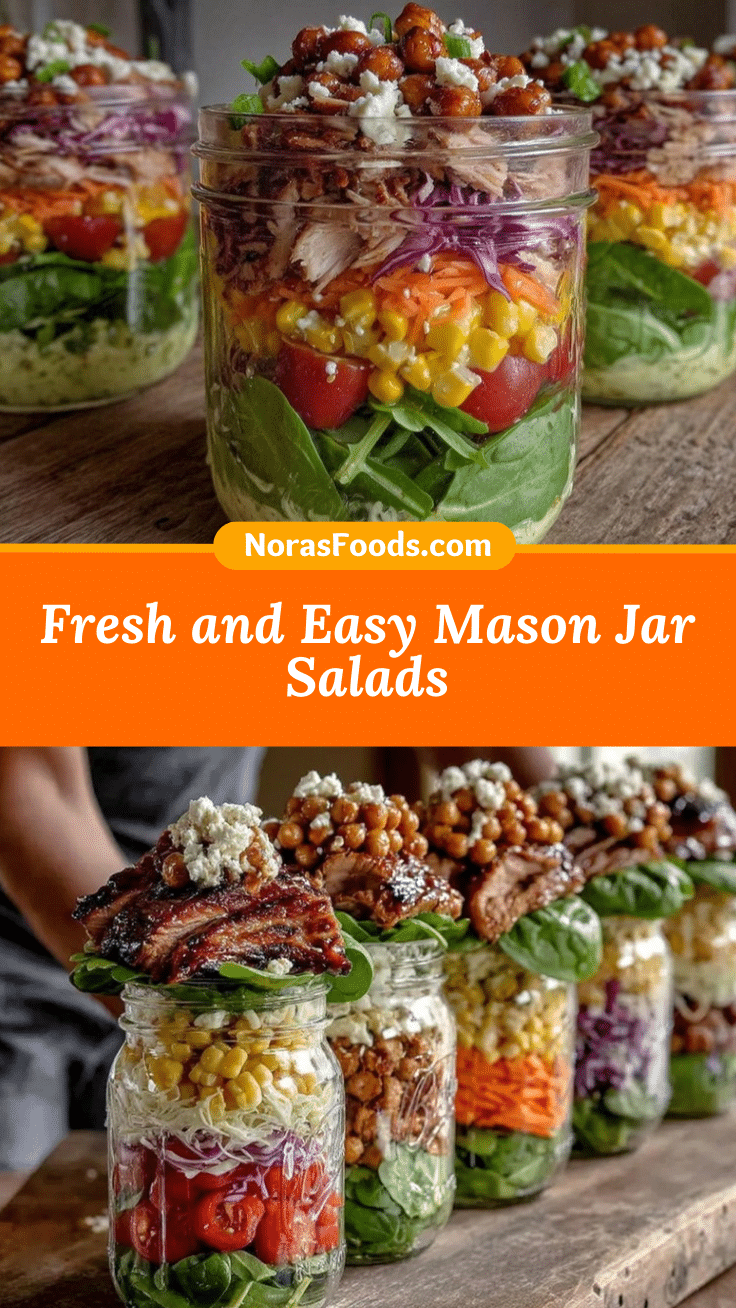
Fresh Mason Jar Salads: Easy Healthy Meal Prep in 5 Steps
These Fresh Mason Jar Salads are a vibrant, customizable, and convenient way to prep healthy meals for the week. Layered for maximum freshness, they stay crisp and delicious for days, making lunch or dinner a breeze.
- Prep Time: 20 minutes
- Cook Time: 10 minutes
- Total Time: 30 minutes
- Yield: 4 servings 1x
- Category: Salad
- Cuisine: American
Ingredients
- 3 tbsp olive oil
- 2 tbsp apple cider vinegar or balsamic vinegar
- 1 tsp honey or maple syrup
- 1/2 tsp Dijon mustard
- Salt & pepper, to taste
- 1/2 cup chopped cucumber
- 1/2 cup cherry tomatoes, halved
- 1/4 cup shredded carrots
- 1/4 cup bell pepper, diced
- 1/4 cup radishes, sliced thin (optional)
- 1/2 cup cooked chicken breast, chopped (or chickpeas for plant-based)
- 1/4 cup cooked quinoa or brown rice
- 1/4 cup feta cheese, crumbled (or vegan feta)
- 2 tbsp nuts or seeds (almonds, sunflower seeds, or pumpkin seeds)
- 1 cup baby spinach or mixed greens
- 1/2 cup arugula
- Fresh herbs, like parsley or basil (optional)
- 1/2 avocado, diced (optional, add before eating)
- 1/4 cup roasted chickpeas (optional)
- Seasonal fruits, like berries or apple slices (optional)
Instructions
- Wash and dry all vegetables thoroughly. Chop cucumbers, tomatoes, peppers, and carrots into bite-sized pieces. Cook your protein (grill or bake chicken, or rinse canned chickpeas). Cook grains like quinoa or rice and allow them to cool. Crumble feta cheese and chop nuts or seeds if using. Pat greens dry.
- In a small bowl, whisk together olive oil, vinegar, honey, Dijon mustard, and a pinch of salt and pepper. Taste and adjust as needed. Pour about 2-3 tablespoons of dressing into the bottom of each mason jar.
- Layer chopped cucumbers, tomatoes, carrots, peppers, and radishes directly onto the dressing. Press lightly to compact, but don’t crush.
- Add your choice of protein (chicken or chickpeas), then grains (quinoa or rice), followed by cheese and nuts/seeds.
- Finish with baby spinach, arugula, and any fresh herbs. Pack lightly so greens aren’t squished. Seal jars tightly with lids. Refrigerate for up to 5 days.
- When ready to eat, shake the jar to loosen ingredients or tip upside down for a few seconds. Pour into a bowl or eat straight from the jar, mixing well so the dressing coats everything. Add avocado or roasted chickpeas just before serving if desired.
Notes
Layering is key to keeping salads crisp: dressing at the bottom, sturdy veggies next, proteins/grains, and greens on top. Dry all ingredients thoroughly before packing. For best texture, add avocado or soft fruits just before serving. Customize with seasonal veggies, proteins, or grains. Store in fridge up to 5 days.
Nutrition
- Serving Size: 1 mason jar salad (1
- Calories: 375
- Sugar: 8
- Sodium: 550
- Fat: 17
- Saturated Fat: 4
- Carbohydrates: 35
- Fiber: 9
- Protein: 17
Keywords: mason jar salad, healthy meal prep, salad in a jar, portable lunch, easy salad, gluten-free, vegetarian, vegan option, meal prep salad, picnic salad


