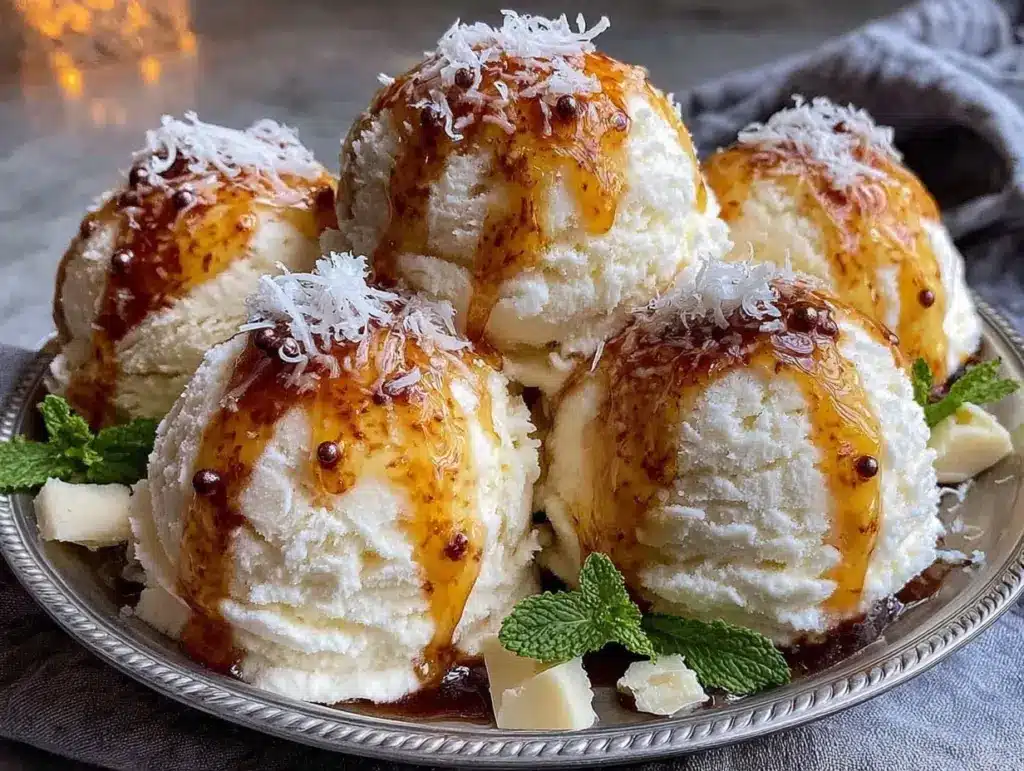
Let me set the scene for you: the world outside my window is blanketed with fresh, powdery snow, and the kitchen fills with the creamy aroma of vanilla bean as I stir together one of winter’s simplest pleasures—fluffy homemade snow ice cream. The first time I scooped icy white clouds into bowls, I was knee-high to a grasshopper and totally convinced this was magic. The snow glistened like tiny diamonds, and the ice cream melted on my tongue in a way store-bought treats never could. It’s the kind of moment where you pause, take a deep breath, and just smile because you know you’re onto something truly special.
Years ago, my grandma would call us in from sledding, announcing, “It’s snow ice cream time!” Her recipe was pure, nostalgic comfort—a sweet treat reserved for the best snowy days. I remember sneaking extra spoonfuls when I thought no one was looking (spoiler: everyone was looking, and nobody minded). Honestly, if you’ve never tried making snow ice cream, you’re missing out on a winter tradition that turns an ordinary snow day into an unforgettable memory.
Now, my own family can’t resist sneaking bites right off the mixing spoon. There’s something about the vanilla bean flecks and the fluffy texture that’s just irresistible. It’s dangerously easy to whip up, perfect for Pinterest-worthy dessert boards, and always a hit at family gatherings. I’ve tested this recipe more times than I’ll admit (in the name of research, of course), and I’m convinced it’s a staple for cozy snow days, impromptu winter parties, and even as a quick sweet fix. If you’re looking for a recipe that feels like a warm hug on a chilly day, you’re going to want to bookmark this fluffy snow ice cream recipe—trust me.
Why You’ll Love This Fluffy Snow Ice Cream Recipe
Let’s face it—snow ice cream is one of those rare treats that brings out the kid in all of us. Over the years, I’ve fine-tuned this recipe, testing everything from different milks to the perfect vanilla bean ratio, and I can confidently say this version is the best yet. Here’s why you’ll love it (and why I keep coming back to it every time the snow falls):
- Quick & Easy: Comes together in under 10 minutes, so you can satisfy sweet cravings fast—no waiting, no fuss.
- Simple Ingredients: No fancy grocery trips required; just fresh snow, cream, sugar, and real vanilla bean (you probably have most of it already).
- Perfect for Snow Days & Parties: Whether it’s a snow day treat for the kids, a Pinterest dessert board addition, or a quirky party dessert, it’s always a crowd-pleaser.
- Crowd-Pleaser: Kids love the fluffy texture, adults appreciate the vanilla bean elegance, and honestly, who doesn’t love eating snow in dessert form?
- Unbelievably Delicious: The creamy vanilla flavor, paired with the light, fluffy texture, is pure comfort food—just a little colder than usual!
What makes this fluffy snow ice cream recipe different? It’s all about the vanilla bean. Instead of just using extract, I split and scrape the pod for that deep, real vanilla flavor (the little black flecks are like edible confetti). I also use heavy cream for a richer mouthfeel, which means every bite feels decadent without being heavy.
This recipe isn’t just good—it’s the kind that makes you close your eyes after the first taste and savor that creamy, chilly sweetness. It’s comfort food reimagined: still simple, still quick, but with a level of flavor and texture that makes it truly special. Whether you’re impressing guests or turning a snowy afternoon into something memorable, this fluffy snow ice cream is the answer.
What Ingredients You Will Need
This recipe uses simple, wholesome ingredients to deliver bold flavor and that signature fluffy texture—without any complicated steps. Most are pantry staples, and you can easily swap a few things if needed. Here’s what you’ll need:
- Fresh, Clean Snow (about 8 cups/1.9 liters) – The star of the show! Collect freshly fallen, powdery snow from a clean spot (avoid old, packed, or icy snow for best results).
- Heavy Cream (1 cup/240 ml) – Adds richness and helps create that velvety, fluffy texture. You can use half-and-half for a lighter version (or coconut cream for dairy-free).
- Whole Milk (½ cup/120 ml) – Balances the cream and keeps the ice cream scoopable. Almond or oat milk works if you’re dairy-free.
- Granulated Sugar (⅔ cup/130 g) – Sweetens the ice cream, but you can adjust to taste. I’ve tried organic cane sugar and it works great too.
- Vanilla Bean Pod (1 pod, split and scraped) – For true vanilla bean elegance. The flecks are gorgeous and the flavor is next-level. If you don’t have a pod, substitute with 2 teaspoons (10 ml) of real vanilla extract.
- Pinch of Salt – Just a tiny pinch sharpens the flavors and keeps things balanced.
- Optional:
- Sweetened Condensed Milk (¼ cup/60 ml) – Adds extra creaminess and sweetness. Use if you want a richer, more decadent ice cream.
- Chocolate Chips, Sprinkles, or Crushed Cookies – For topping or mixing in. Kids love customizing their bowls!
- Fruit Syrups or Compotes – Try a drizzle of raspberry or blueberry sauce for a fruity twist.
Ingredient Tips: If you want to go the extra mile, I recommend Tahiti Gold vanilla beans—super fragrant and robust. When using milk substitutes, go for unsweetened versions to control the sweetness. For sugar, regular granulated is fine, but organic cane sugar gives a slightly deeper flavor and a touch of molasses.
For those who want to keep things gluten-free, good news—this fluffy snow ice cream recipe is naturally gluten-free as long as your mix-ins are too. If you’re vegan or dairy-free, swap in coconut cream and almond milk, and you’ll still get a dreamy, fluffy result. In summer (if you’re making a “snow” version with shaved ice), fresh berries make a fantastic topping. Honestly, it’s hard to go wrong with this list!
Equipment Needed
You won’t need fancy gadgets for this fluffy snow ice cream recipe, which is part of its charm! Here’s what I use:
- Large Mixing Bowl – Big enough to hold all your fluffy snow (think 3-quart/3-liter capacity or bigger).
- Whisk or Large Spoon – I prefer a balloon whisk for fluffiness, but a sturdy wooden spoon works too.
- Measuring Cups & Spoons – For getting the cream, sugar, and vanilla just right.
- Small Paring Knife – For splitting and scraping the vanilla bean pod. If you’re using extract, you can skip this.
- Ice Cream Scoop or Large Spoon – For serving—makes it feel extra special!
- Optional: Airtight Container (for storing leftovers in the freezer).
Honestly, I’ve made this with just a bowl and a spatula when I was in a pinch. If you don’t have a whisk, just make sure you stir vigorously to blend everything well. For vanilla beans, a butter knife works if you’re careful. I’ve even used a plastic mixing bowl on busy snow days, and it worked just fine. For storing, any clean food-safe container will do, but shallow containers freeze more evenly.
Maintenance tip: If you use wooden utensils, make sure they’re dry before mixing—wet spoons can make the snow melt too fast. For budget-friendly options, stick with basic kitchen tools; no need for ice cream machines here!
Preparation Method
-
Gather your snow: Head outside and scoop up 8 cups (1.9 liters) of fresh, powdery snow into your large mixing bowl. Avoid snow that’s icy, packed, or from high-traffic areas for best results. If you can, chill your bowl for a few minutes before starting—this helps keep the snow fluffy longer.
Tip: If the snow starts to melt or clump, stick it in the freezer for 5 minutes to firm up. -
Prepare the vanilla bean: Split the vanilla bean pod lengthwise with a paring knife. Using the back of the knife, scrape out the tiny black seeds and add them to the bowl. If using vanilla extract, add 2 teaspoons (10 ml) instead.
Note: Vanilla bean flecks give the ice cream its classic look and flavor—don’t skip if you can help it! -
Mix the cream and milk: In a separate bowl, combine 1 cup (240 ml) heavy cream and ½ cup (120 ml) whole milk. If you’re adding sweetened condensed milk, whisk in ¼ cup (60 ml) now. Add a pinch of salt and whisk until smooth.
Efficiency tip: Use cold cream and milk to help keep the snow from melting too quickly. -
Add sugar: Whisk in ⅔ cup (130 g) granulated sugar until dissolved. Taste the mixture—if you want it sweeter, add more sugar, 1 tablespoon at a time.
Troubleshooting: If the sugar clumps or doesn’t dissolve, warm the milk slightly (but don’t let it get hot, or it’ll melt the snow). -
Combine mixture with snow: Slowly pour the cream mixture over the snow, stirring gently with a whisk or spoon. Mix just until everything is combined and the texture is light and fluffy. Don’t overmix, or the snow will melt and turn slushy.
Sensory cue: The ice cream should hold soft peaks and look like whipped cream—if it starts to collapse, add a little more fresh snow. -
Taste and adjust: Scoop a spoonful and taste. Adjust vanilla or sugar if needed, but work quickly—melting happens fast!
Personal tip: I like to fold in extra snow at the end for a cloud-like finish. -
Serve immediately: Use an ice cream scoop or large spoon to portion into bowls. Top with sprinkles, chocolate chips, or fruit syrup if desired.
Warning: Snow ice cream is best eaten fresh. If you must store, transfer to an airtight container and freeze immediately. -
Optional storage: If you have leftovers, freeze in a shallow container. To serve later, let thaw for 5-10 minutes and stir before scooping.
Efficiency tip: Smaller portions freeze faster and are easier to scoop.
Cooking Tips & Techniques
Making fluffy snow ice cream sounds easy—and honestly, it is—but there are a couple tricks I’ve learned over the years that make a big difference in texture and flavor. Here’s some wisdom from my many snow day experiments:
- Use the freshest snow possible: The fluffier, the better. I made the mistake once of using old, slightly icy snow and ended up with a gritty, watery mess. Fresh snow is key!
- Chill your bowl and ingredients: Cold keeps everything fluffy. If your kitchen is warm, stick your bowl and utensils in the freezer for five minutes before starting.
- Don’t overmix: Stir until just combined. Overmixing turns the ice cream slushy and dense. If you see the mixture starting to collapse, add a bit more snow and gently fold.
- Timing matters: Work quickly! Snow melts fast, especially if you’re making multiple batches. I always prep my cream mixture first and scoop the snow last.
- Customize as you go: Taste after mixing, and adjust sugar or vanilla. Everyone’s snow is a little different, so tweak to your liking.
I’ve had a few snow ice cream fails—like the time I used skim milk and it was more like snow slushie than actual ice cream (lesson learned: fat equals fluffiness). Multitasking is easy here: while the kids collect snow, you whip up the cream mixture. If you’re serving a crowd, divide into two batches so nothing melts before you’re ready.
Consistency is all about temperature and gentle mixing. And if you ever end up with a bowl that’s too runny, just add more snow and stir gently. It’s forgiving—and honestly, part of the fun is seeing how fluffy you can get it!
Variations & Adaptations
One of the best things about fluffy snow ice cream is how customizable it is. Here are my favorite ways to switch it up:
- Dairy-Free/Vegan: Use coconut cream and almond milk instead of heavy cream and cow’s milk. Add a dash of vanilla extract to boost flavor.
- Chocolate Snow Ice Cream: Replace ¼ cup (25 g) of the snow with unsweetened cocoa powder, and mix in mini chocolate chips for a wintery twist.
- Fruit-Infused: Swirl in raspberry or blueberry compote, or top with fresh berries for a summery taste (yes, you can use shaved ice if it’s not snowy outside).
- Low-Sugar: Swap granulated sugar for stevia or monk fruit sweetener—just use about half as much, and taste as you go.
- Gluten-Free (naturally): The recipe is gluten-free as-is, but watch your mix-ins! Stick with gluten-free cookies or candies.
For different cooking methods: If you’re in a warm climate, use shaved ice from your freezer instead of snow. Or, make “snow” with your blender and ice cubes—it’s not quite the same, but still pretty fun.
My personal favorite? Mixing in crushed graham crackers and a swirl of caramel sauce—like a winter s’mores in a bowl. Honestly, don’t be afraid to experiment. Every batch can be a new Pinterest masterpiece!
Serving & Storage Suggestions
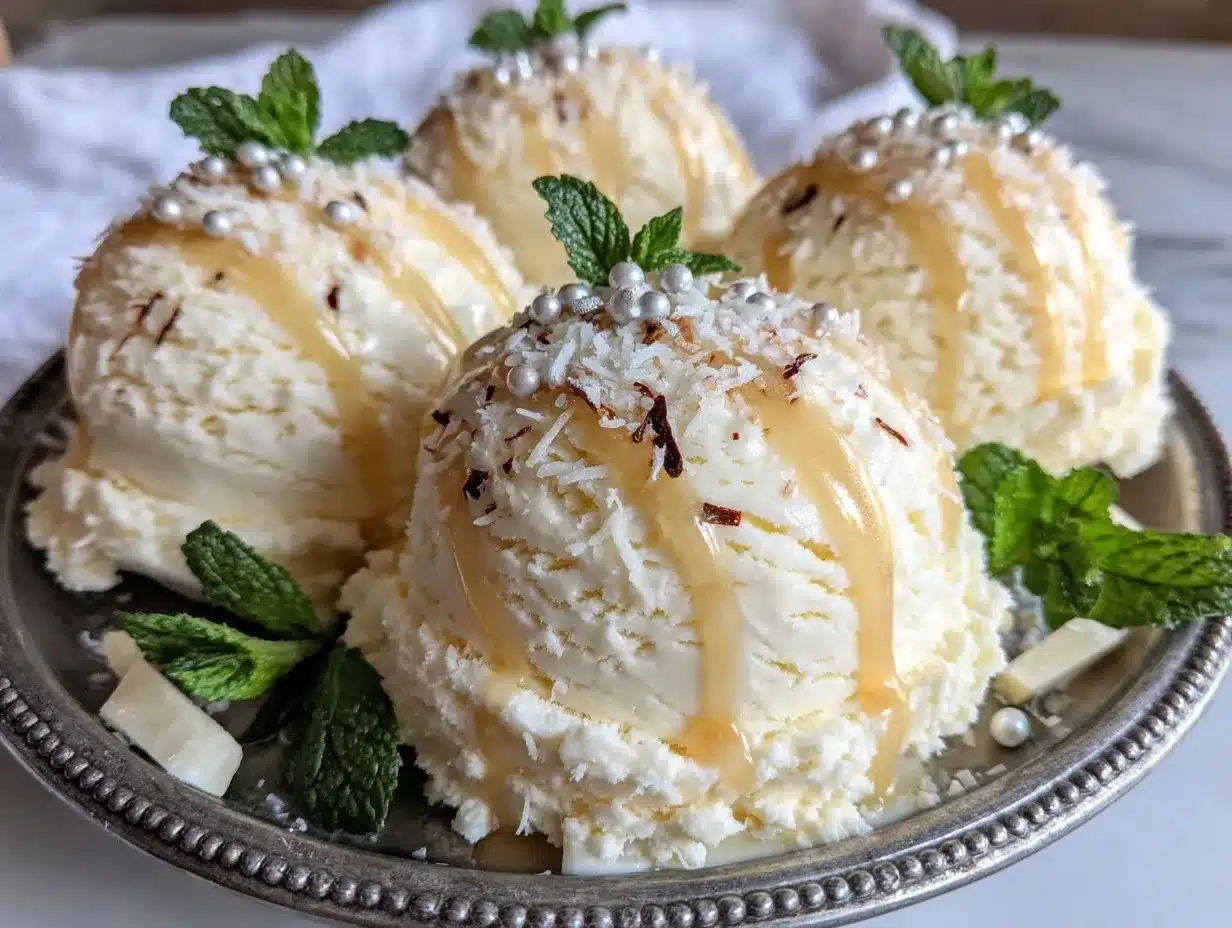
This fluffy snow ice cream is best served immediately—right after mixing, when it’s at peak fluffiness and flavor. I like to scoop it into chilled bowls and sprinkle with crushed cookies, chocolate chips, or even a little cinnamon for an extra cozy vibe.
For presentation, try piling the ice cream high in pretty glass dessert cups or vintage mugs. Add a sprig of mint or a few berries to make it Pinterest-perfect. If you’re serving a crowd, set up a “snow ice cream bar” with lots of toppings so everyone can customize their own bowls.
To store: Place any leftovers in an airtight container and pop them in the freezer. The texture will firm up as it freezes, but you can let it sit at room temperature for 5-10 minutes and stir gently before serving. It won’t be quite as fluffy as fresh, but the flavor holds up really well.
Reheating isn’t necessary, but if your ice cream is too hard to scoop, a few seconds in the microwave (literally 5 seconds!) softens it nicely. Over time, the vanilla flavor deepens—so honestly, it’s still delicious the next day.
Nutritional Information & Benefits
Per serving (about 1 cup/240 ml):
- Calories: approx. 210
- Fat: 12g
- Carbohydrates: 25g
- Protein: 2g
- Fiber: 0g
- Sugar: 23g
Key ingredients like heavy cream and milk provide calcium and vitamin D, supporting healthy bones. Vanilla bean is rich in antioxidants, and using fresh snow (from a clean source) is a fun, natural twist. The recipe is naturally gluten-free and can be adapted for dairy-free or low-sugar diets.
Potential allergens include dairy and, depending on mix-ins, nuts or gluten. As someone who tries to balance indulgence with wellness, I love that this fluffy snow ice cream recipe feels special without being heavy or full of processed ingredients.
Conclusion
If you’re searching for a winter dessert that’s easy, fun, and packed with pure vanilla bean elegance, this fluffy snow ice cream recipe is worth every scoop. It’s the kind of treat that brings family together, sparks laughter, and might just become your new favorite snow day tradition.
Customize it however you like—dairy-free, chocolatey, loaded with sprinkles, or simple and classic. It’s a recipe I come back to year after year, and honestly, I love how it turns even the chilliest days into warm, happy memories.
Give it a try, leave a comment with your best snow ice cream twist, and share your pictures on Pinterest! I’d love to hear how you made it your own. Wishing you cozy, sweet, and fluffy snow days ahead!
Frequently Asked Questions
Can I use packed or old snow for snow ice cream?
Nope—fresh, powdery snow gives the best fluffy texture. Old or icy snow tends to make the ice cream gritty and watery.
Is it safe to eat snow ice cream?
As long as you collect snow from a clean, untouched area away from streets and animals, it’s generally considered safe. Use your best judgment!
Can I make this recipe without a vanilla bean pod?
Absolutely! Substitute with 2 teaspoons of real vanilla extract for a lovely flavor. The vanilla bean flecks are just for extra elegance.
How do I store leftover snow ice cream?
Store in an airtight container in the freezer. Let thaw for a few minutes before serving and stir gently to refresh the texture.
Can I make snow ice cream if I don’t have fresh snow?
Yes—you can use shaved ice or finely blended ice cubes as a substitute. The texture is a bit different, but it’s still delicious!
Pin This Recipe!
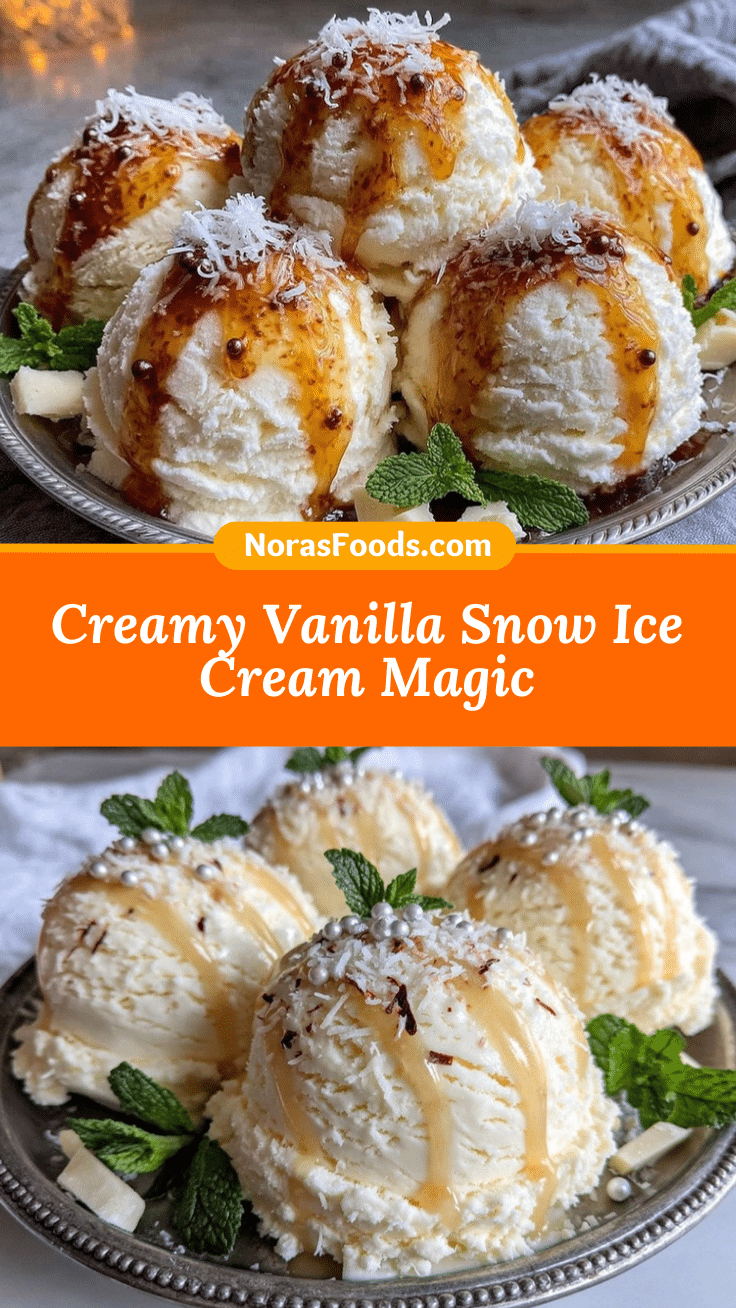
Fluffy Snow Ice Cream Recipe – Easy Homemade Vanilla Bean Dessert

This fluffy snow ice cream is a nostalgic, creamy vanilla bean dessert made with fresh snow, heavy cream, and real vanilla. It’s quick to prepare, irresistibly light, and perfect for cozy winter days or family gatherings.
- Prep Time: 5 minutes
- Cook Time: 5 minutes
- Total Time: 10 minutes
- Yield: 6 servings 1x
- Category: Dessert
- Cuisine: American
Ingredients
- 8 cups fresh, clean snow (about 1.9 liters)
- 1 cup heavy cream (240 ml)
- 1/2 cup whole milk (120 ml)
- 2/3 cup granulated sugar (130 g)
- 1 vanilla bean pod, split and scraped (or 2 teaspoons vanilla extract)
- Pinch of salt
- Optional: 1/4 cup sweetened condensed milk (60 ml)
- Optional: Chocolate chips, sprinkles, or crushed cookies for topping
- Optional: Fruit syrups or compotes for serving
Instructions
- Gather 8 cups of fresh, powdery snow into a large mixing bowl. Chill the bowl beforehand for best results.
- Split the vanilla bean pod lengthwise and scrape out the seeds into the bowl. If using vanilla extract, add 2 teaspoons instead.
- In a separate bowl, combine heavy cream, whole milk, and, if desired, sweetened condensed milk. Add a pinch of salt and whisk until smooth.
- Whisk in granulated sugar until dissolved. Taste and adjust sweetness if needed.
- Slowly pour the cream mixture over the snow, stirring gently with a whisk or spoon until just combined and fluffy. Avoid overmixing.
- Taste and adjust vanilla or sugar as needed, working quickly to prevent melting.
- Serve immediately in bowls, topping with sprinkles, chocolate chips, or fruit syrup as desired.
- For leftovers, transfer to an airtight container and freeze. To serve later, let thaw for 5-10 minutes and stir before scooping.
Notes
Use only fresh, powdery snow from a clean area for best texture. Chill your bowl and ingredients to keep the ice cream fluffy. Work quickly to prevent melting, and avoid overmixing. The recipe is naturally gluten-free and can be adapted for dairy-free or vegan diets by using coconut cream and almond milk. For extra flavor, try Tahiti Gold vanilla beans or organic cane sugar. Customize with your favorite mix-ins or toppings.
Nutrition
- Serving Size: About 1 cup (240 ml)
- Calories: 210
- Sugar: 23
- Sodium: 40
- Fat: 12
- Saturated Fat: 7
- Carbohydrates: 25
- Protein: 2
Keywords: snow ice cream, vanilla bean, winter dessert, homemade ice cream, easy dessert, gluten-free, kid-friendly, snow day treat


