Introduction
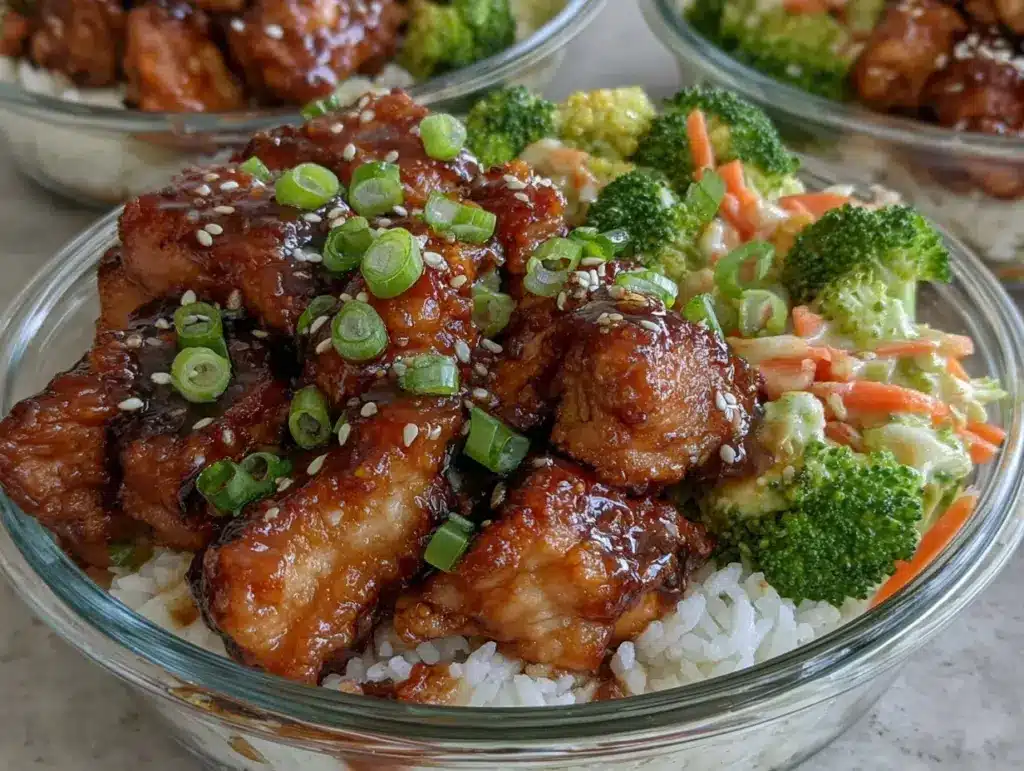
Let me set the scene: the kitchen is filled with the warm, sweet aroma of homemade teriyaki sauce bubbling away, mingling with the savory scent of chicken sizzling in the pan. The glossy, caramelized glaze clings to every tender piece—honestly, it’s the kind of moment where you pause, take a deep breath, and just smile because you know you’re about to eat something really good. The first time I made these Easy Meal Prep Teriyaki Chicken Bowls, it was on a rainy Sunday. I was desperately searching for a healthy lunch I could actually look forward to all week (you know how those meal prep plans go—sometimes they’re just sad salads and dry chicken… ugh).
Back when I was knee-high to a grasshopper, my grandma used to make a sticky-sweet chicken dish for Sunday suppers. She’d let me help whisk the sauce—always tasting, always tweaking. Years later, I found myself craving that same nostalgic comfort but wanted something easy enough to fit my busy schedule. That’s how these teriyaki chicken bowls came to life: a little family tradition, a lot of trial and error, and a healthy twist for modern life.
Honestly, my family can’t keep their hands off these bowls when they’re cooling. Even my pickiest eater sneaks bites—and I can’t really blame him! These bowls have become a staple for potlucks, prepping for busy workweeks, and even gifting to tired friends. They’re dangerously easy, totally reliable, and bursting with flavor that feels like a warm hug. If you’re hunting for healthy lunches that don’t taste like “health food,” you’re going to want to bookmark this one. I’ve tested this recipe more times than I can count (in the name of research, of course), and I can promise you: it’ll brighten up your Pinterest feed and your lunch break.
Why You’ll Love This Recipe
Let’s face it—finding a meal prep recipe that’s actually crave-worthy is a rare thing. After years of testing, tweaking, and taste-testing (sometimes with a not-so-willing family panel), these Easy Teriyaki Chicken Bowls have become my gold standard. Here’s what makes them a must-try:
- Quick & Easy: Comes together in under 35 minutes, so you can whip up healthy lunches even on a hectic Sunday night.
- Simple Ingredients: No wild goose chases at the grocery store—just straightforward pantry staples and fresh chicken.
- Perfect for Lunches: These bowls are ideal for work lunches, after-school meals, or those days you need something nourishing and satisfying.
- Crowd-Pleaser: Children, teens, and adults all give this recipe two thumbs up. You know it’s a winner when everyone fights for leftovers!
- Unbelievably Delicious: The homemade teriyaki sauce is glossy and packed with umami. Tender chicken, fluffy rice, and crisp veggies—every bite is balanced.
What sets these bowls apart? The sauce is homemade (no mystery ingredients), the chicken stays juicy thanks to a quick sear, and the bowls are endlessly customizable. I use a flash-steam method for the veggies to keep them snappy, and the rice base is just right for soaking up every drop of that sticky-sweet goodness.
This isn’t just another “healthy lunch”—it’s the kind of food that makes you do a little happy dance with the first forkful. If you want a meal that brings pure comfort and a touch of nostalgia, but still fits your nutrition goals, these Easy Teriyaki Chicken Bowls are your answer. They’re stress-free to make, impressive to serve, and a guaranteed way to turn a simple weekday into something memorable.
What Ingredients You Will Need
These bowls use simple, wholesome ingredients to deliver bold flavor and satisfying texture—without any fuss. Most are pantry staples, and there’s plenty of room for swaps if needed. Here’s what you’ll need:
For the Chicken & Marinade:
- 1 ½ pounds (680g) boneless, skinless chicken breasts or thighs (thighs for extra juiciness)
- 2 tablespoons soy sauce (use low-sodium for a lighter option)
- 1 tablespoon rice vinegar (balances the sweetness)
- 1 tablespoon sesame oil (adds nutty flavor)
- ½ teaspoon ground black pepper
For the Homemade Teriyaki Sauce:
- ¼ cup (60ml) soy sauce
- 3 tablespoons honey or maple syrup (I use raw local honey for that floral note)
- 2 tablespoons mirin (Japanese sweet rice wine; optional but tasty)
- 1 tablespoon brown sugar (for caramel depth)
- 2 teaspoons fresh ginger, grated (zesty kick)
- 2 cloves garlic, minced
- 1 tablespoon cornstarch mixed with 2 tablespoons water (for thickening)
For the Bowls:
- 2 cups (370g) cooked jasmine or brown rice (or cauliflower rice for low-carb)
- 1 cup (150g) steamed broccoli florets (fresh or frozen)
- 1 cup (120g) shredded carrots
- ½ cup (60g) edamame, shelled (optional, adds protein)
- 2 green onions, thinly sliced (for garnish)
- 1 tablespoon toasted sesame seeds (optional, for crunch)
Substitution Tips:
- Use tamari for a gluten-free version of the sauce
- Swap chicken with firm tofu for vegetarian bowls (cube and pan-sear before adding sauce)
- Any cooked grain works—try quinoa or farro if you’re feeling adventurous
- Seasonal veggies like snap peas, bell peppers, or zucchini make great add-ins
For best texture, I always grab organic chicken and fresh ginger. (If you’re in a pinch, jarred ginger works, but honestly, fresh makes a difference.) These ingredients are flexible, so mix and match to suit your pantry and tastes!
Equipment Needed
You don’t need fancy gadgets for these Easy Teriyaki Chicken Bowls—just a few reliable kitchen tools. Here’s what I reach for every time:
- Large nonstick skillet or sauté pan (for searing chicken and simmering sauce)
- Medium saucepan (for cooking rice)
- Small mixing bowl (for whisking the marinade and sauce ingredients)
- Whisk (makes the sauce smooth—fork works in a pinch!)
- Cutting board and sharp chef’s knife (for prepping chicken and veggies)
- Rice cooker (optional, but a lifesaver if you meal prep often)
- Meal prep containers with lids (glass or BPA-free plastic for easy storage)
If you don’t have a rice cooker, stovetop rice is perfectly fine. I’ve used all sorts of pans over the years—just avoid the super-thin ones, as they tend to burn the sauce. For slicing chicken safely, a good chef’s knife is key. Budget-wise, you can easily swap glass containers for sturdy plastic ones (just make sure they seal tight so your lunch stays fresh). And don’t forget to wash your whisk right after mixing the sticky sauce—trust me, it’s easier than scraping dried honey later!
Preparation Method
- Marinate the Chicken: In a small bowl, whisk together 2 tablespoons soy sauce, 1 tablespoon rice vinegar, 1 tablespoon sesame oil, and ½ teaspoon black pepper. Slice 1 ½ pounds (680g) chicken into 1-inch (2.5cm) pieces. Toss chicken with marinade and let sit for 10-15 minutes (or refrigerate up to 2 hours). Tip: If rushed, even a 10-minute soak makes a big difference!
- Cook the Rice: While the chicken marinates, rinse and cook 2 cups (370g) jasmine or brown rice according to package instructions (usually 15-18 minutes on the stovetop). If using cauliflower rice, sauté in a skillet with a drizzle of oil for 5 minutes until just tender.
- Prepare the Sauce: In a small bowl, mix ¼ cup (60ml) soy sauce, 3 tablespoons honey or maple syrup, 2 tablespoons mirin, 1 tablespoon brown sugar, 2 teaspoons grated ginger, and 2 cloves garlic. Combine 1 tablespoon cornstarch with 2 tablespoons water to make a slurry.
- Steam the Veggies: Steam 1 cup (150g) broccoli, 1 cup (120g) shredded carrots, and ½ cup (60g) edamame until just crisp-tender (about 3-5 minutes). Tip: I use a microwave steamer—it’s super quick and keeps veggies bright.
- Cook the Chicken: Heat a large nonstick skillet over medium-high heat. Add marinated chicken in a single layer. Sear for 3-4 minutes per side until golden and cooked through (internal temp 165°F/74°C). Remove chicken and set aside—don’t crowd the pan or you’ll lose that caramel crust!
- Make the Teriyaki Sauce: In the same skillet, pour in sauce mixture. Bring to a gentle simmer, stirring frequently. Once bubbling, add cornstarch slurry and cook for 1-2 minutes until sauce thickens and turns glossy. Warning: Keep a close eye! Teriyaki sauce burns fast if left unattended.
- Combine Chicken & Sauce: Return chicken to the pan and toss to coat in sauce. Cook together for 1-2 minutes more until chicken is sticky and fully glazed. Sensory cue: Chicken should glisten and smell deeply savory-sweet.
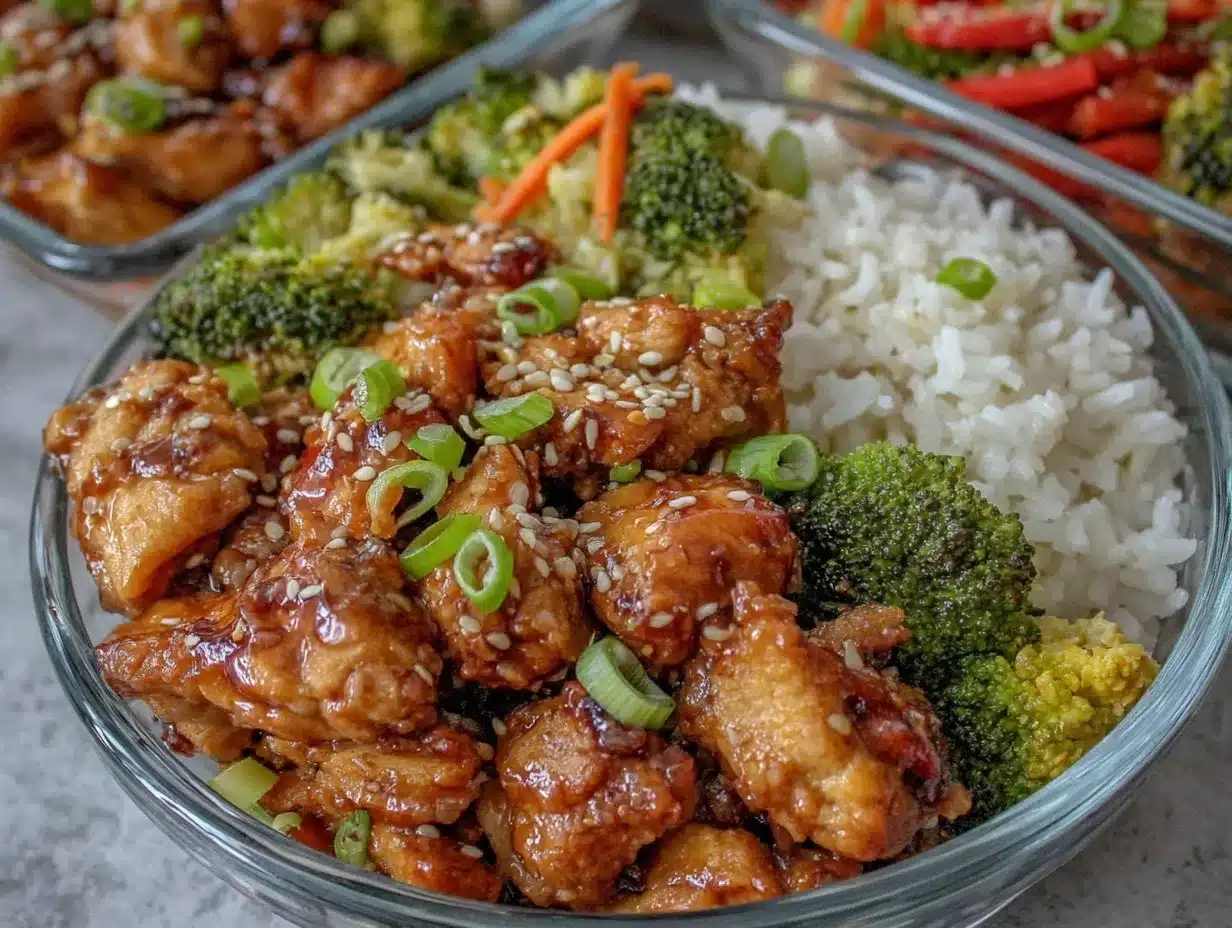
- Assemble Bowls: Divide cooked rice among 4 meal prep containers (about ½ cup/90g per container). Add chicken, then arrange broccoli, carrots, and edamame around the sides. Drizzle any extra sauce over the top.
- Garnish & Store: Sprinkle with sliced green onions and toasted sesame seeds. Let cool before sealing containers. Store in refrigerator up to 4 days.
Personal tip: If you want extra sauce, double the batch and store leftovers in a jar. If the chicken looks a bit dry, add a splash of water and reheat gently. And never skip the garnish—those crunchy sesame seeds are like the cherry on top!
Cooking Tips & Techniques
Okay, real talk: I’ve burned more teriyaki sauce than I care to admit. But after making Easy Teriyaki Chicken Bowls for years, I’ve picked up a few tricks.
- Don’t Overcrowd the Pan: Searing chicken in batches helps keep those edges crispy. If you pile it all in, you’ll get steamed chicken—no thanks!
- Fresh Ginger Matters: The flavor is punchier with fresh ginger. If using jarred, add a little extra for oomph.
- Watch the Sauce: Teriyaki sauce thickens fast. Stir constantly and remove from heat as soon as it reaches a syrupy consistency.
- Timing is Everything: Cook rice and steam veggies while chicken marinates. Multitasking saves you loads of time.
- Consistency Trick: If your sauce looks too thin after adding the slurry, simmer for another minute. Too thick? Add a splash of water and whisk.
- Veggie Prep Shortcut: Buy pre-cut broccoli and carrots to save time. I’m all for shortcuts when life gets busy!
- Personal Fail: Once, I used a sweet teriyaki glaze from the store. It was so salty, everyone needed a gallon of water. Homemade is always better—trust me!
Remember, meal prep is about efficiency, not perfection. If something goes awry (like burnt sauce or mushy rice), don’t sweat it—just adjust next time. With these tips, your teriyaki chicken bowls will be reliably delicious, week after week.
Variations & Adaptations
There’s no single “right” way to make Easy Teriyaki Chicken Bowls. Here are a few twists I’ve tried—and loved—over the years:
- Low-Carb Option: Swap regular rice for cauliflower rice. It keeps carbs low and adds a fun veggie vibe.
- Vegetarian/Vegan: Cube firm tofu and pan-sear with a splash of soy sauce. Toss with teriyaki sauce, then build bowls with tofu instead of chicken.
- Seasonal Veggies: In summer, I use snap peas and bell peppers. In winter, roasted sweet potato or brussels sprouts add warmth.
- Allergen-Friendly: Use tamari for gluten-free bowls. Sub sunflower seed butter in the sauce for a nut-free twist (it’s surprisingly delicious).
- Flavor Boost: Add a dash of chili flakes or sriracha for a spicy kick. A squeeze of lime at the end makes it extra bright!
My personal favorite? A “rainbow bowl” with roasted carrots, purple cabbage, and pineapple chunks. The sweet and tangy combo is always a hit! Play around with what’s in season or on sale—these teriyaki chicken bowls are endlessly flexible.
Serving & Storage Suggestions
Easy Teriyaki Chicken Bowls are best served slightly warm or at room temperature—perfect for lunch breaks or quick dinners. Here’s how I like to present and store them:
- Serving: Arrange chicken and veggies neatly over rice, drizzle with extra sauce, and sprinkle with green onions and sesame seeds. For parties, serve in colorful bowls with chopsticks for an authentic touch.
- Pairings: Complement with a cup of miso soup or a simple cucumber salad. I love iced green tea alongside—so refreshing!
- Storage: Store bowls in airtight containers in the refrigerator for up to 4 days. The flavors meld and actually taste better by day two.
- Freezing: You can freeze cooked chicken and rice together for up to 2 months. Thaw overnight in the fridge—add fresh veggies after reheating for best texture.
- Reheating: Microwave in 30-second bursts until hot, or reheat gently on the stovetop with a splash of water. Avoid overheating to keep chicken tender.
Honestly, these bowls survive the work fridge gauntlet like a champ. If you pack them for lunch, toss in a lemon wedge for brightness, or a packet of extra sauce for dipping. The flavors deepen and mellow with time—so don’t be afraid to prep a double batch!
Nutritional Information & Benefits
Each Easy Teriyaki Chicken Bowl (with rice and veggies) averages about:
- Calories: 420
- Protein: 33g
- Carbohydrates: 49g
- Fat: 9g
- Fiber: 4g
High in lean protein thanks to chicken breast, these bowls help keep you full and energized. Broccoli, carrots, and edamame add fiber, vitamins A and C, and plenty of antioxidants. The homemade sauce skips the preservatives and excess sugar you’ll find in bottled versions.
For gluten-free eaters, swap soy sauce for tamari. If you’re watching carbs, use cauliflower rice. Allergens to watch: soy (soy sauce/edamame), sesame, and chicken. From my wellness perspective, these bowls are a balanced way to enjoy comfort food while sticking to health goals. They’re light but satisfying—just what you want in a meal prep lunch!
Conclusion
If you’re searching for a meal prep recipe that’s easy, healthy, and legitimately delicious, these Easy Teriyaki Chicken Bowls check every box. They pack bold flavor, keep well, and bring a little joy to the weekday lunch rut. You can customize endlessly—swap veggies, change grains, spice it up, or keep it classic.
Honestly, I love this recipe because it’s pure comfort in a bowl. It’s the kind of healthy lunch that never feels boring, and it always gets rave reviews. Give it a try, tweak it to fit your family, and let me know how you make it yours. Drop a comment below with your favorite tweaks, pin it on Pinterest for later, or share with a friend who could use a lunch upgrade. Here’s to happy, healthy eating—one delicious bowl at a time!
FAQs
Can I use store-bought teriyaki sauce instead of homemade?
You can, but I recommend homemade for better flavor and fewer added sugars. If you do use store-bought, choose a low-sodium, natural version and taste before adding—some brands are much saltier than others!
How long do these bowls keep in the fridge?
They stay fresh for up to 4 days if kept in airtight containers. The flavor actually improves after a day or two—just watch for any veggie sogginess if you use delicate greens.
Can I freeze teriyaki chicken bowls?
Yes! Freeze the chicken and rice together in freezer-safe containers for up to 2 months. I recommend adding fresh veggies after thawing and reheating, so they don’t get mushy.
What can I use instead of chicken?
Firm tofu, tempeh, or even shrimp work well. Just adjust cooking times—shrimp cooks fast, and tofu benefits from a crispy sear before tossing with the sauce.
How do I keep the chicken juicy?
Don’t overcook it! Sear chicken quickly on each side, and let it finish cooking in the sauce for just a minute or two. If reheating, use gentle heat and add a splash of water or sauce to keep it moist.
Pin This Recipe!

Easy Teriyaki Chicken Bowls Meal Prep for Healthy Lunches
These Easy Teriyaki Chicken Bowls are a healthy, crave-worthy meal prep option featuring juicy chicken glazed in homemade teriyaki sauce, fluffy rice, and crisp veggies. Perfect for busy lunches, they’re customizable, quick to make, and packed with flavor.
- Prep Time: 15 minutes
- Cook Time: 20 minutes
- Total Time: 35 minutes
- Yield: 4 servings 1x
- Category: Main Course
- Cuisine: Asian
Ingredients
- 1 ½ pounds boneless, skinless chicken breasts or thighs
- 2 tablespoons soy sauce (low-sodium recommended)
- 1 tablespoon rice vinegar
- 1 tablespoon sesame oil
- ½ teaspoon ground black pepper
- ¼ cup soy sauce
- 3 tablespoons honey or maple syrup
- 2 tablespoons mirin (optional)
- 1 tablespoon brown sugar
- 2 teaspoons fresh ginger, grated
- 2 cloves garlic, minced
- 1 tablespoon cornstarch mixed with 2 tablespoons water
- 2 cups cooked jasmine or brown rice (or cauliflower rice for low-carb)
- 1 cup steamed broccoli florets
- 1 cup shredded carrots
- ½ cup edamame, shelled (optional)
- 2 green onions, thinly sliced
- 1 tablespoon toasted sesame seeds (optional)
Instructions
- In a small bowl, whisk together 2 tablespoons soy sauce, 1 tablespoon rice vinegar, 1 tablespoon sesame oil, and ½ teaspoon black pepper. Slice chicken into 1-inch pieces, toss with marinade, and let sit for 10-15 minutes (or refrigerate up to 2 hours).
- While chicken marinates, rinse and cook 2 cups jasmine or brown rice according to package instructions (15-18 minutes on stovetop). For cauliflower rice, sauté in a skillet with a drizzle of oil for 5 minutes until just tender.
- In a small bowl, mix ¼ cup soy sauce, 3 tablespoons honey or maple syrup, 2 tablespoons mirin, 1 tablespoon brown sugar, 2 teaspoons grated ginger, and 2 cloves garlic. Combine 1 tablespoon cornstarch with 2 tablespoons water to make a slurry.
- Steam broccoli, shredded carrots, and edamame until crisp-tender (about 3-5 minutes).
- Heat a large nonstick skillet over medium-high heat. Add marinated chicken in a single layer. Sear for 3-4 minutes per side until golden and cooked through (internal temp 165°F). Remove chicken and set aside.
- In the same skillet, pour in sauce mixture. Bring to a gentle simmer, stirring frequently. Once bubbling, add cornstarch slurry and cook for 1-2 minutes until sauce thickens and turns glossy.
- Return chicken to the pan and toss to coat in sauce. Cook together for 1-2 minutes more until chicken is sticky and fully glazed.
- Divide cooked rice among 4 meal prep containers (about ½ cup per container). Add chicken, then arrange broccoli, carrots, and edamame around the sides. Drizzle any extra sauce over the top.
- Sprinkle with sliced green onions and toasted sesame seeds. Let cool before sealing containers. Store in refrigerator up to 4 days.
Notes
For gluten-free, use tamari instead of soy sauce. Swap chicken for tofu for vegetarian bowls. Double the sauce for extra flavor. Don’t overcrowd the pan when searing chicken. Fresh ginger gives the best flavor. Store bowls in airtight containers for up to 4 days; freeze chicken and rice for up to 2 months. Reheat gently with a splash of water to keep chicken moist.
Nutrition
- Serving Size: 1 bowl (about 1/4 of
- Calories: 420
- Sugar: 13
- Sodium: 780
- Fat: 9
- Saturated Fat: 2
- Carbohydrates: 49
- Fiber: 4
- Protein: 33
Keywords: teriyaki chicken, meal prep, healthy lunch, chicken bowls, Asian recipe, easy lunch, homemade teriyaki sauce, gluten-free option, high protein, rice bowl


