
Let me tell you, the scent of buttery pastry crust mingling with sweet vanilla-scented pastry cream and fresh, vibrant fruit is enough to make anyone’s mouth water. The first time I baked these easy creamy mini fruit tarts with pastry cream, I was instantly hooked—the kind of moment where you pause, take a deep breath, and just smile because you know you’re onto something truly special. Years ago, when I was knee-high to a grasshopper, my grandma would make similar fruit tarts for family gatherings, but they always seemed so complicated and time-consuming. This recipe, though? It’s dangerously easy and offers that same pure, nostalgic comfort.
Honestly, my family couldn’t stop sneaking them off the cooling rack (and I can’t really blame them). You know what’s great? These mini fruit tarts are perfect for potlucks, a sweet treat for your kids, or to brighten up your Pinterest cookie board. I’ve tested this recipe multiple times in the name of research, of course, and it’s become a staple for family gatherings and gifting. It really feels like a warm hug wrapped up in a tiny tart shell, and you’re going to want to bookmark this one.
Why You’ll Love This Recipe
Having spent plenty of time in the kitchen developing dessert recipes, I can say this easy creamy mini fruit tarts with pastry cream is one of those gems that hits all the right notes. Here’s why:
- Quick & Easy: Comes together in under 45 minutes, perfect for busy weeknights or last-minute dessert cravings.
- Simple Ingredients: No fancy grocery trips needed; you likely already have everything in your kitchen pantry.
- Perfect for Entertaining: Great for brunch, holiday mornings, or impressing guests without breaking a sweat.
- Crowd-Pleaser: Always gets rave reviews from kids and adults alike, with fresh fruit adding a bright pop.
- Unbelievably Delicious: The creamy, rich texture of the pastry cream paired with crisp, flaky tart shells is next-level comfort food.
What sets this recipe apart is the silky smooth pastry cream — I blend it just right for an ultra-creamy texture that isn’t too sweet but perfectly balanced. Also, the homemade tart shells have that delicate crumb you just can’t get from store-bought crusts. Honestly, this recipe isn’t just good—it’s the kind that makes you close your eyes after the first bite. It’s comfort food reimagined—simple, fresh, but with that soul-soothing satisfaction you crave.
What Ingredients You Will Need
This recipe uses simple, wholesome ingredients to deliver bold flavor and satisfying texture without the fuss. Most of these are pantry staples, and the fresh fruit topping adds a seasonal touch you can swap out anytime.
- For the Tart Shells:
- All-purpose flour, 1 1/4 cups (150 g)
- Powdered sugar, 1/4 cup (30 g) (adds sweetness and tenderness)
- Salt, 1/4 teaspoon
- Unsalted butter, 1/2 cup (115 g), cold and cubed (I recommend Kerrygold for best flavor)
- Ice water, 2-3 tablespoons (30-45 ml), as needed
- Vanilla extract, 1 teaspoon (for subtle aroma)
- For the Pastry Cream:
- Whole milk, 2 cups (480 ml)
- Granulated sugar, 1/2 cup (100 g)
- Egg yolks, 4 large (room temperature)
- Cornstarch, 1/4 cup (30 g) (helps thicken the cream perfectly)
- Unsalted butter, 2 tablespoons (28 g), softened
- Vanilla bean paste or extract, 1 teaspoon (adds depth of flavor)
- For the Fruit Topping:
- Fresh strawberries, sliced (about 1 cup)
- Blueberries, 1/2 cup
- Kiwi, peeled and sliced, 1 medium
- Mandarin orange segments, 1/2 cup (optional)
- Apricot jam or honey, 2 tablespoons (for glazing, optional)
Feel free to swap in seasonal fruit if you like—raspberries, blackberries, or even peach slices work wonderfully. For a gluten-free version, use almond flour combined with a bit of tapioca starch for the tart shells. And if you need dairy-free, swap the butter with coconut oil and use your favorite plant-based milk for the pastry cream (though the texture will be slightly different).
Equipment Needed
- Mini tart pans or a standard muffin tin with removable bottoms (for easy tart removal)
- Mixing bowls (various sizes)
- Whisk and rubber spatula
- Medium saucepan (for pastry cream)
- Fine mesh sieve (to strain the pastry cream for silky smoothness)
- Rolling pin (for tart dough)
- Cooling rack
- Measuring cups and spoons
If you don’t have mini tart pans, muffin tins work just fine—just be patient removing the tarts. I’ve found silicone pans are easier to work with when it comes to unmolding, but metal pans give a crispier crust. For budget-friendly options, a sturdy muffin pan and parchment paper liners do the trick. Keep your rolling pin cool—you know, wrap it with a damp towel and chill it in the fridge before rolling the dough for flakier crusts.
Preparation Method
- Make the Tart Dough: In a large bowl, whisk together 1 1/4 cups (150 g) all-purpose flour, 1/4 cup (30 g) powdered sugar, and 1/4 teaspoon salt. Add 1/2 cup (115 g) cold, cubed unsalted butter. Using your fingertips or a pastry cutter, work the butter into the flour until the mixture resembles coarse crumbs with pea-sized pieces. (Tip: Don’t overwork or the crust will be tough!)
- Add Vanilla and Water: Stir in 1 teaspoon vanilla extract. Gradually add 2-3 tablespoons (30-45 ml) ice water, mixing gently just until the dough starts to come together. Form into a disk, wrap in plastic, and chill for at least 30 minutes. (Chilling helps relax gluten and prevents shrinking during baking.)
- Prepare Pastry Cream: While dough chills, pour 2 cups (480 ml) whole milk into a medium saucepan and heat over medium heat until just simmering. In a separate bowl, whisk 4 egg yolks with 1/2 cup (100 g) granulated sugar and 1/4 cup (30 g) cornstarch until smooth.
- Temper Eggs: Slowly pour about 1/2 cup hot milk into egg mixture while whisking constantly to avoid curdling. Pour tempered egg mixture back into saucepan with remaining milk. Cook over medium heat, whisking constantly, until it thickens and bubbles, about 3-5 minutes.
- Finish Pastry Cream: Remove from heat, whisk in 2 tablespoons softened butter and 1 teaspoon vanilla bean paste. Strain through a fine mesh sieve for extra smoothness. Cover surface with plastic wrap to prevent skin from forming and chill until cool (about 1 hour).
- Roll and Bake Tart Shells: Preheat oven to 350°F (175°C). Roll chilled dough to about 1/8-inch (3 mm) thickness on a lightly floured surface. Cut rounds slightly larger than your tart pans. Press dough gently into pans, trim edges, and prick bottoms with a fork.
- Bake: Line shells with parchment paper and fill with pie weights or dried beans. Bake 15 minutes, then remove weights and parchment and bake another 10-12 minutes until golden brown. Let cool completely on wire rack.
- Assemble Tarts: Spoon chilled pastry cream into each shell, smoothing the tops. Arrange fresh fruit beautifully on top. (Tip: Mix colors and shapes for eye appeal!)
- Optional Glaze: Warm 2 tablespoons apricot jam with a splash of water and brush lightly over fruit to add shine and help preserve freshness.
- Serve & Enjoy: These tarts are best served the same day but can be refrigerated for up to 1 day before serving.
Cooking Tips & Techniques
One big trick with pastry cream is constant whisking during cooking. I learned the hard way—once I got lumps and had to strain it multiple times. Patience here makes all the difference. Also, don’t rush chilling; cold pastry cream holds better when filling the tarts.
For the dough, cold butter is your best friend. It creates that flaky texture we all love. I sometimes pop the dough back into the fridge halfway through rolling if it gets too soft. Also, avoid overworking the dough or it’ll turn tough—handle it gently like you’re cradling a delicate secret.
When baking tart shells, using pie weights helps keep them from puffing up or shrinking. If you don’t have weights, dried beans or rice work fine. Just make sure you remove them halfway through baking so the bottoms can crisp up nicely.
Multi-tasking tip: Get your pastry cream chilling while you roll and bake the shells. It saves time and keeps everything running smoothly.
Variations & Adaptations
- Dairy-Free Version: Swap butter for coconut oil in the crust and use almond or oat milk in the pastry cream with a thickener like arrowroot powder. Texture will be slightly different but still delicious.
- Seasonal Fruits: In summer, switch out strawberries and kiwi for fresh peaches, raspberries, or blackberries. In winter, pomegranate seeds add a festive pop.
- Chocolate Twist: Add 2 tablespoons cocoa powder to the tart dough for a chocolate shell or swirl melted dark chocolate on top of the pastry cream before adding fruit.
- Nutty Crust: Replace 1/4 cup of flour with finely ground almonds or hazelnuts for a richer, nuttier flavor.
I once tried a lemon pastry cream variation by adding lemon zest and a splash of juice, which gave a bright, refreshing zing—perfect for spring brunches. Feel free to get creative with flavors and textures to suit your taste buds!
Serving & Storage Suggestions
Serve these mini fruit tarts chilled or at room temperature for the best experience. They look gorgeous on a pretty platter, especially when you arrange the fruit artfully. Pair with a light cup of tea or a sparkling lemonade for a refreshing combo.
Store leftovers in an airtight container in the refrigerator for up to 24 hours. Longer than that and the crust might start to soften from the moisture of the pastry cream and fruit. To reheat, let tarts come to room temperature naturally; avoid microwaving or baking as it may ruin the texture.
Flavors actually deepen if you make the pastry cream a day ahead, but assemble the tarts fresh to keep the crust crisp. This recipe is perfect for making components ahead of time and finishing just before serving.
Nutritional Information & Benefits
Each mini tart contains approximately 220 calories, with 10 grams of fat, 28 grams of carbs, and 4 grams of protein. The fresh fruit topping adds a boost of vitamins C and A, along with dietary fiber. Using real butter and whole milk pastry cream means this dessert feels indulgent but made from wholesome ingredients you recognize.
This recipe can be adjusted to fit gluten-free or dairy-free diets by swapping ingredients. Just watch the texture changes. For anyone mindful of sugar, reducing the granulated sugar in the pastry cream slightly won’t hurt the overall flavor much. It’s a lovely treat that balances satisfaction with simpler ingredients—something I appreciate as a health-conscious home cook.
Conclusion
If you’re looking for a homemade dessert that’s both easy and impressive, these easy creamy mini fruit tarts with pastry cream are it. You can customize the fruit and flavors endlessly, so it’s a recipe that grows with your creativity. I love how it brings a little sweetness and freshness to any occasion without feeling complicated or fussy.
Give this recipe a try, and don’t hesitate to leave a comment sharing your favorite fruit combo or any tweaks you made. I’m excited to hear how yours turn out! Remember, baking is about joy and discovery—so have fun with it, and happy tart making!
Frequently Asked Questions
How long do mini fruit tarts last?
They’re best eaten within 24 hours when stored in the fridge to keep the crust crisp and the fruit fresh.
Can I make the pastry cream ahead of time?
Yes! Pastry cream can be made up to two days in advance. Just cover with plastic wrap directly on the surface and chill.
What if I don’t have mini tart pans?
You can use a muffin tin lined with parchment paper or silicone molds as alternatives—you might need to be extra gentle when removing the tarts.
Can I use frozen fruit instead of fresh?
It’s best to use fresh fruit for topping to avoid soggy crusts. If using frozen, thaw and drain well, then pat dry before arranging.
Is there a vegan version of this recipe?
Yes! Swap butter for coconut oil in the crust, use plant-based milk and a thickener like cornstarch or arrowroot for the cream, and choose vegan-friendly fruit toppings.
Pin This Recipe!

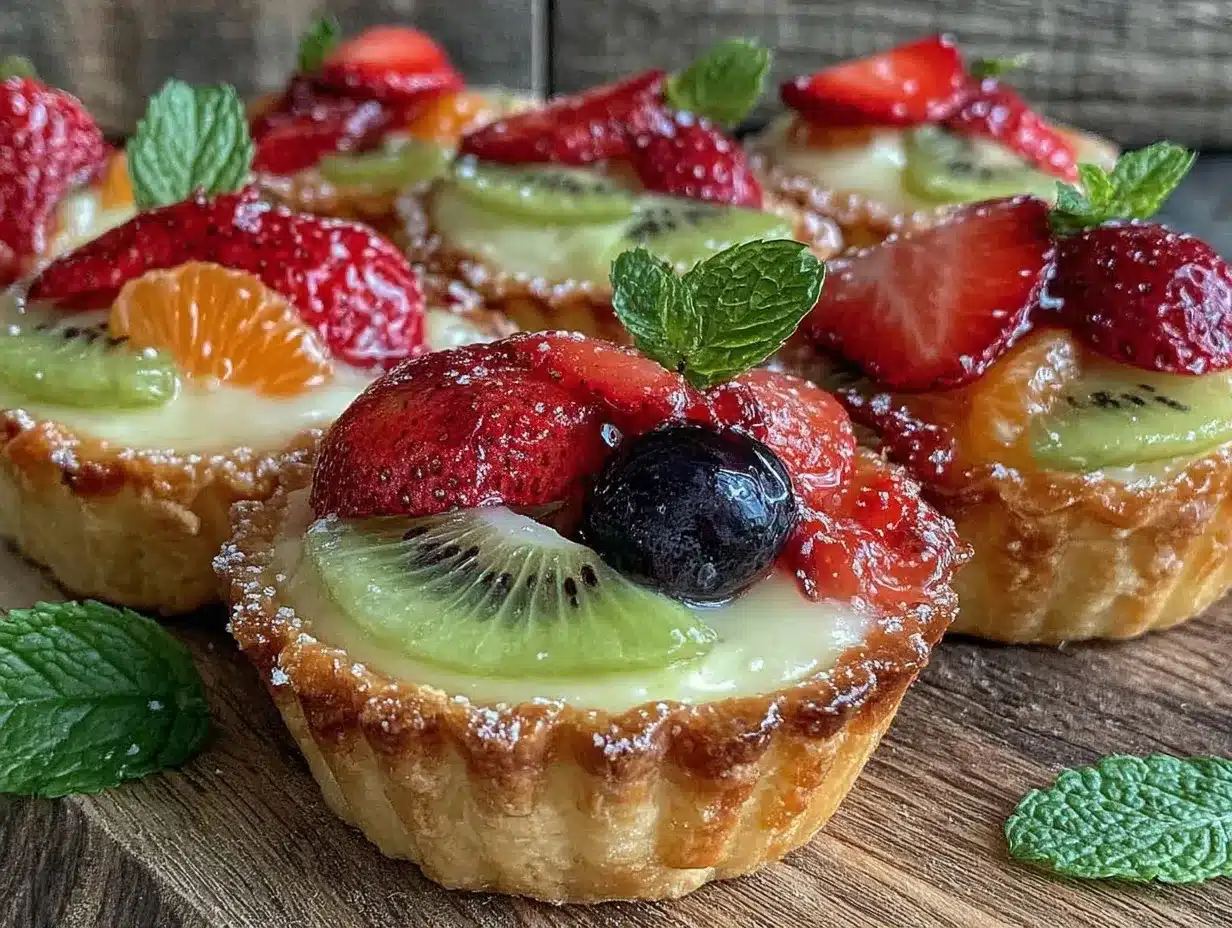
Easy Creamy Mini Fruit Tarts Recipe Perfect for Homemade Desserts

These easy creamy mini fruit tarts combine buttery pastry crusts with smooth vanilla pastry cream and fresh vibrant fruit, perfect for quick homemade desserts that impress.
- Prep Time: 15 minutes
- Cook Time: 27 minutes
- Total Time: 42 minutes
- Yield: 12 mini tarts 1x
- Category: Dessert
- Cuisine: American
Ingredients
- 1 1/4 cups (150 g) all-purpose flour
- 1/4 cup (30 g) powdered sugar
- 1/4 teaspoon salt
- 1/2 cup (115 g) unsalted butter, cold and cubed
- 2–3 tablespoons (30–45 ml) ice water
- 1 teaspoon vanilla extract
- 2 cups (480 ml) whole milk
- 1/2 cup (100 g) granulated sugar
- 4 large egg yolks, room temperature
- 1/4 cup (30 g) cornstarch
- 2 tablespoons (28 g) unsalted butter, softened
- 1 teaspoon vanilla bean paste or extract
- About 1 cup fresh strawberries, sliced
- 1/2 cup blueberries
- 1 medium kiwi, peeled and sliced
- 1/2 cup mandarin orange segments (optional)
- 2 tablespoons apricot jam or honey (for glazing, optional)
Instructions
- In a large bowl, whisk together flour, powdered sugar, and salt. Add cold, cubed butter and work into flour until mixture resembles coarse crumbs with pea-sized pieces. Do not overwork.
- Stir in vanilla extract. Gradually add ice water, mixing gently until dough starts to come together. Form into a disk, wrap in plastic, and chill for at least 30 minutes.
- While dough chills, heat whole milk in a medium saucepan over medium heat until just simmering.
- In a separate bowl, whisk egg yolks with granulated sugar and cornstarch until smooth.
- Slowly pour about 1/2 cup hot milk into egg mixture while whisking constantly to temper eggs. Pour tempered egg mixture back into saucepan with remaining milk.
- Cook over medium heat, whisking constantly, until thickened and bubbling, about 3-5 minutes.
- Remove from heat, whisk in softened butter and vanilla bean paste. Strain through fine mesh sieve. Cover surface with plastic wrap and chill until cool, about 1 hour.
- Preheat oven to 350°F (175°C). Roll chilled dough to about 1/8-inch thickness on lightly floured surface. Cut rounds slightly larger than tart pans. Press dough into pans, trim edges, and prick bottoms with fork.
- Line shells with parchment paper and fill with pie weights or dried beans. Bake 15 minutes, remove weights and parchment, then bake another 10-12 minutes until golden brown. Cool completely on wire rack.
- Spoon chilled pastry cream into each shell, smoothing tops. Arrange fresh fruit on top.
- Optional: Warm apricot jam with a splash of water and brush lightly over fruit for shine and freshness.
- Serve immediately or refrigerate up to 24 hours before serving.
Notes
Keep rolling pin cool by wrapping in a damp towel and chilling before rolling dough for flakier crusts. Use pie weights or dried beans to prevent tart shells from puffing or shrinking. Pastry cream can be made up to two days ahead and chilled. For gluten-free, substitute almond flour and tapioca starch; for dairy-free, use coconut oil and plant-based milk with a thickener like arrowroot powder.
Nutrition
- Serving Size: 1 mini tart
- Calories: 220
- Fat: 10
- Carbohydrates: 28
- Protein: 4
Keywords: mini fruit tarts, pastry cream, homemade dessert, easy tarts, fruit tart recipe, creamy tarts, quick dessert


