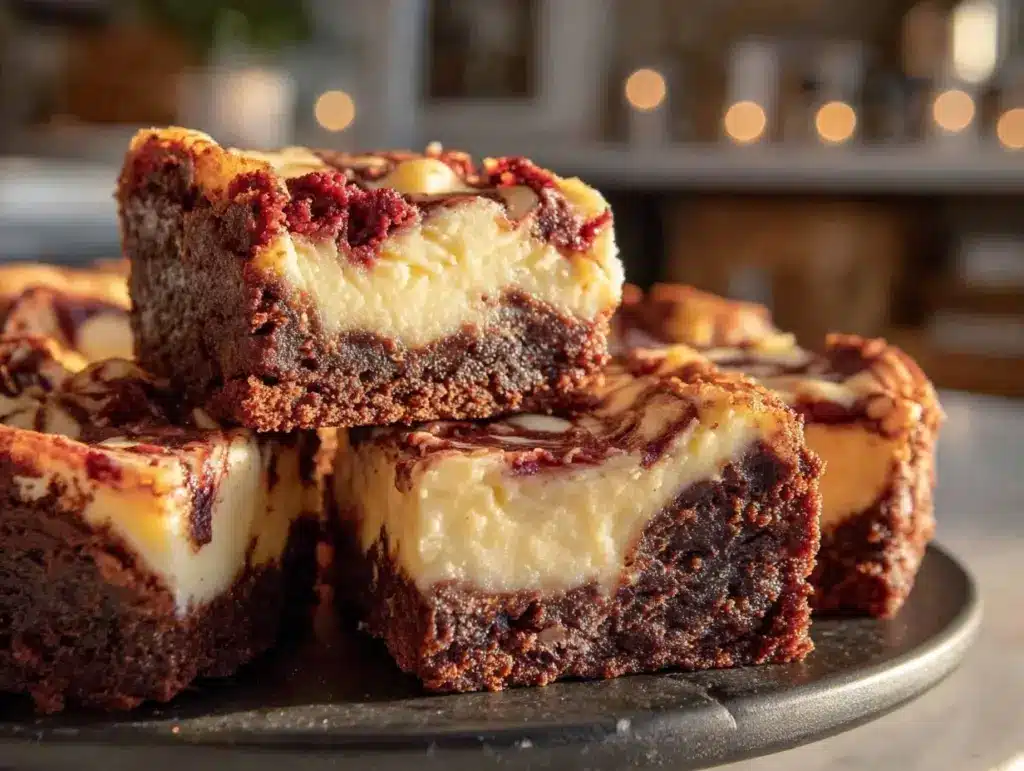
Let me paint you a picture: the kitchen is filled with the sweet, chocolaty aroma of freshly baked brownies, and a swirl of tangy cheesecake dances on top—creamy, vibrant, and just begging for a taste. The first time I pulled a pan of these Creamy Red Velvet Cheesecake Brownies from the oven, the colors were almost too beautiful to eat. That bold red velvet hue with the marbled cheesecake made me pause, take a deep breath, and just admire my handiwork (it’s the kind of moment where you smile and think, “I really nailed it this time!”).
Years ago, when I was knee-high to a grasshopper, my grandma used to tuck a bit of cream cheese into her brownies “for magic,” she’d say. That memory stuck with me, so when I tried to create the perfect Valentine dessert, I knew it had to be a mashup of her cheesecake trick and that iconic red velvet flavor. I first whipped up this recipe for a rainy February bake sale, hoping to impress my kids and their classmates. Honestly, I wish I’d discovered this combo ages ago—it’s dangerously easy and delivers pure, nostalgic comfort in every bite.
My family couldn’t stop sneaking them off the cooling rack (and, let’s face it, I was right there with them). The swirl pattern was so pretty, my daughter insisted we snap a photo for Pinterest before even tasting. The verdict? “Best brownies ever!”—not bad for a dessert that comes together in less than an hour. Whether you’re baking for a romantic night in, a sweet treat for your kids, or just want to brighten up your Pinterest cookie board, these Creamy Red Velvet Cheesecake Brownies are a staple for family gatherings and gifting. I’ve tested this recipe more times than I can count (in the name of research, of course), and every batch feels like a warm hug. Trust me, you’re going to want to bookmark this one.
Why You’ll Love This Recipe
Let me tell you, after years of brownie experiments—some glorious, some less so—I can say this recipe brings together everything you want in a Valentine dessert. It’s the kind of treat that makes you close your eyes after the first bite, savoring the balance of creaminess and chocolate. Here’s why these Creamy Red Velvet Cheesecake Brownies are a must-try:
- Quick & Easy: You can whip these up in under 60 minutes, so no need for hours of kitchen labor. Perfect for those last-minute “oh no, I forgot dessert!” moments.
- Simple Ingredients: No fancy stuff required—you probably have most of it already. Just grab some cream cheese and red food coloring, and you’re set.
- Perfect for Special Occasions: These brownies are ideal for Valentine’s Day, date nights, bake sales, or making any Tuesday feel like a holiday.
- Crowd-Pleaser: Kids love the colors, adults love the creamy swirl, and honestly, everyone asks for seconds.
- Unbelievably Delicious: The fudgy brownie base meets tangy, smooth cheesecake—talk about a next-level flavor combo. It’s pure comfort food reimagined.
What sets these apart from every other red velvet or cheesecake brownie? For starters, I use a method that guarantees a creamy cheesecake swirl without cracks (a lesson learned the hard way). The brownie layer isn’t just dyed chocolate—it’s got that signature buttermilk tang and a hint of cocoa that screams classic red velvet. The cheesecake topping is perfectly balanced, not too sweet, and it complements the brownie base instead of overpowering it.
This recipe is chef-tested (by me, and my family as willing taste testers), and it’s become our go-to for impressing guests without the stress. You know what? When you serve a plate of these, you get that “wow” moment—no one expects brownies to be this pretty and this delicious. Plus, the leftovers are even better the next day (if there are any). Whether you’re a seasoned baker or just want something foolproof, these brownies deliver happiness in every bite.
What Ingredients You Will Need
This recipe uses simple, wholesome ingredients to deliver bold flavor and a satisfying, creamy texture—no fuss, just pure deliciousness. Most are pantry staples, and you’ll find everything at your local grocery store. Here’s what you’ll need for the best Creamy Red Velvet Cheesecake Brownies:
- For the Red Velvet Brownie Base:
- 1/2 cup (115 g) unsalted butter, melted and slightly cooled (adds richness)
- 1 cup (200 g) granulated sugar
- 2 large eggs, room temperature
- 1 teaspoon vanilla extract (pure vanilla gives the best flavor)
- 2/3 cup (85 g) all-purpose flour (or use gluten-free 1:1 blend if needed)
- 2 tablespoons (12 g) unsweetened cocoa powder (I recommend Ghirardelli for deep flavor)
- 1/4 teaspoon salt
- 1 tablespoon buttermilk (for that signature tang; can substitute with milk + a dash of vinegar)
- 2 teaspoons red gel food coloring (gel gives a vibrant color without thinning the batter)
- For the Cheesecake Swirl:
- 8 ounces (225 g) cream cheese, softened (use full-fat for creaminess; Philadelphia is my go-to)
- 1/4 cup (50 g) granulated sugar
- 1 large egg yolk
- 1/2 teaspoon vanilla extract
Ingredient Notes & Substitutions:
- Butter: You can swap in plant-based butter for a dairy-free option.
- Flour: Almond flour works for a lower-carb, gluten-free adaptation (texture will be a bit more dense).
- Food Coloring: Beet powder can be used for a natural red hue, though it’s less vibrant.
- Cream Cheese: Dairy-free cream cheese like Kite Hill works well for those with allergies.
- Buttermilk: If you don’t have buttermilk, mix 1 tablespoon milk with 1/4 teaspoon lemon juice or vinegar.
In summer, you can swirl in a little raspberry puree for a fruity twist, or add mini chocolate chips to the brownie base for extra decadence. I’ve found that using high-quality cocoa powder and cream cheese makes a world of difference—trust me, it’s worth the splurge.
Equipment Needed
You don’t need a fancy kitchen to make these Creamy Red Velvet Cheesecake Brownies. Here’s what I reach for every time:
- 8×8-inch (20×20 cm) square baking pan (nonstick works best; glass pans can make brownies bake a little slower, just keep an eye on them)
- Parchment paper (for easy removal—seriously, don’t skip this step!)
- Mixing bowls: One medium for the brownie base, one small for the cheesecake swirl
- Whisk and spatula: A sturdy whisk for the brownie batter, spatula for scraping every last bit of cheesecake filling
- Hand mixer or stand mixer: For the cheesecake layer—it gets it super creamy. If you don’t have one, a whisk and some elbow grease will do.
- Toothpick or butter knife: For swirling the cheesecake layer into the brownie base
If you don’t have an 8×8 pan, a 9×9 will work (just reduce the bake time by a few minutes). I once tried making these in a muffin tin for mini brownies—cute, but harder to swirl! For budget-friendly options, I’ve used dollar store spatulas and pans with great results. Just make sure your pan is well-greased or lined, and wash your mixer attachments right after using cream cheese (it sticks like nobody’s business).
Preparation Method
- Preheat & Prep: Preheat your oven to 350°F (175°C). Line an 8×8-inch (20×20 cm) baking pan with parchment paper, leaving an overhang for easy removal. Lightly spray or grease the paper. (Tip: If your parchment keeps curling up, crumple it first—it’ll lay flat!)
- Make the Brownie Base: In a medium bowl, whisk together the melted butter and sugar until glossy and combined (about 1 minute). Add eggs and vanilla extract. Whisk vigorously until the mixture is pale and slightly thickened—this step builds that fudgy texture.
- In a separate bowl, sift together flour, cocoa powder, and salt. (It’s worth sifting if your cocoa is clumpy; nobody wants a bite of dry powder.)
- Gently stir the dry ingredients into the wet ingredients until just combined—don’t overmix, or your brownies might turn cakey. Stir in buttermilk and red food coloring until evenly blended. The batter should be thick and glossy, and that vibrant red will make you grin!
- Pour about 3/4 of the brownie batter into your prepared pan. Use a spatula to smooth it out into an even layer. Reserve the rest for topping.
- Make the Cheesecake Swirl: In a small bowl, beat the softened cream cheese until smooth (about 30 seconds). Add sugar, egg yolk, and vanilla extract. Beat until creamy and lump-free (about 1 minute). If it looks grainy, keep going—it should be silky.
- Drop spoonfuls of the cheesecake mixture over the brownie layer. Dollop the remaining brownie batter in between. Use a toothpick or butter knife to gently swirl the two together, creating a marbled effect. (Don’t over-swirl, or you’ll lose the pretty pattern. Three or four gentle loops are plenty.)
- Bake: Bake in the preheated oven for 32-36 minutes. The edges should look set, and a toothpick inserted in the center should come out with a few moist crumbs—don’t wait for it to be bone dry, or you’ll miss the fudgy magic.
- Cool: Let the brownies cool in the pan for at least 20-30 minutes. Then lift them out using the parchment overhang and transfer to a wire rack to cool completely. (This waiting is tough, but it helps the cheesecake set.)
- Slice & Serve: For sharp, clean slices, wipe your knife between cuts. If you’re feeling extra festive, dust with powdered sugar or top with heart-shaped sprinkles. Enjoy!
Troubleshooting Tips: If the cheesecake layer cracks, the oven might be too hot—try baking at 325°F (163°C) next time. If your brownies seem underbaked, let them set in the fridge for a couple hours; they’ll firm up and taste even more decadent. If your swirl looks muddy, use less swirling motion and keep the colors distinct.
Personal Tips: I always save a spoonful of cheesecake mixture to dot right before baking—makes for prettier swirls! For efficiency, measure ingredients ahead and keep your cream cheese at room temp (it blends way smoother). Don’t rush the cooling step—the flavors settle and improve as they rest.
Cooking Tips & Techniques
After a dozen batches (some glorious, some not-so-much), here are my best tips for Creamy Red Velvet Cheesecake Brownie success:
- Room Temperature Ingredients: Bring eggs and cream cheese to room temp before starting. Cold ingredients can cause lumps in the cheesecake swirl, and uneven baking.
- Don’t Overmix: Gently fold the dry ingredients into the wet for the brownie base. Overmixing leads to cakey brownies instead of fudgy ones—that’s a mistake I’ve made more than once!
- Use Gel Food Coloring: Liquid coloring thins the batter, which can mess with texture. Gel gives a bold color with just a small amount.
- Line Your Pan Well: Brownies are notorious for sticking, and there’s nothing sadder than losing a corner. Parchment is your friend—don’t skip it.
- Swirl Strategically: Use a toothpick or butter knife for gentle swirls. Too much swirling muddles the pattern and mixes the layers together.
- Baking Time: Check early! Ovens vary, and brownies are better slightly underbaked than over. The center should be just set.
- Cool Completely: Let brownies cool before slicing. I used to rush this (impatient, I know), but warm brownies are gooey and don’t hold their shape. Patience pays off.
- Multitasking: While the brownies bake, clean up your bowls or prep toppings. It makes the whole process smoother and less stressful.
I’ve had my share of cheesecake layer disasters—cracked tops, runny centers, you name it. What finally worked was lowering the oven temp and not overbeating the cream cheese. If you want every batch to turn out perfect, remember: gentle mixing, careful swirling, and patience with cooling. Honestly, these tips are the difference between “pretty good” and “Pinterest worthy.”
Variations & Adaptations
One of my favorite things about these brownies is how customizable they are. If you’re looking to switch things up, here are some tried-and-true variations:
- Gluten-Free: Swap the all-purpose flour with a 1:1 gluten-free baking blend. Almond flour also works, though it makes a denser brownie.
- Dairy-Free: Use plant-based butter and dairy-free cream cheese (like Kite Hill or Tofutti). The texture stays creamy, and the flavor is just as dreamy.
- Chocolate Lovers: Add 1/3 cup (60 g) mini chocolate chips to the brownie batter for extra richness. You can also drizzle melted chocolate over cooled brownies for an indulgent finish.
- Seasonal Twist: Swirl in raspberry or strawberry puree with the cheesecake layer for a fruity pop—especially nice for summer parties.
- Nutty Adaptation: Sprinkle chopped pecans or walnuts over the batter before baking for a crunchy texture contrast.
- Mini Brownies: Bake in muffin tins for individual servings—just reduce the baking time by about 8-10 minutes.
I once tried a peanut butter swirl for my son’s birthday—so good, but definitely less “Valentine’s Day” in vibe. For allergen-friendly versions, make sure your food coloring is plant-based and check your cream cheese label for hidden gluten. Whether you go classic or creative, these brownies are forgiving and fun to experiment with. Let your taste buds lead the way!
Serving & Storage Suggestions
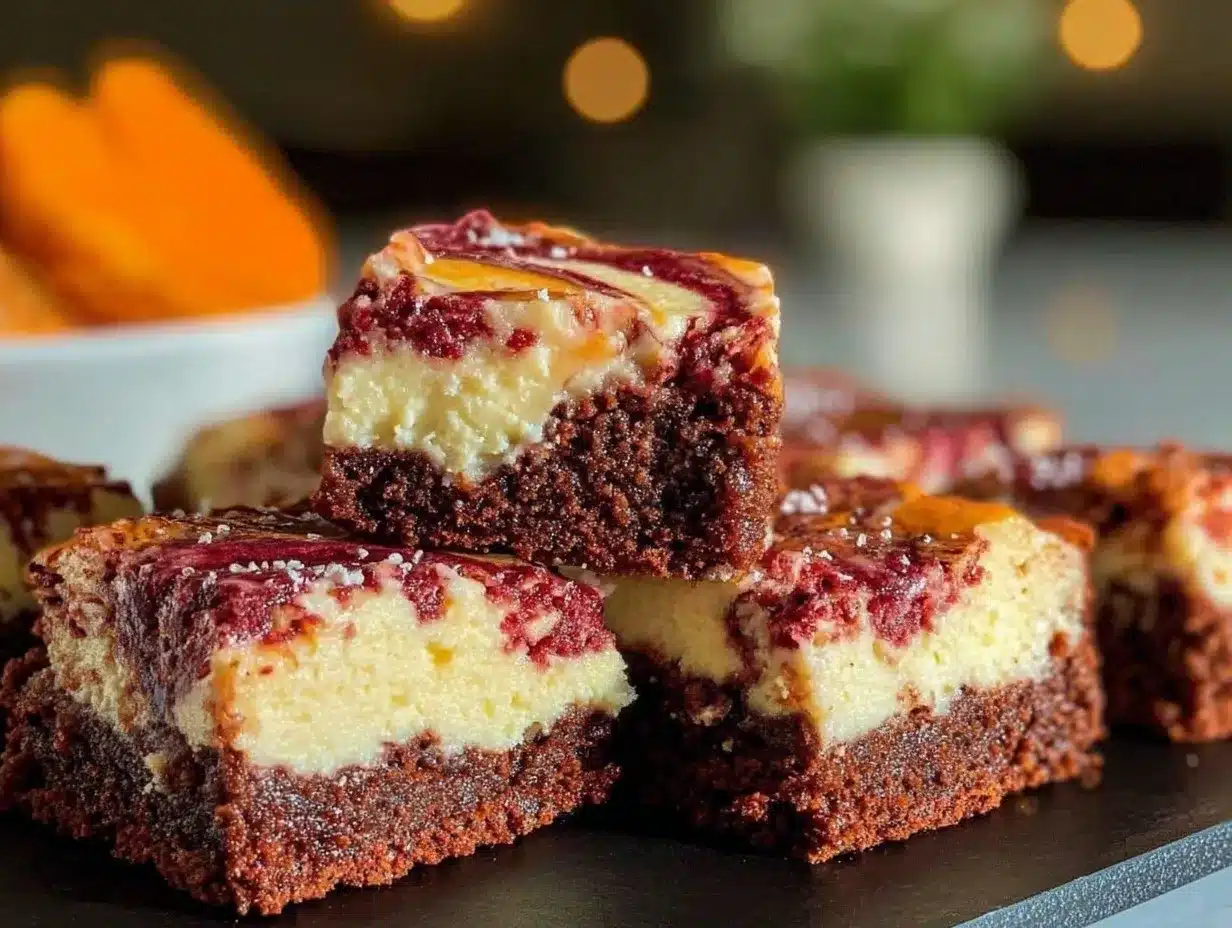
These Creamy Red Velvet Cheesecake Brownies are best served at room temperature for the creamiest texture, but chilled brownies are equally delicious and hold their swirl beautifully. Slice them into squares or heart shapes for a festive touch—perfect for Valentine dessert platters or as a sweet lunchbox surprise.
Pair with a cold glass of milk, hot coffee, or even a scoop of vanilla ice cream if you’re feeling indulgent. For Valentine’s Day, I like to sprinkle a few mini heart-shaped sprinkles or a dusting of powdered sugar on top before serving. They’re also lovely with a side of fresh strawberries or raspberries for color contrast.
Storage: Store brownies in an airtight container in the refrigerator for up to 5 days. They actually taste richer after a day in the fridge—the flavors settle and intensify. For longer storage, freeze individual squares wrapped tightly in plastic wrap and then in a zip-top bag; they’ll keep for up to 2 months. Thaw in the fridge or at room temp before serving.
Reheating: If you prefer warm brownies, microwave individual squares for 10-15 seconds. Just don’t overdo it, or the cheesecake swirl can get rubbery. Honestly, they’re so good cold, you might not even bother with reheating!
Nutritional Information & Benefits
Estimated per serving (1 square, based on 16 squares):
- Calories: ~180
- Fat: 10g
- Carbohydrates: 22g
- Protein: 3g
- Sugar: 15g
The cream cheese provides calcium and a bit of protein, while cocoa powder adds antioxidants. If you opt for gluten-free or dairy-free substitutions, the brownies can fit a range of dietary needs. The recipe is nut-free as written, but always check your ingredient labels for hidden allergens, especially if baking for a crowd.
From a personal wellness perspective, I see these brownies as a treat—just the right balance of indulgence and comfort. They’re portion-controlled, easy to share, and made with simple ingredients. As always, enjoy in moderation and celebrate the little moments with something sweet!
Conclusion
If you’re searching for a show-stopping Valentine dessert that’s easy, stunning, and absolutely delicious, you can’t go wrong with these Creamy Red Velvet Cheesecake Brownies. They combine the best of fudgy brownies and creamy cheesecake in one festive, Pinterest-worthy package. I love how customizable they are—you can tweak them for allergies or personal taste without losing that classic flavor.
Honestly, this recipe is my go-to for special occasions, family gatherings, and anytime I want to bring smiles to the table. I hope you’ll try it and make it your own! If you do, please leave a comment below, share your photos, or let me know how you adapted the recipe. There’s nothing better than seeing your creations and hearing your stories. Wishing you a sweet, love-filled Valentine’s Day—and many delicious brownie memories ahead!
Frequently Asked Questions
Can I make these Creamy Red Velvet Cheesecake Brownies ahead of time?
Absolutely! These brownies keep well in the fridge for up to 5 days, and the flavors actually improve overnight. Just store them in an airtight container.
What’s the best way to get clean, sharp brownie squares?
Let the brownies cool completely, then use a sharp knife. Wiping the knife between cuts helps keep the cheesecake swirl neat and tidy.
Can I double the recipe for a larger crowd?
Yes! Double all the ingredients and bake in a 9×13-inch (23×33 cm) pan. Keep an eye on the baking time—start checking at 35 minutes.
Is it possible to make these brownies gluten-free?
Definitely. Use a gluten-free 1:1 flour blend instead of all-purpose flour. The texture will be a bit different, but still delicious.
Can I freeze these brownies?
You sure can! Wrap individual squares tightly and freeze for up to 2 months. Thaw in the fridge or at room temperature before serving.
Pin This Recipe!
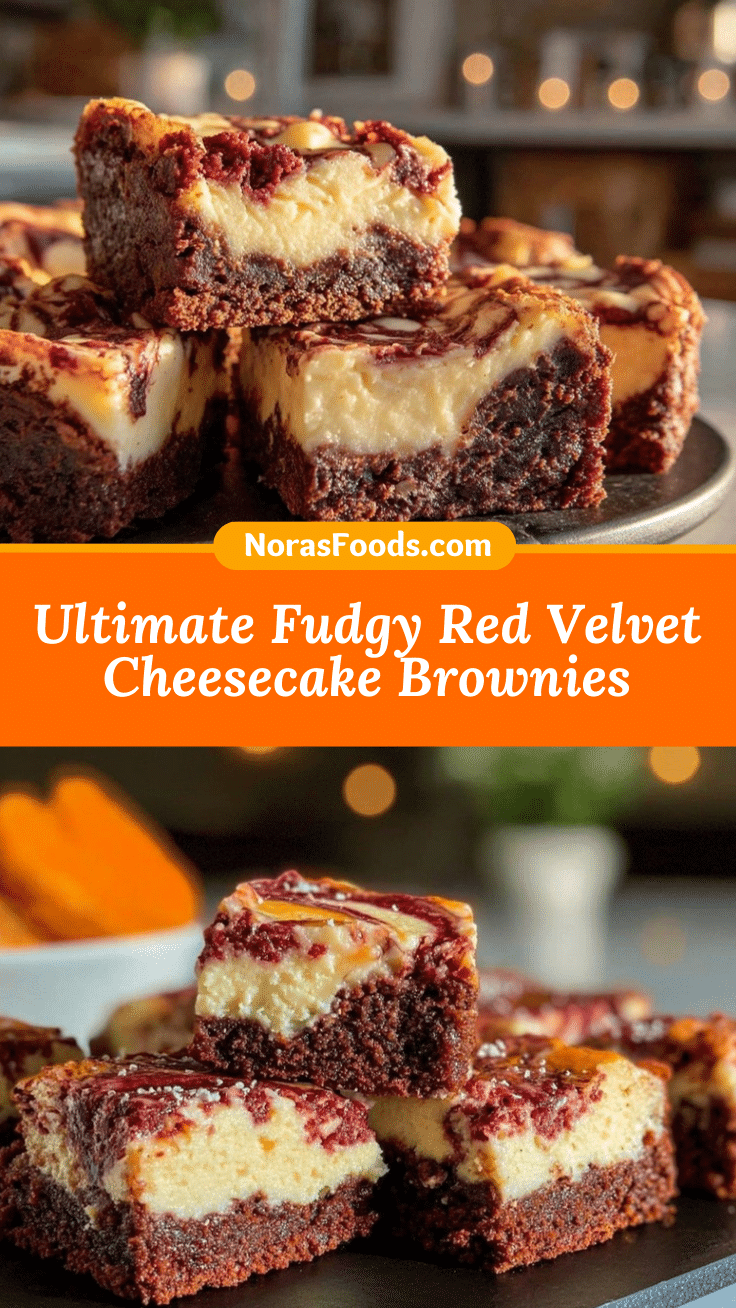
Creamy Red Velvet Cheesecake Brownies
These festive brownies combine a fudgy red velvet base with a creamy cheesecake swirl, making them a show-stopping, easy dessert perfect for Valentine’s Day or any special occasion. Quick to prepare and irresistibly delicious, they’re a crowd-pleaser for kids and adults alike.
- Prep Time: 15 minutes
- Cook Time: 32-36 minutes
- Total Time: 50 minutes
- Yield: 16 squares 1x
- Category: Dessert
- Cuisine: American
Ingredients
- 1/2 cup unsalted butter, melted and slightly cooled
- 1 cup granulated sugar
- 2 large eggs, room temperature
- 1 teaspoon vanilla extract
- 2/3 cup all-purpose flour (or gluten-free 1:1 blend)
- 2 tablespoons unsweetened cocoa powder
- 1/4 teaspoon salt
- 1 tablespoon buttermilk (or 1 tablespoon milk + 1/4 teaspoon lemon juice or vinegar)
- 2 teaspoons red gel food coloring
- 8 ounces cream cheese, softened
- 1/4 cup granulated sugar
- 1 large egg yolk
- 1/2 teaspoon vanilla extract
Instructions
- Preheat oven to 350°F (175°C). Line an 8×8-inch baking pan with parchment paper, leaving an overhang for easy removal. Lightly spray or grease the paper.
- In a medium bowl, whisk together melted butter and sugar until glossy and combined (about 1 minute). Add eggs and vanilla extract, whisking vigorously until pale and slightly thickened.
- In a separate bowl, sift together flour, cocoa powder, and salt.
- Gently stir the dry ingredients into the wet ingredients until just combined. Stir in buttermilk and red food coloring until evenly blended.
- Pour about 3/4 of the brownie batter into the prepared pan and smooth into an even layer. Reserve the rest for topping.
- In a small bowl, beat softened cream cheese until smooth (about 30 seconds). Add sugar, egg yolk, and vanilla extract, beating until creamy and lump-free (about 1 minute).
- Drop spoonfuls of the cheesecake mixture over the brownie layer. Dollop the remaining brownie batter in between. Use a toothpick or butter knife to gently swirl the two together, creating a marbled effect.
- Bake for 32-36 minutes, until edges are set and a toothpick inserted in the center comes out with a few moist crumbs.
- Let brownies cool in the pan for at least 20-30 minutes, then lift out using the parchment overhang and transfer to a wire rack to cool completely.
- Slice into squares and serve. For extra festivity, dust with powdered sugar or top with heart-shaped sprinkles.
Notes
For best results, use room temperature eggs and cream cheese. Don’t overmix the brownie batter to keep it fudgy. Use gel food coloring for vibrant color without thinning the batter. Cool brownies completely before slicing for clean cuts. Store in an airtight container in the fridge for up to 5 days or freeze for up to 2 months.
Nutrition
- Serving Size: 1 square (1/16 of 8x
- Calories: 180
- Sugar: 15
- Sodium: 120
- Fat: 10
- Saturated Fat: 6
- Carbohydrates: 22
- Fiber: 1
- Protein: 3
Keywords: red velvet brownies, cheesecake brownies, Valentine dessert, easy brownies, creamy brownies, marbled brownies, holiday baking, kid-friendly dessert


