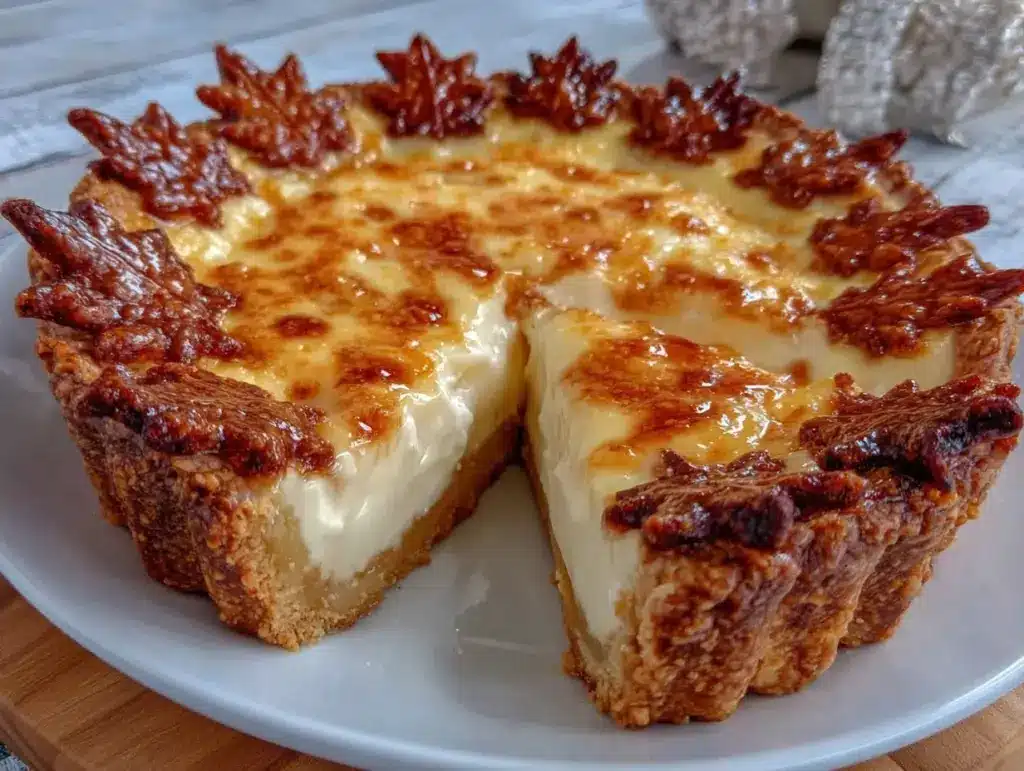
Let’s set the scene: the aroma of pure maple syrup and golden buttermilk drifting through your kitchen, wrapping everything in a sweet, mellow warmth. The first time I pulled this creamy maple buttermilk pie out of the oven, I was hit with that unmistakable fall scent—the one that makes you want to snuggle up under a quilt and forget about your to-do list for just a little while. The golden filling glistened in the light (honestly, it looked almost too pretty to eat), and the rustic leaf crust was crackling just around the edges, begging for a taste test. I paused—spoon in hand—just to soak up the moment, knowing I’d stumbled onto something seriously special.
This recipe came to me one particularly rainy October weekend, when I was knee-high to a grasshopper and my grandma let me help roll out pie dough. She’d press little cookie cutter leaves into the crust, and I’d marvel at how beautiful a pie could look with just a few extra minutes of love. Years later, I found myself trying to recreate that memory for my own family, just hoping it would bring back the same cozy feelings. Well, let’s face it—after the first bite, we were all hooked. My kids couldn’t stop sneaking slices from the cooling rack, and my partner declared it “the best thing you’ve made all fall.” (I’ll take the compliment, thank you very much!)
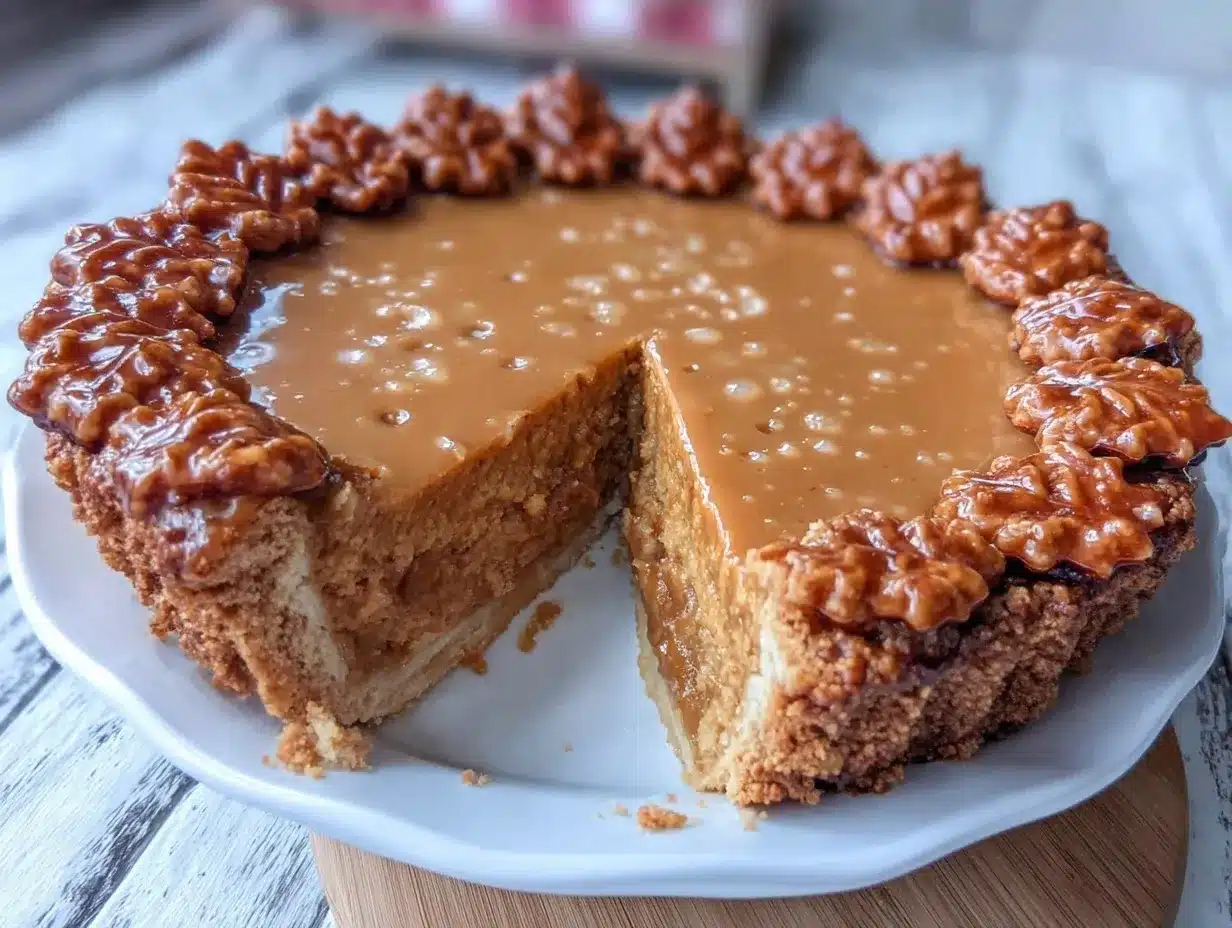
Honestly, this creamy maple buttermilk pie feels like pure, nostalgic comfort. It’s dangerously easy, uses pantry staples, and, let’s be real, it’ll brighten up any Pinterest board with its rustic leaf crust. Perfect for potlucks, holiday tables, or just as a sweet treat after a long day. I’ve tested this recipe more times than I care to admit (in the name of research, of course)—it’s now a staple for family gatherings, gifting, and those afternoons when you need a dessert that feels like a warm hug. Trust me, you’re going to want to bookmark this one!
Why You’ll Love This Creamy Maple Buttermilk Pie Recipe
Let me spill the beans on why this creamy maple buttermilk pie has become such a favorite in my kitchen. After countless rounds of taste-testing (both solo and with a crowd), it’s clear that this dessert just hits differently. Here’s what makes it a must-try for anyone who loves a good slice of pie:
- Quick & Easy: Comes together in under 20 minutes of hands-on prep, so you aren’t stuck in the kitchen all day. Perfect for busy weeknights or last-minute holiday plans.
- Simple Ingredients: No need for fancy shopping trips—you probably have everything on hand. Think buttermilk, maple syrup, eggs, and pantry staples.
- Perfect for Fall Gatherings: This pie just screams autumn, making it ideal for Thanksgiving, potlucks, or cozy Sunday dinners. The rustic leaf crust is a showstopper for guests.
- Crowd-Pleaser: Kids love the sweet, creamy filling, and adults appreciate the subtle maple flavor. I’ve yet to meet someone who didn’t ask for seconds!
- Unbelievably Delicious: The texture is silky, the crust is flaky, and each bite melts in your mouth. It’s comfort food at its finest—no fuss, just pure flavor.
What sets my version apart? Well, I use real maple syrup for depth, and a touch of vanilla for warmth. The rustic leaf crust isn’t just pretty—it adds a perfect crunch and makes every slice feel festive. I’ve played around with ratios and oven temps to nail that creamy center without a soggy bottom (you know the struggle!). This isn’t just another buttermilk pie—it’s my best version, with a flavor combo that’s balanced and a texture that’s downright dreamy.
Honestly, it’s the kind of dessert that makes you pause after the first bite and close your eyes, just soaking it in. It’s a little slice of happiness—healthier than most pies, faster to pull together, but with the same soul-soothing satisfaction. If you want to impress your guests without breaking a sweat, or simply turn a regular meal into something memorable, this creamy maple buttermilk pie is your answer.
What Ingredients You Will Need
This creamy maple buttermilk pie recipe keeps things simple, so you can focus on flavor and comfort. Here’s what you’ll need to bring this rustic beauty to life (plus a few tips for swaps and upgrades):
- For the Filling:
- 1 cup (240 ml) buttermilk (full-fat preferred; adds tang and richness)
- 1/2 cup (120 ml) pure maple syrup (Grade A dark for bold flavor; I love the taste of Anderson’s or Trader Joe’s maple syrup)
- 3 large eggs (room temperature; helps with a smooth, creamy texture)
- 1/2 cup (100 g) granulated sugar (balances the maple without overpowering)
- 1/4 cup (60 g) unsalted butter, melted and cooled (for richness)
- 2 tbsp (16 g) all-purpose flour (helps set the filling; swap for gluten-free flour if needed)
- 1 tsp vanilla extract (for warmth and depth; I recommend Nielsen-Massey)
- 1/4 tsp fine sea salt (rounds out the sweetness)
- For the Rustic Leaf Crust:
- 1 single pie crust, homemade or store-bought (chilled; I usually use my grandma’s recipe, but Pillsbury works in a pinch)
- Extra flour, for dusting
- Egg wash: 1 egg beaten with 1 tbsp milk (for a golden finish)
- Leaf-shaped cookie cutters (optional but highly recommended for that autumn vibe)
- Optional Add-Ins:
- Pinch of ground cinnamon or nutmeg (for a little extra fall flavor)
- Crushed pecans or walnuts (sprinkled on top after baking for crunch)
- Whipped cream or vanilla ice cream (for serving)
Ingredient notes: If you don’t have buttermilk, mix 1 cup milk with 1 tbsp lemon juice and let it sit for 5 minutes—that’ll do in a pinch. Maple syrup is a must for authentic flavor; skip the imitation stuff. For a dairy-free version, swap in coconut milk yogurt and vegan butter. If you’re gluten-free, use a gluten-free pie dough and flour. Seasonal twist? Try adding fresh berries in summer or a splash of bourbon for a grown-up holiday treat.
Equipment Needed
You don’t need a chef’s kitchen for this creamy maple buttermilk pie—just a few trusty tools and maybe a little elbow grease. Here’s what to grab:
- 9-inch (23 cm) pie pan (ceramic or metal both work; I’m partial to Pyrex for even baking)
- Mixing bowls (one large for filling, one small for egg wash)
- Whisk (for smooth filling—an electric mixer is overkill here)
- Measuring cups and spoons (accuracy matters with custard pies!)
- Rolling pin (if working with homemade crust)
- Leaf-shaped cookie cutters (optional but fun—any small cutter works)
- Pastry brush (for egg wash; a spoon works if you’re in a pinch)
- Baking sheet (to catch any drips and make moving the pie easier)
No pie pan? Use a deep-dish tart pan or even a cast-iron skillet (for extra rustic charm). If you don’t have leaf cutters, just use a knife to create freeform leaves. I’ve made this pie with both fancy tools and just my hands—either way, it’s delicious. Pro tip: Keep your rolling pin in the freezer if you struggle with sticky dough. For cleaning, soak pie pans right after use—those maple bits love to stick!
Preparation Method
Ready to bake? Here’s exactly how I make creamy maple buttermilk pie with rustic leaf crust—step by step, with tips I’ve learned the hard way.
- Prepare the crust: If using homemade dough, roll out your pie crust on a floured surface until it’s about 1/8 inch (3 mm) thick. Gently transfer to a 9-inch (23 cm) pie pan, pressing into corners. Trim the edge, leaving about 1/2 inch (1.3 cm) overhang. Chill the crust for 15 minutes (prevents shrinkage).
- Make rustic leaf decorations: Gather scraps of dough, roll out to 1/8 inch (3 mm) thick, and use leaf-shaped cutters (or a knife) to cut out leaves. Place them on a plate and chill until ready to use.
- Mix the filling: In a large bowl, whisk together 1 cup (240 ml) buttermilk, 1/2 cup (120 ml) maple syrup, 3 large eggs, and 1/2 cup (100 g) sugar until smooth. Add 1/4 cup (60 g) melted butter, 2 tbsp (16 g) flour, 1 tsp vanilla extract, and 1/4 tsp salt. Whisk until creamy—no lumps! (If using cinnamon or nutmeg, add here.)
- Preheat the oven: Set your oven to 350°F (175°C). Place a rack in the center.
- Fill the pie: Pour the filling into the chilled crust. Tap the pan gently on the counter to release air bubbles.
- Decorate with rustic leaves: Arrange the chilled leaf cutouts around the edge of the pie, overlapping for a “wreath” effect. Brush leaves and crust with egg wash for shine.
- Bake: Place the pie on a baking sheet. Bake at 350°F (175°C) for 45–55 minutes, until the center is just set but still slightly wobbly. The leaf crust should be golden. If the crust browns too fast, cover edges with foil after 30 minutes.
- Cool: Remove from oven and let cool for at least 2 hours on a wire rack. The filling will set as it cools. Don’t rush this—warm pie will be too runny!
- Serve: Slice and serve at room temperature or chilled. Top with whipped cream, ice cream, or a drizzle of extra maple syrup. (Tip: For clean slices, wipe your knife between cuts.)
Troubleshooting: If your filling is runny after cooling, it probably needed another 5–10 minutes in the oven. If the crust sinks, make sure it was properly chilled before baking. For extra flavor, toast the pie slightly under the broiler for 1–2 minutes—just watch those leaves!
Cooking Tips & Techniques
Let’s talk pie wisdom. After dozens of maple buttermilk pie attempts, I’ve learned a few things that’ll save you time and heartache:
- Don’t overmix the filling: Over-whisking can introduce too much air, leading to a puffy top and cracks. Mix until just smooth.
- Room temperature ingredients: Cold eggs or butter can make the filling curdle. Set everything out 20 minutes before starting (seriously, it matters).
- Chill the crust: Always chill your dough before baking. It keeps the shape crisp and prevents shrinking. I’ve forgotten this step—trust me, it’s worth it.
- Watch the oven: Custard pies can go from perfect to overbaked quickly. Start checking at 40 minutes. If the center jiggles like Jello but isn’t liquid, you’re good.
- Prevent soggy bottoms: Bake the pie on a lower oven rack, or preheat a baking sheet for extra heat underneath. I’ve battled soggy crusts before—this trick works.
- Leaf crust tips: If your leaf cutouts curl, chill them extra long before baking. For a deeper golden color, use a touch more egg in the wash.
- Multitasking: While the crust chills, prep all your filling ingredients. The timing lines up perfectly!
- Consistency: Use the same brand of maple syrup and buttermilk each time for reliable results. I switched syrups once and noticed a flavor difference (still tasty, just not the same).
Most common mistake? Rushing the cool-down. I’ve cut into pies too soon, and the filling always pools out—patience really pays off with this recipe.
Variations & Adaptations
This creamy maple buttermilk pie is a fall classic, but you can tweak it for any taste or dietary need. Here are a few ideas to make it your own:
- Gluten-Free: Swap the all-purpose flour for a 1:1 gluten-free blend and use a gluten-free pie crust. I’ve tried Bob’s Red Mill—it works beautifully.
- Dairy-Free: Use oat milk or coconut milk yogurt instead of buttermilk, and vegan butter. The pie will be slightly less tangy, but still rich and delicious.
- Seasonal Fruit: In summer, add a layer of sliced peaches or berries on the bottom before pouring in the filling. It’s a fresh twist I love when berries are in season.
- Nutty Crunch: Sprinkle chopped pecans or walnuts on top before baking for texture. I did this for a Thanksgiving potluck—huge hit!
- Spiced: Add 1/2 tsp ground cinnamon, ginger, or cardamom to the filling for a warm, spiced version. My personal favorite is a pinch of cardamom in winter.
- Mini Pies: Make individual pies using a muffin tin—reduce baking time to 20–25 minutes. Great for parties!
Allergen note: This recipe contains dairy, eggs, and wheat. For egg-free, try a plant-based custard mix (I haven’t tested this, but let me know if you do!). My go-to is the gluten-free, nutty crunch variation for holiday tables—everyone loves it.
Serving & Storage Suggestions
Creamy maple buttermilk pie is best served at room temperature or lightly chilled, with the leaf crust on full display. I usually place it on a pretty pie plate, sprinkle a little powdered sugar over the leaves, and add whipped cream on the side. It looks stunning on a rustic wooden table—Pinterest worthy for sure!
Pair it with hot coffee, spiced chai, or even apple cider for a true fall experience. If you want to go all out, serve alongside vanilla ice cream or a drizzle of extra maple syrup. For brunch, it’s perfect next to a savory quiche or fresh fruit salad.
Storage is easy: Cover leftovers tightly with plastic wrap or foil and refrigerate for up to 4 days. The flavors deepen as it sits, so day two is even better! You can freeze individual slices for up to a month—just thaw in the fridge overnight. To reheat, warm slices in a 300°F (150°C) oven for 10 minutes. Avoid microwaving—it makes the crust soggy. The leaf decorations stay crisp if you store the pie uncovered for the first hour after baking.
Nutritional Information & Benefits
Each slice of creamy maple buttermilk pie (about 1/8th of a 9-inch pie) has roughly:
| Calories | Fat | Carbs | Protein | Sugar |
|---|---|---|---|---|
| 320 | 15g | 40g | 5g | 24g |
Key health benefits? Buttermilk adds calcium and probiotics, while maple syrup provides antioxidants and minerals (like manganese and zinc). The pie is lower in sugar than most traditional custard pies, thanks to the natural sweetness of maple syrup. It’s nut-free unless you add toppings, but does contain dairy, eggs, and wheat. For gluten-free or dairy-free, see the variations above.
I love that this dessert feels lighter than most pies—no heavy cream, just wholesome ingredients. It’s a sweet treat you can enjoy without feeling weighed down. Personally, I’ve found it’s gentle on the stomach and doesn’t spike my energy like some sugar-laden desserts. As always, adjust for your needs!
Conclusion
There you have it—creamy maple buttermilk pie with rustic leaf crust, the easy fall dessert that’s become my go-to for comforting gatherings and cozy nights. It’s simple enough for beginners, yet beautiful enough for special occasions. Whether you make it as written or put your own spin on it, this recipe is all about bringing warmth and joy to your table.
Don’t be afraid to experiment with flavors, swap ingredients, or get creative with those leaf cutouts. I hope you love this as much as my family does—it’s got heart, history, and a whole lot of autumn magic. If you try it, drop a comment below, share your photos on Pinterest, or let me know your favorite twists. Seriously, your feedback makes my day!
So roll up your sleeves, grab that maple syrup, and bake a pie that feels like a hug. Happy baking—and here’s to making sweet memories, one slice at a time!
Frequently Asked Questions
Can I make creamy maple buttermilk pie ahead of time?
Absolutely! You can bake the pie up to 2 days in advance. Store it covered in the refrigerator and let it come to room temperature before serving for best texture.
What if I don’t have leaf cookie cutters?
No problem—use a small knife to cut freeform leaves or other shapes. Even simple strips or circles look lovely once baked and arranged around the edge.
Can I use honey instead of maple syrup?
You can, but the flavor will be different. Maple syrup gives the pie its signature taste. Honey is sweeter and less complex, so adjust sugar down by 1–2 tablespoons if you substitute.
How do I prevent the crust from getting soggy?
Chill your crust before baking and bake the pie on a preheated baking sheet. If you’re really worried, brush the inside of the crust with a thin layer of egg white before adding the filling—it helps seal it.
What’s the best way to serve creamy maple buttermilk pie?
Serve at room temperature or lightly chilled with whipped cream or ice cream. Sprinkle extra maple syrup or powdered sugar for a festive touch—and always show off that rustic leaf crust!
Pin This Recipe!
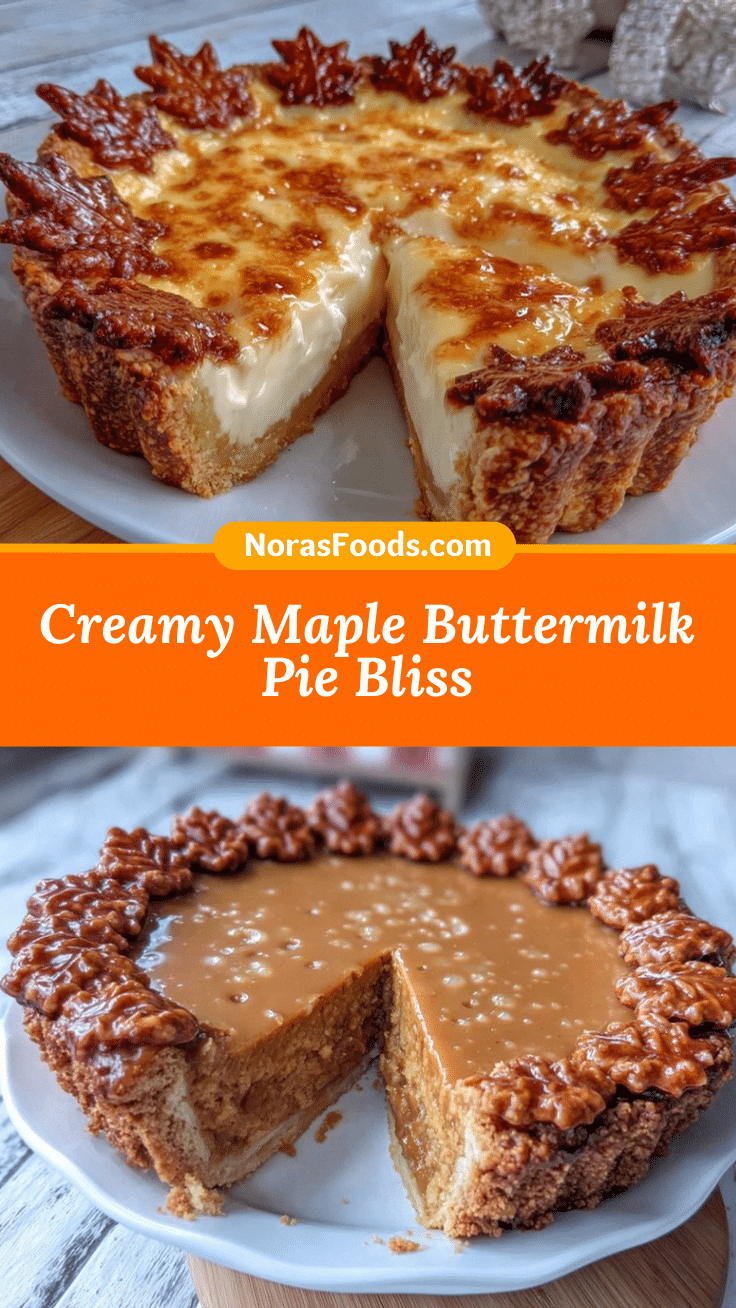
Creamy Maple Buttermilk Pie

This creamy maple buttermilk pie features a silky, custard-like filling infused with pure maple syrup and a rustic leaf-decorated crust. It’s an easy, comforting fall dessert perfect for gatherings, potlucks, or cozy nights in.
- Prep Time: 20 minutes
- Cook Time: 45–55 minutes
- Total Time: 1 hour 15 minutes
- Yield: 8 servings 1x
- Category: Dessert
- Cuisine: American
Ingredients
- 1 cup buttermilk (full-fat preferred)
- 1/2 cup pure maple syrup (Grade A dark recommended)
- 3 large eggs, room temperature
- 1/2 cup granulated sugar
- 1/4 cup unsalted butter, melted and cooled
- 2 tbsp all-purpose flour
- 1 tsp vanilla extract
- 1/4 tsp fine sea salt
- 1 single pie crust, homemade or store-bought (chilled)
- Extra flour, for dusting
- Egg wash: 1 egg beaten with 1 tbsp milk
- Leaf-shaped cookie cutters (optional)
- Pinch of ground cinnamon or nutmeg (optional)
- Crushed pecans or walnuts (optional, for topping)
- Whipped cream or vanilla ice cream (for serving)
Instructions
- Prepare the crust: Roll out your pie crust on a floured surface until about 1/8 inch thick. Transfer to a 9-inch pie pan, trim the edge leaving 1/2 inch overhang, and chill for 15 minutes.
- Make rustic leaf decorations: Gather dough scraps, roll out to 1/8 inch thick, and cut out leaves using cutters or a knife. Chill until ready to use.
- Mix the filling: In a large bowl, whisk together buttermilk, maple syrup, eggs, and sugar until smooth. Add melted butter, flour, vanilla extract, and salt. Whisk until creamy and lump-free. Add cinnamon or nutmeg if desired.
- Preheat oven to 350°F (175°C) and place a rack in the center.
- Fill the pie: Pour the filling into the chilled crust. Tap the pan gently to release air bubbles.
- Decorate: Arrange chilled leaf cutouts around the edge of the pie. Brush leaves and crust with egg wash.
- Bake: Place pie on a baking sheet and bake for 45–55 minutes, until the center is just set but slightly wobbly. Cover edges with foil if crust browns too quickly.
- Cool: Remove from oven and cool for at least 2 hours on a wire rack.
- Serve: Slice and serve at room temperature or chilled. Top with whipped cream, ice cream, or extra maple syrup.
Notes
For gluten-free, use gluten-free flour and pie crust. Chill crust and leaf decorations well for best results. Don’t overmix filling to avoid cracks. Bake on a preheated baking sheet to prevent soggy crust. Let pie cool fully before slicing for clean cuts. Store leftovers covered in the fridge for up to 4 days or freeze slices for up to a month.
Nutrition
- Serving Size: 1 slice (1/8th of a
- Calories: 320
- Sugar: 24
- Sodium: 180
- Fat: 15
- Saturated Fat: 8
- Carbohydrates: 40
- Fiber: 1
- Protein: 5
Keywords: maple buttermilk pie, fall dessert, rustic pie, custard pie, Thanksgiving, easy pie recipe, autumn baking, comfort food, maple syrup, buttermilk


