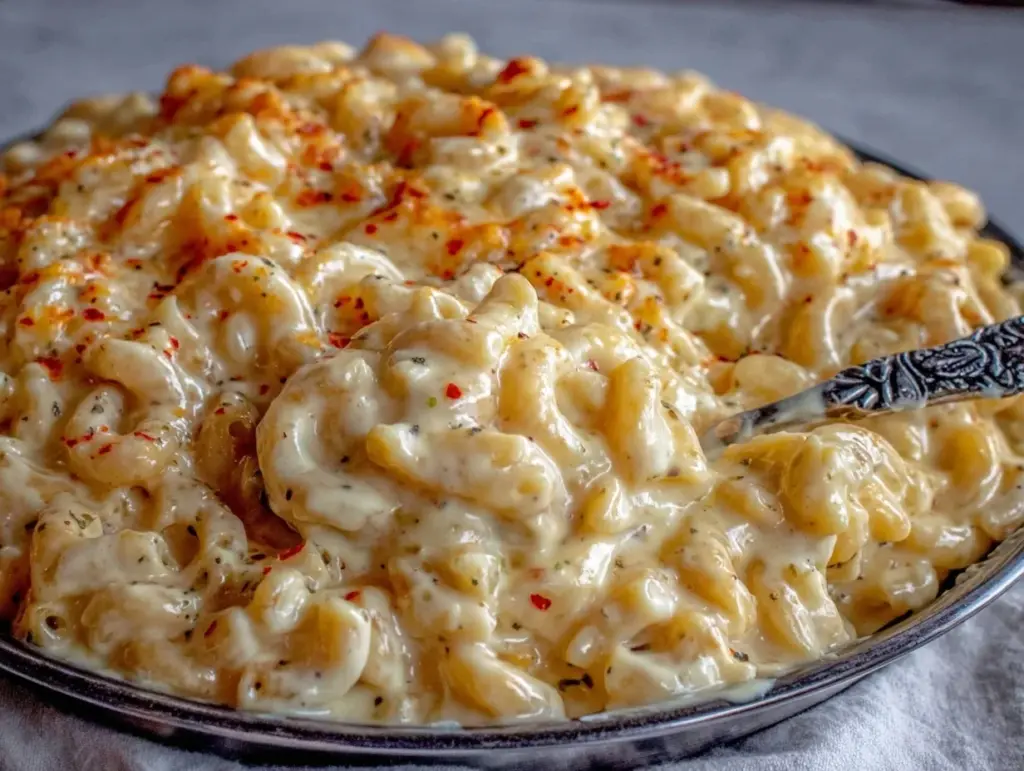
Let me set the scene: a chilly evening, rain tapping against the window, and the irresistible aroma of bubbling cheddar and elbow macaroni curling through the kitchen. Creamy homemade mac and cheese always manages to wrap me in nostalgia—just the sight of that golden crust and gooey cheese makes my heart skip a beat. The first time I whipped up this mac and cheese, I was knee-high to a grasshopper, helping my grandma in her tiny kitchen. She let me scatter breadcrumbs on top, and let’s face it, I made a mess (worth it for that crunchy finish!). But the real magic happened when we dug in—the kind of moment where you pause, take a deep breath, and just smile because you know you’re onto something truly special.
Honestly, this recipe feels like a warm hug from home. It’s the sort of dish that’s dangerously easy to make, but delivers pure, nostalgic comfort every single time. I still remember trying to recreate that creamy texture from my childhood—years ago, I thought boxed mac was the best you could do, but this recipe absolutely changed my mind. My family couldn’t stop sneaking forkfuls off the cooling rack (and I can’t really blame them). This mac and cheese has become a staple for family gatherings, gifting, and those days when only carb-loaded, cheesy goodness will do. Whether you’re feeding a hungry crew at a potluck, surprising the kids after school, or just looking to brighten up your Pinterest board with a classic, you’re going to want to bookmark this one.
I’ve tested this recipe more times than I can count—in the name of research, of course—and I promise, it delivers every time. Creamy homemade mac and cheese is comfort food at its finest, and if you’re anything like me, you’ll wish you’d discovered this recipe years ago.
Why You’ll Love This Recipe
- Quick & Easy: Comes together in under 30 minutes, so you can satisfy those comfort food cravings fast—no need to spend hours in the kitchen.
- Simple Ingredients: No fancy grocery trips needed. Most of these items are pantry staples you already have tucked away.
- Perfect for Any Occasion: Whether you’re serving at a brunch, cozy family dinner, or holiday potluck, this creamy homemade mac and cheese is always a hit.
- Crowd-Pleaser: Both kids and adults dig in with enthusiasm. Trust me, leftovers rarely last longer than a day.
- Unbelievably Delicious: The sauce is ultra-creamy, silky, and loaded with real cheese flavor. The macaroni is perfectly tender, and the crispy topping adds a satisfying crunch.
This isn’t just another mac and cheese recipe—it’s my best version, tested and tweaked over countless family dinners. The secret? A blend of sharp cheddar and creamy Gruyère for deep flavor, plus a simple roux base that guarantees the sauce never turns gritty. I’ve tried adding cottage cheese for extra creaminess, but honestly, the classic combination works every time.
Comfort food doesn’t get better than this. It’s the dish that makes you close your eyes after the first bite and savor that soul-soothing satisfaction. Perfect for impressing guests without the stress, or turning an ordinary weeknight into a memory. If you’ve ever wished for the ultimate creamy homemade mac and cheese that tastes like grandma’s—only easier and faster—this is the one.
What Ingredients You Will Need
This recipe uses simple, wholesome ingredients to deliver bold flavor and a satisfying texture—no fuss, just the good stuff. Most of these are pantry staples, and a few fresh items make all the difference.
- For the Pasta:
- Elbow macaroni – 1 pound (450 g) (classic shape; shells or cavatappi work too)
- For the Cheese Sauce:
- Unsalted butter – 4 tablespoons (56 g), plus more for greasing
- All-purpose flour – 1/4 cup (30 g) (helps thicken the sauce)
- Whole milk – 3 cups (720 ml) (use 2% for a lighter version)
- Heavy cream – 1/2 cup (120 ml) (adds extra richness; can substitute half-and-half)
- Sharp cheddar cheese – 2 cups (200 g), freshly grated (I like Tillamook or Cabot for bold flavor)
- Gruyère cheese – 1 cup (100 g), freshly grated (or Swiss cheese for a milder taste)
- Cream cheese – 2 ounces (56 g) (optional, but makes the sauce extra creamy)
- Salt – 1 teaspoon (adjust to taste)
- Black pepper – 1/2 teaspoon (freshly ground for best flavor)
- Ground mustard – 1/2 teaspoon (adds depth; can skip if you don’t have it)
- Smoked paprika – 1/4 teaspoon (for a subtle smoky layer)
- For the Topping:
- Panko breadcrumbs – 3/4 cup (45 g) (gives a crispy finish)
- Butter – 2 tablespoons (28 g), melted
- Parmesan cheese – 1/4 cup (25 g), grated (optional, for extra flavor)
Substitutions & Tips:
- Use gluten-free pasta and flour to make it gluten-free.
- Swap in dairy-free milk and vegan cheese for an allergy-friendly version.
- Freshly grated cheese melts smoother than pre-shredded (trust me on this one).
- In summer, toss in fresh peas or roasted corn for a seasonal twist.
- You can leave out the Gruyère and double up on cheddar if you prefer classic mac flavor.
I usually pick up store-brand macaroni and splurge on quality cheese—makes all the difference!
Equipment Needed
- Large pot – for boiling the pasta (I use my trusty 6-quart stockpot for big batches)
- Colander – to drain the pasta (any sturdy mesh works)
- Medium saucepan – for making the cheese sauce (nonstick helps with cleanup)
- Whisk – essential for stirring the roux and sauce (I’ve tried with a fork—don’t recommend!)
- Measuring cups and spoons – for accuracy (I use both US and metric for precision)
- Wooden spoon or spatula – for stirring and folding the pasta and sauce together
- 2-quart baking dish – for baking the mac and cheese (ceramic or glass; a cast iron skillet gives a nice crust)
- Oven mitts – don’t skip these, especially when transferring the hot dish
If you don’t have a medium saucepan, a small Dutch oven works just fine. I’ve made this recipe in everything from a Pyrex dish to a cast-iron skillet—each gives a slightly different finish. Maintenance tip: soak sticky pots right away for easy cleanup! Budget-wise, all these tools are basic kitchen staples—no special gadgets needed.
Preparation Method
- Preheat your oven: Set to 375°F (190°C). Grease your baking dish lightly with butter. This helps prevent sticking and gives those crispy edges everyone fights over.
- Cook the pasta: Bring a large pot of salted water to a boil. Add 1 pound (450 g) elbow macaroni and cook for 7-8 minutes, until just al dente (not mushy!)—it’ll finish cooking in the oven. Drain pasta and set aside. If you want to avoid clumping, toss the pasta with a little bit of butter.
- Make the cheese sauce: In a medium saucepan, melt 4 tablespoons (56 g) unsalted butter over medium heat. Sprinkle in 1/4 cup (30 g) flour and whisk continuously for 1-2 minutes until smooth and bubbling (but not browned). Gradually pour in 3 cups (720 ml) whole milk and 1/2 cup (120 ml) heavy cream, whisking constantly. Simmer for 4-5 minutes until thickened. The sauce should coat the back of a spoon—if it’s too thin, cook a bit longer. Remove from heat, then stir in 2 cups (200 g) sharp cheddar, 1 cup (100 g) Gruyère, and 2 ounces (56 g) cream cheese until fully melted. Add salt, black pepper, ground mustard, and smoked paprika. Taste and adjust seasonings! Sometimes I add a pinch more pepper for extra zing.
- Combine pasta and sauce: Pour drained pasta into the buttery cheese sauce. Stir gently with a wooden spoon to coat every noodle. If the sauce seems too thick, add a splash more milk. You want it creamy, not soupy!
- Assemble and bake: Pour mac and cheese mixture into your prepared baking dish. In a small bowl, mix 3/4 cup (45 g) panko breadcrumbs with 2 tablespoons (28 g) melted butter and 1/4 cup (25 g) grated Parmesan. Sprinkle evenly over the top. Bake uncovered for 20-25 minutes until bubbly and golden brown. The top should be crisp and the sauce lusciously creamy underneath.
- Rest and serve: Let the dish cool for 5-10 minutes before serving. This helps the sauce set a bit, making for cleaner scoops. You’ll notice the cheese aroma intensifies—don’t be surprised if everyone hovers nearby!
Troubleshooting: If your sauce looks grainy, it’s probably overheated—next time, lower the heat and whisk slower. If the topping isn’t browning, switch to broil for the last 2 minutes (but watch closely!). For efficiency, prep cheese while pasta boils. I always keep an eye on the sauce—once it thickens, turn off the heat and add cheese right away.
Cooking Tips & Techniques
Through trial and, well, a few epic fails, I’ve picked up some tricks for getting the creamiest homemade mac and cheese:
- Always use freshly grated cheese—pre-shredded varieties contain starches that can make your sauce gritty.
- Whisk the roux for a full minute before adding milk; this helps cook off the raw flour taste and ensures a smooth base.
- Low and slow is the name of the game. If you rush the sauce, it can split or turn lumpy. I learned that the hard way (trust me, it’s worth the patience).
- Don’t overcook the pasta in the boiling stage. Slightly underdone is perfect because it soaks up the cheesy sauce and finishes cooking in the oven.
- If your sauce thickens too much before mixing with pasta, add a splash of milk to loosen it up.
- Multitasking tip: Grate cheese while pasta boils, and prep your topping while the sauce simmers—keeps things moving smoothly.
- For extra depth, try adding a dash of hot sauce or a splash of Worcestershire. Sometimes I sneak in a spoonful of Dijon mustard for a little tang!
- Consistency trick: Stir the sauce constantly, and don’t walk away. Cheese sauces can turn in seconds (I once answered the door mid-stir and regretted it!).
I’ve messed up plenty of batches by overheating or under-seasoning, but each time, I learn something new. With these tips, your creamy homemade mac and cheese will be a reliable favorite.
Variations & Adaptations
Mac and cheese is endlessly customizable—here are some of my favorite twists:
- Gluten-Free: Use gluten-free elbow pasta and substitute the flour with a gluten-free blend. Works great, and the sauce is just as creamy.
- Low-Carb: Swap the macaroni for cooked cauliflower florets. You still get that cheesy goodness, but with fewer carbs.
- Spicy Kick: Add diced jalapeños or a teaspoon of chili flakes to the sauce. Sometimes I toss in pepper jack cheese for a little heat.
- Seasonal Veggie Boost: Stir in roasted broccoli, peas, or sautéed mushrooms before baking. Makes it heartier and adds color.
- Vegan-Friendly: Use vegan butter, plant-based milk, and your favorite dairy-free cheeses. I’ve tried it with cashew cream and it’s surprisingly close!
- Different Cooking Methods: Skip the oven and finish on the stovetop for extra-creamy stovetop mac and cheese. Or use a slow cooker for potlucks.
I once made a bacon-laced version for a game day crowd—absolute hit. You can make it your own by adding herbs, swapping cheeses, or using different pasta shapes. Allergies? Sub oat milk and vegan cheddar. It’s all about what makes you (and your crew) happy!
Serving & Storage Suggestions
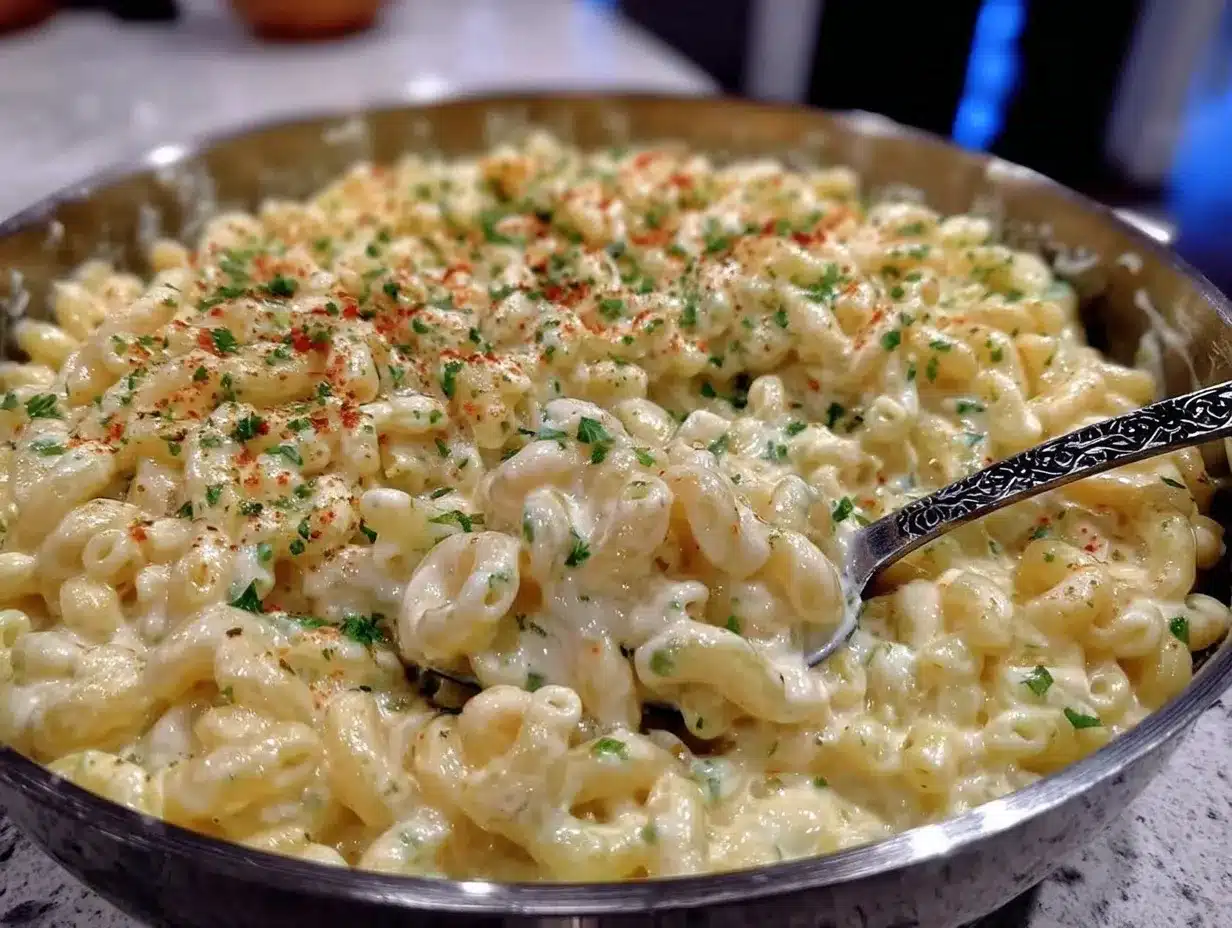
This creamy homemade mac and cheese is best served hot and fresh, straight from the oven. For extra flair, garnish with fresh chives or a sprinkle of smoked paprika. I love pairing it with tangy tomato soup or a crisp green salad. It’s also perfect next to roasted chicken or BBQ ribs if you’re going all out.
Leftovers keep well in an airtight container in the fridge for up to 3 days. To reheat, scoop out a portion and microwave (covered) with a splash of milk to restore creaminess. You can also warm it in the oven at 325°F (163°C) for 15 minutes, covered with foil. Freezing? Yes! Portion into freezer-safe containers and thaw overnight in the fridge before reheating. The flavor deepens a bit over time, making second-day mac and cheese even more irresistible.
Let’s be honest—sometimes the crispy topping is even better the next day. Just re-toast it under the broiler for a minute or two. It’s comfort food that keeps on giving.
Nutritional Information & Benefits
Each serving of creamy homemade mac and cheese (about 1 cup or 200g) delivers roughly:
- Calories: 450
- Protein: 15g
- Carbs: 42g
- Fat: 25g
- Calcium: 30% DV
This dish is a hearty source of protein and calcium thanks to all that real cheese and milk. If you use whole wheat pasta, you’ll bump up the fiber. For those watching gluten or dairy, there are easy swaps to make it allergy-friendly. Main allergens: dairy and wheat. Personally, I love that it’s made with real ingredients—no mystery powders or preservatives. Mac and cheese feeds the soul, and with a few tweaks, you can fit it into just about any diet.
Conclusion
If you’re searching for the ultimate creamy homemade mac and cheese, this recipe is a must-try. It hits all the right notes—easy, crowd-pleasing, and endlessly comforting. Customize it with your favorite cheeses or add-ins, and make it your own.
I love this recipe because it brings my family together around the table and always sparks that nostalgic feeling of home. Give it a go, share your tweaks in the comments below, and let me know how it turned out! Bookmark this comfort food guide and pass it along to friends who need a little cheesy happiness. You’ve got this—and your dinner table is about to get a lot cozier.
FAQs
Can I make creamy homemade mac and cheese ahead of time?
Absolutely! Prepare up to the baking step, cover, and refrigerate for up to 2 days. Bake when ready to serve—just add 5 extra minutes to baking time.
What’s the best cheese for mac and cheese?
Sharp cheddar and Gruyère are my go-tos for flavor and creaminess, but you can swap in Monterey Jack, Colby, or Swiss. Freshly grated is key!
How do I keep my cheese sauce from getting grainy?
Use low heat, whisk constantly, and add cheese off the heat. Pre-shredded cheese can cause clumps, so grate your own if you can.
Can I freeze leftover mac and cheese?
Yes! Portion into airtight containers and freeze up to 2 months. Thaw overnight in the fridge and reheat gently with a splash of milk.
Is this recipe suitable for vegetarians?
Yep! As long as you use vegetarian cheeses (no animal rennet), it’s vegetarian-friendly. Skip the bacon add-ins for a meatless meal.
Pin This Recipe!

Creamy Homemade Mac and Cheese: Easy 5-Step Comfort Food Guide

This creamy homemade mac and cheese is the ultimate comfort food, featuring a silky cheese sauce, tender macaroni, and a crispy breadcrumb topping. Quick to prepare and endlessly customizable, it’s perfect for family dinners, potlucks, or cozy nights in.
- Prep Time: 15 minutes
- Cook Time: 25 minutes
- Total Time: 40 minutes
- Yield: 6 servings 1x
- Category: Main Course
- Cuisine: American
Ingredients
- 1 pound elbow macaroni (about 4 cups dry)
- 4 tablespoons unsalted butter, plus more for greasing
- 1/4 cup all-purpose flour
- 3 cups whole milk
- 1/2 cup heavy cream
- 2 cups sharp cheddar cheese, freshly grated
- 1 cup Gruyère cheese, freshly grated (or Swiss cheese)
- 2 ounces cream cheese (optional)
- 1 teaspoon salt
- 1/2 teaspoon black pepper
- 1/2 teaspoon ground mustard (optional)
- 1/4 teaspoon smoked paprika
- 3/4 cup panko breadcrumbs
- 2 tablespoons butter, melted
- 1/4 cup Parmesan cheese, grated (optional)
Instructions
- Preheat oven to 375°F (190°C). Lightly grease a 2-quart baking dish with butter.
- Bring a large pot of salted water to a boil. Add elbow macaroni and cook for 7-8 minutes until just al dente. Drain and set aside. Toss with a little butter to prevent clumping if desired.
- In a medium saucepan, melt 4 tablespoons butter over medium heat. Whisk in flour and cook for 1-2 minutes until smooth and bubbling, but not browned. Gradually whisk in milk and heavy cream. Simmer for 4-5 minutes until thickened and sauce coats the back of a spoon.
- Remove from heat and stir in cheddar, Gruyère, and cream cheese until melted and smooth. Add salt, black pepper, ground mustard, and smoked paprika. Taste and adjust seasoning.
- Combine drained pasta with cheese sauce, stirring gently to coat all noodles. If sauce is too thick, add a splash more milk.
- Pour mac and cheese mixture into prepared baking dish.
- In a small bowl, mix panko breadcrumbs with melted butter and Parmesan cheese. Sprinkle evenly over the top.
- Bake uncovered for 20-25 minutes until bubbly and golden brown.
- Let cool for 5-10 minutes before serving for easier scooping and intensified flavor.
Notes
For best results, use freshly grated cheese for a smoother sauce. Slightly undercook pasta before baking for perfect texture. Add a splash of milk if sauce thickens too much. For a gluten-free version, use gluten-free pasta and flour. Customize with veggies, bacon, or different cheeses. Leftovers reheat well with a splash of milk.
Nutrition
- Serving Size: About 1 cup (200g) p
- Calories: 450
- Sugar: 6
- Sodium: 700
- Fat: 25
- Saturated Fat: 15
- Carbohydrates: 42
- Fiber: 2
- Protein: 15
Keywords: mac and cheese, creamy mac and cheese, comfort food, baked macaroni, cheese sauce, family dinner, easy recipe, classic mac and cheese, kid-friendly, potluck


