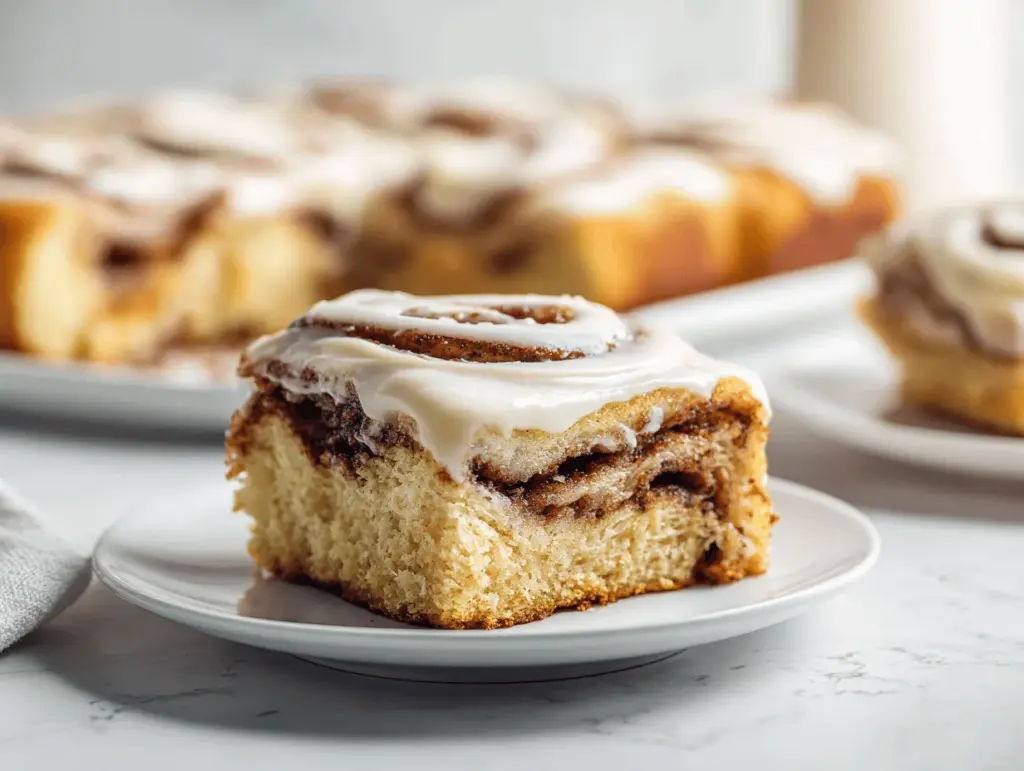
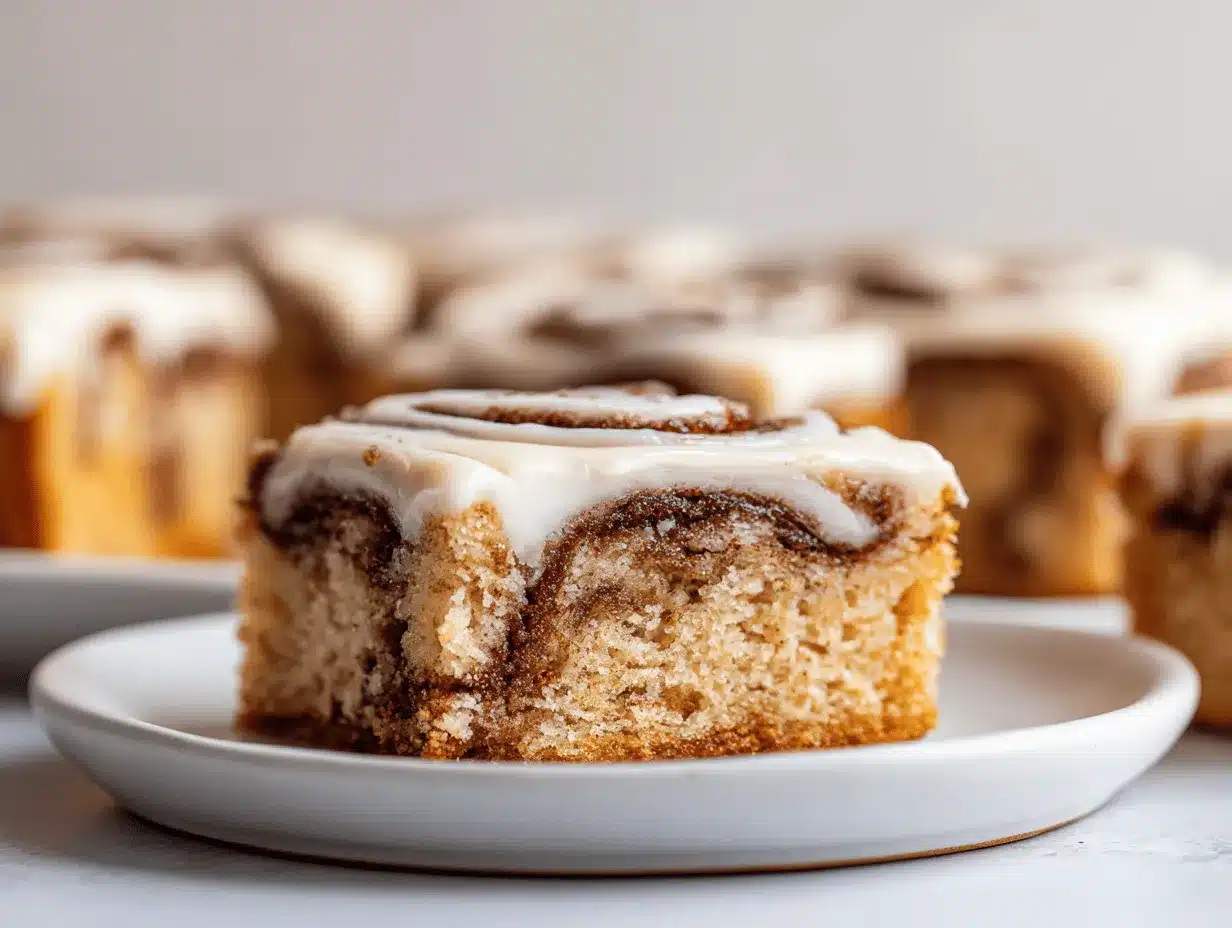
The scent of cinnamon sugar melting into buttery dough is pure magic. The first time I made these cinnamon roll bliss bars, my entire kitchen filled with that cozy, bakery-fresh aroma — and honestly, my kids wandered in, noses twitching, before the timer even beeped. I still remember being in a rush, craving something sweet but not wanting to fuss with yeast or wait for dough to rise. Enter this game-changer: cinnamon roll bliss bars. It’s the shortcut dessert that makes you look like you’ve spent hours baking, but really, you’re just clever with your time (and your sweet tooth).
Cinnamon roll bliss bars are like a cross between gooey cinnamon rolls and chewy cookie bars. You get that familiar swirl of cinnamon, a tender crumb, and a creamy glaze on top. No kneading, no waiting for dough to double — just mix, bake, and enjoy. These bars have become my go-to for potlucks, lazy weekend brunches, and, let’s face it, those nights when you want something sweet but can’t wait. I’ve baked these a dozen times, tweaking here and there, and they always disappear fast (sometimes before they even cool properly). If you love classic cinnamon buns but want something easier, these cinnamon roll bliss bars are your new best friend.
They’re perfect for anyone who wants big flavor with minimal effort. Whether you’re baking with kids, hosting friends, or just treating yourself to a little comfort, this recipe hits all the right notes. Trust me, you’ll want to keep this one in your back pocket for every sweet occasion.
Why You’ll Love This Cinnamon Roll Bliss Bars Recipe
There’s a reason these cinnamon roll bliss bars have become a staple in my kitchen. After countless baking experiments, taste tests, and sharing (sometimes reluctantly) with friends and family, I can honestly say this recipe checks all the boxes for a quick, crowd-pleasing dessert. Here’s what makes these bars such a hit:
- Quick & Easy: You can whip these up in under an hour. No yeast, no waiting, no fancy tools—just simple steps for maximum payoff.
- Simple Ingredients: Everything you need is probably already in your pantry. We’re talking basic flour, sugar, butter, cinnamon, and a handful of fridge staples.
- Perfect for Any Occasion: These dessert bars are ideal for brunches, potlucks, after-dinner treats, or even holiday mornings. They’re pretty enough to serve to guests, but casual enough for a weeknight snack.
- Crowd-Pleaser: Kids and adults love them. I’ve brought these to school bake sales and family reunions, and there are never leftovers.
- Unbelievably Delicious: Each bar is soft, chewy, and layered with that irresistible swirl of cinnamon and sugar. The sweet, creamy glaze on top is the finishing touch that makes everyone go back for seconds.
What really sets these cinnamon roll bliss bars apart? I blend the cinnamon-sugar filling right into the batter, then add an extra swirl for that signature cinnamon roll look and flavor. No dry, boring bars here—these are moist, flavorful, and just the right amount of sweet. If you’ve ever wanted cinnamon rolls without the hassle, this is your recipe.
Honestly, there’s something comforting about a recipe that’s both nostalgic and practical. It’s the kind of treat you bring to a friend in need, or bake just because you want your house to smell like a bakery. These bars have become my “secret weapon” — and now, they can be yours, too.
What Ingredients You Will Need for Cinnamon Roll Bliss Bars
This recipe uses simple, wholesome ingredients to deliver bold cinnamon flavor and that dreamy, gooey texture we all crave. No weird specialty items—just classic baking staples you probably have on hand. Here’s what you’ll need to make these irresistible cinnamon roll bliss bars:
- For the Bars:
- 1 cup (226g) unsalted butter, melted and slightly cooled (adds richness and moisture)
- 1 1/4 cups (250g) packed light brown sugar (for chewiness and caramel notes)
- 1/2 cup (100g) granulated sugar
- 2 large eggs, room temperature (binds everything and adds softness)
- 2 teaspoons pure vanilla extract (for warmth and depth)
- 2 1/4 cups (280g) all-purpose flour (structure)
- 1/2 teaspoon baking powder (lifts the bars)
- 1/2 teaspoon baking soda
- 1/2 teaspoon salt (balances the sweetness)
- For the Cinnamon Swirl:
- 1/3 cup (70g) granulated sugar
- 2 tablespoons ground cinnamon (the star of the show!)
- 2 tablespoons unsalted butter, melted
- For the Cream Cheese Glaze:
- 3 ounces (85g) cream cheese, softened (for a tangy, creamy finish)
- 1 tablespoon unsalted butter, softened
- 1 cup (120g) powdered sugar
- 1–2 tablespoons milk (any kind, to thin the glaze as needed)
- 1/2 teaspoon vanilla extract
Ingredient Tips & Substitutions:
- If you’re out of cream cheese, a little Greek yogurt works in a pinch for the glaze (slightly tangier but still delicious).
- Dairy-free? Use vegan butter and nut milk instead of regular dairy products. The bars turn out just as soft.
- Want to go gluten-free? Swap the all-purpose flour for a 1:1 gluten-free baking blend. I’ve tried King Arthur’s, and it worked like a charm.
- If you’re low on brown sugar, substitute with all granulated sugar, but the bars will be a touch less chewy.
- For the cinnamon, I love using Saigon cinnamon for extra punch, but any ground cinnamon will do.
These ingredients are basic, but the results are anything but. You can mix and match based on what’s in your kitchen—this recipe is pretty forgiving!
Equipment Needed for Cinnamon Roll Bliss Bars
- Mixing Bowls: At least two, one for wet and one for dry ingredients. I’ve used everything from glass to metal, but glass lets you see if you’ve mixed everything in.
- Whisk & Spatula: A sturdy whisk for beating the eggs and sugars, and a silicone spatula for folding in the dry ingredients. If you don’t have a whisk, a fork will do in a pinch.
- Measuring Cups & Spoons: Both dry and liquid measuring cups keep your measurements accurate. I once used a coffee mug for flour—don’t recommend it!
- 8×8-inch (20x20cm) Baking Pan: Metal pans bake most evenly, but glass works too. If you want thinner bars, use a 9×9-inch pan, but check them early.
- Nonstick Spray or Parchment Paper: Lining your pan makes for easy removal and less mess. I use parchment for flawless bar lifting.
- Hand Mixer or Stand Mixer: Optional, but makes the glaze super smooth. Honestly, a good old-fashioned whisk works if you don’t mind a little arm workout.
Maintenance tip: Keep nonstick pans in good shape by using silicone or wooden utensils. If you’re on a budget, most of these items can be found at discount stores or thrift shops—I’ve scored great pans secondhand that lasted years.
How to Make Cinnamon Roll Bliss Bars – Step-By-Step Method
-
Prep Your Pan and Oven: Preheat your oven to 350°F (175°C). Lightly grease an 8×8-inch (20x20cm) baking pan or line it with parchment paper for easy lifting.
Tip: Parchment means you can pull the bars out cleanly — no stuck-on bits! -
Mix the Cinnamon Swirl: In a small bowl, stir together 1/3 cup (70g) granulated sugar, 2 tablespoons ground cinnamon, and 2 tablespoons melted butter. Set aside.
Sensory cue: It should smell like sweet, spicy heaven. No need to be too precise here, a little more or less cinnamon won’t hurt. -
Combine Wet Ingredients: In a large mixing bowl, whisk together 1 cup (226g) melted butter, 1 1/4 cups (250g) brown sugar, and 1/2 cup (100g) granulated sugar until smooth and glossy. Add 2 eggs (room temp) and 2 teaspoons vanilla extract, whisking until fully combined.
If your eggs are cold, run them under warm water to avoid curdling the butter. -
Add Dry Ingredients: In a separate bowl, stir together 2 1/4 cups (280g) flour, 1/2 teaspoon baking powder, 1/2 teaspoon baking soda, and 1/2 teaspoon salt. Gently fold the dry mix into the wet ingredients with a spatula, mixing just until you don’t see streaks of flour.
Don’t overmix—your bars will stay soft and tender. -
Layer & Swirl: Spread half the batter evenly in your prepared pan (it’ll be thick, so use a spatula or damp fingers). Sprinkle half the cinnamon swirl mixture over the batter. Dollop the remaining batter on top and carefully spread it out. Finish with the rest of the cinnamon swirl, using a butter knife to swirl it gently through the top layer.
Swirls don’t have to be perfect! In fact, uneven swirls make every bar unique. -
Bake: Bake on the center rack for 28–32 minutes, or until the bars are golden and just set in the center. A toothpick should come out with moist crumbs, not wet batter.
If your oven runs hot, start checking at 25 minutes. Overbaking = dry bars. -
Cool and Glaze: Let the bars cool in the pan for at least 20 minutes (I know, it’s tough to wait). Meanwhile, beat together 3 ounces (85g) cream cheese, 1 tablespoon butter, 1 cup (120g) powdered sugar, 1–2 tablespoons milk, and 1/2 teaspoon vanilla until smooth and pourable. Drizzle the glaze over warm (not hot) bars using a spoon or piping bag.
The glaze should melt slightly into the bars, giving you that cinnamon roll vibe. - Slice & Serve: Lift bars from the pan, slice into 16 squares, and enjoy! They’re best slightly warm, but honestly, no one complains if they’re cooled.
Troubleshooting: If your bars seem underbaked in the middle but browned on top, cover loosely with foil and bake 3–5 more minutes. If your glaze is too thick, add milk 1 teaspoon at a time. Too thin? More powdered sugar fixes it. Bar edges bake faster, so aim to cut from the center for the gooey-est bites!
Cooking Tips & Techniques for Perfect Cinnamon Roll Bliss Bars
Making these cinnamon roll bliss bars is pretty foolproof, but I’ve learned a few tricks after plenty of trial and error (and a few sticky pans). Here’s what I always keep in mind:
- Don’t Overmix: Once you add flour, mix just until combined. Overmixing leads to dense, tough bars instead of that dreamy, tender crumb.
- Room Temperature Ingredients: Butter that’s too hot can scramble your eggs, and cold eggs can cause the butter to seize. Let everything sit out for 10–15 minutes for best results.
- Parchment Paper is Your Friend: Lining your pan makes for clean slices and easy cleanup. I’ve skipped it before, and let’s just say—never again!
- Watch Your Bake Time: Ovens vary. The bars should be just set in the center, with a slight jiggle if you shake the pan gently. If in doubt, err on the side of slightly underbaked—they’ll firm up as they cool.
- Swirl Like a Pro: Use a butter knife or skewer for those signature cinnamon swirls. Don’t stress about perfection—rustic looks good (and tastes even better).
- Glaze at the Right Time: Pour glaze on when the bars are warm but not hot, so it seeps in a little but doesn’t melt completely off. If the bars are too hot, the glaze will disappear; too cool, and it won’t spread nicely.
- Patience Pays Off: Letting the bars cool before cutting gives you neater squares. I’ve tried to rush things, but warm bars = messy slices (still tasty, though).
And, if you’re multitasking (like baking these while prepping dinner), set a timer for each step. I’ve definitely gone down the “just five more minutes” rabbit hole and ended up with overbaked bars. Keep an eye, trust your senses, and enjoy the process!
Variations & Adaptations for Cinnamon Roll Bliss Bars
One of my favorite things about these cinnamon roll bliss bars is how easily you can tweak them to fit your cravings—or your pantry. Here are a few ways to mix things up:
- Gluten-Free Version: Swap the all-purpose flour for a 1:1 gluten-free baking blend. I’ve tried this with King Arthur’s and Bob’s Red Mill—both work great.
- Vegan/Dairy-Free: Use vegan butter and a plant-based milk for both the bars and the glaze. For the glaze, sub in vegan cream cheese or even coconut yogurt for a different twist.
- Maple Pecan Swirl: Add 1/3 cup chopped pecans to the cinnamon swirl, and replace half the granulated sugar with maple syrup for a cozy, nutty vibe. I did this last fall, and the bars tasted like Thanksgiving morning!
- Fruit Add-Ins: Fold in 1/2 cup diced apples or raisins to give the bars an apple-cinnamon roll feel. Blueberries also work if you want a summery twist.
- Chocolate Chip Cinnamon Bars: Stir 1/2 cup mini chocolate chips into the batter for a gooey, extra-sweet treat. My kids go wild for this version!
- Allergen Substitutions: Egg-free? Use a flax egg (1 tablespoon ground flax + 2.5 tablespoons water per egg) to bind the bars. Nut-free? These are naturally nut-free unless you add pecans or nut milk.
Personally, the maple pecan version is my go-to when I want something extra cozy. Feel free to get creative—this recipe forgives a lot and rewards experimentation!
Serving & Storage Suggestions
Cinnamon roll bliss bars are best served slightly warm, when the glaze is just set and the cinnamon swirl is gooey. For a bakery-style presentation, slice into squares and arrange on a pretty platter, dusting with a little extra cinnamon if you like. If you’re feeling fancy, serve with a scoop of vanilla ice cream or a dollop of whipped cream—seriously, it’s next-level comfort.
Pair these bars with a hot cup of coffee, chai, or even cold milk for the ultimate treat. I love bringing them to brunch with fruit salad and scrambled eggs for balance, but they also make a killer midnight snack (no judgment).
Storing: Keep bars in an airtight container at room temperature for up to 3 days. If your kitchen is warm, store in the fridge to keep the glaze fresh. For longer storage, wrap individual bars and freeze for up to 2 months. Thaw at room temp, then zap in the microwave for 10–15 seconds for that fresh-baked softness.
Bonus tip: The flavors deepen after a day or two, so making these ahead means even gooier, cinnamon-y bars. They rarely last that long here, but on the rare occasion, they’re even better the next day!
Nutritional Information & Benefits
Each cinnamon roll bliss bar (out of 16) has approximately:
- Calories: 220
- Fat: 10g
- Carbs: 30g
- Protein: 2g
- Sugar: 18g
While these bars are definitely a treat, there are some hidden perks! Cinnamon is known for its antioxidant properties and can help regulate blood sugar. Swapping regular flour for whole wheat or a gluten-free blend can add fiber or make them suitable for more diets. You can also cut some sugar or use coconut sugar for a lower glycemic option.
Allergens to note: Contains dairy, eggs, and gluten (unless modified). The recipe is nut-free as written. As someone who likes balance, I see these bars as a perfect “sometimes” food—totally worth every bite for the comfort and joy they bring!
Conclusion
If you’re looking for a quick, easy dessert that brings all the cozy cinnamon roll flavor without the fuss, these cinnamon roll bliss bars are your answer. They’re simple, endlessly adaptable, and always a hit—whether it’s a lazy weekend, a special brunch, or just a Tuesday night sweet tooth. I love how they fill my kitchen with that warm bakery scent and how fast they disappear from the pan.
Don’t be afraid to put your own spin on this recipe. Add nuts, chocolate, or fruit—whatever makes you happy. I hope you enjoy these bars as much as my family and friends have. If you try them, please let me know in the comments! Tag your creations, share with friends, and spread the cinnamon love. Happy baking—may your bars be gooey, sweet, and absolutely irresistible!
FAQs About Cinnamon Roll Bliss Bars
Can I double this cinnamon roll bliss bars recipe for a larger crowd?
Absolutely! Just bake in a 9×13-inch (23x33cm) pan and add 5–10 minutes to the baking time. Keep an eye on the center for doneness.
What’s the best way to store leftover cinnamon roll bliss bars?
Keep them in an airtight container at room temperature for up to 3 days, or refrigerate for longer freshness. For a fresh-baked taste, microwave for 10–15 seconds before serving.
Can I make these bars ahead of time?
Yes! The flavors actually deepen after a day, and they stay soft. You can also freeze them (unglazed or glazed) for up to 2 months.
How do I make these gluten-free or dairy-free?
Use a 1:1 gluten-free flour blend for gluten-free bars and swap in vegan butter and plant milk for dairy-free. Both versions turn out tender and tasty!
Why are my cinnamon roll bliss bars dry or overbaked?
This usually happens from overbaking or using too much flour. Check your oven temp, use the right pan size, and mix just until combined for the best, softest texture.
Pin This Recipe!
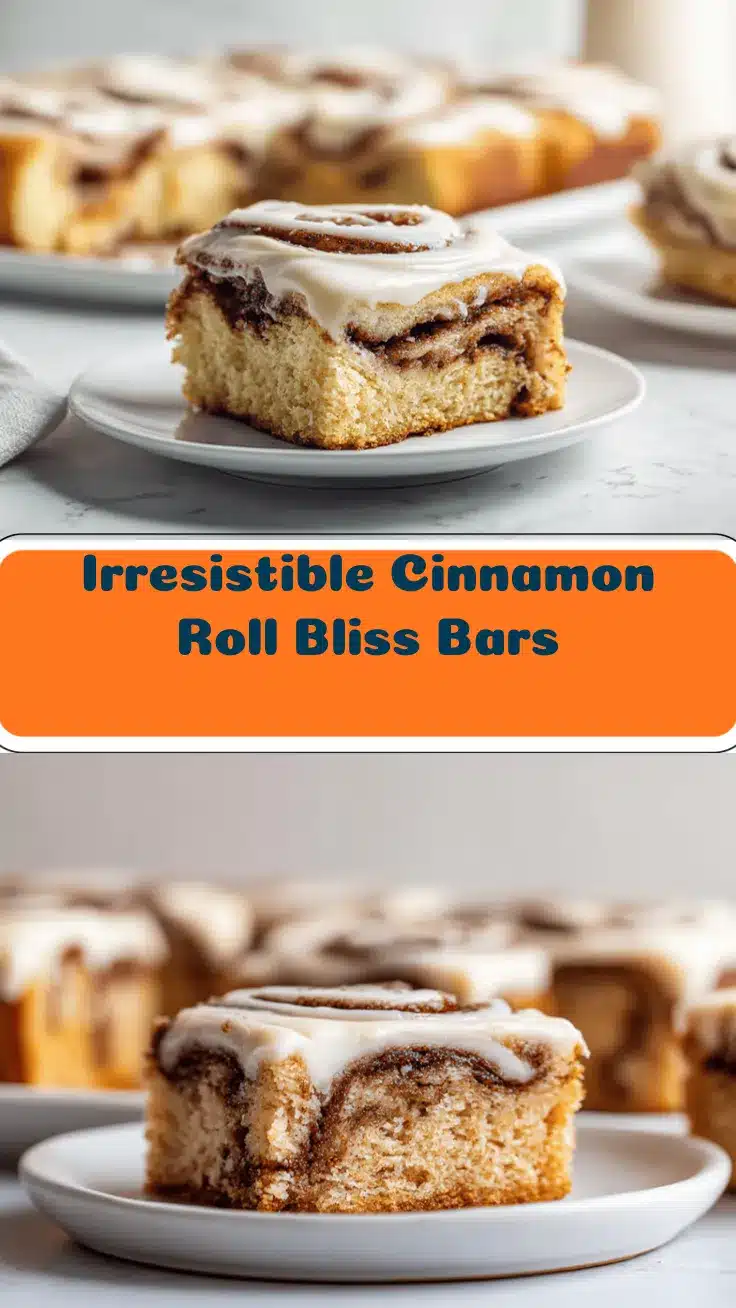
Cinnamon Roll Bliss Bars
Cinnamon Roll Bliss Bars are a quick and easy dessert that combines the gooey, spiced flavor of cinnamon rolls with the chewy texture of cookie bars. Topped with a creamy glaze, these bars are perfect for brunches, potlucks, or whenever you crave a sweet treat without the fuss of yeast.
- Prep Time: 15 minutes
- Cook Time: 30 minutes
- Total Time: 45 minutes
- Yield: 16 bars 1x
- Category: Dessert
- Cuisine: American
Ingredients
- 1 cup (226g) unsalted butter, melted and slightly cooled
- 1 1/4 cups (250g) packed light brown sugar
- 1/2 cup (100g) granulated sugar
- 2 large eggs, room temperature
- 2 teaspoons pure vanilla extract
- 2 1/4 cups (280g) all-purpose flour
- 1/2 teaspoon baking powder
- 1/2 teaspoon baking soda
- 1/2 teaspoon salt
- 1/3 cup (70g) granulated sugar (for cinnamon swirl)
- 2 tablespoons ground cinnamon
- 2 tablespoons unsalted butter, melted (for cinnamon swirl)
- 3 ounces (85g) cream cheese, softened
- 1 tablespoon unsalted butter, softened (for glaze)
- 1 cup (120g) powdered sugar
- 1–2 tablespoons milk (any kind, for glaze)
- 1/2 teaspoon vanilla extract (for glaze)
Instructions
- Preheat your oven to 350°F (175°C). Lightly grease an 8×8-inch (20x20cm) baking pan or line it with parchment paper.
- In a small bowl, stir together 1/3 cup granulated sugar, 2 tablespoons ground cinnamon, and 2 tablespoons melted butter for the cinnamon swirl. Set aside.
- In a large mixing bowl, whisk together 1 cup melted butter, 1 1/4 cups brown sugar, and 1/2 cup granulated sugar until smooth. Add 2 eggs and 2 teaspoons vanilla extract, whisking until fully combined.
- In a separate bowl, stir together 2 1/4 cups flour, 1/2 teaspoon baking powder, 1/2 teaspoon baking soda, and 1/2 teaspoon salt. Gently fold the dry mix into the wet ingredients with a spatula until just combined.
- Spread half the batter evenly in the prepared pan. Sprinkle half the cinnamon swirl mixture over the batter. Dollop the remaining batter on top and carefully spread it out. Finish with the rest of the cinnamon swirl, using a butter knife to gently swirl it through the top layer.
- Bake on the center rack for 28–32 minutes, or until the bars are golden and just set in the center. A toothpick should come out with moist crumbs.
- Let the bars cool in the pan for at least 20 minutes. Meanwhile, beat together 3 ounces cream cheese, 1 tablespoon butter, 1 cup powdered sugar, 1–2 tablespoons milk, and 1/2 teaspoon vanilla until smooth and pourable.
- Drizzle the glaze over warm (not hot) bars using a spoon or piping bag.
- Lift bars from the pan, slice into 16 squares, and enjoy.
Notes
For best results, use room temperature ingredients and avoid overmixing the batter. Lining the pan with parchment paper makes for easy removal. Bars are best slightly warm but can be stored in an airtight container for up to 3 days or frozen for up to 2 months. For gluten-free or dairy-free adaptations, use a 1:1 gluten-free flour blend and vegan butter/milk.
Nutrition
- Serving Size: 1 bar (1/16 of recipe)
- Calories: 220
- Sugar: 18
- Sodium: 120
- Fat: 10
- Saturated Fat: 6
- Carbohydrates: 30
- Fiber: 1
- Protein: 2
Keywords: cinnamon roll bars, dessert bars, easy cinnamon dessert, quick brunch recipe, cinnamon roll bliss bars, cream cheese glaze, potluck dessert, kid-friendly dessert


