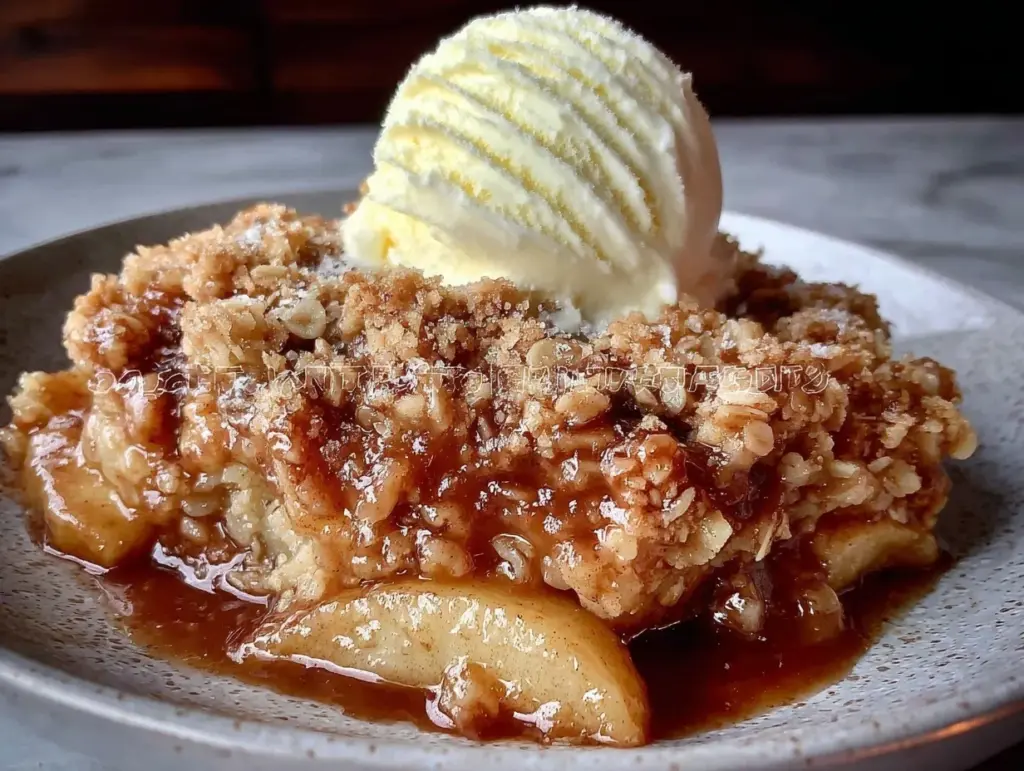
Let me set the scene for you: the kitchen is filled with the warm, spicy scent of cinnamon and baked apples, a hint of brown sugar caramelizing in the oven, and you can almost hear the gentle bubbling as the fruit softens beneath a golden, buttery crumble. There’s just something magical about an apple crisp recipe—especially when it’s served up with a big scoop of creamy vanilla ice cream that melts over the crunchy topping. Honestly, the first time I pulled this apple crisp out of my oven, I knew I’d stumbled upon my new autumn obsession. It was the kind of moment where you pause, take a deep breath, and just smile because you know you’re onto something truly special.
Years ago, when I was knee-high to a grasshopper, my grandma used to make a version of this every October. She’d peel apples with lightning speed, chatting away about the best orchards and how a good crisp could chase away any gloomy day. The memory stuck with me, and now, every fall, I find myself reaching for tart apples and that worn-out baking dish. Let’s face it—there’s pure, nostalgic comfort in a warm apple crisp, and it’s dangerously easy to whip up, even on a chilly weeknight.
Every time I bake this cozy homemade apple crisp, my family can’t stop sneaking bites off the cooling rack (and honestly, I can’t blame them). It’s become our go-to for family gatherings, impromptu movie nights, and even gifting to neighbors. You know what? I wish I’d discovered how simple and foolproof this recipe is years ago. Whether you need a sweet treat for your kids, a make-ahead dessert for Thanksgiving, or simply want to brighten up your Pinterest board, this apple crisp recipe with ice cream is the answer. I’ve tested it more times than I can count (in the name of research, of course), and every time, it feels like a warm hug. You’re going to want to bookmark this one!
Why You’ll Love This Apple Crisp Recipe
When it comes to cozy fall desserts, nothing beats a homemade apple crisp with ice cream. I’ve baked more versions than I care to admit—some too dry, some too sweet—but this one stands out every single time. Here’s why it’s a must-make in my kitchen (and why it’s become the family’s most-requested treat):
- Quick & Easy: Comes together in under 20 minutes of prep—perfect for busy weeknights, last-minute guests, or when the apple craving hits hard.
- Simple Ingredients: No fancy grocery runs needed. If you’ve got apples, oats, flour, sugar, and butter, you’re halfway there. The rest is just a sprinkle of cinnamon and a dash of love.
- Perfect for Any Occasion: Whether it’s a lazy Sunday brunch, a potluck with friends, cozy dinners, or a holiday morning, this apple crisp fits right in.
- Crowd-Pleaser: Kids devour it. Adults swoon. It’s honestly one of those rare desserts that gets rave reviews from everyone.
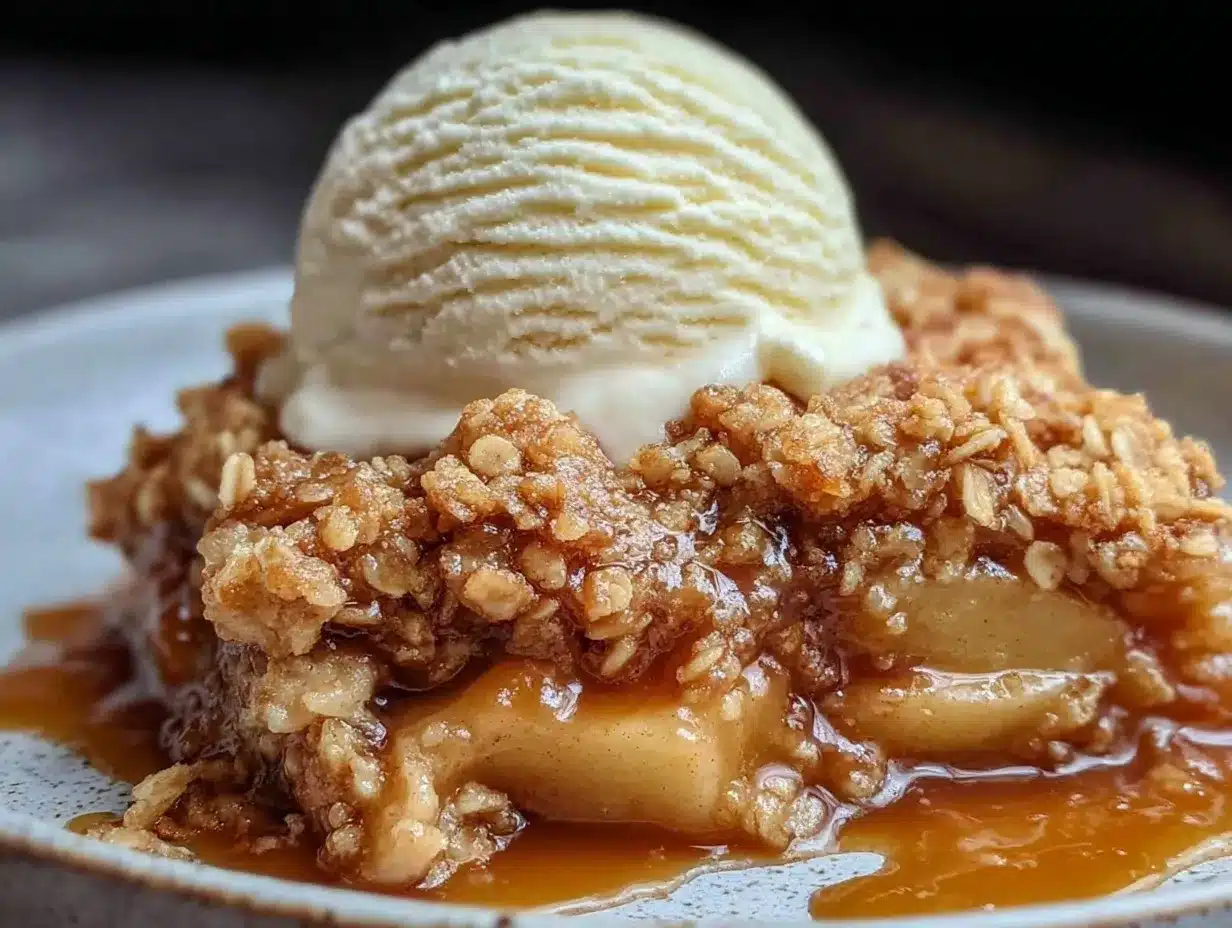
- Unbelievably Delicious: The texture is just next-level—juicy apples under a perfectly crisp, buttery topping. And that vanilla ice cream melting into all the nooks? Forget about it. Comfort food at its finest.
What sets this apple crisp recipe apart is the balance. I blend the oats with just enough flour so the topping crisps up but doesn’t get cakey. The apples are tossed in a touch of lemon juice and cinnamon, so they’re bright and flavorful, not soggy. And unlike some versions, I don’t drown the fruit in sugar—just enough sweetness for that satisfying bite. I’ve been making this for years, tweaking little things, and I can tell you: this is my best version yet.
This recipe isn’t just good—it’s the kind that makes you close your eyes after that first spoonful. It’s comfort food, reimagined for today’s busy kitchens: healthier, faster, but with the same soul-soothing satisfaction. If you’re looking to impress guests without fuss, or just want to turn a simple meal into something memorable, this apple crisp recipe is your secret weapon. Trust me, it’s worth every spoonful!
What Ingredients You Will Need
This apple crisp recipe uses straightforward, wholesome ingredients that come together for incredible flavor and texture—no need for anything fancy. Most are pantry staples, and you can easily swap in seasonal picks or make it gluten-free if needed.
- For the Apple Filling:
- 6 cups (about 900g) apples, peeled, cored, and sliced (Granny Smith, Honeycrisp, or Fuji work well)
- 1/4 cup (50g) granulated sugar (adjust to taste or use coconut sugar for a healthier twist)
- 1 tbsp (15ml) fresh lemon juice (keeps apples bright and balances sweetness)
- 1/2 tsp ground cinnamon
- Pinch of salt
- For the Crisp Topping:
- 3/4 cup (90g) all-purpose flour (swap in gluten-free flour if needed)
- 3/4 cup (70g) rolled oats (old-fashioned oats for best texture, but quick oats work in a pinch)
- 1/2 cup (100g) brown sugar (light or dark, depending on your sweetness preference)
- 1/2 cup (115g) unsalted butter, melted (or use plant-based butter for dairy-free)
- 1/2 tsp ground cinnamon
- 1/4 tsp ground nutmeg (optional, for warmth)
- Pinch of salt
- 1/3 cup (35g) chopped pecans or walnuts (optional, adds crunch and flavor)
- For Serving:
- Vanilla ice cream (classic pairing; use dairy-free or oat milk ice cream for allergy-friendly option)
- Whipped cream (optional but highly recommended!)
For apples, I honestly love mixing tart and sweet—Granny Smith for tang, Honeycrisp for juiciness. If you’re shopping, look for apples that are firm and fragrant. For the oats, Bob’s Red Mill is my go-to brand (they hold up well and always taste fresh). If you need a nut-free dessert, just skip the nuts in the topping; it’s still fantastic.
Got a sweet tooth? Add a splash of maple syrup to the filling. Want a little extra crunch? Toss in sunflower seeds or hemp hearts. In summer, this crisp works beautifully with peaches or berries instead of apples—just adjust the sugar to taste. For gluten-free friends, King Arthur Measure-for-Measure flour works every time. This recipe is flexible, forgiving, and totally customizable for your pantry and preferences.
Equipment Needed
You don’t need a chef’s kitchen to make this apple crisp. Here’s what you’ll need (plus some workarounds if you’re missing something):
- Baking dish: A 9×13-inch (23x33cm) glass or ceramic dish is ideal. If you only have an 8×8-inch (20x20cm), just halve the recipe.
- Mixing bowls: Two medium bowls—one for apples, one for topping. Stainless steel or glass works best (easy cleanup, too).
- Measuring cups and spoons: For accuracy and consistency. I’ve used both plastic and metal—just make sure they’re dry before measuring brown sugar.
- Peeler and corer: A good apple peeler speeds things up. If you don’t have a corer, a sharp paring knife does the trick.
- Knife and cutting board: For chopping apples and nuts.
- Oven mitts: Safety first (I learned the hard way after a hot dish slip, so don’t skip these!).
- Spatula or serving spoon: For dishing out big, cozy servings.
If you’re missing a peeler, just cut the apples into quarters and slice away the skins. For budget-friendly options, I love IKEA’s glass baking dishes—they’re sturdy and affordable. Maintenance tip: soak your baking dish in hot water after use to make cleanup a breeze. If you have a food processor, you can pulse the topping ingredients for extra crunch, but it’s totally optional.
Preparation Method
Ready to bring your apple crisp recipe to life? Just follow these steps, and you’ll be serving up the ultimate fall dessert in no time.
- Preheat the oven: Set your oven to 350°F (175°C). Position a rack in the middle. (Tip: Starting with a hot oven ensures the topping crisps up beautifully.)
- Prepare the apples: Peel, core, and slice 6 cups (about 900g) of apples into 1/4-inch (0.6cm) slices. Place them in a mixing bowl. (Sensory cue: Apples should feel firm, not mushy.)
- Toss the filling: To the apples, add 1/4 cup (50g) granulated sugar, 1 tbsp (15ml) lemon juice, 1/2 tsp cinnamon, and a pinch of salt. Toss until evenly coated. (Note: If apples seem dry, add an extra tablespoon of lemon juice.)
- Transfer apples to baking dish: Spread the apple mixture evenly in your 9×13-inch (23x33cm) baking dish. Press down gently to pack the fruit. (Troubleshooting: If apples pile too high, use a slightly larger dish.)
- Make the topping: In a separate bowl, combine 3/4 cup (90g) flour, 3/4 cup (70g) oats, 1/2 cup (100g) brown sugar, 1/2 tsp cinnamon, 1/4 tsp nutmeg (if using), and a pinch of salt. Stir to blend.
- Add butter and nuts: Pour in 1/2 cup (115g) melted butter and mix until the topping is crumbly but moist. Stir in 1/3 cup (35g) chopped nuts if desired. (Sensory cue: Topping should clump together when squeezed.)
- Layer the topping: Sprinkle the topping evenly over the apples, covering as much fruit as possible. (Personal tip: I like to press the topping lightly for extra crunch.)
- Bake: Place the dish in the oven and bake for 40-45 minutes. The topping should be golden brown and the apples bubbling at the edges. (Troubleshooting: If topping browns too quickly, cover loosely with foil for the last 10 minutes.)
- Cool slightly: Let the crisp cool for 10-15 minutes before serving. This helps the juices thicken and makes scooping easier. (Warning: Don’t dig in too soon—it’s lava-hot straight from the oven!)
- Serve: Spoon warm apple crisp into bowls and top with vanilla ice cream. Add whipped cream if you’re feeling fancy.
Efficiency tip: Prep the apples and mix the topping while the oven preheats. If you’re short on time, use an apple corer/slicer combo. For extra flavor, drizzle a little caramel sauce over the ice cream—totally decadent! If your apples are super juicy, add a tablespoon of flour to the filling to soak up excess liquid. And remember, the best apple crisp is made with a little love and lots of anticipation.
Cooking Tips & Techniques
I’ve learned a few tricks from trial, error, and more than a few kitchen messes. Here’s how to make your apple crisp recipe shine every time:
- Apple selection matters: Mix tart and sweet apples for depth. Granny Smith adds tang, while Honeycrisp or Fuji keep things juicy. Avoid Red Delicious—they turn mushy.
- Don’t skimp on the topping: A thick layer means more crunch. If you love extra crispy bits, double the topping (been there, done that—never regretted it!).
- Melted butter is key: Mixing melted butter into the topping ensures even distribution and that perfect crumbly texture. Cold butter can leave streaks.
- Bake uncovered: The topping needs dry heat to crisp. If it browns too fast, tent with foil. If not brown enough, pop under the broiler for 2 minutes at the end.
- Timing is everything: Start checking at 35 minutes. Apples should be fork-tender, topping golden. Overbaking dries out the apples; underbaking leaves the topping pale.
- Troubleshooting soggy crisp: If your apples are super juicy, add a tablespoon of flour or cornstarch to the filling. It’ll soak up the excess and keep things thick.
- Multitasking tip: While the crisp bakes, scoop your ice cream and let it sit at room temp. Slightly softened ice cream melts beautifully into the warm crisp.
- Consistency tip: Always use the same baking dish for even results. Glass or ceramic works best—metal can over-crisp the topping.
- Personal lesson: The first time I made this, I forgot the cinnamon. The apples were bland, and the crisp just didn’t pop. Don’t skip those spices—they make all the difference!
Trust me, these little tips and tweaks will make your apple crisp recipe foolproof, delicious, and absolutely irresistible every time you bake it.
Variations & Adaptations
One of the best parts about a homemade apple crisp recipe is how easily it adapts to your pantry, diet, or mood. Here are a few of my favorite ways to switch things up:
- Gluten-Free Apple Crisp: Use a certified gluten-free flour blend (like King Arthur or Cup4Cup) and gluten-free oats. The texture and flavor stay spot-on.
- Dairy-Free Version: Swap unsalted butter for coconut oil or a plant-based butter. Serve with oat milk or coconut ice cream for a totally dairy-free treat.
- Berry or Stone Fruit Crisp: Replace half the apples with fresh or frozen berries, peaches, or pears. Adjust sugar if your fruit is extra sweet or tart.
- Nut-Free Option: Just skip the nuts in the topping. For crunch, add sunflower seeds or pumpkin seeds if you like.
- Lower Sugar Crisp: Use less sugar in both the filling and topping, or swap brown sugar for coconut sugar or maple syrup for natural sweetness.
- Spiced Up: Add ground ginger or cardamom to the topping for a little warmth. I tried this with cardamom last year—honestly, it was a hit at Thanksgiving!
- Individual Crisps: Bake in ramekins for single servings. Perfect for parties or portion control.
For a fun twist, I sometimes add dried cranberries or chopped dates to the filling. If you want even more comfort, use cinnamon ice cream instead of vanilla. And if you’re craving extra decadence, drizzle caramel sauce on top. The possibilities are endless, so don’t be afraid to get creative!
Serving & Storage Suggestions
For peak enjoyment, serve your apple crisp recipe warm, straight out of the oven. The contrast of hot crisp and cold ice cream is pure bliss. Scoop generous portions into bowls, top with vanilla ice cream (or whipped cream), and let everyone dig in while it’s bubbling and fragrant.
If you’re hosting, pair apple crisp with spiced chai, coffee, or mulled cider for a festive touch. For brunch, serve alongside scrambled eggs or a simple frittata—it’s a sweet complement. Want to go extra fancy? Sprinkle with powdered sugar or drizzle with caramel sauce just before serving.
Leftovers keep well in the fridge for up to 4 days. Store covered in the baking dish or transfer to airtight containers. For longer storage, freeze portions for up to 2 months. Reheat in the oven at 350°F (175°C) for 10-15 minutes, or microwave for quick single servings.
Pro tip: The flavors deepen overnight, and the topping stays crisp if you reheat in the oven. If you like extra crunch, toss some fresh oats over the top before reheating. This apple crisp recipe is just as good the next day—maybe even better!
Nutritional Information & Benefits
Here’s a rough estimate for one hearty serving of apple crisp (without ice cream):
- Calories: 320
- Fat: 12g
- Carbohydrates: 52g
- Fiber: 5g
- Sugar: 28g
- Protein: 3g
Apples are naturally rich in vitamin C, fiber, and antioxidants. Oats add heart-healthy fiber and help keep you full. If you use nuts, you get a boost of healthy fats, too. For gluten-free or lower-sugar needs, this recipe adapts easily—just swap out the flour and adjust sweeteners.
Potential allergens: Contains wheat (unless gluten-free flour is used), dairy (unless dairy-free butter/ice cream is used), and nuts (if added). From a wellness perspective, I love that you can control the sugar and fat, and still get all the cozy flavor. It’s a dessert that feels good to eat, especially when you use fresh, seasonal apples!
Conclusion
If you’re searching for the ultimate fall dessert, this cozy homemade apple crisp with ice cream is truly worth making. It’s simple, satisfying, and full of nostalgic comfort—exactly what you crave when the leaves start to turn. You can customize the apple crisp recipe for dietary needs or flavor preferences, and it always comes out delicious.
I love this recipe because it brings people together and fills the house with warmth (not just from the oven!). Whether you serve it at a holiday dinner or just for yourself on a quiet evening, it’s the kind of treat that makes any day feel special.
So give it a try, make it your own, and let me know how you like to top your apple crisp. Leave a comment below, share your own twists, or tag me on social media with your beautiful, bubbly creations. Here’s to sweet memories and cozy bites—all season long!
Frequently Asked Questions
Can I make apple crisp ahead of time?
Yes, you can assemble the apple crisp recipe (filling and topping) up to one day ahead. Refrigerate covered, then bake just before serving for fresh, warm crisp.
Which apples are best for apple crisp?
Granny Smith, Honeycrisp, Fuji, or a mix work best. Choose firm apples that hold their shape and provide a balance of tart and sweet flavors.
How do I make apple crisp gluten-free?
Simply swap the all-purpose flour for a gluten-free blend and use certified gluten-free oats. The recipe tastes just as good—promise!
Can I freeze leftover apple crisp?
Absolutely! Cool the crisp, wrap tightly, and freeze for up to 2 months. Thaw overnight and reheat in the oven until warm and bubbly.
What if my topping isn’t crisp enough?
If the topping is too soft, try baking a few minutes longer or broil for 1-2 minutes at the end. Make sure the butter is evenly mixed for the best crunchy texture.
Pin This Recipe!
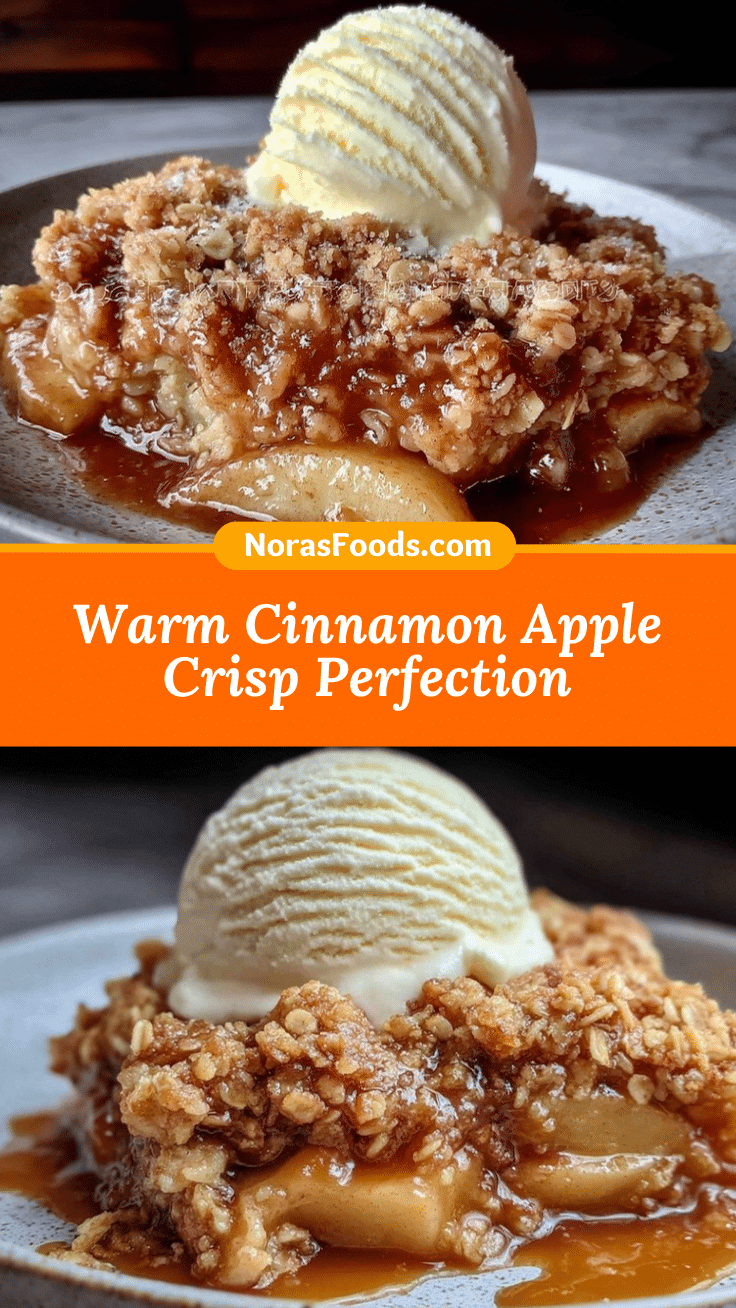
Apple Crisp Recipe – Easy Homemade Dessert with Ice Cream for Fall
This cozy homemade apple crisp features tender, cinnamon-spiced apples under a golden, buttery oat crumble. Serve warm with vanilla ice cream for the ultimate fall dessert that’s quick, easy, and crowd-pleasing.
- Prep Time: 15 minutes
- Cook Time: 40-45 minutes
- Total Time: 55-60 minutes
- Yield: 8 servings 1x
- Category: Dessert
- Cuisine: American
Ingredients
- 6 cups apples, peeled, cored, and sliced (Granny Smith, Honeycrisp, or Fuji)
- 1/4 cup granulated sugar
- 1 tablespoon fresh lemon juice
- 1/2 teaspoon ground cinnamon
- Pinch of salt
- 3/4 cup all-purpose flour
- 3/4 cup rolled oats
- 1/2 cup brown sugar
- 1/2 cup unsalted butter, melted
- 1/2 teaspoon ground cinnamon
- 1/4 teaspoon ground nutmeg (optional)
- Pinch of salt
- 1/3 cup chopped pecans or walnuts (optional)
- Vanilla ice cream, for serving
- Whipped cream, for serving (optional)
Instructions
- Preheat oven to 350°F (175°C). Position rack in the middle.
- Peel, core, and slice apples into 1/4-inch slices. Place in a mixing bowl.
- Add granulated sugar, lemon juice, cinnamon, and a pinch of salt to apples. Toss until evenly coated.
- Spread apple mixture evenly in a 9×13-inch baking dish. Press down gently.
- In a separate bowl, combine flour, oats, brown sugar, cinnamon, nutmeg (if using), and a pinch of salt. Stir to blend.
- Pour in melted butter and mix until topping is crumbly but moist. Stir in nuts if desired.
- Sprinkle topping evenly over apples, covering as much fruit as possible. Press lightly for extra crunch.
- Bake for 40-45 minutes, until topping is golden brown and apples are bubbling at the edges. If topping browns too quickly, cover loosely with foil for the last 10 minutes.
- Let crisp cool for 10-15 minutes before serving.
- Spoon warm apple crisp into bowls and top with vanilla ice cream and whipped cream if desired.
Notes
Mix tart and sweet apples for best flavor. For gluten-free, use gluten-free flour and oats. For dairy-free, use plant-based butter and ice cream. Add a tablespoon of flour to the filling if apples are very juicy. Double the topping for extra crunch. Bake uncovered for crisp topping; tent with foil if browning too quickly. Leftovers keep well in the fridge for up to 4 days or freeze for up to 2 months.
Nutrition
- Serving Size: 1/8 of recipe (about
- Calories: 320
- Sugar: 28
- Sodium: 90
- Fat: 12
- Saturated Fat: 7
- Carbohydrates: 52
- Fiber: 5
- Protein: 3
Keywords: apple crisp, fall dessert, easy apple crisp, homemade apple crisp, apple crisp with ice cream, autumn dessert, oat crumble, comfort food, Thanksgiving dessert, fruit crisp


