The scent of bubbling apples, cinnamon, and sugar drifting from the oven—honestly, that’s my kind of comfort on a chilly night. There’s just something about a homemade apple cobbler recipe that feels like a warm hug. Every time I bake this cobbler, I’m reminded of autumn evenings growing up, when my mom would pull out her battered old pie dish and let us kids help pile on the cinnamon-laced apples. We’d gather in the kitchen, sneaking spoonfuls of the sweet filling before it even hit the oven (confession: I still do that).
I first stumbled on my own twist of apple cobbler during a snowstorm, of all things. With no pie crust in sight and a serious craving for dessert, I cobbled (see what I did there?) together this easy apple cobbler recipe with just a handful of pantry staples. It came out golden, gooey, and absolutely irresistible. Since then, this recipe’s become my go-to—especially when I want something fuss-free but totally satisfying. It’s a lifesaver for busy families, dessert emergencies, or those nights when you need a little extra coziness.
Whether you’re an experienced baker or you’ve never made cobbler before, you’ll love how this recipe delivers rich, comforting flavors without complicated steps. The apples get tender and juicy, and the topping is perfectly crisp with just the right touch of sweetness. If you’re looking for an easy apple cobbler recipe that’s sure to impress (or just make your kitchen smell amazing), this is it. I’ve tested this recipe more times than I care to admit, and it’s never failed to win over even the pickiest eaters. Let’s make some sweet memories with this classic dessert!
Why You’ll Love This Apple Cobbler Recipe
Let me tell you, after baking more apple cobblers than I can count (and a few disasters along the way), this version stands out for all the right reasons. It’s become a staple in my kitchen, and here’s why I think you’ll fall for it too:
- Quick & Easy: You can whip it up in less than 15 minutes of prep—no fancy skills required. It’s perfect for last-minute dessert cravings or when surprise guests pop in.
- Simple Ingredients: No need to hunt down anything exotic. Most of the ingredients are probably sitting in your pantry or fridge right now.
- Perfect for Any Occasion: This apple cobbler recipe shines at family dinners, potlucks, holiday gatherings, or just a cozy movie night at home.
- Crowd-Pleaser: It gets rave reviews from everyone—kids love the sweet, soft apples, and grown-ups can’t resist the buttery, crispy topping.
- Unbelievably Delicious: The combination of tart apples, warm spices, and that biscuit-like topping is pure comfort food bliss.
What sets this apple cobbler recipe apart? For starters, I use a mix of apple varieties for a more complex flavor—think sweet and tangy in every bite. I also add a bit of lemon juice and zest for brightness, and the topping is somewhere between a tender biscuit and a chewy sugar cookie (trust me, it’s worth it). Instead of overcomplicating things with extra steps, I’ve streamlined the process so anyone can pull this off—even on a busy weeknight.
This isn’t just another dessert. It’s a recipe that brings people together, one that makes you want to cozy up under a blanket with a big bowl (and maybe a scoop of vanilla ice cream). It’s the kind of treat that turns a regular night into something special. When you need a little extra comfort or just want to surprise your family, this apple cobbler recipe is the answer.
What Ingredients You Will Need
This apple cobbler recipe keeps things simple but never boring. Every ingredient plays a part in building that classic flavor and texture—no weird shortcuts or hard-to-find items. Most of these are pantry staples, and you can easily swap things if you’re missing something. Here’s what you’ll need:
- For the Apple Filling:
- 6 cups apples (about 5-6 medium apples), peeled, cored, and sliced (Granny Smith for tartness, Honeycrisp for sweetness, or a mix)
- 1/2 cup (100g) granulated sugar (adjust for sweetness)
- 1/4 cup (55g) light brown sugar (adds a caramel note)
- 2 tablespoons (16g) all-purpose flour (thickens the filling)
- 1 tablespoon lemon juice (brightens the flavor)
- 1 teaspoon lemon zest (optional, but so worth it for zing)
- 1 teaspoon ground cinnamon
- 1/4 teaspoon ground nutmeg (freshly grated is best)
- 1/8 teaspoon salt
- 1 teaspoon vanilla extract
- For the Cobbler Topping:
- 1 cup (125g) all-purpose flour
- 1/2 cup (100g) granulated sugar
- 1/4 cup (55g) light brown sugar
- 1 teaspoon baking powder
- 1/2 teaspoon salt
- 1/2 cup (115g) unsalted butter, melted (cooled slightly)
- 1/4 cup (60ml) whole milk (or any milk you have on hand)
- 1 teaspoon vanilla extract
- Optional Topping:
- 2 tablespoons coarse sugar (for sprinkling, adds crunch)
- 1/4 teaspoon ground cinnamon (for dusting on top)
Ingredient Tips: For the apples, I recommend Granny Smith for tartness and Honeycrisp for sweetness. If you’re short on time, you can use pre-sliced apples or even frozen (just thaw and drain first). For a gluten-free version, swap in a 1:1 gluten-free flour blend. If dairy is a concern, use plant-based butter and non-dairy milk. I’ve tried this with coconut sugar in place of brown sugar, and it’s lovely too. The best thing? This apple cobbler recipe is flexible—just make sure you keep the ratios similar, and you’ll be golden.
Equipment Needed
You don’t need a kitchen full of fancy gadgets to make this apple cobbler recipe. In fact, most of the tools are probably already in your cabinets. Here’s what you’ll want to have ready:
- 9×13-inch (23x33cm) baking dish (glass or ceramic preferred for even baking; metal works in a pinch—just watch the edges for browning)
- Large mixing bowl (for tossing the apples)
- Medium mixing bowl (for the cobbler topping)
- Whisk (for blending the topping—if you don’t have one, a fork will do)
- Peeler and apple corer (or just a sharp paring knife if you want to keep it old-school)
- Measuring cups and spoons
- Rubber spatula or wooden spoon (for mixing and spreading)
- Small zester or grater (for the lemon zest, but you can skip if you don’t have one)
If you’re like me and have lost a peeler or two over the years, don’t stress—just use a paring knife. I’ve also made this recipe in a deep skillet (oven-safe, of course) when my baking dish was MIA. For easy cleaning, give your baking dish a quick spray or rub with butter before filling. And if you’re on a budget, glass bakeware from the grocery store works just as well as the pricey stuff (mine’s chipped but still going strong!).
Preparation Method
- Prep the Oven and Pan: Preheat your oven to 375°F (190°C). Lightly grease your 9×13-inch (23x33cm) baking dish with butter or nonstick spray so nothing sticks. This step takes less than two minutes, but it makes cleanup way easier.
- Prepare the Apples: Peel, core, and slice 6 medium apples into 1/2-inch (1.25cm) thick slices. If the apples are extra juicy, pat them dry a bit with a paper towel. Toss them straight into your large mixing bowl.
- Make the Apple Filling: Add 1/2 cup (100g) granulated sugar, 1/4 cup (55g) light brown sugar, 2 tablespoons (16g) flour, 1 tablespoon lemon juice, 1 teaspoon lemon zest, 1 teaspoon cinnamon, 1/4 teaspoon nutmeg, 1/8 teaspoon salt, and 1 teaspoon vanilla extract to the apples. Stir everything together until the apples are evenly coated. The mixture should look glossy and cling to the fruit. If it seems dry, let it sit for 5 minutes—juices will start to release.
- Transfer to Baking Dish: Pour the apple mixture into your prepared baking dish. Spread everything out evenly. Try to avoid gaps so the topping sits nicely on top.
- Mix the Cobbler Topping: In a medium bowl, whisk together 1 cup (125g) flour, 1/2 cup (100g) granulated sugar, 1/4 cup (55g) brown sugar, 1 teaspoon baking powder, and 1/2 teaspoon salt. In a separate small bowl, mix 1/2 cup (115g) melted butter (let it cool for a minute), 1/4 cup (60ml) milk, and 1 teaspoon vanilla extract. Pour the wet ingredients into the dry, stirring just until combined. Don’t over-mix; the batter should be thick, like drop biscuit dough.
- Assemble the Cobbler: Drop large spoonfuls of the topping all over the apples. Don’t worry if it doesn’t cover every inch—the topping spreads as it bakes, and a few bare spots let the apple goodness bubble up. Sprinkle 2 tablespoons coarse sugar and 1/4 teaspoon cinnamon over the top for extra crunch and flavor (optional, but I highly recommend).
- Bake: Place the dish on the center rack and bake for 40-45 minutes. The filling should be bubbling around the edges, and the topping will turn golden brown. If the topping browns too quickly, loosely cover with foil for the last 10 minutes.
- Cool and Serve: Let cool for at least 15 minutes before serving. The filling thickens as it sits, and the flavors meld together. If you serve it too soon, it might be a bit runny (but still delicious, trust me!).
Troubleshooting Tips: If your apples seem too firm after baking, just pop the dish back in for another 5-10 minutes. If the topping looks dry, brush it with a little melted butter before serving. And if the filling looks watery, give it a gentle stir and let it cool a bit longer—the flour will do its job as it sits. I’ve made more than one “soupy” cobbler by rushing, but honestly, no one ever complained!
Cooking Tips & Techniques
Over the years, I’ve picked up a few tricks for perfecting this apple cobbler recipe (and learned from my fair share of kitchen goofs):
- Apple Selection Matters: Use a mix of tart and sweet apples for depth. If you use only sweet apples, add a bit more lemon juice for balance. Too tart? Sprinkle in a little extra sugar.
- Don’t Overmix the Topping: The less you handle the dough, the lighter and fluffier it’ll bake up. If you overwork it, the topping can get dense—think hockey puck instead of biscuit. I learned this the hard way!
- Let the Cobbler Rest: As tempting as it is to dig in right away, letting the cobbler sit for 15-20 minutes helps the filling thicken and the flavors meld. It’s worth the wait.
- Watch the Bake Time: Ovens can be a little unpredictable. If you know yours runs hot, check for doneness at 35 minutes. A toothpick in the topping should come out clean; the filling should bubble.
- Keep It Rustic: Don’t aim for perfection. Cobbler is supposed to look a little messy and homey—those uneven edges are pure charm.
- Batch Cooking: You can double this recipe for a crowd or halve it for a smaller batch (use an 8×8-inch/20x20cm dish). Just adjust the bake time accordingly.
For multitasking, prep the apples ahead and let them sit in lemon juice to prevent browning. Sometimes, I’ll even mix the topping while the oven preheats. If you want to get a jump start, you can assemble the whole cobbler a few hours before baking—just store it covered in the fridge. Remember, even if your cobbler isn’t picture-perfect, it’ll taste incredible. That’s the beauty of a classic apple cobbler recipe!
Variations & Adaptations
This apple cobbler recipe is endlessly adaptable. I love experimenting with different twists—sometimes on purpose, sometimes because I’m missing an ingredient. Here are a few ways you can make it your own:
- Gluten-Free: Use a 1:1 gluten-free flour blend in both the filling and topping. I’ve had great results with King Arthur Measure for Measure and Bob’s Red Mill.
- Dairy-Free: Swap the butter for plant-based margarine or coconut oil, and use almond or oat milk instead of dairy. The topping stays just as golden and delicious.
- Seasonal Fruit Swaps: Add a handful of fresh or frozen berries (like blueberries or raspberries) for a summer twist. In fall, try mixing in a pear or two for extra sweetness.
- Spice It Up: Add a pinch of ground ginger or cardamom for a cozy, unexpected flavor.
- Low-Sugar Option: Cut back on the sugar by a third, or use monk fruit sweetener instead of granulated sugar. The apples are naturally sweet, so you won’t miss much!
- Individual Servings: Bake the cobbler in ramekins for single-serve desserts—perfect for dinner parties.
One of my favorite versions is adding a splash of bourbon to the apple filling (just a tablespoon or so)—it gives the cobbler a subtle warmth and depth. If you’re feeling adventurous, try a handful of chopped pecans in the topping for crunch. No matter how you switch it up, the heart of this apple cobbler recipe stays the same: easy, cozy, and always comforting.
Serving & Storage Suggestions
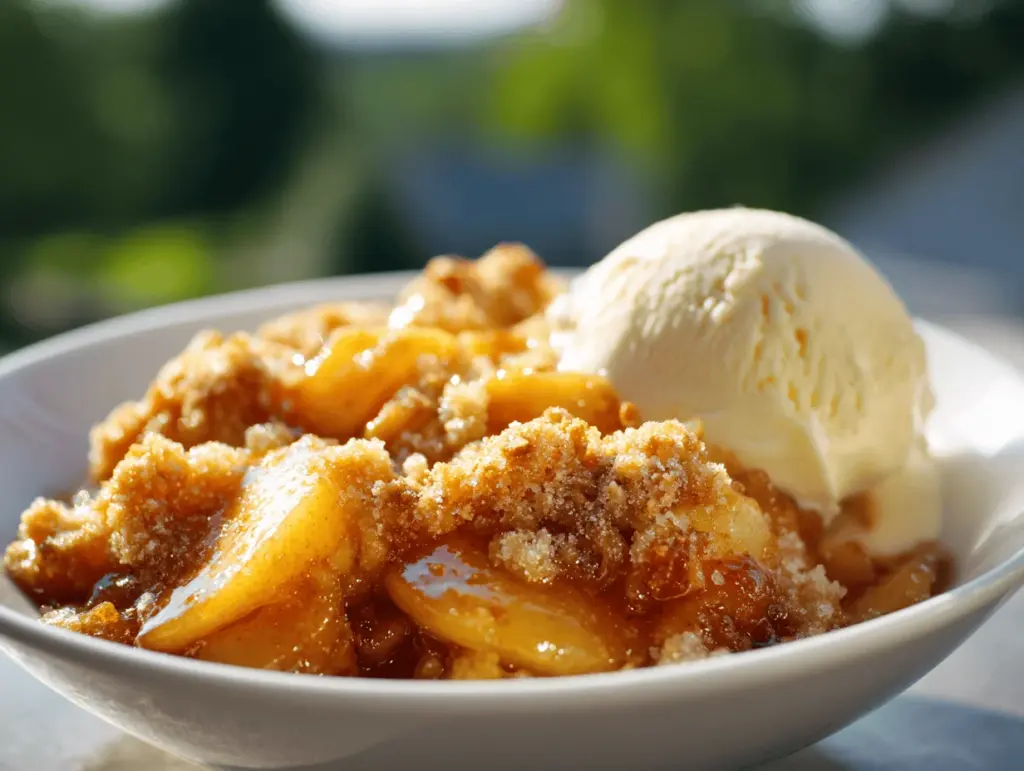
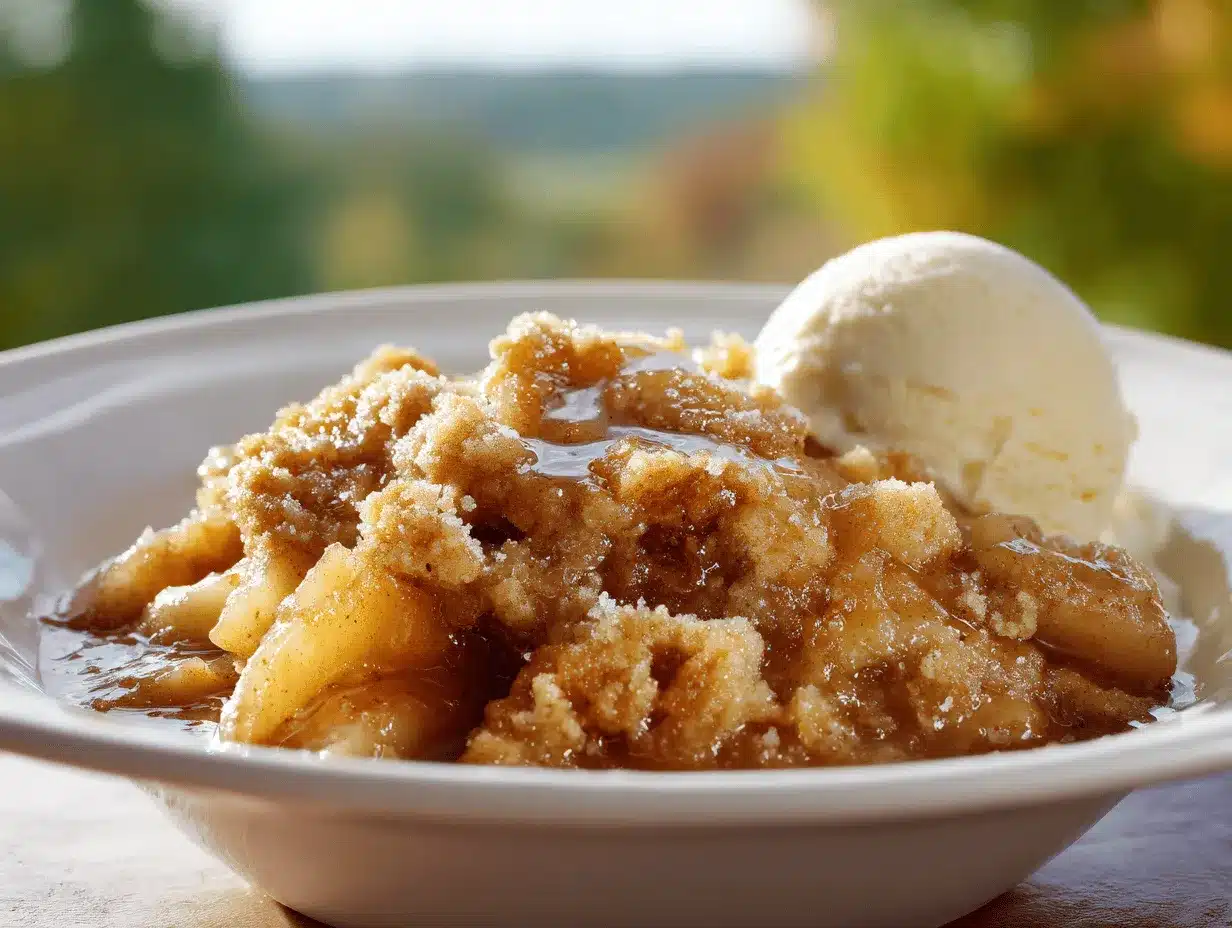
I love serving this apple cobbler recipe warm, straight from the oven, with a scoop of vanilla ice cream melting into all the nooks and crannies. If you want to get a little fancy, a dollop of freshly whipped cream or a drizzle of caramel sauce makes it even more decadent. For brunch, try it alongside a cup of hot coffee or chai tea—it’s basically breakfast and dessert in one!
Leftovers (if you have any) keep well in the fridge, covered tightly, for up to four days. To reheat, just pop a serving in the microwave for about 30 seconds, or warm the whole dish in a 325°F (160°C) oven for 10-15 minutes. The topping will crisp up nicely again. If you want to freeze the cobbler, let it cool completely, then wrap tightly and freeze for up to two months. Thaw overnight in the fridge, then reheat as above.
One thing I’ve noticed: the flavors deepen after a day in the fridge—the spices mellow, and the apples get even more tender. So, don’t be afraid to make it ahead or enjoy it cold (I’ve been caught eating leftovers straight from the pan more than once!).
Nutritional Information & Benefits
Here’s a quick look at what you’re getting in each serving (about 8 generous portions):
- Calories: ~320
- Fat: 11g (mostly from butter—swap for plant-based if needed)
- Carbs: 54g
- Sugar: 30g
- Fiber: 3g
- Protein: 2g
The apples are the star here—packed with fiber, vitamin C, and natural sweetness. Cinnamon brings a little antioxidant boost, while the topping keeps things satisfying. If you make it gluten-free or dairy-free, you’ll still get all the flavor with a few less allergens. Of course, this is a dessert, but I love that you can tweak it to suit your health goals (or just your cravings!).
Conclusion
If you’ve been searching for the ultimate cozy dessert, this apple cobbler recipe is the answer. It’s simple, flexible, and guaranteed to bring a smile to anyone who tries it. Whether you follow the classic version or play around with your own twists, you really can’t go wrong. Every time I bake this, it becomes a new favorite—there’s just something about warm apples and a buttery topping that never gets old.
Don’t be afraid to experiment with flavors or swap in your favorite ingredients. I’d love to hear about your own takes on this apple cobbler recipe—leave a comment, share your photos, or let me know how you made it your own. Trust me, once you try this, it’ll be a staple for every cozy night in. Happy baking, and may your kitchen always smell like cinnamon and apples!
FAQs About Apple Cobbler Recipe
What are the best apples for apple cobbler?
Granny Smith and Honeycrisp apples are my favorites for this apple cobbler recipe. Granny Smith gives a nice tart bite, while Honeycrisp adds sweetness. Mixing a few varieties works great, too!
Can I make apple cobbler ahead of time?
Absolutely! You can prepare the cobbler and store it unbaked in the fridge for up to 24 hours. When you’re ready, just bake as directed. The baked cobbler also tastes even better the next day.
How do I prevent my cobbler topping from getting soggy?
Make sure your apples aren’t too juicy—pat them dry if needed and don’t skip the flour in the filling. Also, let the cobbler cool a bit after baking so the topping can set and crisp up.
Can I freeze apple cobbler?
Yes! Let it cool completely, then wrap tightly and freeze for up to two months. Thaw in the fridge overnight and reheat in a low oven until warmed through.
What’s the difference between apple cobbler and apple crisp?
Great question! Apple cobbler has a biscuit or cake-like topping, while apple crisp features a crumbly oat and brown sugar topping. Both are delicious, but the textures are quite different—cobbler is more like a soft cookie on top of juicy apples.
Pin This Recipe!
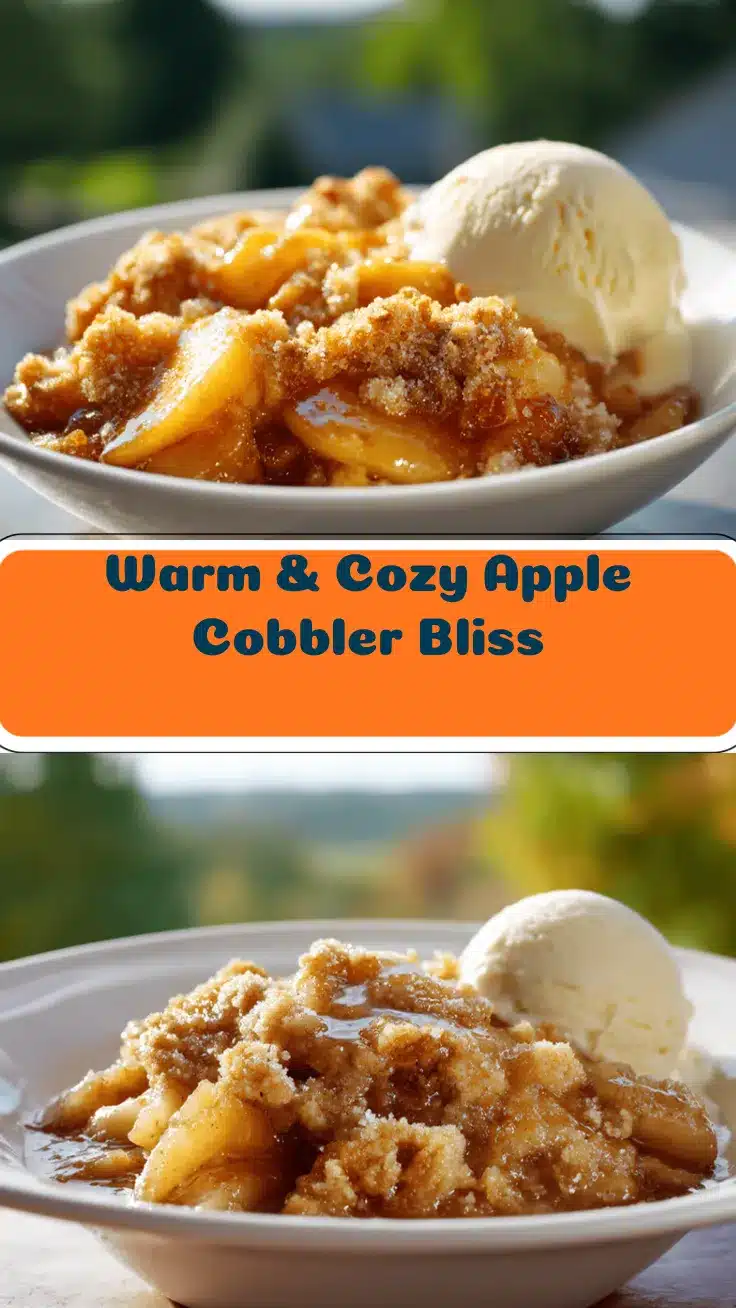
Apple Cobbler Recipe – Easy Homemade Dessert for Cozy Nights

This easy homemade apple cobbler features tender, cinnamon-spiced apples and a golden, biscuit-like topping. It’s the perfect cozy dessert for chilly nights, family gatherings, or whenever you crave a comforting treat.
- Prep Time: 15 minutes
- Cook Time: 40-45 minutes
- Total Time: 1 hour
- Yield: 8 servings 1x
- Category: Dessert
- Cuisine: American
Ingredients
- 6 cups apples (about 5–6 medium apples), peeled, cored, and sliced (Granny Smith, Honeycrisp, or a mix)
- 1/2 cup granulated sugar
- 1/4 cup light brown sugar
- 2 tablespoons all-purpose flour
- 1 tablespoon lemon juice
- 1 teaspoon lemon zest (optional)
- 1 teaspoon ground cinnamon
- 1/4 teaspoon ground nutmeg
- 1/8 teaspoon salt
- 1 teaspoon vanilla extract
- 1 cup all-purpose flour
- 1/2 cup granulated sugar
- 1/4 cup light brown sugar
- 1 teaspoon baking powder
- 1/2 teaspoon salt
- 1/2 cup unsalted butter, melted
- 1/4 cup whole milk (or any milk)
- 1 teaspoon vanilla extract
- 2 tablespoons coarse sugar (optional, for sprinkling)
- 1/4 teaspoon ground cinnamon (optional, for dusting on top)
Instructions
- Preheat your oven to 375°F (190°C). Lightly grease a 9×13-inch baking dish with butter or nonstick spray.
- Peel, core, and slice 6 medium apples into 1/2-inch thick slices. Place them in a large mixing bowl.
- Add 1/2 cup granulated sugar, 1/4 cup light brown sugar, 2 tablespoons flour, 1 tablespoon lemon juice, 1 teaspoon lemon zest, 1 teaspoon cinnamon, 1/4 teaspoon nutmeg, 1/8 teaspoon salt, and 1 teaspoon vanilla extract to the apples. Stir until evenly coated.
- Pour the apple mixture into the prepared baking dish and spread evenly.
- In a medium bowl, whisk together 1 cup flour, 1/2 cup granulated sugar, 1/4 cup brown sugar, 1 teaspoon baking powder, and 1/2 teaspoon salt.
- In a small bowl, mix 1/2 cup melted butter, 1/4 cup milk, and 1 teaspoon vanilla extract. Pour wet ingredients into dry and stir just until combined (do not overmix).
- Drop large spoonfuls of the topping over the apples. Sprinkle with 2 tablespoons coarse sugar and 1/4 teaspoon cinnamon if desired.
- Bake for 40-45 minutes, until the filling is bubbling and the topping is golden brown. If the topping browns too quickly, cover loosely with foil for the last 10 minutes.
- Let cool for at least 15 minutes before serving to allow the filling to thicken.
Notes
Use a mix of tart and sweet apples for best flavor. For gluten-free, substitute a 1:1 gluten-free flour blend. For dairy-free, use plant-based butter and non-dairy milk. Let the cobbler rest after baking for the filling to thicken. Serve warm with vanilla ice cream or whipped cream. Leftovers keep in the fridge for up to 4 days and can be reheated in the microwave or oven.
Nutrition
- Serving Size: 1/8 of cobbler (about 1 generous portion)
- Calories: 320
- Sugar: 30
- Sodium: 220
- Fat: 11
- Saturated Fat: 7
- Carbohydrates: 54
- Fiber: 3
- Protein: 2
Keywords: apple cobbler, easy apple cobbler, homemade dessert, fall dessert, cozy dessert, apple dessert, comfort food, family recipe, baking, autumn recipe


