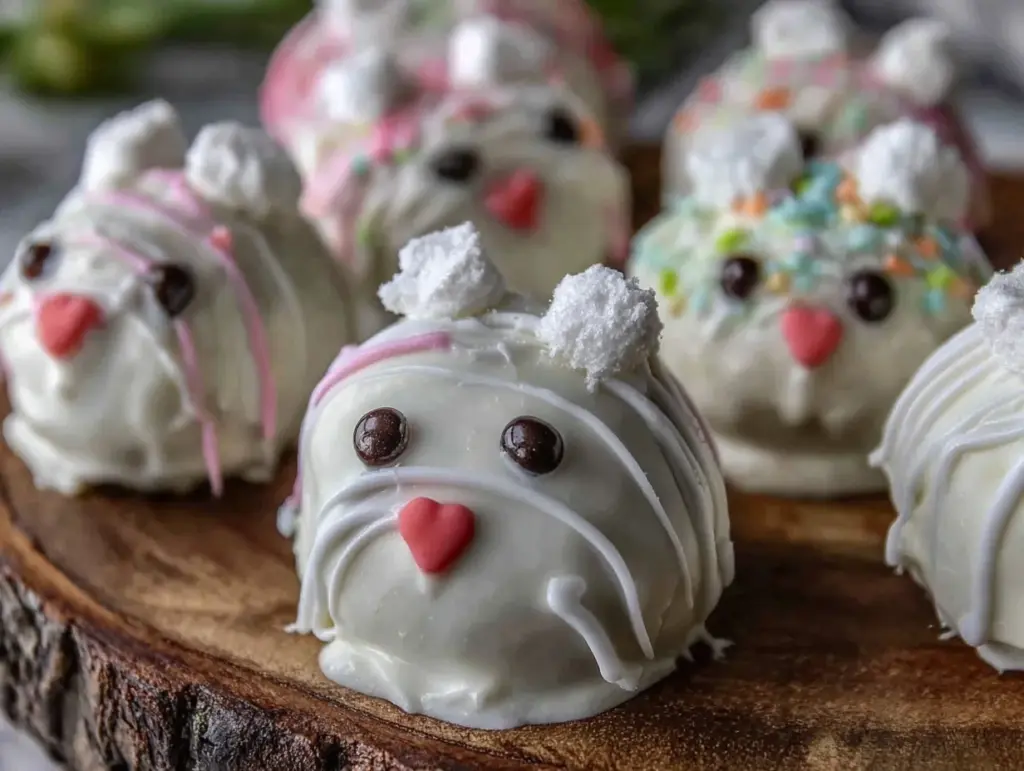
Let me tell you, the sight of these adorable creamy bunny cake pops lined up on my kitchen counter had me grinning like a kid in a candy store. The soft pastel colors, the smooth, velvety coating, and those tiny little ears—honestly, it’s like springtime wrapped up in a sweet little bite. The first time I made these bunny cake pops, it was on a rainy Saturday afternoon when I needed a little sunshine in my life. I was instantly hooked, the kind of moment where you pause, take a deep breath, and just smile because you know you’re onto something truly special.
Years ago, when I was knee-high to a grasshopper, my grandma used to bake simple treats that felt like pure, nostalgic comfort. These cake pops remind me of those carefree days, but with a fun, modern twist perfect for brightening up any spring celebration. My family couldn’t stop sneaking them off the cooling rack (and I can’t really blame them). You know what? These little guys are dangerously easy to make and are sure to become a staple at your holiday brunches, potlucks, or even just a sweet surprise for your kids after school.
After testing this recipe more times than I can count—in the name of research, of course—these creamy bunny cake pops have become my go-to for gifting and family gatherings. They feel like a warm hug you can eat, and honestly, you’re going to want to bookmark this one.
Why You’ll Love This Recipe
Having made these adorable creamy bunny cake pops more times than I can admit, I’ve picked up a few tricks and insights that make this recipe stand out. Whether you’re a seasoned baker or just starting out, this treat is designed to bring joy with minimal fuss.
- Quick & Easy: These cake pops come together in under an hour, perfect for busy weeknights or last-minute celebrations.
- Simple Ingredients: No fancy grocery store runs needed—you probably have everything in your pantry already.
- Perfect for Spring Celebrations: Ideal for Easter brunches, school parties, or just a cheerful springtime snack.
- Crowd-Pleaser: Kids adore them, adults can’t get enough, and they’re a guaranteed hit at any gathering.
- Unbelievably Delicious: The creamy texture paired with the light cake center makes every bite feel like a little celebration.
This isn’t just another cake pop recipe. The secret lies in the creamy frosting mixed into the cake crumbs, which gives the pops a moist, melt-in-your-mouth texture that’s hard to beat. Plus, the delicate bunny decorations add a playful charm that makes each pop feel special. Honestly, it’s comfort food with a springtime soul, easy enough for anyone to make but impressive enough to wow your guests.
What Ingredients You Will Need
This recipe uses simple, wholesome ingredients to deliver bold flavor and satisfying texture without the fuss. Most of these are kitchen staples, and you can easily swap a few depending on your preferences or dietary needs.
- For the Cake Base:
- 1 box of white or vanilla cake mix (about 15.25 oz / 432 g) – I recommend Betty Crocker for consistent results
- Water, oil, and eggs as per cake mix instructions (usually about 1 cup water, 1/3 cup vegetable oil, 3 large eggs)
- For the Creamy Frosting Binder:
- 1 cup (240 g) cream cheese, softened (adds richness and moisture)
- ¾ cup (90 g) powdered sugar, sifted
- 1 teaspoon pure vanilla extract
- For the Coating:
- 12 oz (340 g) white chocolate or candy melts (use dairy-free melts if needed)
- Food coloring in pastel shades (pink, blue, yellow, or green) – gel colors work best
- For Decoration:
- Mini marshmallows (cut in half for bunny tails and ears)
- Black edible marker or tiny chocolate chips (for eyes and nose)
- Pink sugar pearls or edible glitter (optional, for an extra springtime sparkle)
Substitution tip: If you want a gluten-free version, swap the cake mix for your favorite gluten-free alternative. Also, coconut yogurt can replace cream cheese for a dairy-free creamy binder, but the texture will shift slightly. Fresh seasonal berries can add a burst of flavor if you decide to get creative with your cake mix.
Equipment Needed
To make these bunny cake pops, you’ll want a few handy tools to keep things smooth and simple. Here’s what worked best for me:
- Mixing Bowls: Medium and large bowls for cake batter and frosting mixing.
- Baking Pan: A standard 9×13-inch (23×33 cm) pan to bake the cake evenly.
- Food Processor or Fork: To crumble the baked cake into fine crumbs.
- Spatula: For combining frosting and cake crumbs.
- Disposable Gloves: Optional, but handy to keep things clean when shaping cake pops.
- Cake Pop Sticks: Essential for holding your bunny pops.
- Microwave-safe Bowl: For melting chocolate or candy melts.
- Styrofoam Block or Cake Pop Stand: To hold the pops upright while drying.
If you don’t have a cake pop stand, a simple block of styrofoam or even an inverted cardboard box with holes poked in it will do just fine. I’ve tried both, and honestly, a styrofoam block is my favorite for stability. For melting chocolate, I like using a microwave with 20-second bursts and stirring in between to avoid burning. No fancy gadgets needed—just the basics and a bit of patience.
Preparation Method
- Preheat & Bake the Cake: Preheat your oven to 350°F (175°C). Prepare your 9×13-inch pan by greasing it lightly or lining with parchment paper. Mix cake batter according to the box instructions (usually about 15 minutes total prep and mixing). Pour into the pan and bake for 30-35 minutes or until a toothpick inserted in the center comes out clean. Let the cake cool completely, ideally for at least an hour.
- Crumble the Cake: Once cool, crumble the cake into a large bowl using your hands or a fork until you have fine crumbs. Watch out for large chunks—they won’t mix well with the frosting.
- Make the Creamy Binder: In a medium bowl, beat the softened cream cheese with powdered sugar and vanilla extract until smooth and creamy. This frosting acts as the glue for your cake pops.
- Combine Cake & Frosting: Add the cream cheese frosting to the cake crumbs. Mix gently but thoroughly until the mixture holds together when pressed. If it feels too dry, add a teaspoon of cream cheese at a time; too wet, add a little more cake crumbs.
- Shape the Bunny Pops: Scoop about 2 tablespoons (30 g) of the mixture and roll into an oval shape for the bunny body. Then, shape a smaller oval or circle for the head. Attach the head to the body by gently pressing together. Place on a parchment-lined tray. Insert a cake pop stick into the base of each bunny. Chill in the fridge for at least 30 minutes to firm up.
- Prepare the Coating: Melt white chocolate or candy melts in a microwave-safe bowl in 20-second intervals, stirring well between each. Stir in food coloring until you get soft pastel hues. Don’t overheat—smooth, glossy chocolate is the goal.
- Dip the Pops: Remove the cake pops from the fridge. Dip each bunny fully into the colored coating, tapping off excess gently. Place back upright in your stand or styrofoam. Quickly attach mini marshmallow ears and tails before the coating sets.
- Add Details: Once coated and slightly set, use an edible marker or tiny chocolate chips to dot eyes and nose on each bunny. Add pink sugar pearls for cheeks or a little sparkle if you like.
- Chill & Serve: Allow the cake pops to fully set in the fridge for 1-2 hours before serving. This helps the coating firm up and flavors meld beautifully.
Pro tip: Work swiftly while dipping and decorating to keep the chocolate from hardening too fast. If it thickens, just warm gently again. You’ll know the coating is perfect when it’s glossy and smooth, without any clumps or streaks.
Cooking Tips & Techniques
Working with cake pops can be a bit of a learning curve, but once you get the hang of it, it’s pure fun. Here are some tips from my experience:
- Moisture Balance: Too much frosting makes the mixture soggy and difficult to shape; too little and the pops crumble apart. Aim for a consistency that holds together but isn’t sticky.
- Chilling is Key: Don’t skip the refrigeration step before dipping. It helps the pops hold their shape and prevents the coating from cracking.
- Melting Chocolate: Use short bursts in the microwave and stir often. Overheating can cause the chocolate to seize and become grainy.
- Stick Stability: Dip the tip of your cake pop sticks in melted chocolate before inserting into the cake ball. This acts like glue and helps prevent the pops from falling off later.
- Decoration Timing: Add ears and tails while the coating is still wet so they stick well. Use tweezers for precise placement if you have them.
One time, I rushed the chilling and dipped the pops too soon—resulting in a cracked coating and sad little bunnies. Lesson learned! Also, multitasking by melting the chocolate while shaping the pops can save time. Just keep an eye on the chocolate so it doesn’t harden while you work.
Variations & Adaptations
These creamy bunny cake pops are a versatile canvas ready for your creativity!
- Flavor Twists: Add lemon zest or almond extract to the frosting for a fresh spring flavor. You could also swap vanilla for chocolate cake mix to make chocolate bunny pops.
- Dietary Adjustments: Use gluten-free cake mix to accommodate gluten sensitivities. For dairy-free, try coconut cream cheese and dairy-free chocolate melts.
- Seasonal Themes: Swap bunny ears for tiny carrot shapes made from orange fondant or use pastel sprinkles instead of marshmallows for decorating.
Personally, I once made a batch where I mixed crushed freeze-dried strawberries into the cake crumbs before adding the frosting—talk about a tangy surprise! Feel free to play around with colors and decorations to match your party vibe or kids’ favorite hues.
Serving & Storage Suggestions
Serve these bunny cake pops chilled or at room temperature for the best creamy texture and flavor. They’re perfect arranged on a festive platter, nestled in a basket with shredded paper grass for that extra springtime charm.
Pair them with a light tea, fresh lemonade, or a fruity punch to complement the sweet, creamy notes. These pops also shine as a party favor or centerpiece for kids’ celebrations.
To store, place them in an airtight container in the fridge for up to 4 days. They freeze well too—wrap individually in plastic wrap and store in a freezer-safe container for up to a month. Thaw in the fridge overnight before serving. Just a heads-up, the coating might lose a little shine after freezing, but the taste stays spot-on.
Flavors tend to deepen after resting a few hours, making them even more delightful the next day. So if you want, make them a day ahead and relax while your guests enjoy!
Nutritional Information & Benefits
Each creamy bunny cake pop contains roughly 150-180 calories, depending on size and ingredients used. They offer a satisfying sweet treat with moderate fat and sugar content, thanks to the cream cheese frosting providing richness without excess sugar.
The cream cheese adds a bit of protein and calcium, while the white chocolate coating delivers that silky texture loved by many. Using quality ingredients means you’re treating yourself and guests to a better-for-you indulgence compared to standard store-bought sweets.
For those mindful of allergens, note that this recipe contains dairy, eggs, and gluten (unless adapted). However, with simple substitutions, these bunny cake pops can easily fit gluten-free or dairy-free diets.
Honestly, these treats balance indulgence and homemade goodness—a little reminder that sweet moments can be part of a thoughtful diet.
Conclusion
These adorable creamy bunny cake pops are a delightful way to bring joy and a touch of whimsy to your spring celebrations. They’re simple enough for beginners but charming enough to impress even the pickiest eaters. I love how customizable they are—you can tweak flavors, colors, and decorations to match your mood or occasion.
Honestly, baking these little bunnies brings a bit of magic into the kitchen, and it’s such a rewarding feeling to see smiles all around as everyone enjoys them. Give this recipe a go, make it your own, and don’t forget to share how your pops turn out—I’m always eager to hear your creative twists!
So, what are you waiting for? Get baking, and let these creamy bunny cake pops hop right into your heart and celebrations!
FAQs About Adorable Creamy Bunny Cake Pops
Q: Can I make these cake pops ahead of time?
A: Absolutely! You can prepare the cake pops and decorate them a day or two in advance. Just store them in the fridge in an airtight container to keep them fresh.
Q: What’s the best way to store leftover cake pops?
A: Keep them refrigerated in an airtight container for up to 4 days. For longer storage, freeze them wrapped individually and thaw overnight in the fridge before serving.
Q: Can I use homemade cake instead of box mix?
A: Yes! Homemade cake works wonderfully. Just make sure it’s fully cooled before crumbling and mixing with the frosting.
Q: How do I prevent the cake pops from falling off the sticks?
A: Dip the tip of each stick in melted chocolate before inserting it into the cake ball. This acts like glue and helps keep the pop secure.
Q: What if my coating chocolate is too thick to dip?
A: Warm it gently in short bursts and stir until smooth. Avoid overheating, which can cause the chocolate to seize and thicken.
Pin This Recipe!
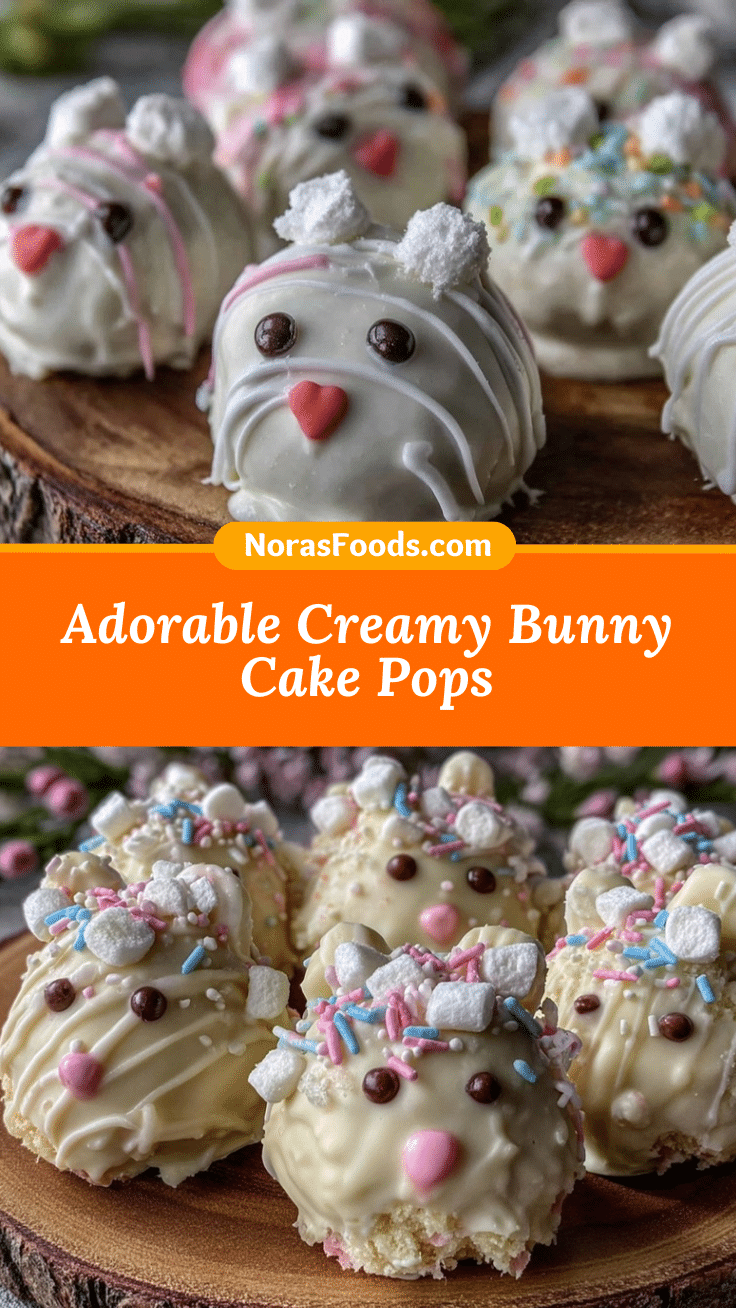
Adorable Creamy Bunny Cake Pops
These adorable creamy bunny cake pops are a quick and easy spring celebration treat featuring a moist cake center mixed with creamy frosting and coated in pastel-colored white chocolate, decorated with cute bunny details.
- Prep Time: 20 minutes
- Cook Time: 35 minutes
- Total Time: 1 hour 55 minutes
- Yield: 24 cake pops 1x
- Category: Dessert
- Cuisine: American
Ingredients
- 1 box white or vanilla cake mix (about 15.25 oz / 432 g)
- Water, oil, and eggs as per cake mix instructions (usually about 1 cup water, 1/3 cup vegetable oil, 3 large eggs)
- 1 cup (240 g) cream cheese, softened
- 3/4 cup (90 g) powdered sugar, sifted
- 1 teaspoon pure vanilla extract
- 12 oz (340 g) white chocolate or candy melts (use dairy-free melts if needed)
- Food coloring in pastel shades (pink, blue, yellow, or green) – gel colors work best
- Mini marshmallows (cut in half for bunny tails and ears)
- Black edible marker or tiny chocolate chips (for eyes and nose)
- Pink sugar pearls or edible glitter (optional)
Instructions
- Preheat oven to 350°F (175°C). Grease or line a 9×13-inch pan with parchment paper.
- Prepare cake batter according to box instructions (about 15 minutes prep and mixing). Pour into pan and bake for 30-35 minutes or until a toothpick inserted in the center comes out clean. Let cool completely, ideally for at least an hour.
- Crumble the cooled cake into fine crumbs using hands or a fork, avoiding large chunks.
- In a medium bowl, beat softened cream cheese with powdered sugar and vanilla extract until smooth and creamy.
- Add the cream cheese frosting to the cake crumbs and mix gently but thoroughly until the mixture holds together when pressed. Adjust consistency by adding more cream cheese or cake crumbs as needed.
- Scoop about 2 tablespoons (30 g) of mixture and roll into an oval shape for the bunny body. Shape a smaller oval or circle for the head and attach it to the body by gently pressing together. Place on a parchment-lined tray. Insert a cake pop stick into the base of each bunny. Chill in the fridge for at least 30 minutes to firm up.
- Melt white chocolate or candy melts in a microwave-safe bowl in 20-second intervals, stirring well between each. Stir in food coloring until soft pastel hues are achieved. Avoid overheating.
- Remove cake pops from fridge. Dip each bunny fully into the colored coating, tapping off excess gently. Place upright in a stand or styrofoam. Quickly attach mini marshmallow ears and tails before coating sets.
- Once coated and slightly set, use an edible marker or tiny chocolate chips to dot eyes and nose on each bunny. Add pink sugar pearls or edible glitter for extra sparkle if desired.
- Allow cake pops to fully set in the fridge for 1-2 hours before serving.
Notes
Dip the tip of cake pop sticks in melted chocolate before inserting into cake balls to help secure them. Work quickly when dipping and decorating to prevent chocolate from hardening too fast. Chill cake pops before dipping to help them hold shape and prevent cracking. Use short microwave bursts to melt chocolate and stir often to avoid overheating.
Nutrition
- Serving Size: 1 cake pop
- Calories: 150180
- Sugar: 15
- Sodium: 90
- Fat: 8
- Saturated Fat: 5
- Carbohydrates: 20
- Fiber: 0.5
- Protein: 2
Keywords: cake pops, bunny cake pops, spring treats, Easter desserts, creamy cake pops, easy cake pops, kid-friendly desserts


