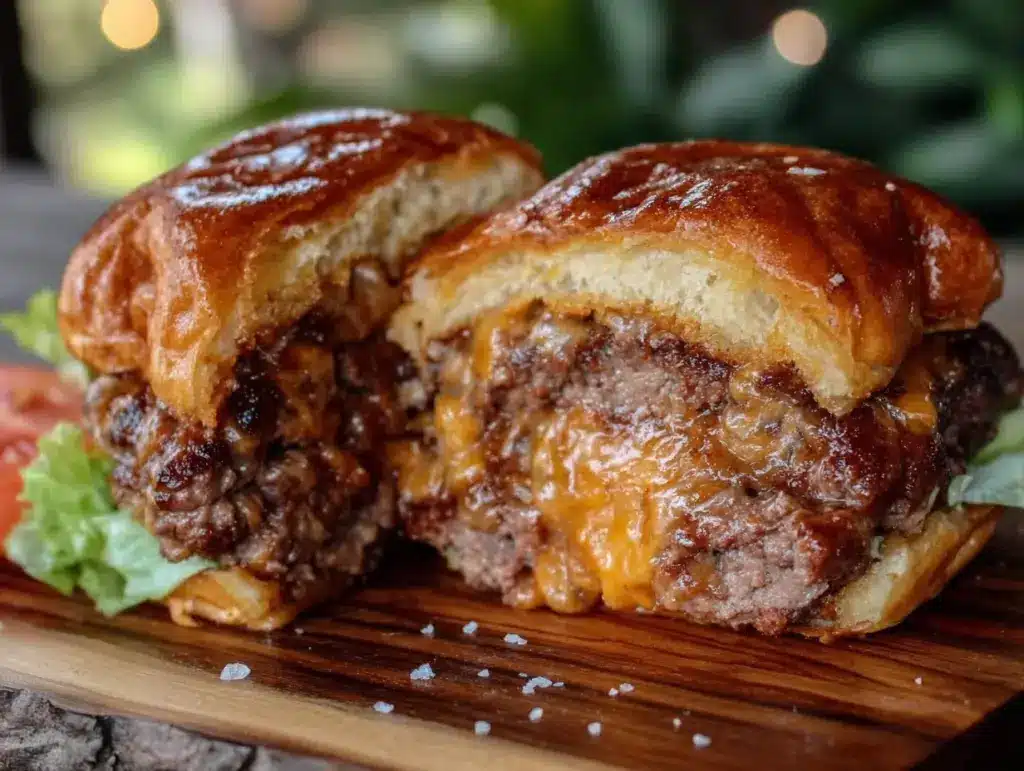
Let me tell you, the scent of sizzling ground beef mingled with molten cheese oozing out as you take a bite is enough to make anyone’s mouth water. The first time I made this Savory Juicy Lucy Burger with Melty Cheese, I was instantly hooked. It was one of those rare moments where you pause, take a deep breath, and just smile because you know you’re onto something truly special. Back when I was knee-high to a grasshopper, my grandma used to talk about this legendary burger that hid its cheesy treasure inside the patty. Years ago, I finally tried making it myself on a rainy weekend, and honestly, I wish I’d discovered this recipe way sooner.
My family couldn’t stop sneaking these off the grill (and I can’t really blame them). The melty cheese inside creates this dangerously easy, pure nostalgic comfort that brightens up any dinner table. Whether it’s a casual weekend cookout, a sweet treat for your kids, or a way to brighten up your Pinterest burger board, this Juicy Lucy burger brings the perfect combination of juicy, savory, and cheesy in every bite. After testing this recipe multiple times (in the name of research, of course), it’s become a staple for family gatherings and gifting to friends. It honestly feels like a warm hug on a plate, and you’re going to want to bookmark this one.
Why You’ll Love This Savory Juicy Lucy Burger Recipe
Having made this Savory Juicy Lucy Burger with Melty Cheese countless times, I can say it’s a real winner for so many reasons. Here’s why you’ll love it:
- Quick & Easy: The whole burger comes together in under 30 minutes — perfect for busy weeknights or last-minute cravings.
- Simple Ingredients: No crazy grocery trips needed; you probably already have everything in your kitchen right now.
- Perfect for Cookouts: Great for backyard barbecues, family dinners, or when you want to impress without stress.
- Crowd-Pleaser: Kids and adults alike rave about the surprise cheese inside that melts perfectly every time.
- Unbelievably Delicious: The beefy, juicy patty paired with gooey cheese is comfort food at its finest.
What sets this apart from your average cheeseburger is the technique of sealing the melty cheese inside the patty, so every bite bursts with flavor. I like using a mix of sharp cheddar and mozzarella for that perfect balance of taste and melt. It’s not just a burger — it’s an experience. The seasoning is just right, not overpowering but enough to bring out the savory goodness. Honestly, it’s comfort food reimagined—simple, fast, but with soul-soothing satisfaction. This recipe has helped me turn simple meals into memorable moments. Give it a try and watch your family’s eyes light up after that first bite!
What Ingredients You Will Need
This Savory Juicy Lucy Burger recipe uses simple, wholesome ingredients to deliver bold flavor and satisfying texture without the fuss. Most are pantry staples, and substitutions are easy if needed.
- Ground Beef (80/20 blend): About 1 pound (450g) for juicy, flavorful patties. I prefer fresh ground beef from my local butcher for best texture.
- Sharp Cheddar Cheese: 4 ounces (115g), shredded or sliced (adds richness and sharpness).
- Mozzarella Cheese: 4 ounces (115g), shredded (for that melty stretch).
- Salt: 1 teaspoon (preferably kosher salt, enhances the beef’s natural flavor).
- Black Pepper: ½ teaspoon, freshly ground (adds a subtle kick).
- Garlic Powder: ½ teaspoon (optional, boosts savory notes).
- Onion Powder: ½ teaspoon (optional for a little extra depth).
- Hamburger Buns: 4 sturdy buns, toasted (I like brioche for a touch of sweetness, but classic sesame works too).
- Butter: 2 tablespoons, softened (for toasting buns).
- Optional Toppings: Lettuce, tomato slices, pickles, ketchup, mustard, or your favorite burger fixings.
Substitution tips: If you want a lighter version, swap ground beef with ground turkey or chicken. For a gluten-free bun option, try lettuce wraps or gluten-free bread. Vegan cheese works well if you want to skip dairy, and almond flour can be used as a binder if you want a firmer patty texture.
Equipment Needed
- Large mixing bowl – for combining beef and seasoning (a sturdy glass or metal bowl works best).
- Sharp knife – to cut cheese into cubes or slices for stuffing the patties.
- Cutting board – preferably wooden for prep.
- Grill or large skillet/frying pan – cast iron skillet is my favorite for even heat and great sear.
- Spatula or tongs – for flipping burgers without squishing them.
- Meat thermometer (optional but handy) – to check for perfect doneness (160°F/71°C is safe for ground beef).
- Basting brush (optional) – to spread butter on buns for toasting.
If you don’t have a grill, no worries! The cast iron skillet is a budget-friendly option that gives a nice crust. For maintenance, I recommend seasoning your cast iron pan regularly to keep it non-stick. If you don’t own a meat thermometer, just trust your nose and the burger’s firmness (more on that later).
Preparation Method

- Prepare the Cheese: Cut the sharp cheddar and mozzarella into small cubes or strips, about ½ inch (1.25 cm) pieces. This will make stuffing easier and help the cheese melt evenly. Set aside.
- Mix the Beef: In a large bowl, gently combine 1 pound (450g) of ground beef with salt (1 tsp), black pepper (½ tsp), garlic powder (½ tsp), and onion powder (½ tsp) if using. Use your hands but don’t overmix! Overworking the meat can make the burgers tough. This step should take about 3-5 minutes.
- Divide the Meat: Split the seasoned beef into 8 equal portions (about 2 ounces / 60g each). Flatten 4 portions into thin patties roughly 4 inches (10 cm) wide and ¼ inch (0.6 cm) thick on a clean surface.
- Add the Cheese: Place a few cheese cubes (about 1-2 tablespoons) in the center of each flattened patty. Don’t overfill or cheese might leak out during cooking.
- Seal the Patties: Take the remaining 4 portions of beef and flatten them similarly. Carefully place each on top of the cheese-topped patties. Pinch and seal the edges firmly all around to trap the cheese inside. You want a nice tight seal with no gaps. It’s a bit like making a beefy pouch! This step takes a few minutes but is key for juicy results.
- Preheat Your Cooking Surface: Heat your grill or cast iron skillet to medium-high heat (around 375°F/190°C). If using a skillet, add a little oil or butter to prevent sticking.
- Cook the Burgers: Place the sealed patties on the hot surface. Cook for about 4-5 minutes on the first side without pressing down (pressing squeezes out juices!). Flip carefully with a spatula and cook another 4-5 minutes. Use a meat thermometer if you have one—target 160°F (71°C) internal temperature.
- Toast the Buns: While burgers cook, spread softened butter on the insides of the buns and toast them on the grill or skillet until golden brown, about 1-2 minutes.
- Rest and Assemble: Let the burgers rest for 3 minutes after cooking to redistribute juices (this step is a game changer). Then assemble your burgers with your favorite toppings and the toasted buns.
Tip: If cheese starts oozing out during cooking, just scrape it off with a spatula and keep going. A little melted cheese outside the patty is part of the charm! Also, don’t flip too often—just once or twice for a nice crust.
Cooking Tips & Techniques
Making the perfect Juicy Lucy burger can be tricky, but these tips will get you there every time. First, use ground beef with about 20% fat content (80/20) to keep the patties juicy. Leaner beef tends to dry out quickly, and honestly, fat is flavor’s best friend here.
When mixing, be gentle. Overworking the meat packs it too tight, making the burger dense rather than tender. And sealing the cheese inside? Make sure you pinch the edges well. I’ve learned the hard way that a sloppy seal means cheese escapes and burns on the pan.
Don’t press down on the patties while cooking! It’s tempting to flatten them with your spatula, but that squeezes out all those precious juices. Let the heat do the work. Use a meat thermometer if you can—nothing ruins a burger like undercooking or overcooking it.
Multitasking tip: While the burgers cook, toast your buns and prep toppings to save time. Resting the cooked patties before serving is crucial—it keeps the juices inside instead of spilling out as soon as you bite.
Lastly, experiment with your cheese blend. I’ve found mixing sharp cheddar with mozzarella hits the spot for that perfect melty, flavorful bite. Tried just cheddar once and missed the creamy stretchiness of mozzarella.
Variations & Adaptations
One of the best things about this Savory Juicy Lucy Burger recipe is how easy it is to tweak. Here are some ideas:
- Spicy Kick: Add diced jalapeños inside the cheese stuffing or mix some hot sauce into the beef for a fiery surprise.
- Seasonal Twist: Swap cheddar and mozzarella for smoked gouda and pepper jack during fall for a smoky, spicy combo.
- Vegetarian Option: Use plant-based meat substitutes and vegan cheese for a meat-free Juicy Lucy.
- Gluten-Free: Serve on gluten-free buns or lettuce wraps. The patties themselves are naturally gluten-free.
- Personal Favorite Variation: I once added caramelized onions and a smear of garlic aioli on the bun—it added an amazing sweet and savory layer that blew my mind.
Adjust cooking times slightly if using alternative proteins—they might cook faster or slower than beef. For the cheese, feel free to experiment with your favorites; just make sure they melt well.
Serving & Storage Suggestions
This burger is best enjoyed hot off the grill with a side of crispy fries or a fresh green salad. Serve immediately for the meltiest, juiciest experience. I like to present mine with a pickle spear and a dollop of ketchup and mustard on the side.
If you have leftovers (they’re rare, but it happens), wrap them tightly in foil and refrigerate for up to 2 days. Reheat gently in a skillet over low heat to keep the cheese melty—microwaving tends to dry it out. For longer storage, you can freeze cooked patties (without buns) for up to 3 months.
Flavors actually develop a bit after resting overnight in the fridge, so if you have time, making the patties a day ahead can boost taste. Just remember to seal the cheese well to avoid leaks during cooking the next day.
Nutritional Information & Benefits
Each Savory Juicy Lucy Burger with Melty Cheese patty contains roughly 450-500 calories, depending on bun and toppings. It provides a solid source of protein (~30g per burger), which is great for muscle repair and satiety. The cheese adds calcium and vitamin D, important for bone health.
Using fresh ground beef means fewer additives and preservatives compared to processed options. If you switch to leaner meats or plant-based alternatives, you can tailor the recipe to fit low-carb or heart-healthy diets. Keep in mind this recipe contains dairy and gluten (unless swapped), so it’s not suitable for those with allergies unless modified.
From a wellness perspective, I find balancing indulgence with wholesome cooking here—simple ingredients, no mystery additives, and a meal that satisfies both body and soul.
Conclusion
This Savory Juicy Lucy Burger with Melty Cheese recipe is worth trying because it brings a fun twist to a classic favorite. The surprise melted cheese inside makes every bite exciting and utterly delicious. Feel free to tweak it to your taste—switch cheeses, add spices, or try new toppings to make it your own.
I love this recipe because it’s reliably juicy, easy to make, and always a hit at the table. It’s become my go-to when I want to impress without fuss. If you give it a try, let me know how it goes! Drop a comment, share your favorite variations, or tell me what sides you paired it with. Happy cooking, and here’s to many melty, savory moments ahead!
FAQs About Savory Juicy Lucy Burgers
What’s the best cheese for a Juicy Lucy burger?
Sharp cheddar mixed with mozzarella works great for flavor and meltiness. You can also try pepper jack or gouda for different tastes.
How do I prevent the cheese from leaking out while cooking?
Make sure to seal the patty edges tightly by pinching them well. Avoid overfilling the cheese inside the patties.
Can I make Juicy Lucy burgers ahead of time?
Yes! You can prepare and seal the patties a day ahead and keep them refrigerated until you’re ready to cook.
Are Juicy Lucy burgers safe to eat since the cheese is inside?
Absolutely, as long as you cook them to an internal temperature of 160°F (71°C) to ensure the beef is fully cooked.
What sides go well with Juicy Lucy burgers?
Classic fries, onion rings, coleslaw, or a fresh green salad all complement these burgers nicely.
Pin This Recipe!
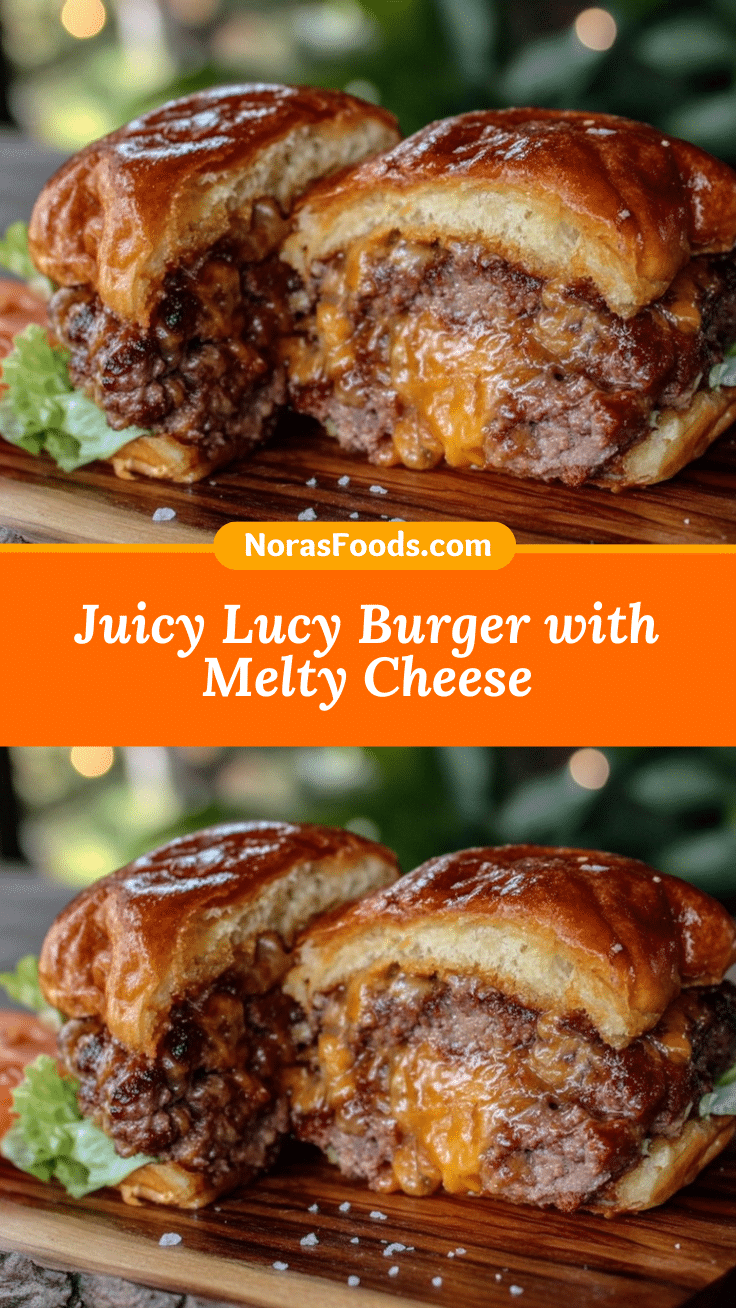
Savory Juicy Lucy Burger Recipe with Melty Cheese Easy and Perfect

A juicy, savory burger with molten cheese sealed inside the patty, delivering a perfect combination of flavor and meltiness. Quick and easy to make, ideal for cookouts and family dinners.
- Prep Time: 10 minutes
- Cook Time: 15 minutes
- Total Time: 25 minutes
- Yield: 4 servings 1x
- Category: Main Course
- Cuisine: American
Ingredients
- 1 pound (450g) ground beef (80/20 blend)
- 4 ounces (115g) sharp cheddar cheese, shredded or sliced
- 4 ounces (115g) mozzarella cheese, shredded
- 1 teaspoon kosher salt
- ½ teaspoon freshly ground black pepper
- ½ teaspoon garlic powder (optional)
- ½ teaspoon onion powder (optional)
- 4 sturdy hamburger buns, toasted (brioche or sesame)
- 2 tablespoons softened butter (for toasting buns)
- Optional toppings: lettuce, tomato slices, pickles, ketchup, mustard, or favorite burger fixings
Instructions
- Cut the sharp cheddar and mozzarella into small cubes or strips about ½ inch pieces and set aside.
- In a large bowl, gently combine ground beef with salt, black pepper, garlic powder, and onion powder if using. Mix by hand without overworking the meat.
- Divide the beef mixture into 8 equal portions (about 2 ounces each). Flatten 4 portions into thin patties about 4 inches wide and ¼ inch thick.
- Place a few cheese cubes (1-2 tablespoons) in the center of each flattened patty without overfilling.
- Flatten the remaining 4 portions of beef and place each on top of the cheese-topped patties. Pinch and seal the edges tightly all around to trap the cheese inside.
- Preheat grill or cast iron skillet to medium-high heat (around 375°F). Add a little oil or butter if using a skillet.
- Cook the sealed patties for 4-5 minutes on the first side without pressing down. Flip carefully and cook another 4-5 minutes until internal temperature reaches 160°F (71°C).
- While burgers cook, spread softened butter on the insides of buns and toast on grill or skillet until golden brown, about 1-2 minutes.
- Let the burgers rest for 3 minutes after cooking to redistribute juices.
- Assemble burgers with toasted buns and your favorite toppings.
Notes
Do not overmix the beef to keep patties tender. Seal cheese inside patties tightly to prevent leaks. Avoid pressing down on patties while cooking to retain juices. Rest burgers after cooking for best juiciness. If cheese leaks, scrape it off and continue cooking. Use a meat thermometer to ensure safe internal temperature of 160°F.
Nutrition
- Serving Size: 1 burger
- Calories: 450500
- Sugar: 4
- Sodium: 700
- Fat: 35
- Saturated Fat: 15
- Carbohydrates: 30
- Fiber: 1
- Protein: 30
Keywords: Juicy Lucy burger, stuffed burger, melty cheese burger, grilled burger, easy burger recipe, family dinner, cookout recipe


