It was a Tuesday night, maybe 7:30, and I was staring into the fridge with that familiar “I don’t want to cook but I have to feed everyone” feeling. The chicken breasts were defrosted—because of course they were—and I knew I could either drag myself through another pan-fried dinner or try something different. That’s when I remembered a trick my neighbor had mentioned months ago: baking chicken tenders with a serious crunch, no oil splatters, no standing over the stove. I had my doubts. Baked chicken always felt like the healthier compromise that tasted like a compromise. But I was tired, and honestly, a little desperate.
I grabbed a sheet pan, raided the pantry for breadcrumbs, and figured I’d just see what happened. Twenty-five minutes later, I pulled out a tray of golden, crispy chicken tenders that actually crackled when I touched them. My kid, who usually picks at dinner, ate six pieces without saying a word. My husband asked if I’d ordered takeout. And I just stood there, holding the spatula, thinking why haven’t I been doing this my whole life?
That night changed how I think about weeknight dinners. These crispy baked chicken tenders aren’t just easy—they’re the kind of recipe that makes you feel like you’ve cracked some secret code. No deep frying, no mess, and somehow, they come out crunchier than anything you’d get from a drive-thru. I’ve made them for picky toddlers, for grown adults who claim they don’t like chicken, and for Super Bowl parties where they vanished before the chips. Every single time, someone asks for the recipe. And every single time, I smile and say, “It’s nothing fancy. Just baked.”
Trust me on this one.
Why You’ll Love This Recipe
I’ve tested this recipe more times than I care to admit. I’ve tried different breading techniques, different oven temperatures, different coatings. I’ve burned a few batches, undercooked a few, and ended up with soggy tenders more times than I’d like to remember. But this version? This is the one that works every single time. Here’s why it stands out from every other chicken tender recipe out there:
- No deep frying required — You get that golden, crunchy exterior without standing over a pot of hot oil. Less mess, less stress, and way less grease.
- Ready in under 30 minutes — From start to finish, you’re looking at about 25 minutes. Perfect for those nights when you walk in the door hungry and need food on the table fast.
- Made with pantry staples — Chances are, you already have everything you need. No fancy ingredients, no special trips to the store.
- Crowd-pleaser guaranteed — Kids love them. Adults love them. Even that one relative who “doesn’t eat chicken” will sneak a piece when no one’s looking.
- Healthier than fried — All the crunch, half the guilt. You get that satisfying texture without the heavy feeling after.
- Endlessly customizable — Spicy, herb-crusted, gluten-free—whatever you’re craving, this recipe adapts.
What really sets these apart is the technique. Instead of just coating the chicken and hoping for the best, I use a double-dredge method that locks in moisture while building that crispy shell. The breadcrumbs get a quick toast in the oven before the chicken even touches them, which makes all the difference. It’s a small step, but it’s the kind of thing you learn from trial and error—and I’ve done the error part so you don’t have to.
This isn’t just another baked chicken tender recipe. It’s the one you’ll come back to again and again, the one you’ll text your friends about, the one that makes you actually look forward to cooking on a Tuesday night.
What Ingredients You Will Need
This recipe uses simple, everyday ingredients that work together to create that perfect crunchy coating while keeping the chicken tender and juicy on the inside. No complicated stuff here—just good, honest food.
For the Chicken
- 1 ½ pounds boneless, skinless chicken breasts — Look for even-sized breasts so they cook uniformly. If they’re really thick, you can butterfly them or pound them to an even thickness.
- 1 cup buttermilk — This is the secret to tender chicken. The acidity in buttermilk helps break down the proteins, keeping the meat moist during baking. No buttermilk? No problem—see the substitution note below.
- 1 tablespoon hot sauce (optional) — I use Frank’s RedHot. It doesn’t make the tenders spicy, just adds a subtle tang that enhances the flavor. You won’t even know it’s there.
- ½ teaspoon salt — For seasoning the chicken before breading.
- ½ teaspoon black pepper — Freshly ground is best.
For the Breading
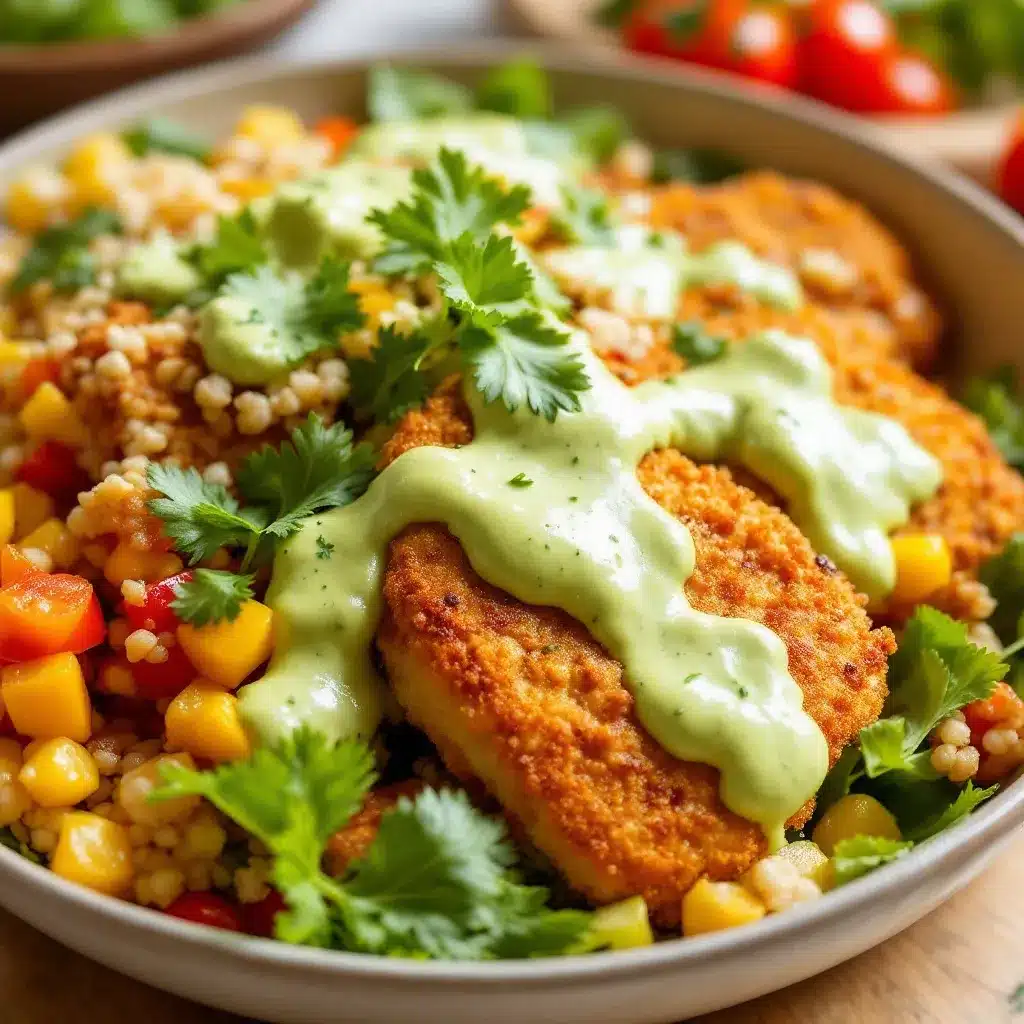
- 1 ½ cups panko breadcrumbs — Panko is non-negotiable here. These Japanese breadcrumbs are larger and flakier than regular breadcrumbs, which means they create a much crunchier texture. I’ve tried regular breadcrumbs, and they just don’t give the same result.
- ½ cup grated Parmesan cheese — The good stuff, not the green can. Freshly grated Parmesan adds flavor and helps the breading get extra golden. Plus, it helps the coating stick better.
- 1 teaspoon garlic powder — Not garlic salt. We’re controlling the salt separately.
- 1 teaspoon onion powder — Adds depth without being overpowering.
- 1 teaspoon paprika — Smoked paprika is amazing here if you have it. Regular works great too. This is mostly for color and a little warmth.
- ½ teaspoon dried oregano — Optional, but I love the subtle Italian vibe it adds.
- ¼ teaspoon cayenne pepper — Totally optional. Leave it out if you’re cooking for kids or spice-sensitive folks.
- 2 tablespoons olive oil or melted butter — This is what helps the breading get golden and crispy. Don’t skip it. I prefer olive oil for a lighter result, but butter adds incredible flavor.
For Serving (Optional but Recommended)
- Honey mustard, ranch, or barbecue sauce — For dipping. I’ll share my favorite combinations later.
- Fresh parsley — For garnish, if you’re feeling fancy.
- Lemon wedges — A squeeze of lemon right before eating brightens everything up.
Ingredient Note: I’ve tested this with different brands of panko, and my favorite is Kikkoman—they’re consistently flaky and crunchy. For the Parmesan, I buy a block and grate it myself. The pre-grated stuff has anti-caking agents that don’t melt as well and can make the coating less crispy.
Buttermilk Substitution: If you don’t have buttermilk, you can make your own by adding 1 tablespoon of lemon juice or white vinegar to 1 cup of regular milk. Let it sit for 5 minutes, and you’re good to go. It works perfectly.
Gluten-Free Option: Use gluten-free panko (I like Ian’s brand) and make sure your other ingredients are certified gluten-free. The texture is slightly different but still delicious.
Equipment Needed
You don’t need a lot of fancy equipment for this recipe, which is part of why I love it. Here’s what you’ll need:
- Large baking sheet — A half-sheet pan (18×13 inches) works perfectly. Make sure it has a rim so nothing slides off.
- Wire cooling rack — This is optional but highly recommended. Placing the chicken on a rack set inside the baking sheet allows air to circulate underneath, making the tenders crispy all around instead of soggy on the bottom. I use a standard cooling rack that fits inside my sheet pan.
- Two shallow bowls or pie plates — For the wet and dry mixtures. Pie plates work great because they’re wide enough to easily dredge the chicken.
- Tongs — For moving the chicken from the wet mixture to the dry mixture without making a mess. Trust me, your fingers will thank you.
- Cutting board and sharp knife — For trimming and cutting the chicken breasts into tenders.
- Meat mallet or rolling pin — Optional, for pounding the chicken to even thickness. I use the bottom of a heavy skillet in a pinch.
- Measuring cups and spoons — Standard kitchen tools.
- Instant-read thermometer — Not strictly necessary, but if you’re new to cooking chicken, it takes the guesswork out. Chicken is done at 165°F.
Budget Tip: If you don’t have a wire cooling rack, just spray your baking sheet well with non-stick spray and flip the tenders halfway through baking. They’ll still get crispy, just not quite as evenly on the bottom.
Preparation Method
Alright, let’s get cooking. I’ve broken this down into simple steps so you can follow along without any confusion. Take your time with the breading—it’s the most important part.
Step 1: Prep the Chicken
Start by cutting your chicken breasts into strips. I aim for pieces that are about 1 inch wide and 3-4 inches long—roughly the size of your average chicken tender. If your chicken breasts are uneven in thickness, place them between two sheets of plastic wrap and gently pound them to an even thickness with a meat mallet or rolling pin. This ensures they cook evenly. Season the chicken strips with salt and pepper on both sides.
Step 2: Marinate in Buttermilk
In a shallow bowl, whisk together the buttermilk and hot sauce (if using). Add the chicken strips, making sure they’re fully submerged. Cover and refrigerate for at least 30 minutes, or up to 4 hours. I know, waiting is hard. But this step is what makes the chicken incredibly tender. If you’re really short on time, even 15 minutes makes a difference.
Step 3: Prepare the Breading
While the chicken marinates, preheat your oven to 425°F (220°C). In another shallow bowl, combine the panko breadcrumbs, grated Parmesan, garlic powder, onion powder, paprika, oregano, and cayenne (if using). Mix well. Drizzle the olive oil or melted butter over the breadcrumb mixture and toss with your fingers until everything is evenly moistened. This is key—the oil helps the breadcrumbs toast to a beautiful golden brown instead of staying pale.
Step 4: Set Up Your Dredging Station
You’ll have two bowls: one with the marinated chicken (wet) and one with the breadcrumb mixture (dry). Place a wire rack on your baking sheet and spray it lightly with non-stick spray. If you’re not using a rack, just spray the baking sheet well.
Step 5: Coat the Chicken
Working with one piece at a time, lift a chicken strip from the buttermilk, letting the excess drip off. Place it in the breadcrumb mixture and press firmly so the crumbs stick. Flip and press again, making sure every surface is coated. Don’t be shy—really press those crumbs in. Place the coated tender on the prepared rack or baking sheet. Repeat with all the chicken strips.
Step 6: Bake to Perfection
Bake the chicken tenders for 12 minutes. Then, carefully flip each tender using tongs and bake for another 10-12 minutes, until the coating is deep golden brown and the chicken is cooked through. The internal temperature should reach 165°F (74°C) when checked with an instant-read thermometer. If you want extra crunch, you can broil for the last 1-2 minutes—just watch closely so they don’t burn.
Step 7: Rest and Serve
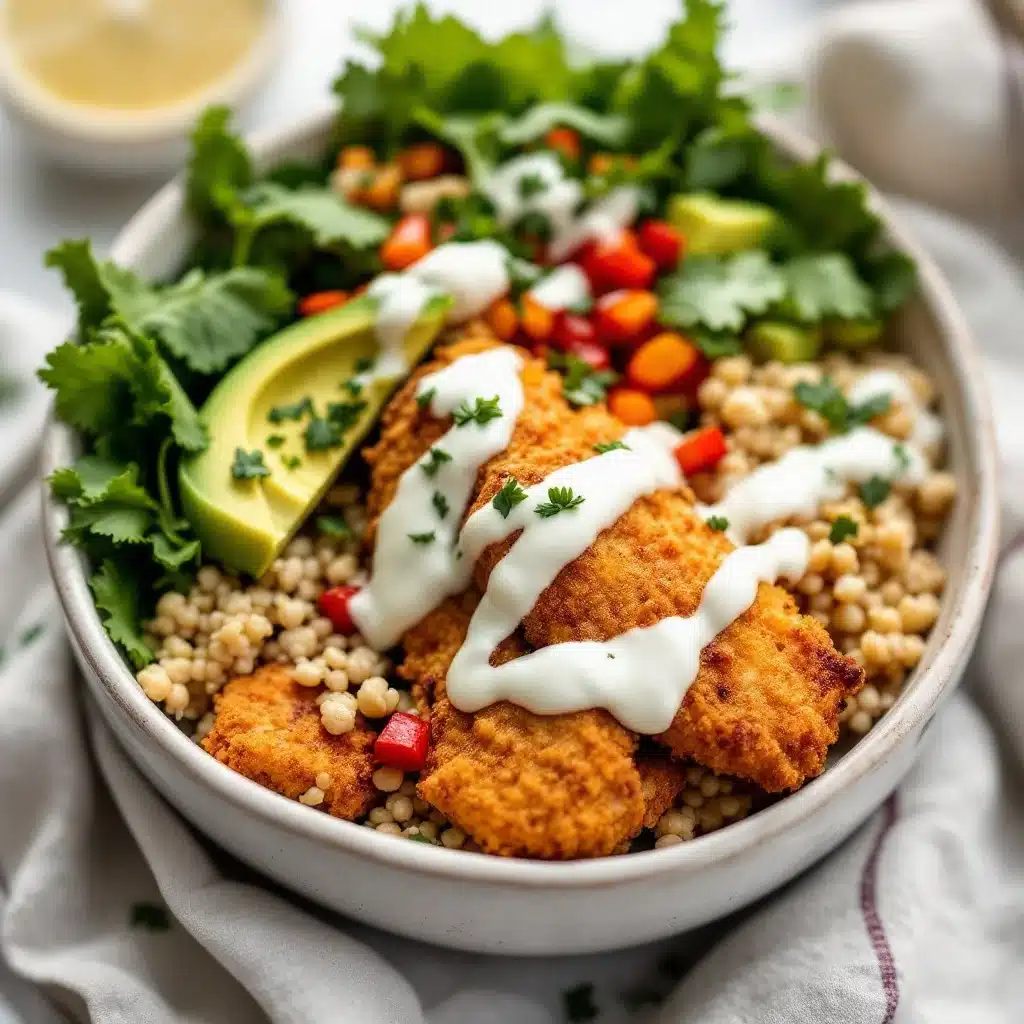
Let the chicken tenders rest on the baking sheet for 2-3 minutes. This helps the coating set and keeps it from falling off when you bite into it. Transfer to a serving platter, garnish with fresh parsley and lemon wedges if desired, and serve immediately with your favorite dipping sauces.
Visual Cue: The breading should look like tiny golden pebbles—crispy and textured, not flat or powdery. When you tap a tender with your finger, it should sound hollow and feel firm.
Troubleshooting Tip: If your breading is falling off during baking, it usually means the chicken was too wet when you added it to the breadcrumbs, or you didn’t press firmly enough. Let the excess buttermilk drip off thoroughly, and really press those crumbs in.
Cooking Tips & Techniques
I’ve made this recipe more times than I can count, and I’ve learned a few things along the way. Here are my best tips for getting perfect results every time:
Don’t Skip the Buttermilk Soak
I know it’s tempting to skip this step when you’re in a hurry, but the buttermilk does two things: it tenderizes the chicken and helps the breading stick. Without it, you’ll end up with dry chicken and a coating that slides right off. If you’re truly out of time, even a 15-minute soak helps.
Use Panko, Not Regular Breadcrumbs
This is the single most important tip for crispy baked chicken. Panko breadcrumbs are larger and have more surface area, which means they get crunchier. Regular breadcrumbs will give you a finer, more dense coating that just doesn’t have the same texture. I learned this the hard way after making a batch that came out more like breaded fish than chicken tenders.
Don’t Crowd the Pan
Leave at least an inch of space between each tender on the baking sheet. If they’re too close together, they’ll steam instead of bake, and you’ll lose that crispy texture. If you need to make a double batch, use two baking sheets and rotate them halfway through.
Flip Halfway Through
This ensures even browning on both sides. I set a timer for 12 minutes, flip, then set another for 10 minutes. It’s that simple.
Use a Rack for Maximum Crispiness
The wire rack is a game-changer. It lifts the chicken off the baking sheet so air can circulate underneath. This means the bottom gets just as crispy as the top. Without a rack, the bottom can get soggy from the steam and oil that pools on the sheet pan.
Test for Doneness
Chicken tenders are thin, so they cook quickly. But because they can vary in thickness, it’s worth checking with a thermometer. Insert it into the thickest part of the largest tender—it should read 165°F. If you don’t have a thermometer, cut into one to check. The juices should run clear, and there should be no pink in the center.
My Biggest Failure
I once forgot to add the oil to the breadcrumbs. The tenders came out pale, dry, and sad-looking. They tasted okay, but the texture was all wrong—like eating sandy chicken. The oil is what gives the breadcrumbs that golden, fried-looking color. Don’t skip it!
Variations & Adaptations
One of the best things about this recipe is how easy it is to change up. Here are some of my favorite variations:
Spicy Buffalo Tenders
Add 1-2 tablespoons of cayenne pepper to the breadcrumb mixture and increase the hot sauce in the buttermilk to 2 tablespoons. After baking, toss the tenders in your favorite buffalo wing sauce. Serve with blue cheese or ranch dressing. These are perfect for game day or when you’re craving something with a kick.
Herb-Crusted Tenders
Replace the paprika and cayenne with 1 tablespoon of dried Italian seasoning or herbes de Provence. Add 2 tablespoons of fresh chopped parsley to the breadcrumb mixture. These are lovely served with a lemon aioli or tzatziki sauce.
Gluten-Free Tenders
Use gluten-free panko breadcrumbs and make sure your other ingredients (like the hot sauce and spices) are certified gluten-free. The texture is slightly different—a bit more delicate—but still very good. I’ve made these for friends with celiac disease and they’ve always been a hit.
Air Fryer Version
If you have an air fryer, this recipe works beautifully. Preheat the air fryer to 400°F (200°C). Cook the tenders in a single layer for 8-10 minutes, flipping halfway through, until golden and cooked through. You might need to work in batches depending on the size of your air fryer. The result is even crispier than the oven version.
Keto/Low-Carb Tenders
Replace the panko with crushed pork rinds or almond flour mixed with Parmesan. The pork rind version is surprisingly good—crunchy and savory. Just be aware that the texture is different from the original, but it scratches that fried chicken itch without the carbs.
My Personal Favorite Variation
I love adding a teaspoon of smoked paprika and a pinch of chipotle powder to the breadcrumb mixture. It gives the tenders a subtle smokiness that pairs perfectly with a honey-lime dipping sauce (just mix honey, lime juice, and a pinch of salt). I made this version for a summer barbecue and people went crazy for it.
Serving & Storage Suggestions
These chicken tenders are incredibly versatile when it comes to serving. Here’s how I like to enjoy them:
Serving Ideas
- Classic Dinner: Serve with a side of roasted vegetables and mashed potatoes or a simple green salad. This is my go-to weeknight meal.
- Game Day Platter: Arrange the tenders on a large platter with dipping sauces like honey mustard, ranch, barbecue sauce, and sriracha mayo. Add some celery and carrot sticks for crunch.
- Salad Topper: Slice the tenders and arrange them over a bed of mixed greens with cherry tomatoes, cucumbers, and your favorite dressing. It’s like a crispy chicken salad but way better than anything from a restaurant.
- Sandwich Filling: Pile the tenders onto a soft bun with lettuce, tomato, and a drizzle of ranch or buffalo sauce. Add some pickles for extra tang.
- Kid-Friendly Meal: Serve with mac and cheese, apple slices, and a side of ketchup. Simple, but it makes everyone happy.
Storage Instructions
If you have leftovers (which is rare in my house, but it happens), here’s how to store them:
- Refrigerator: Place cooled tenders in an airtight container. They’ll keep for up to 4 days. The breading will soften slightly, but they’re still delicious.
- Freezer: These freeze beautifully. Place the baked and cooled tenders on a baking sheet in a single layer and freeze until solid (about 2 hours). Transfer to a freezer-safe bag or container. They’ll keep for up to 3 months. To reheat, bake directly from frozen at 375°F for 12-15 minutes, or until heated through.
Reheating Tips
The best way to reheat these is in the oven or air fryer. The microwave will make them soggy, so avoid it if you can. For the oven, reheat at 375°F for 5-7 minutes, or until warmed through. For the air fryer, reheat at 350°F for 3-4 minutes. They’ll come out almost as crispy as the first time.
How Flavors Develop
These tenders are best enjoyed fresh out of the oven when the coating is at its crispiest. However, I’ve found that the flavors actually meld together nicely after a day in the fridge. The spices become more pronounced, and the chicken stays tender. If you’re meal-prepping, I recommend baking them fresh and reheating as needed.
Nutritional Information & Benefits
Here’s the approximate nutritional breakdown for one serving (about 3-4 tenders, based on the recipe as written):
| Nutrient | Amount Per Serving |
|---|---|
| Calories | 385 |
| Total Fat | 14g |
| Saturated Fat | 4g |
| Cholesterol | 110mg |
| Sodium | 680mg |
| Total Carbohydrates | 22g |
| Dietary Fiber | 2g |
| Sugars | 4g |
| Protein | 38g |
Health Benefits: Chicken breast is an excellent source of lean protein, which is essential for muscle repair and keeping you full. The buttermilk adds calcium and probiotics, while the Parmesan cheese provides a small amount of calcium and protein. By baking instead of frying, you’re cutting down on unhealthy fats and calories without sacrificing flavor or texture.
Dietary Considerations: This recipe can be made gluten-free (as noted in the variations section) and is naturally low in sugar. If you’re watching your sodium, you can reduce the salt in the breading and use low-sodium Parmesan.
Potential Allergens: This recipe contains dairy (buttermilk, Parmesan) and gluten (panko). For dairy-free, use a dairy-free milk with lemon juice for the buttermilk and omit the Parmesan or use a dairy-free alternative. For gluten-free, use gluten-free panko.
I’m not a nutritionist, but I’ve always believed that food should be both nourishing and enjoyable. These tenders hit that sweet spot—they feel indulgent but are made with real, whole ingredients. That’s a win in my book.
Conclusion
So there you have it—the crispy baked chicken tenders that everyone in my family (and yours) will love. They’re crunchy, juicy, and ridiculously easy to make. No deep frying, no complicated techniques, just honest food that tastes like you spent way more effort than you actually did.
What I love most about this recipe is how adaptable it is. You can make it spicy, herby, gluten-free, or even keto-friendly. You can serve it for a quick weeknight dinner, a game day party, or a lazy Sunday lunch. It’s the kind of recipe that becomes a staple—the one you turn to when you need something reliable, delicious, and stress-free.
I’d love to hear how yours turn out. Did you try a fun variation? Did your kids gobble them up? Drop a comment below and let me know—I read every single one. And if you’re looking for another easy weeknight winner, check out my easy sheet pan Hawaiian chicken or these cozy crockpot sloppy joes for more no-fuss dinner ideas.
Happy cooking, friends. And remember—sometimes the best meals come from a tired Tuesday night and a little bit of faith in your oven.
Frequently Asked Questions
Can I use chicken thighs instead of chicken breasts?
Absolutely! Chicken thighs will be even juicier and more flavorful. Just keep in mind that they may need a few extra minutes of baking time since they’re typically thicker. Always check for an internal temperature of 165°F.
Why did my breading fall off?
This usually happens for one of three reasons: the chicken was too wet when you added it to the breadcrumbs, you didn’t press the breadcrumbs firmly enough, or the chicken wasn’t fully coated. Make sure to let the excess buttermilk drip off, press the breadcrumbs in firmly, and cover every surface completely.
Can I make these ahead of time for a party?
Yes! You can bread the chicken tenders up to 24 hours in advance and keep them covered in the refrigerator. When you’re ready to bake, just pop them in the oven straight from the fridge—you might need to add 2-3 minutes to the baking time. Alternatively, you can bake them fully and reheat in the oven or air fryer before serving.
What’s the best dipping sauce for these tenders?
My personal favorites are honey mustard (just mix equal parts honey and Dijon mustard), ranch dressing, and a simple barbecue sauce. For something different, try a sriracha mayo or a creamy garlic aioli. The tenders are also delicious on their own!
Can I freeze the unbreaded chicken?
You can freeze the chicken strips in the buttermilk marinade for up to 3 months. Thaw in the refrigerator overnight, then proceed with the breading and baking as directed. Or, you can bread the chicken and freeze it on a baking sheet before transferring to a freezer bag. Bake from frozen, adding 5-7 minutes to the cooking time.
Pin This Recipe!
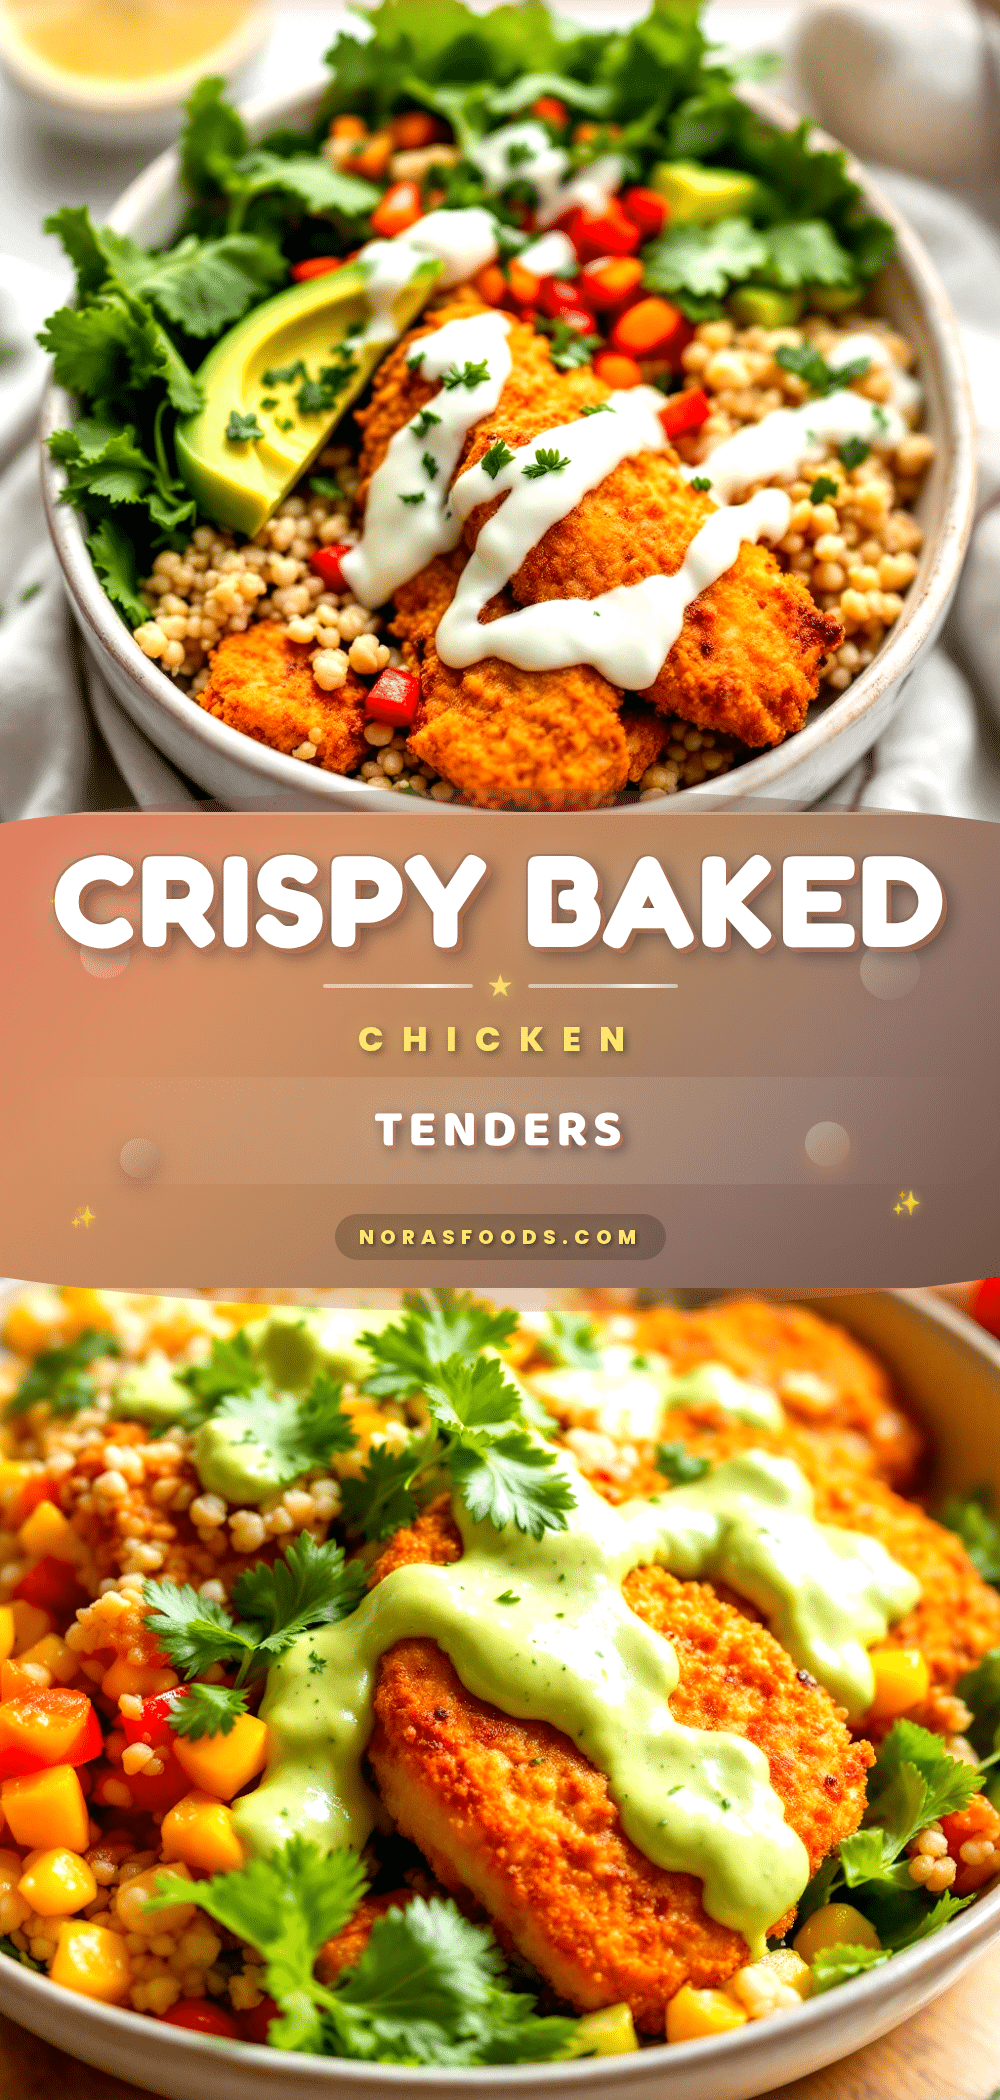
Best Crispy Baked Chicken Tenders Recipe (So Easy!)

These crispy baked chicken tenders are crunchy, juicy, and ready in under 30 minutes. No deep frying required, just a simple double-dredge method that locks in moisture and creates a golden, crunchy coating.
- Prep Time: 15 minutes
- Cook Time: 25 minutes
- Total Time: 40 minutes
- Yield: 4 servings 1x
- Category: Main Course
- Cuisine: American
Ingredients
- 1 ½ pounds boneless, skinless chicken breasts
- 1 cup buttermilk
- 1 tablespoon hot sauce (optional, such as Frank’s RedHot)
- ½ teaspoon salt
- ½ teaspoon black pepper
- 1 ½ cups panko breadcrumbs
- ½ cup grated Parmesan cheese
- 1 teaspoon garlic powder
- 1 teaspoon onion powder
- 1 teaspoon paprika
- ½ teaspoon dried oregano (optional)
- ¼ teaspoon cayenne pepper (optional)
- 2 tablespoons olive oil or melted butter
- Honey mustard, ranch, or barbecue sauce (for serving, optional)
- Fresh parsley (for garnish, optional)
- Lemon wedges (for serving, optional)
Instructions
- Cut chicken breasts into strips about 1 inch wide and 3-4 inches long. If uneven, pound to even thickness. Season with salt and pepper.
- In a shallow bowl, whisk together buttermilk and hot sauce (if using). Add chicken strips, ensuring they are fully submerged. Cover and refrigerate for at least 30 minutes (up to 4 hours).
- Preheat oven to 425°F (220°C). In another shallow bowl, combine panko breadcrumbs, Parmesan, garlic powder, onion powder, paprika, oregano, and cayenne (if using). Drizzle with olive oil or melted butter and toss until evenly moistened.
- Set up a dredging station: one bowl with marinated chicken (wet), one with breadcrumb mixture (dry). Place a wire rack on a baking sheet and spray with non-stick spray (or spray baking sheet directly).
- Working one piece at a time, lift chicken from buttermilk, letting excess drip off. Place in breadcrumb mixture, press firmly to coat all sides. Place on prepared rack or baking sheet. Repeat with all chicken.
- Bake for 12 minutes. Flip each tender and bake for another 10-12 minutes, until golden brown and internal temperature reaches 165°F (74°C). For extra crunch, broil for 1-2 minutes at the end.
- Let rest on baking sheet for 2-3 minutes. Transfer to a serving platter, garnish with parsley and lemon wedges if desired, and serve immediately with dipping sauces.
Notes
For maximum crispiness, use a wire rack on the baking sheet. Do not skip the buttermilk soak—it tenderizes the chicken and helps the breading stick. If breading falls off, the chicken may have been too wet or not pressed firmly enough. For gluten-free, use gluten-free panko. For dairy-free, use dairy-free milk with lemon juice for buttermilk and omit Parmesan.
Nutrition
- Serving Size: 3-4 tenders
- Calories: 385
- Sugar: 4
- Sodium: 680
- Fat: 14
- Saturated Fat: 4
- Carbohydrates: 22
- Fiber: 2
- Protein: 38
Keywords: crispy baked chicken tenders, easy chicken tenders, baked chicken tenders, healthy chicken tenders, chicken tenders recipe