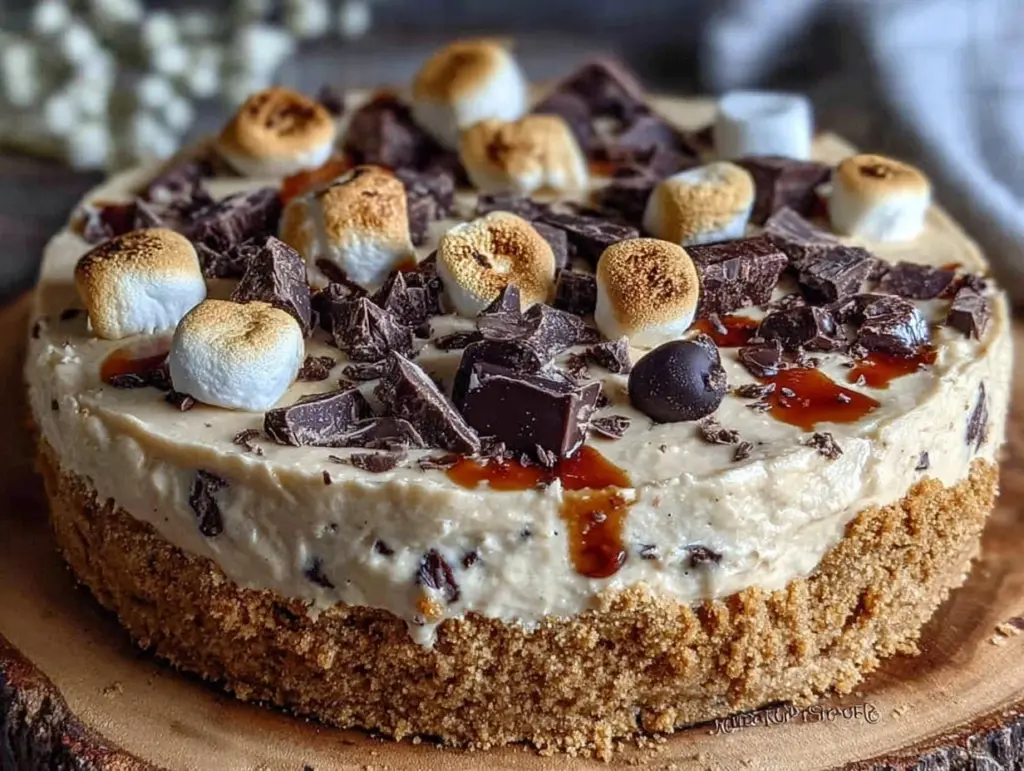
“You really have to try this pie,” my neighbor insisted one summer afternoon, holding up a container that smelled like a campfire memory. I was skeptical. Frozen desserts are often icy, and s’mores? Usually just a simple sandwich of graham crackers and melted marshmallow. But this creamy frozen s’mores pie with toasted marshmallow topping turned out to be an unexpected gem—a no-bake dessert that somehow feels like a cozy campfire in every bite, even when the sun is blazing.
I remember sitting on my porch, fork hovering over that first slice, wondering if this was some wizardry or just plain old good luck. The crust was perfectly crumbly, the filling silky and sweet, and the toasted marshmallow topping? Honestly, it felt like a warm hug from an old friend. And here’s the thing: I ended up making it three times that week. It’s one of those recipes that sneaks into your routine without much fuss but leaves a lasting impression.
What’s funny is that the idea came about when I was trying to whip up something for a last-minute gathering. I didn’t have an oven free, and the heat made firing up the stove the last thing I wanted. Luckily, this frozen s’mores pie with toasted marshmallow topping came to the rescue. It’s creamy, indulgent, and the perfect sweet to wrap up a summer evening—or honestly, any time you want a bit of toasted marshmallow magic without the campfire hassle.
It stuck with me because it’s simple, approachable, and just a little nostalgic. You know, the kind of dessert that makes you pause and savor, even if it’s just a quiet moment in the kitchen. No frills, no fuss, just pure, creamy s’mores delight.
Why You’ll Love This Recipe
This creamy frozen s’mores pie with toasted marshmallow topping is more than just a dessert; it’s a crowd-pleaser that’s easy to pull together—perfect for those days when you want something sweet without the stress.
- Quick & Easy: Ready in under 30 minutes, then just freeze. Ideal for busy weeknights or spontaneous get-togethers.
- Simple Ingredients: Uses pantry staples like graham crackers, chocolate, and marshmallows—no need for specialty stores.
- Perfect for Summer: A refreshing, no-bake treat that cools you down with every creamy bite.
- Crowd-Pleaser: Kids and adults alike can’t get enough of that gooey toasted marshmallow topping paired with silky chocolate filling.
- Unbelievably Delicious: The contrast of crunchy crust, creamy filling, and fluffy, toasted marshmallow is pure indulgence.
What sets this pie apart? It’s the technique of folding whipped cream into a rich chocolate mixture to create a luscious, airy filling that freezes without turning icy. The toasted marshmallow topping adds that authentic campfire flavor, giving it a perfect golden glow and slight crispness on top. Honestly, it feels like s’mores reinvented for the kitchen—a little more sophisticated but still full of that childhood joy.
Whether you’re serving it at a backyard barbecue or sneaking a slice after a long day, this pie feels like a treat worth savoring. And if you’re looking for more creamy, comforting recipes, you might appreciate the creamy vegan mac and cheese with cashew sauce for a savory twist or the chewy vegan chocolate chip cookies when you want a classic baked good.
What Ingredients You Will Need
This creamy frozen s’mores pie uses simple, wholesome ingredients to deliver bold flavor and satisfying texture without the fuss. Most are kitchen staples, making it an easy dessert to pull together anytime.
- Graham Cracker Crust:
- 1 ½ cups graham cracker crumbs (about 12 full sheets, finely crushed)
- ¼ cup granulated sugar
- 6 tablespoons unsalted butter, melted (adds richness and helps bind)
- Pinch of salt (balances sweetness)
- Chocolate Filling:
- 8 oz (225g) semi-sweet chocolate, chopped (I prefer Ghirardelli for smooth melting)
- 1 cup heavy cream (for richness and creaminess)
- 1 teaspoon vanilla extract (rounds out flavor)
- 1 cup whipped cream (folded in for light texture; can use store-bought or homemade)
- Toasted Marshmallow Topping:
- 2 cups mini marshmallows (or large marshmallows cut into smaller pieces)
- Optional: a kitchen torch for toasting (or broiler method works too)
Tip: If you want a gluten-free crust, swap graham crackers with gluten-free graham-style crackers or almond flour mixed with a bit of sugar and butter. For dairy-free, coconut cream and dairy-free chocolate chips do a fine job, and you can find vegan marshmallows at specialty stores.
Equipment Needed
- 9-inch (23 cm) pie dish or springform pan (for easy removal)
- Mixing bowls (one large for crust, one for filling)
- Microwave-safe bowl or double boiler (to melt chocolate)
- Electric mixer or whisk (to whip cream if making fresh)
- Rubber spatula (for folding whipped cream gently into chocolate)
- Kitchen torch (optional, but best for perfectly toasted marshmallows)
- Baking sheet (if using broiler to toast marshmallows)
- Measuring cups and spoons
If you don’t have a kitchen torch, no worries—just adjust the broiler carefully to avoid burning. I’ve also used a handheld butane lighter in a pinch, but keep safety in mind! For whisking cream, a handheld electric mixer speeds things up, but a sturdy balloon whisk works if you don’t mind a little arm workout.
Preparation Method
- Prepare the crust: In a bowl, combine 1 ½ cups graham cracker crumbs, ¼ cup sugar, and a pinch of salt. Pour in 6 tablespoons melted butter and mix until crumbs are evenly coated and look like wet sand. Press the mixture firmly into the bottom and up the sides of your pie dish (about 9 inches). Use the bottom of a glass to compact it for a sturdy base. Chill in the fridge while you make the filling. (10 minutes prep + chilling)
- Melt the chocolate: Place chopped chocolate in a microwave-safe bowl. Microwave in 30-second bursts, stirring between, until smooth and fully melted. Alternatively, use a double boiler on low heat. Set aside to cool slightly but not harden. (5 minutes)
- Heat the cream: In a small saucepan, warm 1 cup heavy cream until it just starts to simmer. Pour the hot cream over the melted chocolate and let it sit for a minute to soften the chocolate. Stir gently until smooth and glossy. Add 1 teaspoon vanilla extract. Let mixture cool to room temperature but still pourable. (7-10 minutes)
- Fold in whipped cream: Whip 1 cup heavy cream until soft peaks form. Gently fold the whipped cream into the cooled chocolate mixture in thirds. Be careful not to deflate the mixture—you want it light and airy. This will create the creamy texture and prevent the pie from freezing rock-hard. (10 minutes)
- Assemble and freeze: Pour the chocolate filling over the chilled crust, smoothing the top with a spatula. Cover loosely with plastic wrap or foil. Freeze for at least 4 hours or overnight. (4+ hours freezing)
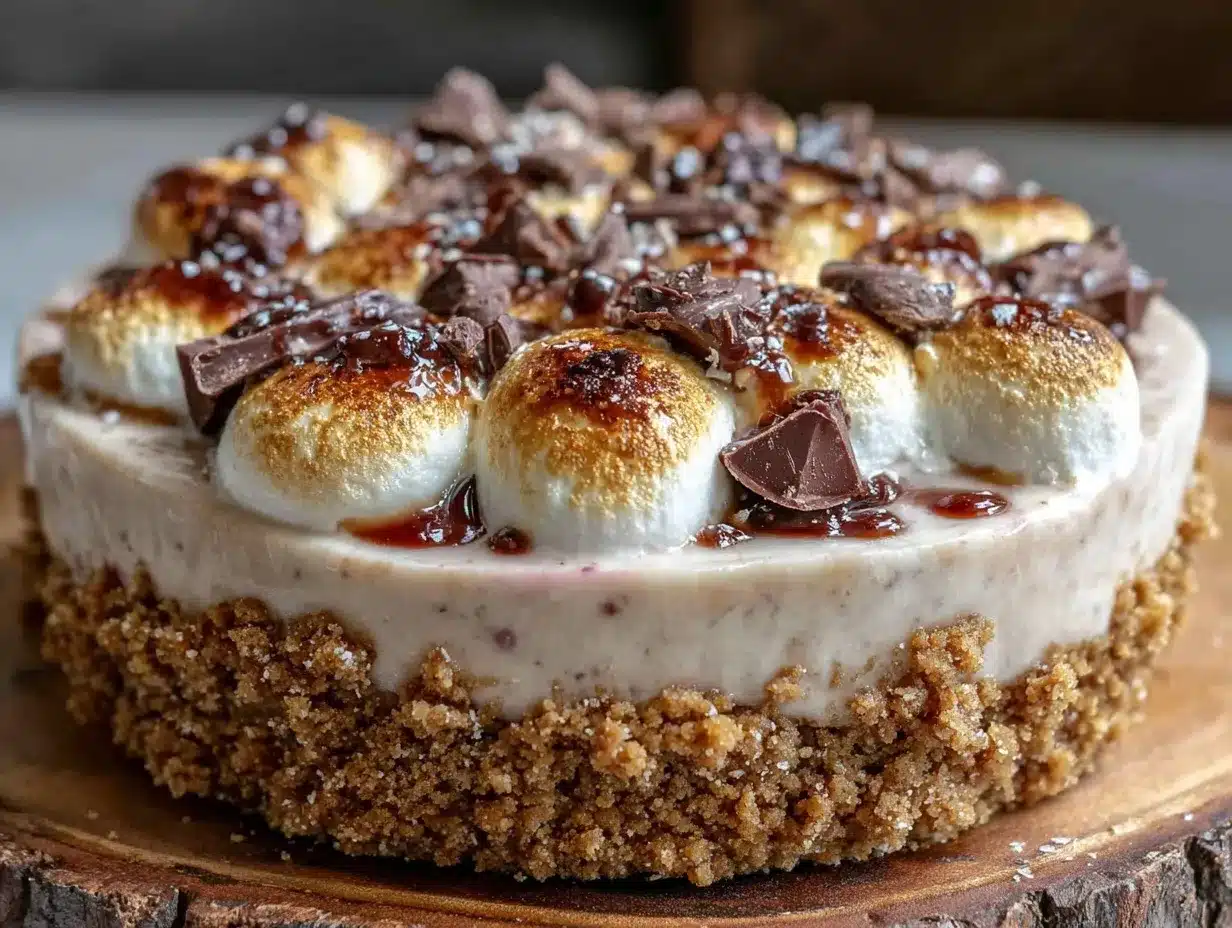
- Add marshmallow topping: Scatter 2 cups mini marshmallows evenly over the frozen pie. Use a kitchen torch to toast the marshmallows until golden and bubbly. If you don’t have a torch, place the pie under a preheated broiler for 1-2 minutes—watch closely so they don’t burn. Let the toasted marshmallow topping set for a few minutes before slicing. (5 minutes)
Pro tip: If the crust seems soft when slicing, let the pie sit a few minutes at room temperature for easier cutting. Also, use a sharp knife dipped in hot water and wiped dry to get clean slices without dragging the marshmallow topping.
Cooking Tips & Techniques
One of the trickiest parts is folding the whipped cream into the chocolate filling. You want to keep as much air in the mixture as possible—this is what keeps the pie creamy and not icy after freezing. I usually fold slowly with a rubber spatula, cutting through the center and gently lifting the mixture from the bottom.
Toasting marshmallows can be intimidating if you’ve never used a kitchen torch. Start with low flames and keep the torch moving in small circles. It’s tempting to hold it in one spot, but that leads to burnt marshmallows—nobody wants that. If you’re using the broiler, keep the oven door slightly open to watch the top, as marshmallows can go from golden to black in seconds.
Another tip: Don’t skip chilling the crust before adding the filling. It helps the butter set so the crust holds together when slicing. I once tried this without chilling and ended up with a crumbly mess—lesson learned the hard way.
For slicing, a warm knife is your best friend. Dip it in hot water, dry it, then slice. Repeat between cuts to keep slices neat and tidy.
Variations & Adaptations
- Peanut Butter Twist: Swirl ½ cup creamy peanut butter into the chocolate filling for a nutty surprise that pairs beautifully with marshmallow.
- Vegan Version: Use dairy-free chocolate, coconut cream whipped topping, and vegan marshmallows for a plant-based treat. Press a gluten-free crust using almond flour and coconut oil.
- Fruit-Infused: Add a layer of raspberry or strawberry jam between crust and filling for a tart contrast to the sweet filling.
- Chocolate Variations: Swap semi-sweet chocolate for dark chocolate for a richer, less sweet experience or milk chocolate for extra creaminess.
- Mini Pies: Use a muffin tin lined with cupcake wrappers to make individual frozen s’mores pies—perfect for parties and portion control.
Personally, I once tried adding a sprinkle of sea salt on top of the toasted marshmallows—it cut through the sweetness and added a lovely complexity. Also, if you’re into experimenting, the gourmet rice krispie treats with dark chocolate and sea salt might inspire some fun flavor combos for your next no-bake dessert adventure.
Serving & Storage Suggestions
This creamy frozen s’mores pie is best served straight from the freezer for that perfect, firm slice. Let it sit at room temperature for about 5 minutes before serving to soften slightly, which makes cutting easier and releases more flavor.
For presentation, I like to add a few extra mini marshmallows or a drizzle of melted chocolate on the side. It pairs well with a cold glass of milk, iced coffee, or even a fruity iced tea for a summer-friendly combo.
Store leftovers wrapped tightly with plastic wrap or in an airtight container in the freezer. It keeps well for up to a week, though I doubt it will last that long. When reheating, avoid the microwave—just let slices thaw at room temperature to keep the texture creamy and prevent marshmallows from turning rubbery.
Over time, the flavors meld beautifully, and the crust softens just a touch, making each bite even better the next day.
Nutritional Information & Benefits
This pie is a treat, so while it’s rich and indulgent, it also offers some nutritional perks. The graham cracker crust provides a modest amount of fiber, and the chocolate brings antioxidants (especially if you opt for dark chocolate). Marshmallows are mostly sugar, so moderation is key.
Approximate per slice (1/8 pie): 350 calories, 20g fat, 38g carbs, 3g protein. Gluten-free and dairy-free options are easily achievable with substitutions.
From a wellness standpoint, this dessert satisfies sweet cravings without baking or complicated prep, making it a stress-free option that keeps you from overindulging on more processed sweets. It also pairs nicely with lighter meals, like a fresh mason jar salad to balance the day.
Conclusion
This creamy frozen s’mores pie with toasted marshmallow topping has earned a permanent spot in my recipe box. It’s effortless to make, needs no oven, and brings that nostalgic campfire vibe in a cool, creamy form. I love how it’s customizable and forgiving—you can tweak ingredients or toppings to match your mood or pantry.
Give it a try when you want a dessert that feels special but doesn’t require special effort. I promise, once you’ve had that first spoonful of silky chocolate and toasted marshmallow, you’ll find yourself reaching for it again and again. And if you do experiment with this recipe, I’d love to hear how you make it your own—share your notes or photos!
Here’s to cozy, creamy treats and simple joys in the kitchen!
FAQs about Creamy Frozen S’mores Pie
Can I make this pie ahead of time?
Yes! It actually tastes better if frozen overnight, allowing the flavors to meld and the filling to set perfectly.
What if I don’t have a kitchen torch for the marshmallow topping?
No problem! Place the pie under the broiler for 1-2 minutes, watching closely to toast the marshmallows without burning.
How do I prevent the crust from getting soggy?
Chilling the crust before adding filling helps it set firmly. Also, press the crust tightly to avoid crumbs loosening.
Can I use flavored marshmallows or chocolate?
Absolutely! Chocolate with sea salt or marshmallows with vanilla or cinnamon can add a fun twist to the classic flavors.
Is this recipe suitable for vegans?
With substitutions like dairy-free chocolate, coconut cream, and vegan marshmallows, you can make a delicious vegan version of this pie.
Pin This Recipe!
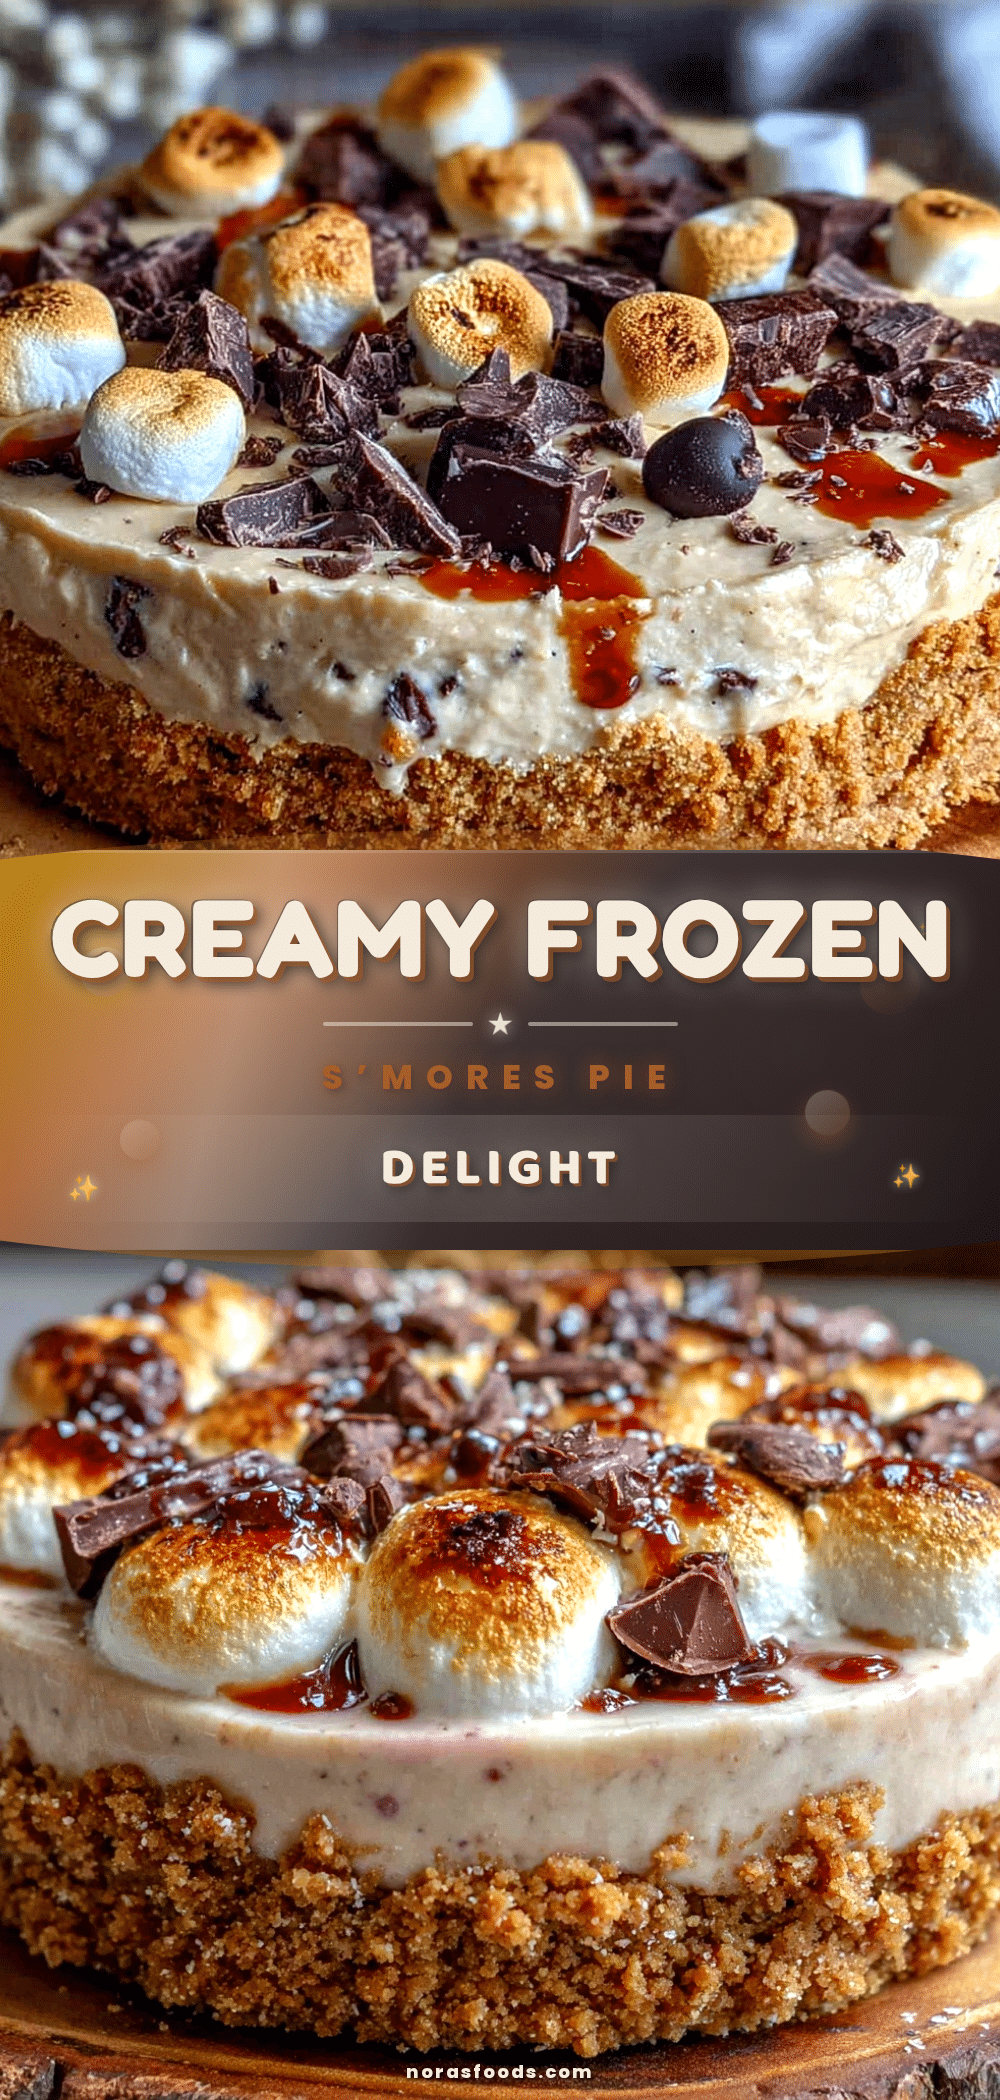
Creamy Frozen S’mores Pie Recipe Easy No-Bake Dessert with Toasted Marshmallow Topping

A creamy, no-bake frozen s’mores pie featuring a crumbly graham cracker crust, silky chocolate filling folded with whipped cream, and a toasted marshmallow topping that evokes cozy campfire memories.
- Prep Time: 20 minutes
- Cook Time: 5 minutes
- Total Time: 4 hours 25 minutes
- Yield: 8 servings 1x
- Category: Dessert
- Cuisine: American
Ingredients
- 1 ½ cups graham cracker crumbs (about 12 full sheets, finely crushed)
- ¼ cup granulated sugar
- 6 tablespoons unsalted butter, melted
- Pinch of salt
- 8 oz semi-sweet chocolate, chopped
- 1 cup heavy cream
- 1 teaspoon vanilla extract
- 1 cup whipped cream
- 2 cups mini marshmallows
Instructions
- Prepare the crust: In a bowl, combine graham cracker crumbs, sugar, and salt. Pour in melted butter and mix until crumbs are evenly coated and look like wet sand. Press mixture firmly into bottom and up sides of a 9-inch pie dish. Chill in fridge while making filling.
- Melt the chocolate: Place chopped chocolate in microwave-safe bowl. Microwave in 30-second bursts, stirring between, until smooth and melted. Alternatively, use a double boiler. Set aside to cool slightly but not harden.
- Heat the cream: Warm 1 cup heavy cream in a small saucepan until just simmering. Pour hot cream over melted chocolate and let sit for a minute. Stir gently until smooth and glossy. Add vanilla extract. Let cool to room temperature but still pourable.
- Fold in whipped cream: Whip 1 cup heavy cream until soft peaks form. Gently fold whipped cream into cooled chocolate mixture in thirds, keeping mixture light and airy.
- Assemble and freeze: Pour chocolate filling over chilled crust, smooth top with spatula. Cover loosely with plastic wrap or foil. Freeze at least 4 hours or overnight.
- Add marshmallow topping: Scatter mini marshmallows evenly over frozen pie. Use kitchen torch to toast marshmallows until golden and bubbly, or place under broiler for 1-2 minutes watching closely. Let topping set a few minutes before slicing.
Notes
Chill crust before adding filling to prevent sogginess. Fold whipped cream gently to keep filling airy and prevent iciness. Use a kitchen torch for best toasted marshmallow topping or broiler as alternative. For clean slices, dip knife in hot water and dry between cuts. Gluten-free and vegan substitutions available.
Nutrition
- Serving Size: 1 slice (1/8 of pie)
- Calories: 350
- Fat: 20
- Carbohydrates: 38
- Protein: 3
Keywords: frozen s’mores pie, no-bake dessert, toasted marshmallow topping, graham cracker crust, creamy chocolate filling, summer dessert, easy dessert, crowd-pleaser


