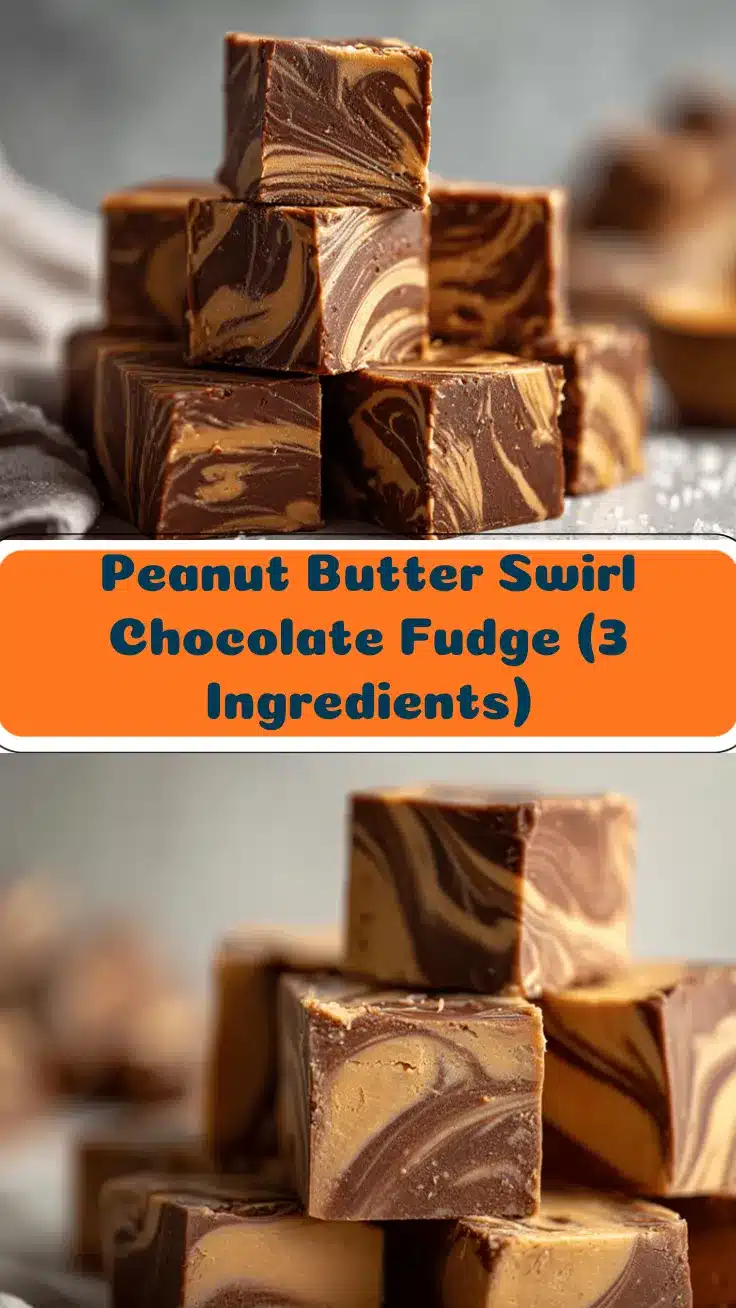
That moment when you bite into a square of peanut butter swirl chocolate fudge and it practically melts on your tongue—well, it’s pure happiness. Every time I whip up this fudge, the kitchen fills with the sweet aroma of chocolate and roasted peanuts, and honestly, it’s almost impossible to wait for it to set. You know those recipes that become instant favorites the second you taste them? For me, this peanut butter swirl chocolate fudge shot straight to the top of the list the very first time I made it.
I stumbled onto this recipe one late night when my sweet tooth struck but my pantry was looking a little sparse. All I had was a leftover jar of peanut butter, a bag of chocolate chips, and a can of sweetened condensed milk. With a little curiosity (and a craving that wouldn’t quit), I combined them—and, wow, I couldn’t believe how easy and delicious the result was. The swirls of creamy peanut butter running through rich, chocolatey fudge look downright fancy, but this treat is so simple you’ll be making it on repeat.
Whether you’re looking for a last-minute party dessert, a holiday gift, or just something to satisfy your chocolate-peanut butter craving, this peanut butter swirl chocolate fudge recipe is the answer. It’s fuss-free, no-bake, and made with only three ingredients you probably have already. Plus, it’s a recipe anyone can master—even if you’ve never made fudge before. Trust me, I’ve tested (and tasted) this fudge more times than I care to admit. So, grab your mixing bowl and let’s make some magic!
Why You’ll Love This Recipe
I’ve made a lot of fudge over the years, but nothing wins hearts (and taste buds) like this peanut butter swirl chocolate fudge. Here’s why you’ll be making it on repeat:
- Quick & Easy: You need only 10 minutes of hands-on time. Perfect for busy days, late-night cravings, or when you need a treat fast.
- Only 3 Ingredients: No need for candy thermometers or special equipment—just chocolate chips, peanut butter, and sweetened condensed milk. That’s it.
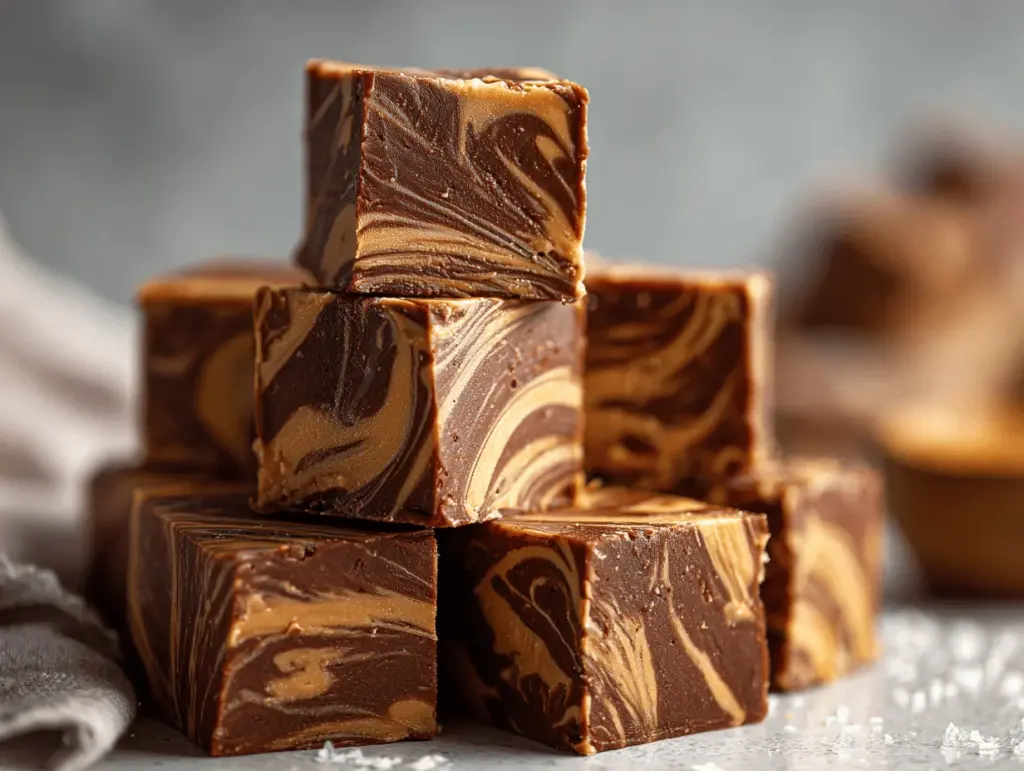
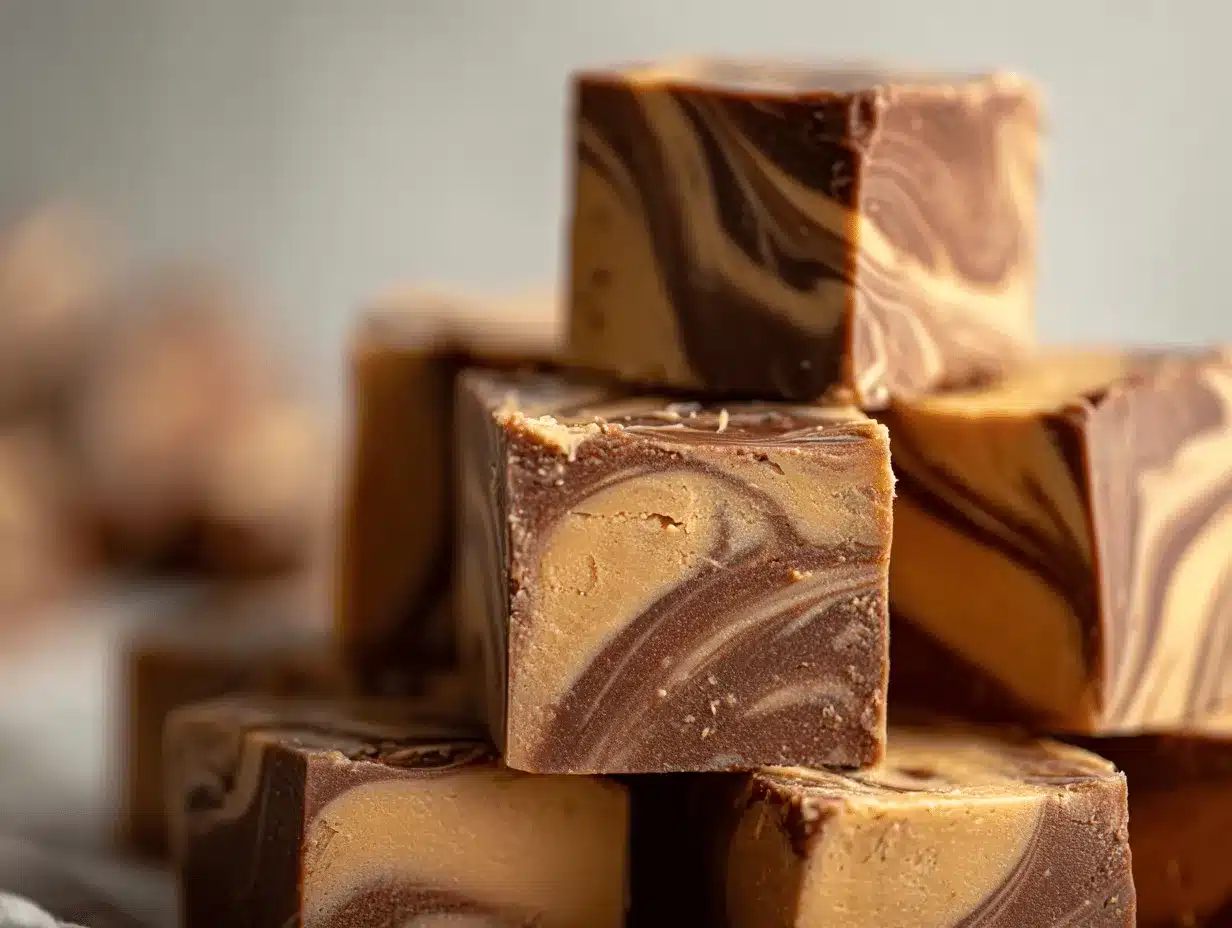
- Showstopper Swirl: The peanut butter swirl isn’t just gorgeous—it gives every bite a nutty, salty-sweet punch that takes classic chocolate fudge to a whole new level.
- Perfect for All Occasions: Great for gifting, parties, potlucks, or just sneaking from the fridge for dessert. I even wrap up a batch for holiday cookie trays each year (always the first thing gone!).
- Kid-Friendly & Crowd-Pleaser: Both kids and adults go wild for this fudge. My nephew calls it “the magic chocolate,” and honestly, I agree.
- Fail-Proof: No fussy steps. No need to worry about gritty sugar or tricky temperatures. Just mix, swirl, chill—and enjoy.
What truly sets this recipe apart is how accessible it is. I’ve made it with my little cousins, with friends who claim they “can’t bake,” and even as a last-minute treat for unexpected guests. The peanut butter swirl isn’t just for looks (though it does make for some Instagram-worthy treats)—it balances the sweetness with a salty, creamy twist. If you love classic fudge but want something with a little more personality and pizzazz, this is the recipe to try.
It’s comfort food, but just a bit extra. It’s the kind of treat that makes you close your eyes and savor every bite. And if you’re anything like me, you’ll find yourself sneaking back to the fridge for “just one more piece” again and again!
What Ingredients You Will Need
This peanut butter swirl chocolate fudge recipe keeps things simple, but every ingredient brings something special to the table. These are the three key players you’ll need:
- Semi-Sweet Chocolate Chips (2 cups / about 340g): These are the backbone of the fudge—rich, chocolatey, and perfectly melty. I usually go for a classic brand like Ghirardelli or Nestlé Toll House, but store brands work too! If you want an extra-deep chocolate flavor, you can swap in dark chocolate chips (go for 60-70% cacao). Milk chocolate chips will result in a softer, sweeter fudge—perfect if you prefer things extra creamy.
- Sweetened Condensed Milk (1 can / 14 oz or 397g): This magical can is what gives the fudge its smooth texture and signature sweetness. Don’t substitute with evaporated milk—it’s not the same! If you’re looking for a dairy-free version, there are coconut-based sweetened condensed milks available, and they work surprisingly well (plus, they add a subtle coconut note that’s actually pretty delicious).
- Creamy Peanut Butter (1/2 cup / about 125g): You want the classic, creamy stuff here—like Jif, Skippy, or your favorite store brand. Natural peanut butter (the kind that separates) also works, but you’ll want to give it a good stir first for even swirling. Chunky peanut butter adds a little texture, if you’re into crunchy surprises. For nut allergies, sunflower seed butter or almond butter are good stand-ins—though the flavor will shift a bit.
That’s it—no butter, no powdered sugar, and definitely no candy thermometer. I love that you can swap in different nut butters or chocolate chips depending on what’s in your pantry. If you’re feeling fancy, you can sprinkle a pinch of flaky sea salt on top before chilling, or even swirl in a spoonful of Nutella for a chocolate-hazelnut twist. But honestly, the basic version is already a winner.
Optional add-ins or toppings (totally not required, but fun!):
- Chopped roasted peanuts (for crunch and visual pop)
- Mini chocolate chips or white chocolate chips (scattered on top)
- Crushed pretzels (for a salty-sweet vibe)
- A drizzle of caramel sauce (if you’re feeling wild)
No matter how you tweak it, these three ingredients are the secret to fudge that’s rich, creamy, and absolutely irresistible.
Equipment Needed
You really don’t need much to make this peanut butter swirl chocolate fudge—just a few basics and you’re good to go:
- Microwave-Safe Mixing Bowl: Perfect for melting chocolate and mixing everything together. If you don’t have one, a heatproof glass or ceramic bowl works just fine.
- Rubber Spatula or Wooden Spoon: Makes stirring and scraping out every bit of fudge super easy. I love silicone spatulas because nothing sticks!
- 8×8 Inch Square Baking Pan (20×20 cm): This gives the perfect thickness for fudge squares. A 9×9 inch pan works too—just expect slightly thinner pieces. In a pinch, use a loaf pan for thick, chunky fudge.
- Parchment Paper or Aluminum Foil: Lining your pan helps the fudge pop right out (no sticking or mess). If you skip this, just grease your pan well with butter or nonstick spray.
- Toothpick or Butter Knife: For swirling the peanut butter into beautiful patterns. Swirling is the fun part, honestly!
Don’t sweat it if you’re missing a fancy tool. I’ve made this fudge at a friend’s house with a regular mixing bowl and a spoon—still turned out amazing. For easy cleanup, wash your spatula and bowl while the fudge chills. If you’re using a metal pan, avoid using sharp knives to cut the fudge (they can scratch the surface). A plastic knife or a bench scraper works great for perfect squares!
Preparation Method
- Line Your Pan: Line an 8×8-inch (20×20 cm) baking pan with parchment paper or aluminum foil, leaving some overhang on the sides. This makes it easy to lift out the fudge later. Lightly grease the paper or foil for extra insurance against sticking.
- Melt the Chocolate & Milk: In a large microwave-safe bowl, combine 2 cups (340g) semi-sweet chocolate chips and 1 can (14 oz/397g) sweetened condensed milk. Microwave on high for 60 seconds. Stir, then continue microwaving in 20-second bursts, stirring each time, until the chocolate is melted and smooth (usually 2-3 minutes total). If you don’t have a microwave, melt the chocolate and milk together in a saucepan over low heat, stirring constantly—don’t let it scorch!
- Pour Fudge Base into Pan: Quickly pour the chocolate mixture into the prepared pan and spread it evenly with a spatula. It should look glossy and thick. Work quickly—the mixture starts to set as it cools!
- Add Peanut Butter Swirl: Warm 1/2 cup (125g) creamy peanut butter in the microwave for 20-30 seconds (it should be pourable but not hot). Dollop spoonfuls of peanut butter over the chocolate layer—about 8-10 spots. Using a butter knife or toothpick, gently swirl the peanut butter through the chocolate. Don’t overmix! You want visible swirls, not a blended layer.
- Chill: Refrigerate the fudge for at least 2 hours, or until firm. If you’re in a rush, the freezer speeds things up—just check after 45 minutes. The fudge should feel solid to the touch before slicing.
- Slice & Serve: Use the parchment overhang to lift the fudge out of the pan. Place on a cutting board and slice into 16 squares (or smaller pieces, if you like bite-sized treats). For neat edges, run a sharp knife under hot water, wipe dry, and slice—repeat as needed.
Troubleshooting & Tips:
- If the chocolate seizes or looks grainy, it may have overheated. Add a splash of extra condensed milk and stir vigorously to smooth it out.
- If your peanut butter is too thick to swirl, add 1-2 teaspoons of vegetable oil and mix until smooth before adding to the fudge.
- Fudge too soft? It might need more chilling time, or your kitchen is warm. Pop it in the freezer for 10-15 minutes before slicing.
- For super-clean squares, always use a hot, dry knife and wipe between cuts.
Once you get the hang of swirling, you’ll be dreaming up all kinds of patterns (hearts, zigzags, you name it). Have fun with it—there’s no wrong way to swirl fudge!
Cooking Tips & Techniques
I’ve had my fair share of fudge fails—so here’s what I’ve learned from experience to help you nail this peanut butter swirl chocolate fudge every time:
- Low & Slow Melting: Melting chocolate too quickly can cause it to seize (turn grainy and stiff). Always use short bursts in the microwave and stir often. If using the stovetop, keep the heat low and stir constantly.
- Perfect Swirls: Don’t rush the swirling step. Dollop the peanut butter evenly over the chocolate, then gently drag a knife or toothpick through the mixture. Less is more—if you swirl too much, you’ll lose those pretty streaks.
- Chill Thoroughly: It’s tempting to dig in right away, but let the fudge set completely for clean slices and the perfect texture. If you’re in a hurry, a quick 30-45 minutes in the freezer works wonders.
- Consistent Slices: For even pieces, use a ruler to mark your squares before cutting. Wipe your knife between slices for sharp, bakery-style edges.
- Temperature Matters: If your kitchen is warm, chill the fudge longer or store in the fridge until serving. Soft fudge is tricky to slice and serve!
Once, I tried to hurry the cooling process and ended up with fudge that wouldn’t hold its shape—lesson learned! Now I always give it plenty of chilling time. If you’re making this for a party, make it the day before and let it sit in the fridge overnight. And don’t be afraid to experiment—try swirling in extra toppings or adding a sprinkle of sea salt for a gourmet touch. The key is to keep things fun and stress-free—this fudge is meant to be easy, after all!
Variations & Adaptations
One of the best things about this peanut butter swirl chocolate fudge recipe is how flexible it is. Here are some of my favorite twists and tweaks:
- Nut-Free Version: Swap the peanut butter for sunflower seed butter or soy nut butter to make it allergy-friendly. The flavor is a bit different, but still delicious and safe for nut-free schools.
- Vegan & Dairy-Free: Use dairy-free chocolate chips and a coconut-based sweetened condensed milk. Substitute peanut butter with a vegan nut or seed butter of your choice. I’ve tried this with almond butter and coconut condensed milk, and it’s fantastic!
- Flavored Fudge: Stir in 1/2 teaspoon of vanilla extract or a pinch of espresso powder to the chocolate mixture for deeper flavor. For a festive touch, sprinkle crushed peppermint candies or chopped pretzels on top before chilling.
- Chunky Crunch: Mix in chopped roasted peanuts, almonds, or even toffee bits before pouring the chocolate mixture into the pan. My favorite twist is adding a handful of mini marshmallows for a Rocky Road vibe.
- White Chocolate Variation: Use white chocolate chips instead of semi-sweet chocolate for a sweet, creamy base. Swirl in peanut butter as usual—it’s a whole new (and very addictive) flavor combo.
Personally, my kids like it best with a sprinkle of sea salt and a handful of mini chocolate chips on top. If you’re feeling adventurous, try swirling in Nutella or cookie butter for a gourmet upgrade. The possibilities are endless!
Serving & Storage Suggestions
Peanut butter swirl chocolate fudge is best served chilled or at cool room temperature. Here’s how to make the most of every piece:
- Presentation: Arrange fudge squares on a pretty platter, or stack them in a glass jar for gifting. For parties, cut the fudge into bite-sized pieces and serve with toothpicks—no sticky fingers!
- Pairings: This fudge pairs perfectly with a cold glass of milk, hot coffee, or even a scoop of vanilla ice cream. For a fancier dessert, serve with fresh berries or a drizzle of caramel sauce.
- Storage: Store fudge in an airtight container in the refrigerator for up to 1 week. Place parchment paper between layers to prevent sticking. For longer storage, freeze fudge squares in a zip-top bag for up to 2 months. Thaw in the fridge before serving.
- Reheating: No need to reheat—just let the fudge come to room temperature if it feels too firm straight from the fridge.
- Flavor Over Time: The flavors actually deepen and get even better after a day or two in the fridge, so it’s a great make-ahead treat.
If you’re wrapping fudge for gifts, use wax paper or small cellophane bags tied with a ribbon. It makes for a heartfelt, homemade present that’s always a hit.
Nutritional Information & Benefits
This easy peanut butter swirl chocolate fudge is definitely a treat, but it’s got a few sweet perks:
- Estimated Nutritional Values (per square, based on 16 servings): 180 calories, 9g fat, 25g carbs, 3g protein. (Values are approximate and can vary with brands and portion size.)
- Health Benefits: Peanut butter offers protein, healthy fats, and a little fiber. Chocolate brings antioxidants to the party, and sweetened condensed milk makes it smooth and creamy.
- Dietary Considerations: Can be gluten-free (double-check your brands). Easily adapted for vegan and nut-free diets with the right swaps.
- Allergens: Contains milk and peanuts (or other nut/seed butters if substituted). Always check labels if you’re serving to anyone with allergies.
While this fudge is definitely an indulgent dessert, it’s made with real ingredients you can pronounce—no weird preservatives or artificial stuff. I love treating myself to a square after dinner (it really satisfies a sweet tooth without going overboard!).
Conclusion
Peanut butter swirl chocolate fudge isn’t just another dessert—it’s a three-ingredient miracle that delivers big on flavor, fun, and visual wow factor. Whether you’re craving a midnight snack, need a quick party treat, or want to surprise someone with a homemade gift, this recipe is your new secret weapon.
What I love most is how easy it is to customize—swap nut butters, try new chocolates, or add your own swirl of creativity. Every batch feels a little different, but always hits the spot. If you’re new to fudge, this is the perfect place to start. If you’re a seasoned pro, you’ll love how quick and low-stress it is.
Give this peanut butter swirl chocolate fudge a try and let me know how your batch turns out! Leave a comment, snap a photo for Pinterest, or share your own favorite twist. Life’s too short to skip dessert—so grab your ingredients and start swirling!
FAQs About Peanut Butter Swirl Chocolate Fudge
Can I use natural peanut butter for this fudge?
Yes, you can! Just make sure to stir it well so it’s smooth and not separated. If it’s too thick to swirl, warm it up for a few seconds in the microwave or add a tiny bit of oil.
What’s the best way to cut fudge cleanly?
Let the fudge chill completely, then use a sharp knife heated under hot water (and wiped dry) for each slice. This helps you get neat, bakery-style squares every time.
Can I make this recipe on the stovetop instead of the microwave?
Absolutely! Melt the chocolate chips and sweetened condensed milk together in a saucepan over low heat, stirring constantly. Once it’s smooth, proceed with the rest of the recipe as usual.
How long does peanut butter swirl chocolate fudge last?
It keeps well in the fridge for up to a week, or in the freezer for up to two months. Store in an airtight container with layers separated by parchment paper.
Is this fudge gluten-free?
Yes, as long as your chocolate chips and peanut butter are gluten-free (most are, but check labels to be sure), this fudge is naturally gluten-free. Great for gifting to friends with dietary restrictions!
Pin This Recipe!
Peanut Butter Swirl Chocolate Fudge
This easy, no-bake peanut butter swirl chocolate fudge is a rich, creamy treat made with just three ingredients: chocolate chips, peanut butter, and sweetened condensed milk. With a beautiful peanut butter swirl and melt-in-your-mouth texture, it’s perfect for parties, gifting, or satisfying your sweet tooth any time.
- Prep Time: 10 minutes
- Cook Time: 3 minutes
- Total Time: 2 hours 15 minutes
- Yield: 16 squares 1x
- Category: Dessert
- Cuisine: American
Ingredients
- 2 cups semi-sweet chocolate chips (about 12 oz or 340g)
- 1 can (14 oz or 397g) sweetened condensed milk
- 1/2 cup creamy peanut butter (about 125g)
- Optional: Chopped roasted peanuts, mini chocolate chips, white chocolate chips, crushed pretzels, caramel sauce, flaky sea salt for topping
Instructions
- Line an 8×8-inch (20×20 cm) baking pan with parchment paper or aluminum foil, leaving some overhang. Lightly grease for easy removal.
- In a large microwave-safe bowl, combine chocolate chips and sweetened condensed milk. Microwave on high for 60 seconds, stir, then continue in 20-second bursts, stirring each time, until melted and smooth (2-3 minutes total). Alternatively, melt together in a saucepan over low heat, stirring constantly.
- Quickly pour the chocolate mixture into the prepared pan and spread evenly with a spatula.
- Warm peanut butter in the microwave for 20-30 seconds until pourable. Dollop spoonfuls over the chocolate layer (8-10 spots). Swirl gently with a butter knife or toothpick to create visible swirls.
- Refrigerate for at least 2 hours, or until firm. For faster setting, chill in the freezer for 45 minutes.
- Lift fudge out of the pan using the parchment overhang. Place on a cutting board and slice into 16 squares. For clean edges, use a hot, dry knife and wipe between cuts.
- Store in an airtight container in the refrigerator for up to 1 week, or freeze for up to 2 months.
Notes
For best swirls, don’t overmix the peanut butter into the chocolate. If using natural peanut butter, stir well and warm slightly if too thick. For a vegan or nut-free version, use dairy-free chocolate and condensed milk, and substitute with sunflower seed butter. Fudge slices best when fully chilled; use a hot, dry knife for clean cuts. Store with parchment between layers to prevent sticking.
Nutrition
- Serving Size: 1 square (1/16 of recipe)
- Calories: 180
- Sugar: 21
- Sodium: 55
- Fat: 9
- Saturated Fat: 4
- Carbohydrates: 25
- Fiber: 1
- Protein: 3
Keywords: peanut butter fudge, chocolate fudge, easy fudge, 3 ingredient fudge, no bake dessert, holiday treat, gluten free dessert, party dessert, homemade fudge, peanut butter chocolate