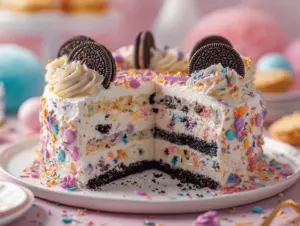
The first time I made this No-Bake Funfetti Oreo Icebox Cake, my kitchen looked like a sprinkle explosion—and I absolutely loved it. There’s just something magical about those rainbow dots nestled between layers of cookies and whipped cream. You can almost hear the laughter and party chatter with every slice. I started making this dessert when my oven broke down before a birthday bash, and honestly, I’ve never looked back. This recipe is like instant happiness in a pan—fun, colorful, and so easy that you’ll find every excuse to whip it up for any occasion. Whether you’re planning a birthday surprise, a family get-together, or you just want a treat that feels like a celebration, this Funfetti Oreo Icebox Cake will be your new go-to.
You know how some desserts promise to be simple but end up with a million steps? This isn’t one of them. Layers of Funfetti Oreos (yes, they exist and yes, they’re glorious), pillowy whipped cream, and a confetti of sprinkles come together with zero baking required. It’s perfect for those hot summer days when turning on the oven is a hard no. As someone who has tested this recipe more times than I can count—tweaking the creaminess, trying different sprinkles, even adding an extra cookie layer—I can say it’s a foolproof winner. Even my picky eaters (and believe me, they’re tough critics) ask for seconds. If you’re short on time or need a showstopper with minimal effort, this icebox cake fits the bill every single time. And hey, if you’re a sprinkle lover like me, you’ll appreciate the joy this No-Bake Funfetti Oreo Icebox Cake brings to the table!
Why You’ll Love This No-Bake Funfetti Oreo Icebox Cake
- Quick & Easy: Comes together in just about 20 minutes—no oven, no fuss. Perfect for busy days or last-minute parties.
- Simple Ingredients: Everything you need is probably already at your local grocery store, and you don’t need any fancy equipment.
- Ultimate Party Treat: The pops of color from the sprinkles make this cake an instant hit at birthdays, potlucks, and celebrations.
- Crowd-Pleaser: Kids beg for it, adults sneak seconds, and honestly, who can resist those Funfetti Oreos?
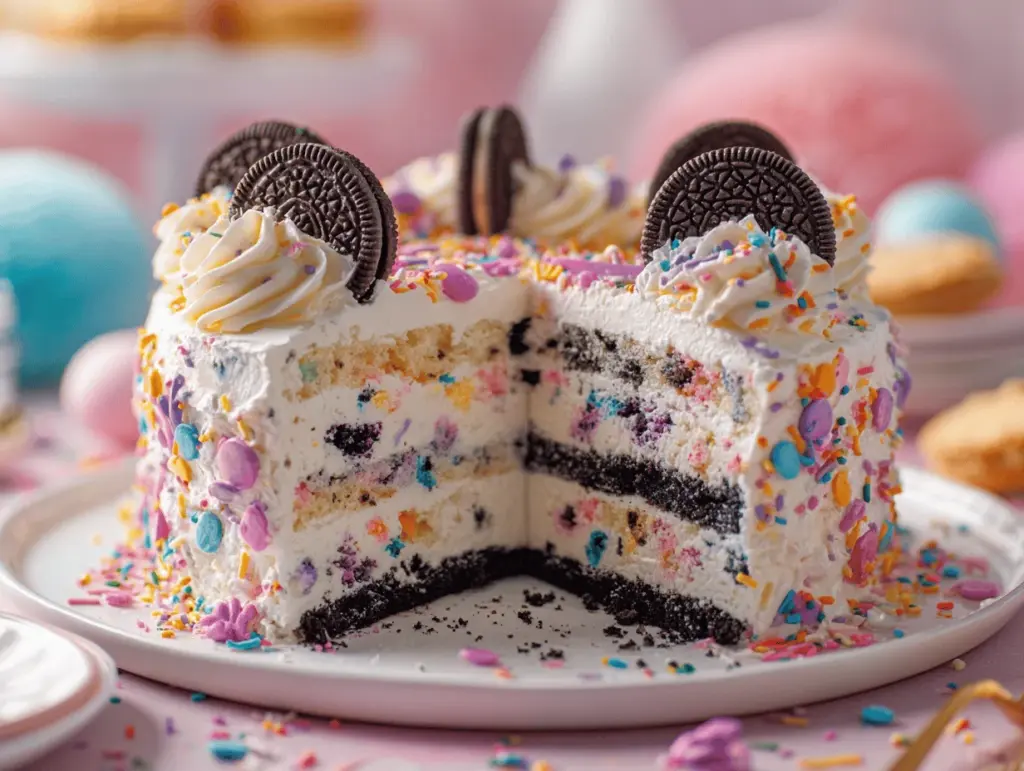
- Outrageously Delicious: Soft, creamy, and just the right amount of sweet—the cookies soak up the cream while sprinkles add a pop of texture and color.
What sets this no-bake Funfetti Oreo icebox cake apart? It’s not just another cookies-and-cream dessert. I blend a hint of vanilla extract into the whipped cream for depth, and I’m generous with the sprinkles for that happy, party vibe. The Funfetti Oreos soften overnight, turning into almost cake-like layers—no dry cookies here. I’ve tried the classic versions with chocolate Oreos and even graham crackers, but the Funfetti Oreos are where it’s at if you want that birthday cake flavor without the oven. Even the pickiest dessert skeptics in my family have asked for the recipe. There’s something about a no-bake cake that feels like a little kitchen magic—effortless, yet impressive.
This cake is more than just a dessert. It’s a moment—like blowing out candles or making a wish. It’s the kind of treat that makes a regular Tuesday feel like a celebration. I love it because you can make it ahead, it looks stunning on a party table, and it’s customizable for every color scheme or holiday. If you want to create memories (and not just desserts), this No-Bake Funfetti Oreo Icebox Cake is the way to go.
What Ingredients You Will Need
The best part about this No-Bake Funfetti Oreo Icebox Cake is that it uses simple, joyful ingredients that create a dessert bursting with flavor and color. If you’re a fan of easy recipes and pantry staples, you’re in luck! Here’s what you’ll need:
- Funfetti Oreo Cookies (36 cookies, about 2 sleeves): The star of the show! These limited-edition Oreos have rainbow sprinkles baked right in. If you can’t find them, use Golden Oreos and add extra sprinkles between the layers.
- Heavy Whipping Cream (3 cups / 720 ml): For that dreamy, cloud-like texture. I prefer using fresh cream over frozen whipped topping, but you can swap in whipped topping if you’re in a pinch.
- Powdered Sugar (1/2 cup / 60 g): Adds a touch of sweetness to the whipped cream without making it gritty.
- Vanilla Extract (2 teaspoons): Don’t skip it—this gives the cream a subtle, cake-batter flavor.
- Rainbow Sprinkles (1/2 cup / 80 g + more for topping): The more, the merrier! Jimmies are best as they don’t bleed color. I once tried nonpareils and ended up with streaky cream—lesson learned.
- Cream Cheese (optional, 4 ounces / 115 g, softened): For a tangier, cheesecake-like whipped layer. I add this sometimes when I want a little extra richness.
- Whole Milk (1/2 cup / 120 ml): For dunking the Oreos (helps them soften and meld into the cream). You can use dairy-free milk if needed.
Ingredient Notes & Tips:
- If you can’t find Funfetti Oreos, use Golden Oreos or Birthday Cake Oreos, then add extra sprinkles to capture that funfetti vibe.
- For a gluten-free version, swap in gluten-free vanilla sandwich cookies.
- Want a dairy-free option? Use coconut whipped topping and plant-based milk. I’ve tried it with almond milk and coconut cream—still delicious!
- If you’re feeling extra, toss in some mini chocolate chips or a handful of crushed freeze-dried strawberries between the layers.
- Brands I trust: I usually go with Nabisco for the Oreos and use a good-quality heavy cream like Organic Valley or Horizon for the best whipped cream texture.
Equipment Needed
- 8×8-inch (20×20 cm) or 9×9-inch (23×23 cm) Square Baking Dish: Glass or ceramic works best so you can see the colorful layers. You can double the recipe for a 9×13-inch (23×33 cm) pan if you’re feeding a crowd.
- Stand Mixer or Hand Mixer: For whipping the cream. I’ve done it by hand with a whisk (and sore arms), but an electric mixer is way easier, trust me.
- Large Mixing Bowl: For the whipped cream. Stainless steel bowls chill nicely, which helps the cream whip up faster.
- Rubber Spatula: For folding in sprinkles and spreading cream evenly. A silicone spatula is easy to clean and gentle on the whipped cream.
- Measuring Cups and Spoons: Precision matters for the perfect balance of sweet and creamy.
- Small Bowl: For dunking Oreos in milk. I use a soup bowl for this step.
- Plastic Wrap or Foil: To cover the cake while it chills in the fridge.
Alternatives: If you don’t have a square baking dish, a loaf pan or even individual mason jars work for mini trifles. Disposable aluminum pans are a budget-friendly option for potlucks or gifting. For easy cleanup, line your pan with parchment.
Care Tip: Keep your mixer attachments and bowls cold by popping them in the freezer for 5-10 minutes before making whipped cream—it really helps the cream whip up faster and fluffier!
How to Make No-Bake Funfetti Oreo Icebox Cake
- Chill Your Tools (5 minutes): Place your mixing bowl and beaters or whisk in the freezer. This helps the whipped cream get extra fluffy.
- Make the Whipped Cream (10 minutes): Pour 3 cups (720 ml) chilled heavy whipping cream into the cold bowl. Add 1/2 cup (60 g) powdered sugar and 2 teaspoons vanilla extract. Beat on medium-high speed for 2-3 minutes until stiff peaks form—careful not to overbeat or it gets grainy! If using cream cheese, beat 4 ounces (115 g) softened cream cheese in a separate bowl until smooth before folding into the whipped cream.
- Fold in the Sprinkles (1 minute): Gently fold 1/2 cup (80 g) rainbow sprinkles into the whipped cream with a spatula. Don’t overmix—just enough so they’re evenly distributed. (If you use nonpareils, add them just before layering to avoid color bleed.)
- Dunk the Oreos (5 minutes): Pour 1/2 cup (120 ml) milk into a shallow bowl. Quickly dip each Funfetti Oreo (about 18 for the first layer) into the milk for 1-2 seconds—just until barely softened. Lay them in a single layer across the bottom of your 8×8-inch (20×20 cm) pan. They’ll soften more as the cake chills, so don’t soak them too long.
- Layer the Cream (2 minutes): Spread half the whipped cream mixture over the cookies. Use a spatula to smooth it into the corners.
- Repeat Layers (5 minutes): Dunk and layer another 18 Oreos over the whipped cream. Top with the remaining whipped cream, smoothing out the top. If you have extra cookies, crush a few and sprinkle them over the top for texture.
- Decorate (2 minutes): Scatter more rainbow sprinkles generously over the top—don’t hold back! For a party look, add a drizzle of melted white chocolate or a few piped dollops of whipped cream, if you’re feeling fancy.
- Chill (at least 4 hours, preferably overnight): Cover tightly with plastic wrap or foil and refrigerate. The magic happens while it chills—the cookies soften into cake-like layers and the flavors meld together. Overnight is best, but I’ve gotten away with 4 hours in a pinch.
- Serve: Slice with a sharp knife for clean edges. Use a spatula to lift out generous squares. If it’s extra chilled, let it sit at room temp for 5 minutes before cutting.
Troubleshooting Tips:
- If your whipped cream looks grainy, you may have overwhipped. Try folding in a tablespoon or two of extra cream to loosen it up.
- If the cookies are still crunchy after chilling, give it a few more hours—patience pays off!
- Too many sprinkles can make the cream streaky—add them gently, and use “jimmies” for best results.
Prep Note: Use a light hand when folding in the sprinkles. The first time I made this, I stirred too much and ended up with rainbow-colored whipped cream (pretty, but a bit wild!).
Pro Cooking Tips & Techniques
- Get the Cream Right: Whip the cream just until it holds stiff peaks. If you go too far and it’s starting to look curdled, add a splash of fresh cream and gently fold to smooth it out. Cold tools make a big difference here!
- Layer Evenly: Take your time spreading the whipped cream. Even layers mean every bite is perfectly balanced—no dry cookie surprises or rogue pockets of cream.
- Don’t Oversoak the Oreos: A super quick dip in milk is all you need. If you soak too long, the cookies will get mushy and the cake might be soggy; too short and they’ll stay crunchy.
- Chill for Best Texture: The longer the cake chills, the softer and more cake-like the cookies become. I’ve tried slicing after just 2 hours (impatient, I know), but overnight is hands-down the best for texture.
- Use the Right Sprinkles: Jimmies work best since they don’t bleed color. I once used nonpareils and ended up with tie-dye whipped cream—not my best look.
- Multitasking Hack: While the cake chills, prep other party treats or decorations. This dessert is hands-off after assembly, so you can focus on everything else.
- Consistency Matters: For a neater look, line your pan with parchment before layering. It makes lifting out the cake a breeze and helps with clean-up.
I’ve definitely had my share of messy, soggy, or streaky icebox cakes—so don’t worry if your first try isn’t “Pinterest perfect.” The flavor always wins, and you’ll get more confident with each go. The key is not rushing the chill time, and remembering that a little imperfection means it’s homemade with love.
Variations & Adaptations
- Gluten-Free Funfetti Icebox Cake: Use gluten-free vanilla sandwich cookies and check that your sprinkles are gluten-free. I’ve used Glutino vanilla cookies and they worked great—just as fun and tasty.
- Dairy-Free Version: Swap the heavy cream for coconut whipped topping and use plant-based milk for dunking the Oreos. I’ve made this for my dairy-sensitive friends, and it’s still a party hit.
- Chocolate Lover’s Twist: Use golden Oreos for the base, then add a layer of mini chocolate chips or drizzle chocolate sauce between the layers. Top with chocolate jimmies for extra fun.
- Seasonal Flair: For a summer party, fold in chopped fresh strawberries. In winter, use peppermint Oreos and red-and-green sprinkles for a holiday twist.
- Allergy-Friendly Options: Nut allergies? Skip any nut-based toppings. Egg-free? Most store-bought Oreos are already egg-free, but check packaging to be sure.
- Personal Favorite: Once, I swapped the vanilla for almond extract and tossed in a layer of sliced bananas—think birthday cake meets banana cream pie. It was gone in minutes!
Feel free to get creative! The base recipe is super adaptable, so you can match your cake to the season, occasion, or taste preference. I love letting my kids pick the sprinkles—they always surprise me with their choices!
Serving & Storage Suggestions
This No-Bake Funfetti Oreo Icebox Cake is best served cold, straight from the fridge. I usually cut it into big squares and serve on colorful plates to show off those layers. For a party vibe, add a few extra sprinkles or a candle on top—kids go wild for it! Pair with a glass of cold milk, a mug of coffee, or even strawberry lemonade for a summery treat.
Store leftovers tightly wrapped in the fridge for up to 4 days. The cookies will get softer over time, but honestly, it’s still delicious. For longer storage, freeze individual squares in airtight containers. Thaw in the fridge overnight before serving. If you like your cake slightly firmer, pop it in the freezer for about 30 minutes before slicing. I’ve found the flavor deepens after a day in the fridge—the sprinkles melt a little and the whole cake gets extra luscious.
Reheating isn’t necessary, but if you want to soften it up, just let it sit at room temperature for 10 minutes before serving. I sometimes sprinkle on fresh berries for brunch or drizzle a bit of chocolate sauce for extra indulgence. No matter how you serve it, this cake is always the first thing gone at the dessert table.
Nutritional Information & Benefits
Each serving of No-Bake Funfetti Oreo Icebox Cake (about 1/9th of a pan) has roughly:
- Calories: 340
- Fat: 18g
- Carbohydrates: 42g
- Protein: 3g
- Sugar: 26g
Key Benefits: While this dessert is definitely a treat, it’s lighter than traditional cakes because it skips the butter and eggs. The heavy cream provides some calcium and a touch of protein. You can make it gluten-free or dairy-free with the right swaps. Just watch out for potential allergens in cookies, cream, and sprinkles—always check labels if you’re serving a crowd.
From a wellness perspective, I think it’s all about balance. This cake brings so much joy and fun to any occasion. Sometimes, a little sweetness is just what the doctor ordered (at least for the soul!).
Conclusion
If you’re searching for the ultimate no-fuss, wow-factor dessert, this No-Bake Funfetti Oreo Icebox Cake is your answer. It’s the type of treat that makes people smile before they even take a bite—colorful, creamy, and party-ready in every way. I love this recipe because it’s endlessly customizable and always brings a little sparkle to my day, whether I’m celebrating something big or just making an ordinary moment special.
Don’t be afraid to make it your own—switch up the cookies, swap the sprinkles, or add a layer of fruit. I hope it becomes a staple in your kitchen like it has in mine. If you try this No-Bake Funfetti Oreo Icebox Cake, let me know how it went! Leave a comment, share a photo, or tell me about your favorite variation. Here’s to more happy (and sprinkle-filled) celebrations!
FAQs About No-Bake Funfetti Oreo Icebox Cake
Can I use regular Oreos instead of Funfetti Oreos?
Yes! If you can’t find Funfetti Oreos, swap in Golden Oreos or classic Oreos, and add extra rainbow sprinkles between layers for that funfetti vibe.
How far in advance can I make this icebox cake?
You can make it up to 2 days in advance. Just keep it tightly covered in the fridge. The flavors actually get better as it chills!
Do I have to use heavy whipping cream, or can I use whipped topping?
You can use store-bought whipped topping for convenience. Freshly whipped cream gives a richer flavor, but both work well for this recipe.
What size pan should I use?
An 8×8-inch (20×20 cm) or 9×9-inch (23×23 cm) pan works best. You can double the recipe for a 9×13-inch (23×33 cm) pan if you’re feeding a crowd.
How do I keep the sprinkles from bleeding into the whipped cream?
Use jimmies (long, soft sprinkles) instead of nonpareils, and fold them in gently just before layering the cake. That way, your cream stays bright and pretty!
Pin This Recipe!
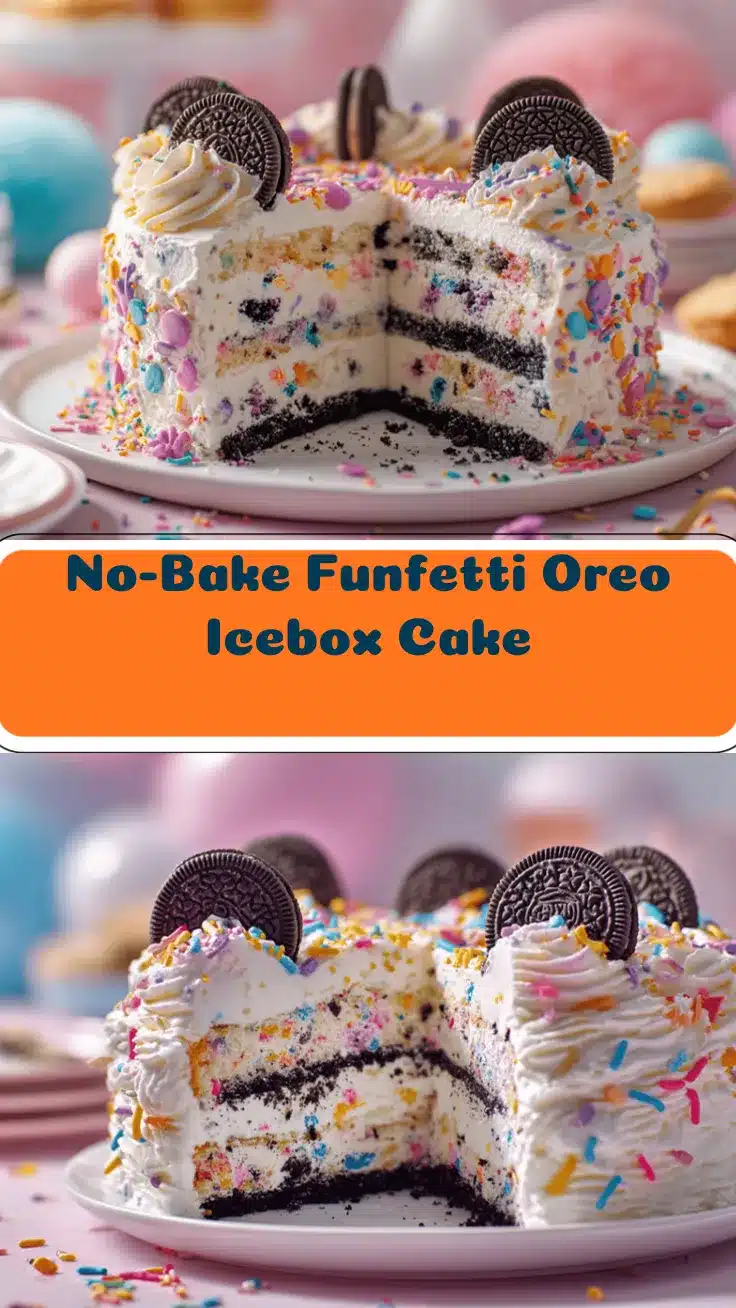
No-Bake Funfetti Oreo Icebox Cake

This no-bake Funfetti Oreo Icebox Cake is a colorful, crowd-pleasing dessert featuring layers of Funfetti Oreos, fluffy whipped cream, and rainbow sprinkles. It’s easy to make, requires no oven, and is perfect for birthdays, parties, or any celebration.
- Prep Time: 20 minutes
- Cook Time: 0 minutes
- Total Time: 4 hours 20 minutes (includes chilling time)
- Yield: 9 servings 1x
- Category: Dessert
- Cuisine: American
Ingredients
- 36 Funfetti Oreo Cookies (about 2 sleeves; substitute Golden Oreos or Birthday Cake Oreos if needed)
- 3 cups heavy whipping cream
- 1/2 cup powdered sugar
- 2 teaspoons vanilla extract
- 1/2 cup rainbow sprinkles (plus more for topping; use jimmies for best results)
- 4 ounces cream cheese, softened (optional, for a tangier layer)
- 1/2 cup whole milk (for dunking Oreos; dairy-free milk works too)
Instructions
- Chill your mixing bowl and beaters or whisk in the freezer for 5 minutes.
- In the cold bowl, beat 3 cups heavy whipping cream, 1/2 cup powdered sugar, and 2 teaspoons vanilla extract on medium-high speed for 2-3 minutes until stiff peaks form. (If using cream cheese, beat 4 ounces softened cream cheese in a separate bowl until smooth, then fold into the whipped cream.)
- Gently fold 1/2 cup rainbow sprinkles into the whipped cream with a spatula. Do not overmix.
- Pour 1/2 cup milk into a shallow bowl. Quickly dip each Funfetti Oreo (about 18 for the first layer) into the milk for 1-2 seconds, then arrange in a single layer in an 8×8-inch pan.
- Spread half the whipped cream mixture over the cookies, smoothing into the corners.
- Dunk and layer another 18 Oreos over the whipped cream. Top with the remaining whipped cream, smoothing out the top.
- Decorate with more rainbow sprinkles. Optionally, add a drizzle of melted white chocolate or piped whipped cream.
- Cover tightly with plastic wrap or foil and refrigerate for at least 4 hours, preferably overnight.
- Slice with a sharp knife and serve cold. Let sit at room temperature for 5 minutes before cutting if extra chilled.
Notes
For best results, use jimmies sprinkles to avoid color bleeding. Chill the cake overnight for the softest, most cake-like texture. You can substitute Golden Oreos or Birthday Cake Oreos if Funfetti Oreos are unavailable, and add extra sprinkles for the funfetti effect. For gluten-free or dairy-free adaptations, use appropriate cookies and whipped toppings. Do not oversoak the Oreos in milk to prevent sogginess.
Nutrition
- Serving Size: 1/9th of an 8x8-inch pan
- Calories: 340
- Sugar: 26
- Sodium: 180
- Fat: 18
- Saturated Fat: 11
- Carbohydrates: 42
- Protein: 3
Keywords: no-bake, icebox cake, funfetti, oreo, party dessert, birthday cake, easy dessert, summer dessert, kid-friendly, sprinkles