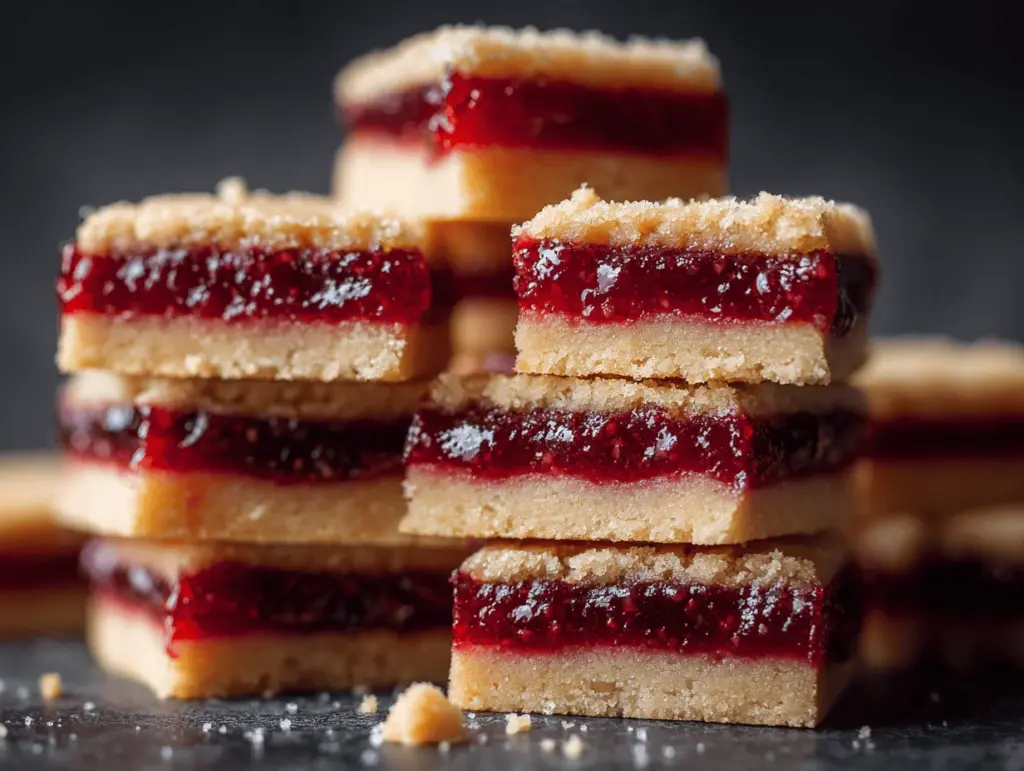
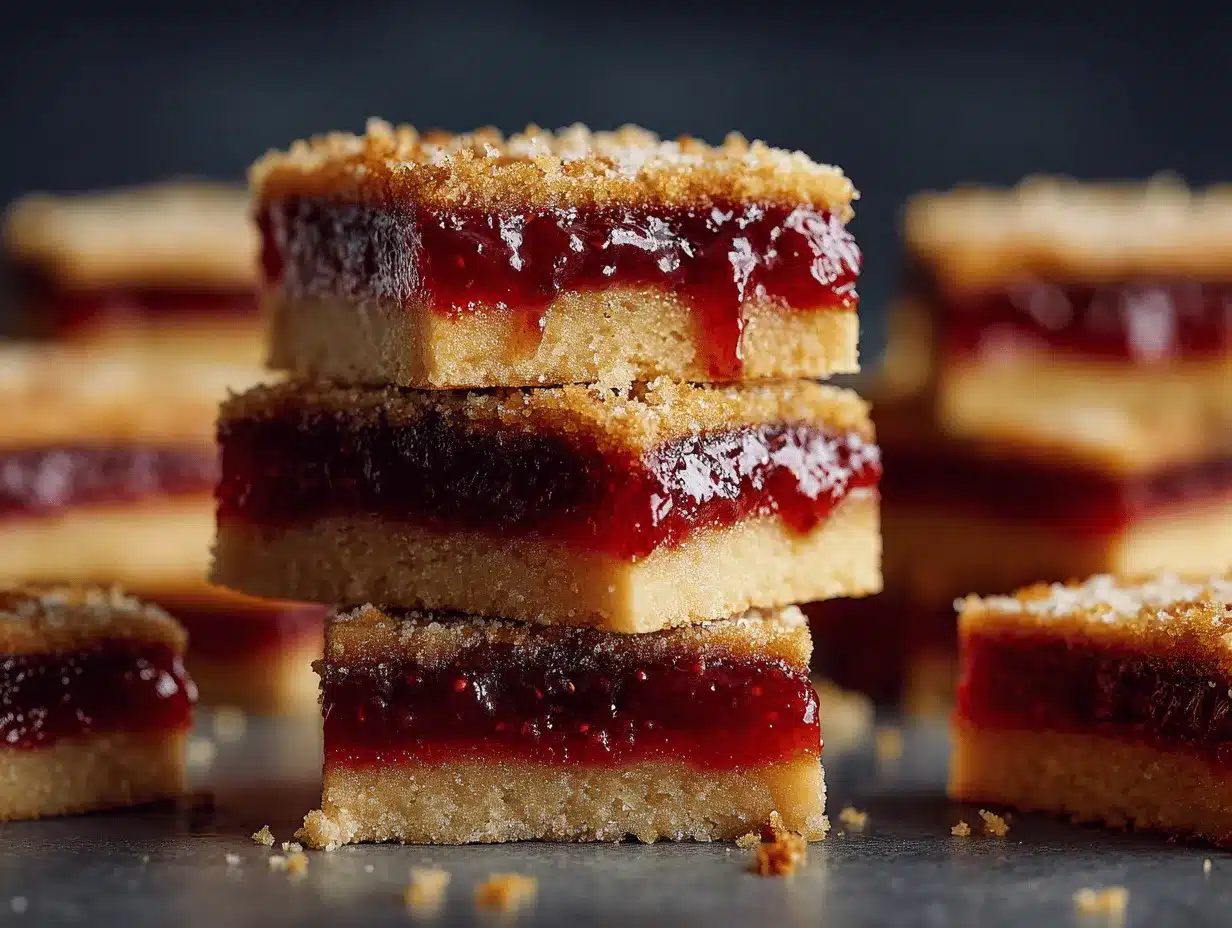
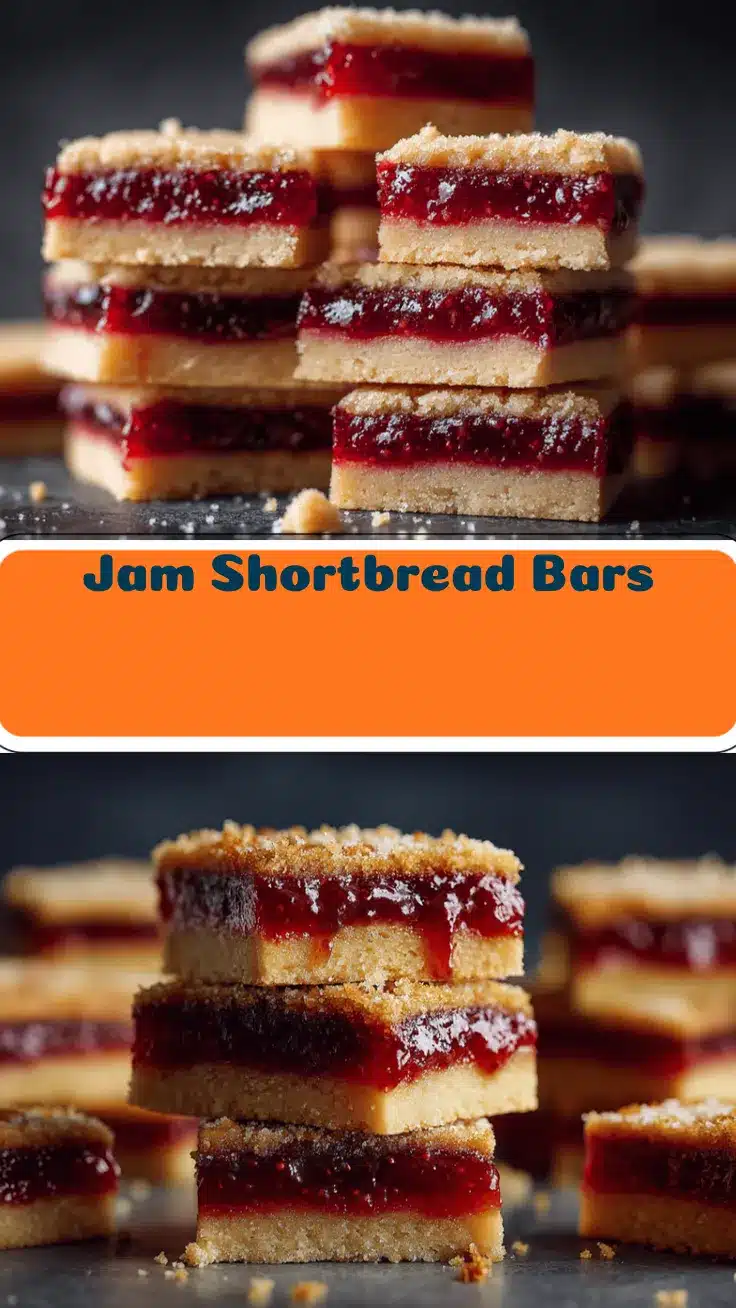
The buttery aroma of freshly baked shortbread, layered with sweet, jewel-toned jam, always makes my kitchen feel like a cozy bakery. The first time I made jam shortbread bars, I was honestly just trying to use up a half-empty jar of raspberry preserves. But, wow—what a happy accident! That crumbly, melt-in-your-mouth base with a bright, fruity layer and a golden, crumbly topping? Pure magic.
This jam shortbread bars recipe has become my go-to for potlucks, bake sales, and, let’s be real, random Tuesday afternoons when I need a sweet pick-me-up. It’s one of those easy homemade dessert bars you’ll love for its simplicity and flavor. Over the years, I’ve tinkered with ratios and tried out different jams—there’s just something so comforting and classic about these bars.
If you’re craving a dessert that’s fuss-free, crowd-pleasing, and adaptable for any season (trust me, you can use almost any jam), these jam shortbread bars are calling your name. Whether you’re baking with kids, impressing brunch guests, or just want an afternoon treat with your coffee, this recipe fits right in. I’ve tested it more times than I can count, and it never disappoints. Let’s talk about why these easy dessert bars should be your next baking project!
Why You’ll Love This Recipe
- Quick & Easy: Seriously, you can have these assembled and in the oven in under 15 minutes—no mixer required, no fancy techniques.
- Simple Ingredients: All you need are kitchen staples: flour, butter, sugar, and your favorite jam. No trips to specialty stores (unless you want to try a new jam flavor, which is always fun!).
- Perfect for Any Occasion: These jam shortbread bars shine at brunches, tea parties, holiday gatherings, or whenever you want a little homemade sweetness. They also make a thoughtful edible gift.
- Crowd-Pleaser: Kids go wild for the fruity jam layer, while adults can’t resist the rich, buttery shortbread. I’ve brought these to family events, and there’s never a crumb left.
- Unbelievably Delicious: The combination of crumbly, tender shortbread and vibrant, sweet-tart jam is just next level. Each bite is a little celebration!
What really sets my jam shortbread bars recipe apart? I use a slightly higher ratio of butter and a pinch of salt in the dough, which gives the bars a perfectly balanced, rich flavor. Pressing the base firmly and crumbling the top layer gives you that signature bakery-style look and texture. And if you’re feeling fancy, a sprinkle of coarse sugar on top adds sparkle and crunch.
Honestly, these bars are more than just a recipe—they’re a warm hug. They’re easy enough for beginner bakers, but the flavor is so good that even my picky aunt asks for the recipe every time. Whether you’re new to baking or a seasoned pro, you’ll find yourself coming back to this easy jam shortbread bars recipe again and again.
What Ingredients You Will Need
This recipe uses simple, wholesome ingredients to deliver bold flavor and a satisfyingly tender texture. Most of these are pantry staples, so you can whip up a batch any time the craving strikes. Here’s what you’ll need:
- All-Purpose Flour (2 2/3 cups / 335g) – Forms the structure of the shortbread. For a gluten-free version, use a 1:1 gluten-free blend like King Arthur or Bob’s Red Mill.
- Unsalted Butter (1 cup / 226g, cold and cubed) – The key to that rich, melt-in-your-mouth crumb. I always use high-quality butter like Kerrygold for the best flavor, but any unsalted butter works.
- Granulated Sugar (3/4 cup / 150g) – Sweetens the dough and helps create that lovely golden color on top.
- Salt (1/4 teaspoon) – Just a little, to balance the sweetness and bring out the buttery notes.
- Pure Vanilla Extract (1 teaspoon) – Adds warmth and depth. If you’re out, almond extract is a fun twist.
- Your Favorite Jam or Preserves (3/4 – 1 cup / 240g) – Raspberry, apricot, strawberry, or even a tart lemon curd. I love Bonne Maman for its real fruit flavor. Opt for a thick jam; runny jam can make the bars soggy.
- Optional: Coarse Sugar or Demerara Sugar (for sprinkling) – Adds a pretty, crunchy finish.
Ingredient Tips & Substitutions:
- If you only have salted butter, reduce or skip the added salt.
- Want a nutty crunch? Mix 1/2 cup (60g) chopped pecans or sliced almonds into the top crumble.
- For vegan bars, swap butter for a plant-based stick (like Earth Balance) and check your jam is vegan-friendly.
- Jam selection is where you can truly make these bars your own. In summer, blueberry or peach jam is fantastic; cranberry or fig jam is perfect for fall and winter.
- Don’t be shy about mixing jams! Strawberry-rhubarb plus a spoonful of lemon curd is a dreamy combo.
These ingredients come together in the most delightful way—simple, but oh so satisfying. Keep reading for the foolproof method!
Equipment Needed
- 8×8-inch (20x20cm) Baking Pan or 9×9-inch (23x23cm) Pan – A metal or glass pan both work. I prefer metal for even browning, but honestly, I’ve used glass in a pinch and it’s just fine.
- Parchment Paper – Makes lifting out and slicing the bars a breeze. If you’re out, butter the pan well and dust with flour.
- Mixing Bowls – At least one medium to large bowl for mixing the dough.
- Pastry Cutter or Two Forks – For cutting butter into the flour. You can also use clean hands (my favorite method—nothing like getting a little messy in the kitchen).
- Measuring Cups and Spoons – Precision matters for that perfect crumbly texture.
- Rubber Spatula or Spoon – For spreading the jam layer evenly.
- Cooling Rack – Optional, but helps bars cool faster and keeps the bottoms crisp.
If you don’t own a pastry cutter, don’t sweat it! Just use two forks or your fingertips to rub the butter into the flour. I’ve also used a food processor when I was in a rush, but be careful not to overmix—it should look like coarse crumbs, not a dough ball. For easy cleanup, line your pan with parchment paper, letting it overhang the sides for a handy sling. And if you’re on a budget, dollar store pans work just fine—just check for hot spots if your oven runs unevenly.
Preparation Method
-
Prep Your Pan and Oven:
- Preheat your oven to 350°F (175°C).
- Line an 8×8-inch (20x20cm) pan with parchment paper, leaving a bit of overhang on the sides for easy lifting later. (If skipping parchment, butter and flour the pan.)
-
Make the Shortbread Dough:
- In a medium mixing bowl, whisk together 2 2/3 cups (335g) all-purpose flour, 3/4 cup (150g) sugar, and 1/4 teaspoon salt.
- Add 1 cup (226g) cold, cubed unsalted butter and 1 teaspoon vanilla extract.
- Using a pastry cutter, two forks, or your fingertips, cut the butter into the flour until the mixture resembles coarse crumbs. (It’s okay if some pea-sized bits of butter remain—that’s what makes the bars tender!)
- Personal tip: If your kitchen is warm, pop the bowl in the fridge for a few minutes to keep the butter cold and crumbly.
-
Form the Base:
- Pour about two-thirds of the crumb mixture (roughly 3 cups) into the prepared pan.
- Press down firmly and evenly with your hands or the bottom of a measuring cup. You want a compact base so the bars hold together when sliced.
- Note: Don’t over-press, or the base can become tough. Just enough so it holds together.
-
Spread the Jam:
- Gently spread 3/4 – 1 cup (240g) of your chosen jam over the crust. Go all the way to the edges, but don’t press down too hard—the base is still a bit delicate at this stage.
- If your jam is too thick to spread, microwave it for 10-15 seconds to loosen up, then stir.
- Tip: A small offset spatula or the back of a spoon works wonders here.
-
Add the Crumble Top:
- Take the remaining shortbread mixture and crumble it evenly over the jam layer.
- Don’t worry if there are some gaps—those little windows let the jam peek through for a beautiful, rustic look.
- Optional: Sprinkle a tablespoon of coarse sugar on top for extra sparkle and crunch.
-
Bake:
- Bake for 35-40 minutes, or until the top is lightly golden and the jam is bubbling at the edges.
- Ovens can be quirky, so check at 35 minutes and add time if needed. The bars should smell buttery and sweet—your kitchen will smell incredible!
-
Cool and Slice:
- Let the pan cool completely on a wire rack. (Tough, I know. But if you slice too soon, the jam will be gooey and messy.)
- Once cool, lift out using the parchment sling and cut into 16 squares or 12 larger bars.
- Tip: For super-clean slices, chill the cooled bars in the fridge for 30 minutes before cutting.
If your bars come out crumbly, don’t panic—they’re meant to be tender! But if the base is falling apart, next time try pressing the crust a bit firmer. If the top browns too fast, tent loosely with foil. And if your jam bubbles over, just call them “rustic”—they’ll still taste amazing!
Cooking Tips & Techniques
Over the years, I’ve picked up a few tricks that guarantee perfect jam shortbread bars every time. Here’s what I’ve learned (sometimes the hard way!):
- Keep Butter Cold: The secret to a tender, crumbly shortbread is using cold, cubed butter. If your kitchen is warm, chill your bowl and flour for 10 minutes before mixing. When I used softened butter once, the bars turned out greasy—lesson learned!
- Don’t Overmix: Stop mixing as soon as the dough resembles coarse crumbs. Overmixing develops gluten, making the bars tough instead of melt-in-your-mouth.
- Jam Consistency Matters: Use a thick jam or preserves, not jelly or a runny fruit spread. Thin jams can make the bars soggy. If needed, reduce runny jam on the stove for a few minutes to thicken it up.
- Press, Don’t Pound: When forming the base, press the dough in firmly, but don’t compact it to a brick. Too much pressure and you lose that delicate crumb.
- Even Layers: Spread the jam out to the edges for an even pop of fruit in every bite. I sometimes double up on jam for extra gooey bars—just be ready for a bit more mess (and flavor!).
- Cool Completely: This is hard, but essential! The bars set up as they cool, and slicing too soon will make for a sticky mess. If you’re impatient like me, chill them in the fridge to speed things up.
- For Consistent Results: Always measure your flour properly—spoon it into the cup and level off, don’t scoop. Too much flour = dry bars.
Honestly, the biggest mistake I’ve made was underbaking the bars—if the top isn’t golden and the jam isn’t bubbling, give it a few more minutes. And if you want to multitask, prep the dough and line the pan while the oven heats up. These little steps make baking jam shortbread bars a breeze, even on your busiest days.
Variations & Adaptations
One of the best things about jam shortbread bars is how customizable they are. Here are a few favorite ways to make them your own:
- Gluten-Free: Swap the all-purpose flour for a 1:1 gluten-free baking blend. I’ve made this swap for my gluten-sensitive friends and it works beautifully—just check that your jam is also gluten-free.
- Nutty Crumble: Mix 1/2 cup (60g) chopped pecans, walnuts, or sliced almonds into the top crumble layer for added crunch and flavor.
- Citrus Zest: Add the zest of 1 lemon or orange to the shortbread dough for a bright, fresh twist that pairs perfectly with berry or apricot jams.
- Vegan Option: Use a plant-based butter and make sure your jam contains no animal products. Earth Balance is my go-to vegan butter for baking.
- Different Jams & Fillings: Go wild—try blueberry-lavender, fig, or even a thin layer of lemon curd. I once did half raspberry, half apricot for a “two-tone” batch, and it was a hit with both kids and adults!
- Almond Extract: Swap in 1/2 teaspoon almond extract for the vanilla, especially if you’re using cherry or apricot jam. It gives the bars a subtle, bakery-style flavor.
If you prefer a bar that’s less sweet, use a lower-sugar jam or cut back the sugar in the dough by a tablespoon or two. For a fun holiday twist, swirl cranberry sauce with orange zest over the base. The possibilities are endless, and I love experimenting with whatever I have in the fridge or pantry.
Serving & Storage Suggestions
Jam shortbread bars are best served at room temperature—this lets the flavors shine and the texture stay perfectly tender. I love arranging them on a pretty platter for brunches or dessert tables; they look especially inviting next to a pot of tea or a fresh cup of coffee.
Pair with a dollop of whipped cream or a scoop of vanilla ice cream if you’re feeling extra indulgent. For a cozy afternoon treat, try them with a mug of Earl Grey or hot chocolate. These bars also make a lovely addition to a holiday cookie tray or picnic basket.
To store, place bars in an airtight container at room temperature for up to 3 days. For longer storage, refrigerate for up to a week (they’ll be a bit firmer, but still tasty). To freeze, layer bars between sheets of parchment in a freezer-safe container and freeze for up to 2 months. Let thaw at room temp before serving. To refresh, pop them in a 300°F (150°C) oven for 5 minutes—this brings back that fresh-baked aroma and texture.
Honestly, the flavors deepen and the texture sets even more after a day, so don’t be afraid to make these ahead. I’ve even packed them up for road trips, and they hold up beautifully.
Nutritional Information & Benefits
Each jam shortbread bar (based on 16 squares) contains approximately:
- Calories: 210
- Fat: 10g
- Carbohydrates: 27g
- Sugar: 12g
- Protein: 2g
Shortbread bars are definitely a treat, but there’s something satisfying about knowing you’re enjoying real butter, honest ingredients, and fruity jam. If you use lower-sugar jam or swap in whole wheat flour for part of the base, you can boost the fiber and reduce the sweetness a bit. The bars are naturally egg-free and easy to adapt for gluten-free or vegan diets as well. (Just be mindful of allergens in your chosen jam and flour blend.)
From a wellness perspective, I think there’s value in a homemade dessert you can feel good about sharing—no mysterious ingredients, just simple comfort food at its best.
Conclusion
Jam shortbread bars are the kind of dessert that brings people together—simple, nostalgic, and honestly impossible to resist. With their buttery base, fruity jam layer, and crumbly topping, they’re a perfect treat for any occasion. I love that you can mix and match jams to suit the season or your mood, and that even beginner bakers can nail this recipe on the first try.
Give these bars a whirl and make them your own—swap jams, add nuts, or try a new twist! I’d love to hear how they turn out, so drop a comment below with your favorite variation or tag me if you share on social media. There’s nothing better than seeing your creative takes on a classic recipe. Happy baking, and here’s to more sweet moments in your kitchen!
Frequently Asked Questions
Can I use any type of jam for these bars?
Absolutely! Use your favorite jam or preserves. Just make sure it’s thick—not runny—to prevent soggy bars. I love raspberry, apricot, and strawberry, but get creative with what you have.
How do I keep the shortbread base from getting too hard?
Don’t over-press the base—just pat it down until it holds together. Also, be careful not to overbake; the bars should be lightly golden, not brown all over.
Can these jam shortbread bars be made gluten-free?
Yes! Use a 1:1 gluten-free flour blend (like King Arthur or Bob’s Red Mill). The texture is nearly identical and just as delicious.
What’s the best way to cut the bars cleanly?
Let the bars cool completely first. For extra clean slices, chill the bars in the fridge for 30 minutes, then use a sharp knife wiped clean between cuts.
Do jam shortbread bars freeze well?
They freeze beautifully! Layer bars between parchment in a freezer-safe container, freeze up to 2 months, and thaw at room temperature when ready to enjoy.
Pin This Recipe!
Jam Shortbread Bars
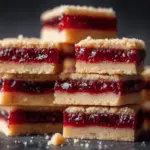
These easy jam shortbread bars feature a buttery, crumbly base layered with your favorite jam and a golden, bakery-style topping. Perfect for potlucks, brunches, or a cozy homemade treat, they’re simple to make and endlessly adaptable.
- Prep Time: 15 minutes
- Cook Time: 35-40 minutes
- Total Time: 50-55 minutes
- Yield: 16 bars 1x
- Category: Dessert
- Cuisine: American
Ingredients
- 2 2/3 cups (335g) all-purpose flour
- 1 cup (226g) unsalted butter, cold and cubed
- 3/4 cup (150g) granulated sugar
- 1/4 teaspoon salt
- 1 teaspoon pure vanilla extract
- 3/4 – 1 cup (240g) thick jam or preserves (raspberry, apricot, strawberry, etc.)
- Optional: 1 tablespoon coarse sugar or demerara sugar, for sprinkling
Instructions
- Preheat oven to 350°F (175°C). Line an 8×8-inch (20x20cm) baking pan with parchment paper, leaving overhang for easy lifting. Alternatively, butter and flour the pan.
- In a medium mixing bowl, whisk together flour, sugar, and salt.
- Add cold, cubed butter and vanilla extract. Cut butter into flour mixture using a pastry cutter, two forks, or your fingertips until the mixture resembles coarse crumbs (pea-sized bits of butter are fine).
- Pour about two-thirds of the crumb mixture (roughly 3 cups) into the prepared pan. Press down firmly and evenly to form the base.
- Gently spread jam over the crust, going all the way to the edges. If jam is too thick, microwave for 10-15 seconds to loosen.
- Crumble the remaining shortbread mixture evenly over the jam layer. Sprinkle with coarse sugar if desired.
- Bake for 35-40 minutes, until the top is lightly golden and jam is bubbling at the edges.
- Let the pan cool completely on a wire rack. Once cool, lift out using the parchment sling and cut into 16 squares or 12 larger bars. For cleaner slices, chill in the fridge for 30 minutes before cutting.
Notes
For gluten-free bars, use a 1:1 gluten-free flour blend. Keep butter cold for the best crumbly texture. Use thick jam to prevent soggy bars. Add nuts or citrus zest for variation. Cool bars completely before slicing for clean edges. Bars freeze well for up to 2 months.
Nutrition
- Serving Size: 1 bar (1/16 of recipe)
- Calories: 210
- Sugar: 12
- Sodium: 60
- Fat: 10
- Saturated Fat: 6
- Carbohydrates: 27
- Fiber: 1
- Protein: 2
Keywords: jam shortbread bars, dessert bars, easy shortbread, raspberry bars, bake sale, brunch, homemade dessert, fruit bars, buttery shortbread, easy baking