
Let me set the scene: You walk into the kitchen, and the sweet scent of creamy white chocolate mingling with roasted peanut butter hits you like a wave. It’s rich, it’s nutty, and honestly, it’s almost impossible not to sneak a taste before it’s ready. The first time I made Creamy Tiger Butter Bark with Peanut Butter Swirl, it was a chilly Saturday afternoon, and I was looking for something fun (and dangerously easy) to whip up with my kids. We were craving something sweet but not too fussy—just the kind of recipe that feels like pure, nostalgic comfort. You know what I mean, right? The kind of moment where you pause, take a deep breath, and just smile because you know you’re onto something truly special.
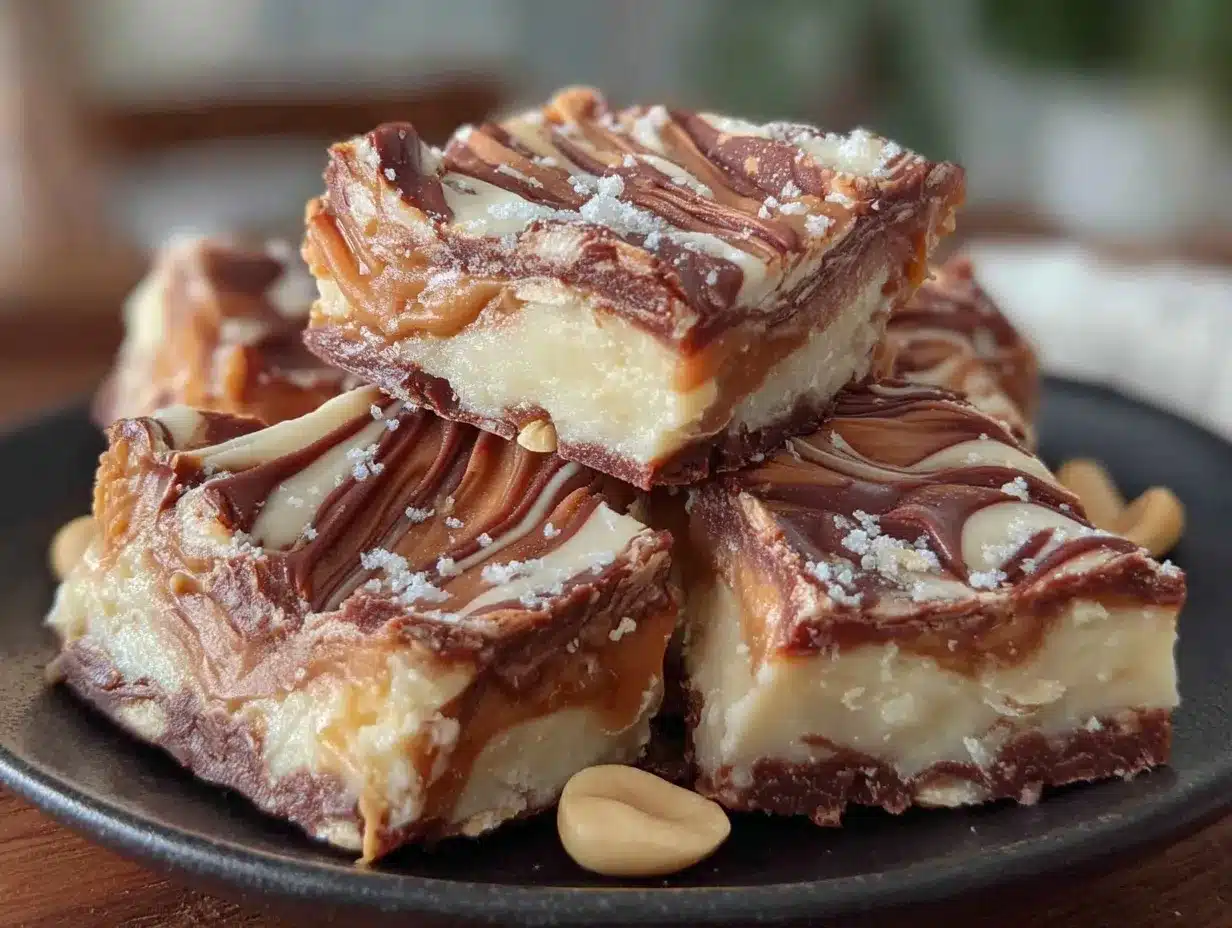
This bark is all about those gorgeous swirls—creamy peanut butter ribbons dancing through marbled white and semisweet chocolate. I remember being knee-high to a grasshopper and watching my grandma make similar treats for holiday parties, but this version has a modern twist (and a much easier prep). It’s now a staple at our family gatherings, and every time I set a tray of tiger butter bark out, the kids (okay, and the grown-ups) can’t stop sneaking pieces off the parchment. I don’t blame them one bit!
Honestly, I wish I’d discovered this recipe years ago. It’s perfect for potlucks, gifting, or just brightening up your Pinterest dessert board. The creamy texture, the sweet-and-salty flavor combo, and the eye-catching swirls make this treat a guaranteed winner. It’s been tested in my home kitchen more times than I can count—in the name of research, of course—and it’s never failed to draw rave reviews. If you’re searching for an easy homemade treat that feels like a warm hug, bookmark this one. Creamy Tiger Butter Bark with Peanut Butter Swirl is about to become your new go-to for every occasion!
Why You’ll Love This Creamy Tiger Butter Bark Recipe
- Quick & Easy: Comes together in under 20 minutes (plus a little chilling time). Perfect when you need a sweet fix or a last-minute party treat.
- Simple Ingredients: No fancy grocery trips required. Most of the ingredients are probably sitting in your pantry right now—white chocolate, peanut butter, and a bit of semisweet chocolate.
- Perfect for Gifting and Celebrations: This bark is a hit at holiday parties, birthdays, or any occasion where you want to impress without stress.
- Crowd-Pleaser: Kids love the creamy sweetness and fun swirls, while adults appreciate the nostalgic peanut butter flavor. It always disappears fast!
- Unbelievably Delicious: The texture is super creamy with just enough snap from the chocolate. The flavor combo is pure comfort food—sweet, salty, and a little bit addictive.
What makes my Creamy Tiger Butter Bark different from the rest? It’s all about the peanut butter swirl technique. Instead of just mixing everything together, you get those gorgeous ribbons of peanut butter running through the chocolate—so every bite is marbled perfection. I use a blend of white chocolate and semisweet chocolate to keep it from being too sweet (trust me, the balance is key). And if you want a little extra crunch, toss in a few roasted peanuts or a sprinkle of sea salt on top. This isn’t just another candy bark—this is THE tiger butter bark your taste buds have been waiting for.
I’ve made this for bake sales, school parties, and even tucked it into holiday tins for neighbors. It’s the kind of treat that makes you close your eyes and savor that first bite. Whether you’re making it for your own crew or sharing it with friends, this homemade peanut butter swirl bark is comfort food—faster, easier, and just as soul-satisfying as you remember. I promise, you’ll want to make it again (and again)!
What Ingredients You Will Need
This recipe uses simple, wholesome ingredients to deliver bold flavor and satisfying texture—no fuss, no complicated steps. Most of these are pantry staples, and there’s plenty of room for easy swaps if needed.
- White Chocolate Chips (450 g / 16 oz): Choose a high-quality brand for the creamiest results. I love Ghirardelli or Guittard. The white chocolate forms the base and gives that classic tiger butter bark sweetness.
- Creamy Peanut Butter (240 g / 1 cup): Smooth, unsweetened peanut butter works best for swirling. If you want a little extra richness, try Jif or Skippy. (Natural peanut butter can be used, but stir well to avoid separation.)
- Semisweet Chocolate Chips (85 g / 1/2 cup): Adds a beautiful contrast and balances out the sweetness. You can swap in dark chocolate chips if you prefer a richer flavor.
- Roasted Peanuts (Optional, 40 g / 1/4 cup): For extra crunch and texture. Sprinkle these on top before chilling for a fun twist.
- Flaky Sea Salt (Optional): A tiny sprinkle on top really pops the flavors and adds a gourmet touch (I use Maldon or Jacobsen). Totally optional, but highly recommended!
Ingredient Tips: For the white chocolate, look for chips or bars labeled “real white chocolate”—they should list cocoa butter as a main ingredient. If you’re dairy-free, swap with vegan white chocolate chips. Almond butter can stand in for peanut butter if you have a peanut allergy, and sunflower seed butter works great for nut-free households. Want a gluten-free treat? All the main ingredients are naturally gluten-free, but double-check your chocolate labels just to be sure.
Seasonal swaps are easy, too. In summer, add a handful of freeze-dried berries to the mix for a fruity pop. Around the holidays, toss in some crushed peppermint or a dusting of cinnamon for festive flair. This bark is endlessly customizable, so don’t be afraid to play around with your favorite flavors!
Equipment Needed
- Microwave-Safe Bowls: For melting the chocolates and peanut butter. If you don’t have a microwave, a double boiler works just as well.
- Rubber Spatula: Essential for stirring and spreading the chocolate mixture smoothly. I’ve tried using wooden spoons, but the spatula gives you way more control (and less waste stuck to the bowl).
- Baking Sheet (about 9×13-inch / 23×33 cm): You’ll need this lined with parchment paper for easy removal and clean-up.
- Parchment Paper: Keeps the bark from sticking—trust me, you don’t want to skip this step.
- Toothpick or Skewer: For creating those gorgeous peanut butter swirls. A butter knife works in a pinch, but toothpicks make the design pop.
If you’re on a budget, any shallow tray or pan will do—even a large plate lined with parchment. Just keep the bark about 1/4-inch thick for best results. For maintenance, clean bowls and spatulas right away before the chocolate hardens. Specialty bark pans are fun, but totally not required! I’ve made this recipe on everything from cookie sheets to pizza pans—whatever’s clean and handy works just fine.
Preparation Method
-
Line your baking sheet: Cover a 9×13-inch (23×33 cm) baking sheet with parchment paper. Leave a little overhang for easy lifting later.
Tip: If you want thicker bark, use a smaller pan! -
Melt the white chocolate: Place 16 oz (450 g) white chocolate chips in a microwave-safe bowl. Microwave in 30-second intervals, stirring between each, until fully melted and smooth (about 90 seconds total).
Warning: White chocolate can scorch easily, so don’t rush—stir well!
Sensory cue: It should be glossy with no lumps. -
Stir in the peanut butter: Add 1 cup (240 g) creamy peanut butter to the melted white chocolate. Stir until completely combined and creamy.
Tip: If your peanut butter is stiff, microwave it for 10 seconds to loosen it up.
Sensory cue: Mixture should be thick, shiny, and smell deliciously nutty. -
Spread the base: Pour the peanut butter-white chocolate mixture onto the prepared baking sheet. Use a spatula to spread evenly to about 1/4-inch thickness.
Note: Work quickly—chocolate sets up fast. -
Melt the semisweet chocolate: Place 1/2 cup (85 g) semisweet chocolate chips in a microwave-safe bowl. Heat in 20-second intervals, stirring until smooth (usually about 40 seconds).
Sensory cue: Should be pourable, no chunks. -
Swirl it up: Drizzle the melted semisweet chocolate over the base in zigzag lines. Using a toothpick, skewer, or butter knife, drag through both chocolates to create tiger-like swirls.
Tip: Go easy—too much swirling blends the colors too much.
Personal note: My kids love making “secret shapes” in the bark. -
Add toppings (optional): Sprinkle roasted peanuts and/or flaky sea salt over the top for crunch and flavor.
Note: Press gently so toppings stick. -
Chill the bark: Transfer the tray to the refrigerator and let set until firm, about 40-60 minutes. If you’re in a hurry, 20 minutes in the freezer works (but don’t forget it—chocolate can bloom!).
Sensory cue: Bark should be hard to the touch and easily lift off the parchment. -
Break and serve: Lift bark from the pan and break into bite-sized pieces. Serve immediately or store for later.
Personal tip: Odd-shaped pieces make for a fun presentation!
Troubleshooting: If your chocolate seizes (turns grainy), add a teaspoon of coconut oil and stir gently. If bark is sticky after chilling, give it 10 more minutes in the fridge. For ultra-clean swirls, clean your toothpick after each pass.
Cooking Tips & Techniques
Honestly, I’ve made just about every chocolate bark mistake out there, and here’s what I’ve learned:
- Melting Matters: Always melt chocolate slowly in short bursts to prevent burning. If your microwave runs hot, try 20-second intervals. Burnt chocolate is a no-go!
- Swirling Technique: Less is more! Over-mixing the swirl can muddy the pattern. Drag a toothpick in gentle figure-eights for the prettiest results. I once got carried away and ended up with “brown bark”—still tasty, but not Pinterest-worthy.
- Temperature Timing: Work quickly once the chocolate is melted. It starts setting up fast, so have your toppings ready to go. If it hardens before you swirl, just reheat in the microwave for 10 seconds.
- Consistency Tips: Use fresh, creamy peanut butter for the smoothest swirl. If your bark turns out greasy, it’s likely from peanut butter separation—stir well before adding.
- Multitasking: While the bark chills, clean up your kitchen or prep gift bags. I usually set a timer so I don’t forget the bark in the fridge (learned that the hard way—chocolate “bloom” is real!).
And don’t stress if the swirls aren’t perfect—homemade bark is supposed to look rustic! Each batch has its own personality. My advice? Have fun with it. The messier the swirl, the more unique your tiger butter bark will be.
Variations & Adaptations
This Creamy Tiger Butter Bark recipe is endlessly adaptable! Here are a few of my favorite twists:
- Dietary Swaps: For nut-free, use sunflower seed butter instead of peanut butter. For dairy-free, swap white chocolate with vegan chips and use coconut oil for extra smoothness.
- Seasonal Flavors: Stir in freeze-dried raspberries or blueberries for a fruity twist. Around the holidays, add crushed peppermint candies or a dash of cinnamon for festive flavor.
- Texture Boost: Mix in chopped pretzels, mini marshmallows, or toasted coconut before spreading the base for extra crunch and fun.
- Cooking Methods: If you don’t have a microwave, melt everything gently in a double boiler over simmering water—just watch closely!
- Personal Favorite: I love adding roasted cashews instead of peanuts for a slightly different flavor. My husband swears by a sprinkle of espresso powder in the semisweet chocolate—makes the swirl pop!
Want it extra sweet? Use milk chocolate chips for the swirl. Prefer bold flavors? Go for dark chocolate and a pinch of smoked salt. This bark is a blank canvas—customize to your heart’s content and make it your own!
Serving & Storage Suggestions
For best flavor, serve Creamy Tiger Butter Bark chilled or at cool room temperature. Arrange pieces on a platter for parties, or pack in cute cellophane bags for homemade gifts (kids love helping with this part!).
- Presentation: Stack pieces in a pretty tin or box with wax paper between layers. For Pinterest-perfect photos, sprinkle a few extra nuts or chocolate chips on top right before serving.
- Pairings: This bark pairs beautifully with cold milk, hot cocoa, or even coffee for grown-ups. Try serving alongside fresh fruit or salty snacks for a sweet-and-savory spread.
- Storage: Store bark in an airtight container in the fridge for up to 2 weeks. For longer storage, freeze in a zip-top bag for up to 2 months (thaw in the fridge before serving).
- Reheating: No need to reheat—just let frozen bark sit at room temperature for 10-15 minutes to soften slightly.
Pro tip: The flavors actually deepen after a day in the fridge. If you can wait, let it rest overnight before serving—the result is even creamier and richer!
Nutritional Information & Benefits
| Serving Size | About 1 oz (28 g) |
|---|---|
| Calories | 160 |
| Fat | 10g |
| Carbs | 14g |
| Protein | 3g |
Health benefits: Peanut butter offers healthy fats and protein, while dark and semisweet chocolate contribute antioxidants. White chocolate is more of a treat, but you can boost nutrition by using nut butters with no added sugar or salt.
Allergy note: Contains peanuts and milk. For gluten-free or nut-free options, see variations above. From a wellness perspective, this treat is best enjoyed in moderation—think of it as a little pick-me-up for your spirit!
Conclusion
So there you have it—my Creamy Tiger Butter Bark with Peanut Butter Swirl. It’s easy, it’s gorgeous, and it’s addictively delicious. Whether you’re making it for your family, a party, or just yourself (no judgement!), this recipe has a way of turning any moment into something a little more special.
Don’t be afraid to tweak the flavors or swap ingredients to match your taste. That’s part of the fun! Personally, I love this bark because it brings back childhood memories and lets me share a bit of homemade joy with everyone around me.
Try it out, snap a photo for your Pinterest board, and let me know in the comments how you make it your own. Did you add a new twist, or stick with the classic? I’d love to hear your stories and see your creations—sharing recipes is what makes cooking so much fun. Happy swirling, friends!
FAQs
Can I use crunchy peanut butter in tiger butter bark?
Absolutely! Crunchy peanut butter adds extra texture. Just make sure to stir well for even swirls.
How do I keep the chocolate from seizing?
Melt slow and steady—30-second microwave bursts, stirring in between. If it seizes, add a teaspoon of coconut oil and gently mix.
Is this recipe gluten-free?
Yes! All main ingredients are naturally gluten-free. Double-check chocolate and peanut butter labels to be sure.
Can I make tiger butter bark ahead for gifting?
Definitely. It stores well in the fridge for up to 2 weeks or freezer for 2 months. Just pack in airtight containers or bags.
What’s the best way to get clean swirls?
Drizzle chocolate in thin lines and drag a clean toothpick gently through. Wipe the toothpick often for crisp patterns—don’t over-swirl!
Pin This Recipe!
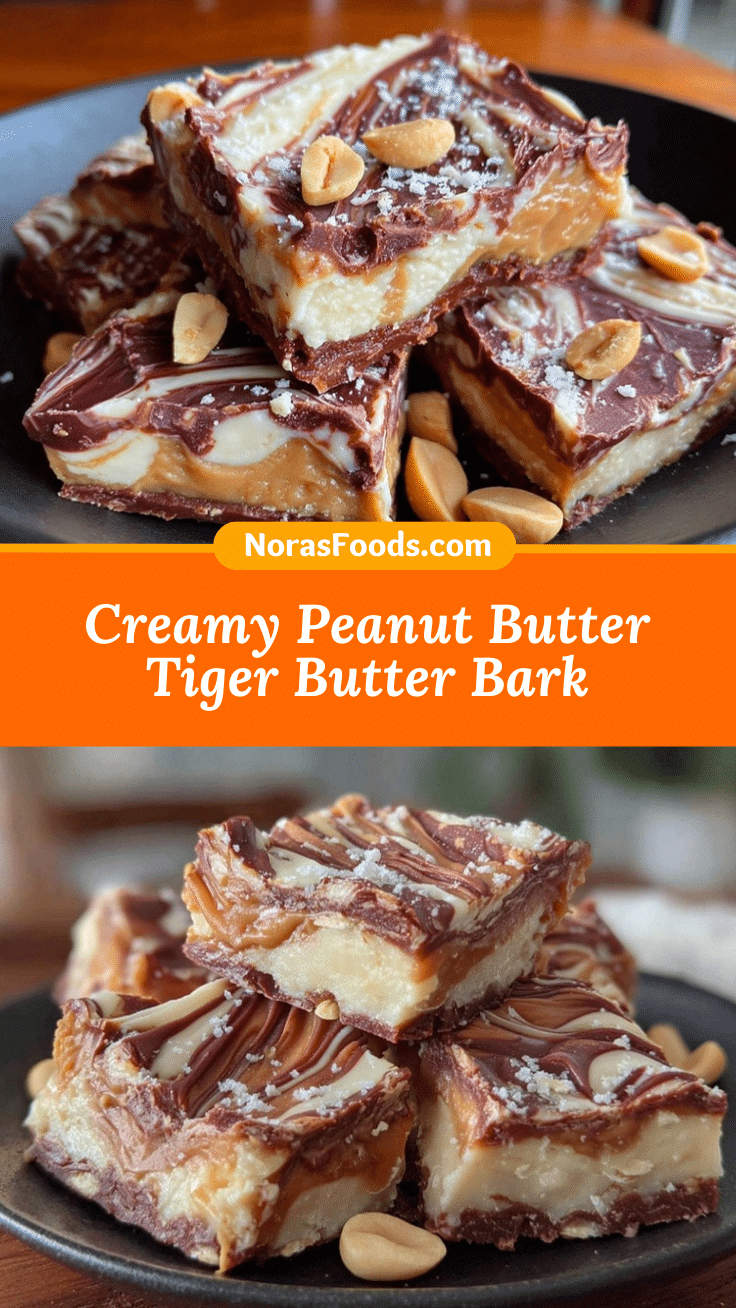
Creamy Tiger Butter Bark Recipe – Easy Homemade Peanut Butter Swirl Treat
This creamy tiger butter bark features luscious swirls of peanut butter and chocolate in a marbled white chocolate base. It’s a quick, easy, and crowd-pleasing treat perfect for parties, gifting, or a sweet snack at home.
- Prep Time: 10 minutes
- Cook Time: 5 minutes
- Total Time: 55 minutes
- Yield: 16 servings 1x
- Category: Dessert
- Cuisine: American
Ingredients
- 16 oz (450 g) white chocolate chips
- 1 cup (240 g) creamy peanut butter
- 1/2 cup (85 g) semisweet chocolate chips
- 1/4 cup (40 g) roasted peanuts (optional)
- Flaky sea salt (optional, for topping)
Instructions
- Line a 9×13-inch baking sheet with parchment paper, leaving an overhang for easy lifting.
- Place white chocolate chips in a microwave-safe bowl. Microwave in 30-second intervals, stirring between each, until melted and smooth (about 90 seconds total).
- Add creamy peanut butter to the melted white chocolate and stir until fully combined and creamy.
- Pour the peanut butter-white chocolate mixture onto the prepared baking sheet. Spread evenly to about 1/4-inch thickness with a spatula.
- Melt semisweet chocolate chips in a microwave-safe bowl in 20-second intervals, stirring until smooth (about 40 seconds).
- Drizzle the melted semisweet chocolate over the base in zigzag lines. Use a toothpick, skewer, or butter knife to swirl the chocolates together for a marbled effect.
- Sprinkle roasted peanuts and/or flaky sea salt over the top, pressing gently so toppings stick (optional).
- Transfer the tray to the refrigerator and chill until firm, about 40-60 minutes. Alternatively, freeze for 20 minutes if in a hurry.
- Lift the bark from the pan and break into bite-sized pieces. Serve immediately or store in an airtight container.
Notes
For best results, use high-quality white chocolate with cocoa butter. Melt chocolate slowly to avoid scorching. Swirl gently for distinct patterns. Bark can be customized with different nut butters, toppings, or chocolate types. Store in the fridge for up to 2 weeks or freeze for up to 2 months.
Nutrition
- Serving Size: About 1 oz (28 g)
- Calories: 160
- Fat: 10
- Carbohydrates: 14
- Protein: 3
Keywords: tiger butter bark, peanut butter swirl, chocolate bark, easy dessert, homemade candy, party treat, gifting, gluten-free dessert, kid-friendly, holiday bark


