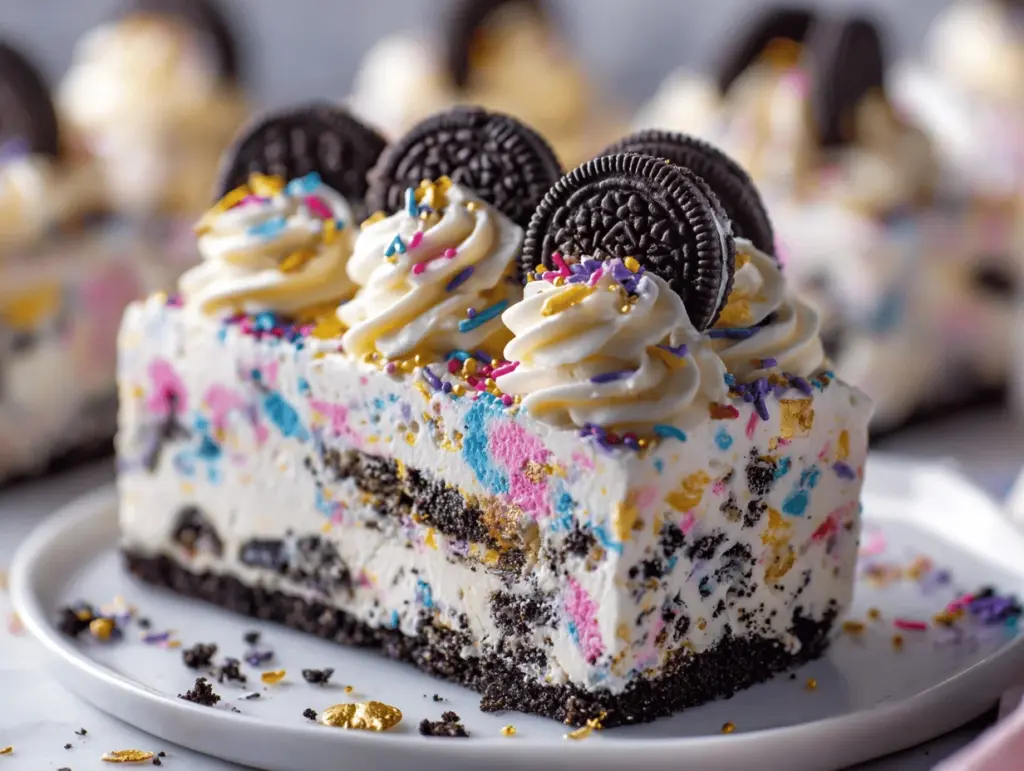
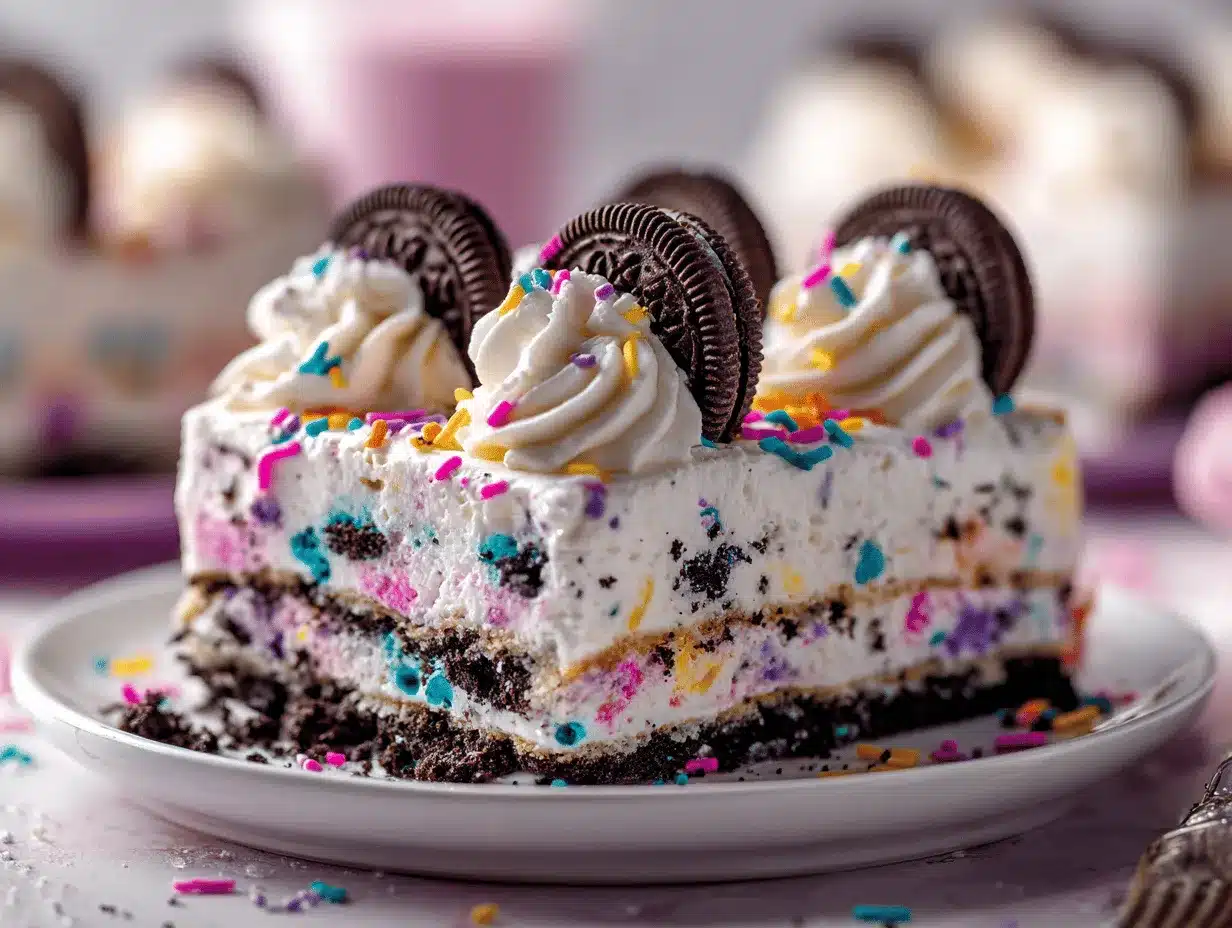
Sprinkles scattered across a creamy, dreamy layer of whipped filling and crunchy Birthday Cake Oreos—if that doesn’t shout “party,” I don’t know what does! The first time I whipped up this No-Bake Birthday Cake Oreo Icebox Cake, it was for my son’s birthday, and I honestly couldn’t believe how quickly it disappeared. You know those desserts that have everyone going back for seconds (and sneaking thirds when they think you’re not looking)? This is one of them.
I’ve always loved the classic icebox cake, but let’s face it—sometimes you just don’t want to turn on the oven, especially in the middle of summer or when your kitchen is already a flurry of party prep. That’s where this recipe comes in. No baking. No complicated steps. Just a handful of everyday ingredients, a little layering, and some chill time in the fridge. The result? An irresistible, colorful treat that feels like a celebration in every bite.
What’s really special about this No-Bake Birthday Cake Oreo Icebox Cake is how it combines the nostalgic flavor of birthday cake Oreos and the classic coolness of an icebox cake. It’s perfect for busy parents, anyone craving a low-fuss dessert, or those last-minute “Oh no, I forgot the cake!” moments. I’ve tested it for birthday parties, picnics, and just-because nights—you name it. The verdict is always the same: pure joy. Plus, it’s easy enough for kids to help make, which honestly makes the whole thing even sweeter.
Whether you’re a seasoned baker or brand new to the kitchen, this cake is about as foolproof as it gets. If you love easy, festive desserts that make people smile, you’ve got to try this No-Bake Birthday Cake Oreo Icebox Cake. Trust me, once you do, you’ll find yourself making it for every celebration… and maybe just because it’s Tuesday.
Why You’ll Love This No-Bake Birthday Cake Oreo Icebox Cake
- Quick & Easy: You can put this together in about 20 minutes, then just let the fridge do the rest. No oven mitts required!
- Simple Ingredients: Everything is available at your local grocery store (and you probably already have most on hand).
- Perfect for Parties: It’s the ultimate birthday dessert, but it works just as well for baby showers, potlucks, or any day you need a bit of fun.
- Crowd-Pleaser: Kids go wild for the sprinkles and Oreos, and adults love the creamy, nostalgia-packed layers.
- Unbelievably Delicious: The combination of Birthday Cake Oreos, whipped cream, and creamy pudding is like eating a cold, fluffy slice of birthday heaven.
This isn’t just any icebox cake. The Birthday Cake Oreos add a pop of color and that familiar birthday cake flavor that’s impossible to resist. Instead of just layering cookies and cream, I blend in rainbow sprinkles and a touch of vanilla pudding, giving every bite a little party sparkle. I’ve tried a lot of no-bake desserts, but this one stands out for its simplicity and wow-factor (seriously, people will ask for the recipe every time). And the best part? It’s super forgiving—no fancy techniques, no stress about perfect layers.
I love how this dessert brings out everyone’s inner kid. There’s something about digging into those soft, cake-like Oreo layers that reminds me of childhood birthdays, but with a grown-up twist. It’s comfort food at its most playful, and it always makes any gathering feel extra special. Whether you’re looking to impress guests with minimal effort or just want a quick treat that feels festive, this No-Bake Birthday Cake Oreo Icebox Cake is the answer. You might even find yourself making it “just because.”
What Ingredients You Will Need
This recipe uses simple, crowd-pleasing ingredients to create a dessert that’s as fun to look at as it is to eat. You’ll find most of these in your pantry or grocery store aisle—no hunting for specialty items!
- Birthday Cake Oreos (36–40 cookies): The star of the show! These have colorful sprinkles baked in and a sweet, festive filling. If you can’t find them, Golden Oreos plus a few extra sprinkles work in a pinch.
- Heavy Whipping Cream (2 cups / 480 ml): Whip it up for that luscious, fluffy layer. You can swap with store-bought whipped topping if you want to save time.
- Powdered Sugar (1/3 cup / 40g): Sweetens the whipped cream just enough. If you prefer less sweetness, reduce by a tablespoon or two.
- Vanilla Extract (1 teaspoon / 5 ml): Adds a warm, classic touch. If you love extra vanilla flavor, go for a heaping teaspoon.
- Instant Vanilla Pudding Mix (1 box, 3.4 oz / 96g): This thickens the filling and gives it that classic birthday cake taste. You can use French vanilla or cheesecake flavor for a twist.
- Cold Milk (1 1/2 cups / 360 ml): To make the pudding extra smooth and creamy. Whole milk is best, but 2% works fine.
- Rainbow Sprinkles (1/3 cup / 50g, plus extra for topping): Because everything’s better with sprinkles! I use the classic “jimmies” style, but use what you love.
- Optional: Cream Cheese (4 oz / 115g, softened): For a tangier, richer layer—totally up to you, but I love the balance it gives.
Ingredient Notes & Substitutions:
- Oreos: Any fun flavor works if you can’t find Birthday Cake (Golden, Lemon, or even Chocolate Oreos are all delicious). For gluten-free, use gluten-free sandwich cookies.
- Whipped Cream: Store-bought whipped topping (like Cool Whip) is a shortcut, but homemade tastes fresher.
- Pudding: Instant is a must—regular cook-and-serve won’t set the same.
- Dairy-Free: Use coconut whipped topping and plant-based milk for the pudding.
- Sprinkles: Double-check for gluten or allergen warnings if needed. Some brands add wheat or soy.
When it comes to brands, I’ve had the best luck with Nabisco Birthday Cake Oreos and Jell-O instant pudding. For sprinkles, go wild—Wilton or Sweetapolita are both fun and colorful. Don’t stress if you need to swap an ingredient—this cake is super forgiving.
Equipment Needed
You don’t need much to make this No-Bake Birthday Cake Oreo Icebox Cake, and that’s half the joy! Here’s what I always reach for:
- 8×8-inch (20×20 cm) or 9×9-inch (23×23 cm) Baking Dish: Glass or ceramic is best for showing off those pretty layers. You can use a disposable aluminum pan for parties.
- Mixing Bowls (2–3): One for whipping the cream, one for making pudding, and another if you add cream cheese.
- Hand Mixer or Stand Mixer: Whipping the cream by hand is possible but—trust me—an electric mixer saves your arm!
- Rubber Spatula: For folding and spreading the filling evenly.
- Measuring Cups & Spoons: Accuracy makes all the difference for the pudding and whipped cream.
- Offset Spatula (Optional): Helps smooth the top layer for that perfect “Pinterest-worthy” finish.
- Plastic Wrap or Foil: For chilling and storing the finished cake.
If you don’t have a stand mixer, a sturdy whisk and some elbow grease will still get you there (just takes a bit longer). I’ve made this in a deep pie dish when I was in a pinch—works fine, just a bit messier to slice. For cleanup, I recommend soaking your mixer beaters and bowls right away, especially if you use pudding—less scrubbing later!
Pro tip: If you’re using a glass dish, let the cake chill uncovered for the first hour before covering to avoid condensation on the top.
How to Make No-Bake Birthday Cake Oreo Icebox Cake
-
Make the Whipped Cream:
Pour 2 cups (480 ml) cold heavy cream into a large mixing bowl. Add 1/3 cup (40g) powdered sugar and 1 teaspoon (5 ml) vanilla extract. Using a hand mixer or stand mixer, whip on medium-high speed for 2–3 minutes until soft peaks form. (Soft peaks mean the cream holds its shape, but tips fold over.)
Tip: Chill your bowl and beaters for 10 minutes before starting—cream whips faster when cold! -
Prepare the Pudding Layer:
In a separate bowl, whisk 1 box (3.4 oz/96g) instant vanilla pudding mix with 1 1/2 cups (360 ml) cold milk for 2 minutes. Let sit for 3–5 minutes until thick.
Warning: Don’t use warm milk or the pudding won’t set. -
Blend the Filling:
Gently fold the prepared pudding into the whipped cream using a spatula. If you’re adding cream cheese (4 oz / 115g, softened), beat it smooth and fold it in now. Sprinkle in 1/3 cup (50g) rainbow sprinkles and gently mix until just combined.
Sensory cue: The mixture should be thick, fluffy, and flecked with colorful sprinkles. -
Layer the Cookies:
Arrange a single layer of Birthday Cake Oreos (about 16) on the bottom of your dish. You might need to break a few to fit the edges. Don’t worry if there are small gaps—they’ll soften and fill in as the cake chills. -
Add the Filling:
Spread half of the whipped cream-pudding mixture over the Oreos. Use an offset spatula or the back of a spoon to smooth it out. Sprinkle a few extra sprinkles over this layer for a pop of color. -
Repeat:
Add a second layer of Birthday Cake Oreos (about 16 more), then top with the remaining filling. Smooth the top evenly. Finish with a generous handful of rainbow sprinkles. -
Chill:
Cover the dish with plastic wrap or foil and refrigerate for at least 4 hours (overnight is best). The cookies will soften and take on a cake-like texture that’s just dreamy. -
Slice & Serve:
After chilling, cut into squares and lift out with a spatula. Serve cold, and watch the smiles break out!
Troubleshooting:
- If your whipped cream looks grainy, you probably over-whipped—add a splash of cream and whisk gently to smooth it out.
- Cookies not softening? Let the cake chill longer; it needs time for the layers to meld.
- Worried about runny filling? Make sure you use instant pudding and really cold milk.
Personal tip: For the cleanest slices, pop the cake in the freezer for 30 minutes before cutting. It’ll hold its shape perfectly for serving.
Cooking Tips & Techniques
There’s a bit of magic to making an icebox cake just right, and I’ve picked up some tricks over the years that make a big difference!
- Chill Everything: Cold bowls, cold cream, even cold cookies (if your kitchen is hot)—it helps the whipped cream stay fluffy and prevents the filling from getting too loose.
- Don’t Rush the Chill: I know it’s tempting to dig in early, but the layers need time to blend. Four hours is the minimum, but overnight gives you the absolute dreamiest texture.
- Layer Evenly: Try to keep the cookie and filling layers as even as possible for the prettiest presentation (and best taste in every bite).
- Use a Serrated Knife to Slice: It glides through the soft cookies and creamy filling without smushing everything together.
- Get Creative with Toppings: I like to add extra Oreos on top or even a drizzle of melted white chocolate for a little flair. Sometimes I let the birthday kid decorate the top—it never looks perfect, but it’s always loved!
Common mistakes? Over-whipping the cream (turns into butter!), using regular instead of instant pudding (the filling won’t set), or not chilling long enough. I’ve made all those errors, and honestly, it’s still tasty, just not as pretty. If you’re multitasking, make the pudding first so it thickens while you whip the cream. Clean as you go so you’re not left with a mess when the party starts.
For consistency, measure your ingredients carefully—especially the milk for the pudding. And don’t be afraid to let kids help with the layering. It’s not about perfection; it’s about fun and flavor!
Variations & Adaptations
One of the best things about this No-Bake Birthday Cake Oreo Icebox Cake is how easy it is to change up for any occasion, dietary need, or flavor craving. Here are some tried-and-true ideas:
- Gluten-Free: Use gluten-free sandwich cookies (there are several birthday cake-style options out there) and check your sprinkles for allergens.
- Dairy-Free: Swap in coconut whipped topping and plant-based milk for the pudding. Most instant pudding mixes are accidentally vegan—just read the box!
- Chocolate Lovers: Substitute Chocolate Birthday Cake Oreos or regular Chocolate Oreos for a rich twist. Add a layer of chocolate chips or a drizzle of fudge sauce between the layers.
- Seasonal Flavors: Use different Oreo flavors for holidays—think Peppermint Bark at Christmas or Lemon at Easter. Swap the sprinkles for seasonal colors or edible glitter.
- Fruity Fun: Add a layer of sliced strawberries or bananas between the Oreos and filling for a fruity surprise (I’ve done this with strawberry Oreos and it’s amazing!).
Personally, I love adding a layer of lightly sweetened cream cheese to the filling for a tangy kick—it’s like cheesecake met birthday cake in the best way. You can also play with the pudding flavor: cheesecake, white chocolate, or even pistachio are all fun. For smaller gatherings, make individual servings in mason jars or clear cups—super cute and mess-free!
Don’t be afraid to experiment. This cake is a blank canvas, and the only rule is to have fun with it.
Serving & Storage Suggestions
This No-Bake Birthday Cake Oreo Icebox Cake is best served chilled—straight from the fridge. I love slicing it into neat squares and plating each piece with a few extra sprinkles or a mini Oreo on top. For parties, serve on a colorful platter or in cupcake liners for easy grab-and-go treats.
If you’re looking to round out the dessert table, pair this cake with a scoop of vanilla ice cream, a glass of cold milk, or even a fun birthday punch. Coffee and tea are great for the grown-ups (trust me, the sweetness pairs perfectly).
To store, cover the dish tightly with plastic wrap or foil and keep in the refrigerator for up to 4 days. The longer it sits, the softer the cookie layers become—some say it’s even better on day two when the flavors meld together! For longer storage, freeze slices individually—wrap each tightly in plastic, then foil, and freeze for up to a month. Thaw in the fridge before serving.
Reheating isn’t needed, but if the cake has been in the freezer, let it sit at room temperature for 10–15 minutes for the creamiest texture. Don’t leave it out too long at room temp—cream-based desserts can get too soft. Honestly, leftovers rarely last at my house, but if you do have any, they make the happiest midnight snack ever.
Nutritional Information & Benefits
Each generous serving of this No-Bake Birthday Cake Oreo Icebox Cake clocks in at approximately 350–400 calories, with about 5g protein, 25g fat, 42g carbohydrates, and 28g sugar. (These values will vary a bit based on your specific brands and any substitutions.)
The star ingredients—heavy cream and milk—add calcium, a little protein, and that satisfying richness. Using real whipped cream instead of whipped topping means you skip the extra additives, and you can control the sweetness. If you go for dairy-free or gluten-free swaps, the nutrition will change, but you’ll still get that fun, party-ready treat!
Potential allergens include dairy, gluten, and soy (check your Oreos and pudding mix). If you’re watching carbs or sugar, try using sugar-free pudding and a light whipped topping. Personally, I’m all about balance—this dessert is a celebration, and a little indulgence here and there is totally worth it for the memories made around the table.
Conclusion
If you’re looking for a show-stopping yet simple dessert, this No-Bake Birthday Cake Oreo Icebox Cake is the one to try. It’s easy, colorful, and guaranteed to put a smile on everyone’s face—whether it’s for a birthday, a potluck, or just a regular Tuesday that needs a little extra sparkle.
I love how this recipe brings back those happy birthday memories, but with a modern, no-fuss twist. Don’t be afraid to put your own spin on it—change up the cookies, add fruit, or let the kids go wild with toppings. That’s the best part about this cake: it’s as fun to make as it is to eat.
So, what are you waiting for? Whip up this No-Bake Birthday Cake Oreo Icebox Cake, snap a photo, and share your creations below! I’d love to hear about your favorite variations or see how you made it your own. Happy celebrating, and here’s to the sweetest of memories!
FAQs
How far ahead can I make this No-Bake Birthday Cake Oreo Icebox Cake?
You can make it up to 2 days ahead. In fact, letting it chill overnight gives you the softest, cake-like texture!
Can I use different flavors of Oreos?
Absolutely! Any fun flavor—Golden, Chocolate, even Lemon—works great. Just pick your favorite or match your party theme.
What if I don’t have instant pudding mix?
Instant pudding is key for the right texture, but you can use stabilized whipped cream (with a little gelatin) if needed. The filling will be lighter and less firm.
Can I make this dessert gluten-free or dairy-free?
Yes! Use gluten-free sandwich cookies and check your sprinkles for allergens. For dairy-free, swap in coconut whipped topping and plant-based milk for the pudding.
How do I get clean slices when serving?
Chill the cake well, then use a sharp, serrated knife. Wiping the blade between slices helps keep everything neat. For extra tidy pieces, freeze the cake for 20–30 minutes before cutting.
Pin This Recipe!
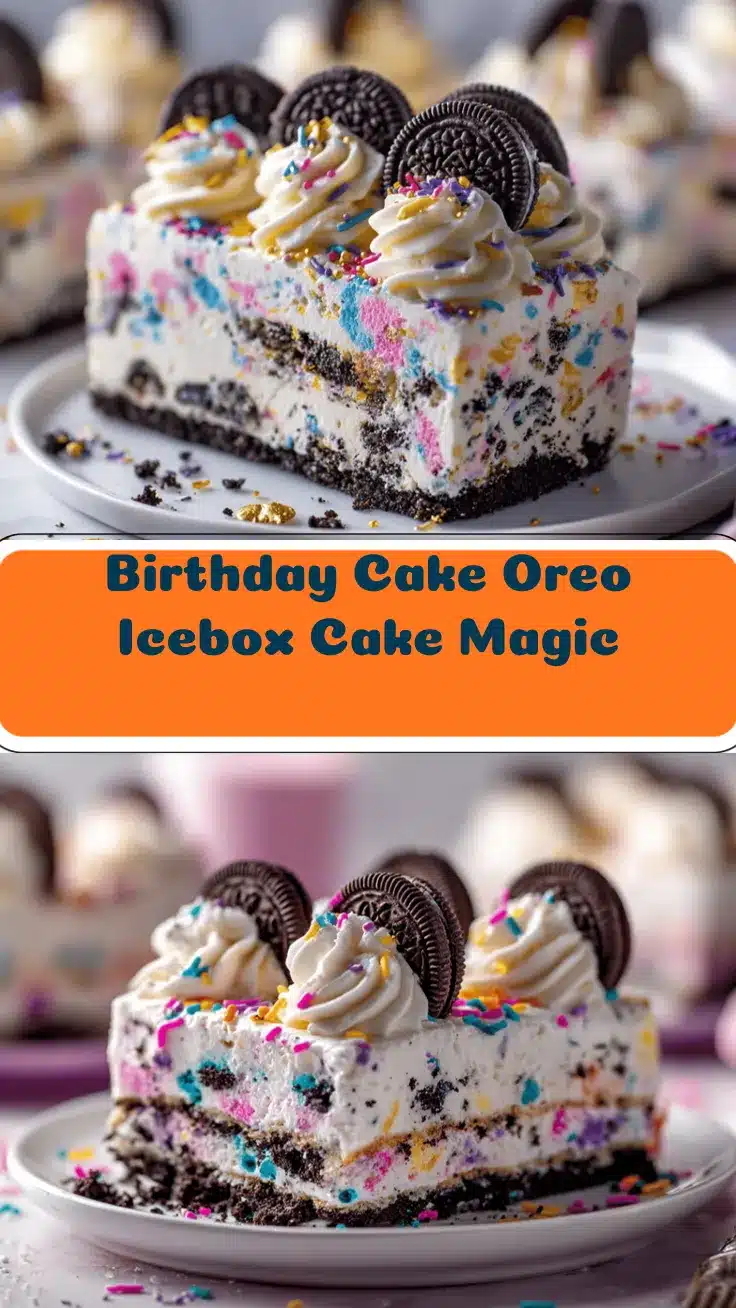
No-Bake Birthday Cake Oreo Icebox Cake

This easy, no-bake icebox cake layers Birthday Cake Oreos, fluffy whipped cream, vanilla pudding, and rainbow sprinkles for a festive, crowd-pleasing dessert. Perfect for birthdays, parties, or any occasion when you want a fun, colorful treat without turning on the oven.
- Prep Time: 20 minutes
- Cook Time: 0 minutes
- Total Time: 4 hours 20 minutes
- Yield: 9 servings 1x
- Category: Dessert
- Cuisine: American
Ingredients
- 36–40 Birthday Cake Oreos (or Golden Oreos plus extra sprinkles)
- 2 cups heavy whipping cream (cold)
- 1/3 cup powdered sugar
- 1 teaspoon vanilla extract
- 1 box (3.4 oz) instant vanilla pudding mix
- 1 1/2 cups cold milk (whole milk preferred, 2% okay)
- 1/3 cup rainbow sprinkles (plus extra for topping)
- Optional: 4 oz cream cheese, softened
Instructions
- Pour 2 cups cold heavy cream into a large mixing bowl. Add 1/3 cup powdered sugar and 1 teaspoon vanilla extract. Using a hand mixer or stand mixer, whip on medium-high speed for 2–3 minutes until soft peaks form.
- In a separate bowl, whisk 1 box instant vanilla pudding mix with 1 1/2 cups cold milk for 2 minutes. Let sit for 3–5 minutes until thick.
- Gently fold the prepared pudding into the whipped cream using a spatula. If using, beat 4 oz softened cream cheese until smooth and fold it in now. Sprinkle in 1/3 cup rainbow sprinkles and gently mix until just combined.
- Arrange a single layer of Birthday Cake Oreos (about 16) on the bottom of an 8×8-inch or 9×9-inch baking dish. Break cookies as needed to fit.
- Spread half of the whipped cream-pudding mixture over the Oreos. Sprinkle a few extra sprinkles over this layer.
- Add a second layer of Birthday Cake Oreos (about 16 more), then top with the remaining filling. Smooth the top evenly and finish with a generous handful of rainbow sprinkles.
- Cover the dish with plastic wrap or foil and refrigerate for at least 4 hours (overnight is best) to allow the cookies to soften.
- After chilling, cut into squares and serve cold. For clean slices, freeze for 20–30 minutes before cutting.
Notes
For best results, chill the cake overnight for the softest, cake-like texture. Use cold ingredients and bowls for fluffier whipped cream. Swap in gluten-free or dairy-free alternatives as needed. For clean slices, freeze the cake for 20–30 minutes before cutting. Get creative with Oreo flavors or add fruit for variations.
Nutrition
- Serving Size: 1 square (about 1/9 of cake)
- Calories: 375
- Sugar: 28
- Sodium: 320
- Fat: 25
- Saturated Fat: 14
- Carbohydrates: 42
- Protein: 5
Keywords: no-bake, birthday cake, Oreo, icebox cake, party dessert, easy dessert, kid-friendly, sprinkles, summer dessert, pudding cake


