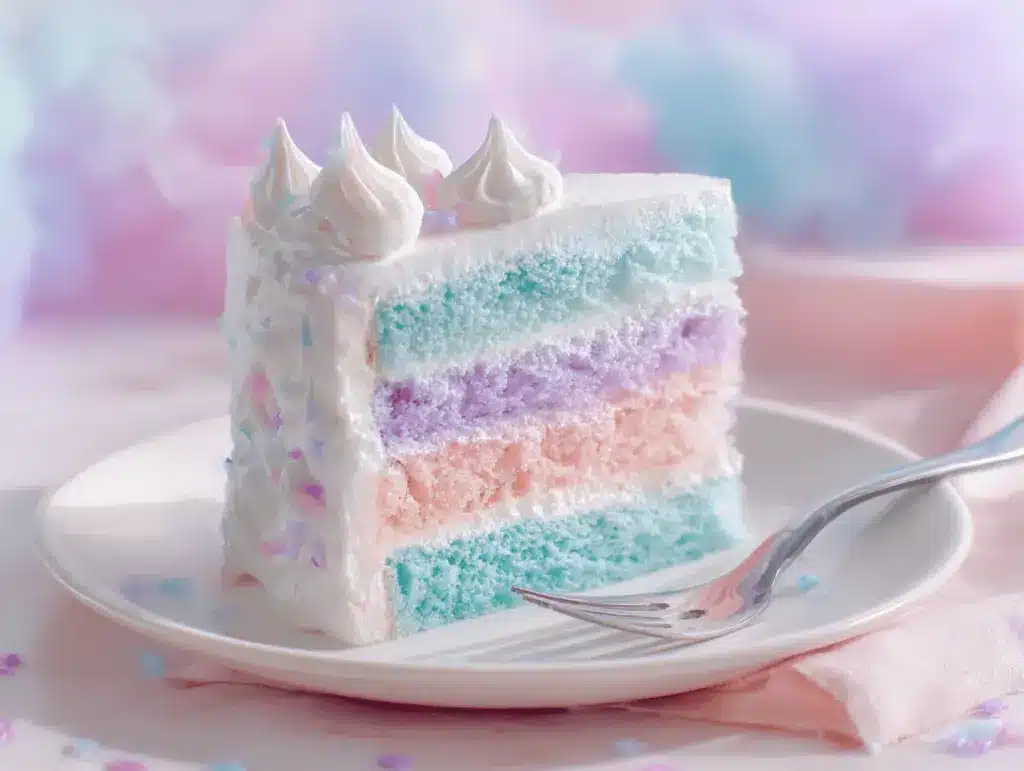
Picture this: you walk into a room filled with laughter, pastel balloons, and the sweet, almost magical scent of cotton candy swirling through the air. There, at the center of the table, sits the most whimsical cotton candy cake, its fluffy, cloud-like topping practically begging you to take a bite. That, my friend, is the exact moment I realized how much joy a simple cotton candy cake could bring to a party—even before anyone grabbed a fork!
I first stumbled upon the idea for a cotton candy cake while planning my niece’s birthday. She’s obsessed with anything pastel and sweet, so the plan was to create a dessert that was as adorable as it was delicious. After a few test runs (and rainbow-colored kitchen messes), this magical easy cotton candy cake was born. Let me tell you, it’s not just a show-stopper; it’s a mood-lifter, a conversation starter, and the kind of cake that makes even grownups grin like kids.
This cotton candy cake recipe is a total dream for anyone who loves DIY party desserts. It’s surprisingly easy to make, doesn’t require fancy baking skills, and delivers a flavor that’s both nostalgic and delightful. Whether you’re hosting a birthday, baby shower, or just want to surprise your kids with something special, this cake is the answer. If you’ve got a sweet tooth or want to spark a little wonder at your next gathering, you’ll love what this cake brings to the table. Trust me—I’ve baked it for countless parties, and it’s always the first thing to disappear.
If you’re looking for a dessert that’s cute, easy, and guaranteed to get people talking, this cotton candy cake recipe is your new secret weapon. Let’s get into why you’ll fall in love with it!
Why You’ll Love This Cotton Candy Cake Recipe
- Quick & Easy: This cake comes together in about an hour, so you won’t spend all day in the kitchen. Perfect for those last-minute party plans or when you just want to whip up something special without a fuss.
- Simple Ingredients: No need to hunt down specialty items. The base cake uses pantry staples, and the cotton candy topping is available at most grocery stores or online.
- Perfect for Parties: Seriously, if you want your dessert table to look like something off Pinterest, this is the cake. It works for birthday parties, baby showers, and even whimsical bridal showers.
- Crowd-Pleaser: Kids adore the fun colors and sweet flavor, while adults can’t help but feel a wave of nostalgia. I’ve never had leftovers—someone always goes back for seconds!
- Unbelievably Delicious: The cake itself is light, moist, and flavored with a hint of vanilla. The cotton candy topping melts in your mouth, adding that extra bit of magic to every bite.
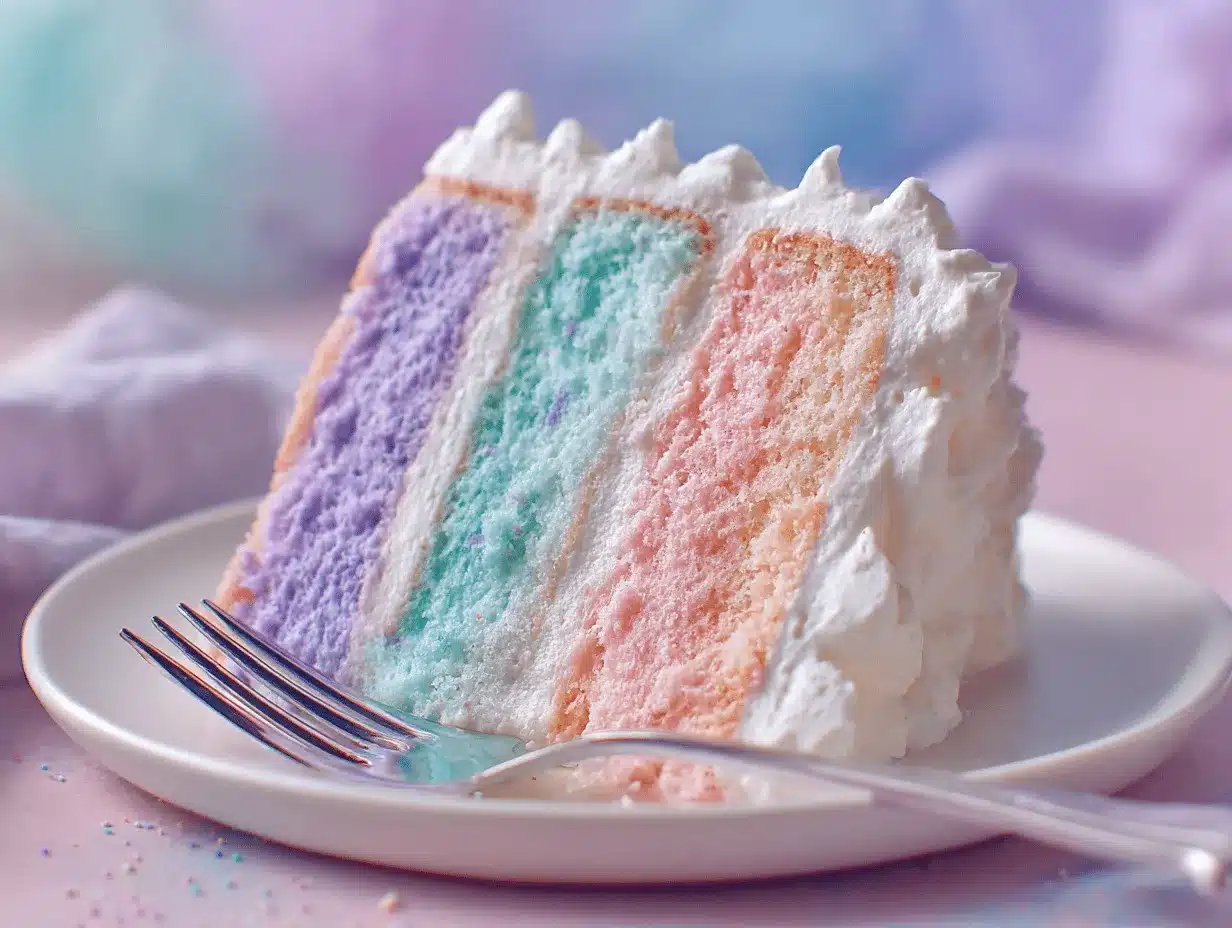
What makes this cotton candy cake different from the dozens of recipes out there? Well, for starters, I use a special technique to keep the cotton candy fresh and fluffy on top of the cake (I’ll show you how in the steps below). Plus, I’ve balanced the sweetness so it’s never overwhelming—just perfectly dreamy. There’s also a playful swirl of pastel colors inside the cake layers, which makes every slice look like a piece of edible art.
Honestly, this isn’t just a cake—it’s a whole party vibe. Whether you’re baking with your kids, impressing guests, or just treating yourself, this cotton candy cake recipe is the joyful, easy DIY dessert you didn’t know you needed. Every time I serve it, I get asked for the recipe—so here it is, just for you!
What Ingredients You Will Need
This recipe uses simple, familiar ingredients to create a cake that’s as magical as it is delicious. Most of what you need is probably already in your pantry, and you can find the rest at any regular grocery store. Here’s what you’ll need to make your own magical cotton candy cake:
- For the Cake:
- 2 1/2 cups (310g) all-purpose flour (for a tender crumb)
- 2 1/2 teaspoons baking powder
- 1/2 teaspoon salt
- 1 cup (225g) unsalted butter, softened (adds richness and moisture)
- 1 3/4 cups (350g) granulated sugar
- 4 large eggs, room temperature (for structure and a fluffy rise)
- 1 tablespoon pure vanilla extract (or cotton candy extract for more flavor)
- 1 cup (240ml) whole milk, room temperature
- Pink and blue gel food coloring (optional, for pastel swirls)
- For the Frosting:
- 1 cup (225g) unsalted butter, softened
- 4 cups (480g) powdered sugar, sifted
- 2-3 tablespoons (30-45ml) whole milk or heavy cream
- 1 teaspoon pure vanilla extract (or cotton candy extract, if available)
- Pinch of salt
- Pink and blue gel food coloring (for the signature cotton candy look)
- For Decorating:
- Cotton candy (store-bought or homemade—look for pastel colors)
- Sprinkles (optional, but oh-so-cute!)
- Edible glitter or stars (for extra sparkle, if you want to go all out)
Ingredient Tips: If you want to go gluten-free, simply swap in a 1:1 gluten-free flour blend. Dairy-free? Use vegan butter and plant-based milk—just make sure they’re unsweetened so you don’t make the cake too sweet. I’ve tried both swaps for friends, and they work! For flavor, I recommend LorAnn’s cotton candy extract for the most authentic taste, but plain vanilla is still dreamy.
Substitutions: You can use boxed vanilla cake mix as a shortcut (just add a little cotton candy extract if you can). For the frosting, cream cheese buttercream also works great if you like a tangy twist. If you’re feeling adventurous, swap in purple or yellow gel colors for a unicorn effect!
Equipment Needed
- Two 8-inch (20cm) round cake pans (or one 9×13-inch/23x33cm pan for a sheet cake version)
- Electric stand mixer or handheld mixer (for a smooth batter and fluffy frosting)
- Mixing bowls (at least two, for separating colors and mixing batter)
- Measuring cups and spoons (accuracy is key!)
- Rubber spatula and offset spatula (for folding and frosting)
- Wire cooling rack (so your cake layers don’t get soggy)
- Parchment paper (for easy cake removal)
- Toothpicks or cake tester (to check doneness)
Personal note: I’ve made this cake with both nonstick metal and glass pans—both work, but metal pans give a slightly better rise. If you don’t have two matching pans, bake in batches and reuse! For the mixer, a good old hand mixer does the trick if you don’t have a stand mixer (just takes a bit more elbow grease). And don’t skip the parchment paper—trust me, it saves a lot of tears when you flip the cake out.
If you’re on a tight budget, dollar store spatulas and bowls work just fine for this recipe. Just make sure everything is clean and dry before you start—especially when making the frosting.
How to Make Magical Easy Cotton Candy Cake
-
Preheat & Prep:
Set your oven to 350°F (175°C). Grease two 8-inch (20cm) cake pans and line the bottoms with parchment paper. This helps your cakes pop right out without sticking. -
Mix Dry Ingredients:
In a medium bowl, whisk together 2 1/2 cups (310g) flour, 2 1/2 teaspoons baking powder, and 1/2 teaspoon salt. Set aside—this keeps the baking powder evenly distributed. -
Cream Butter & Sugar:
In a large bowl, use an electric mixer to beat 1 cup (225g) softened butter with 1 3/4 cups (350g) sugar on medium speed until pale and fluffy—about 3 minutes. The mixture should look light and airy (this makes your cake soft!). -
Add Eggs & Flavor:
Beat in 4 large eggs, one at a time, scraping down the bowl after each. Mix in 1 tablespoon vanilla or cotton candy extract. If you’re using the cotton candy flavor, your kitchen will start smelling like a carnival! -
Alternate Dry Ingredients & Milk:
On low speed, add the flour mixture in three parts, alternating with 1 cup (240ml) milk. Begin and end with flour. Mix until just combined—don’t overbeat or your cake might turn dense. -
Color the Batter:
Divide the batter between two bowls. Tint one bowl pink and the other blue with gel food coloring. Gently swirl the two colors together in the pans with a knife or skewer (don’t over-mix or you’ll lose the marble effect). -
Bake:
Pour the batter into your prepared pans. Bake for 25-28 minutes, or until a toothpick inserted in the center comes out clean. If your oven runs hot, start checking at 22 minutes—no one likes a dry cake! -
Cool:
Let the cakes cool in the pans for 10 minutes. Then run a knife around the edge and flip onto a wire rack to cool completely. (If you try to frost warm cakes, you’ll get a melty mess. Trust me—I’ve learned this the hard way!) -
Make the Frosting:
Beat 1 cup (225g) softened butter until smooth. Gradually add 4 cups (480g) powdered sugar, 2-3 tablespoons (30-45ml) milk or cream, and 1 teaspoon vanilla or cotton candy extract. Add a pinch of salt. Beat until light and fluffy, about 3-4 minutes. Divide and tint the frosting pink and blue as you like. -
Assemble the Cake:
Place the first cake layer on a cake stand. Spread a layer of frosting on top. Add the second layer, then frost the top and sides with remaining frosting. For a fun look, swirl pink and blue frosting together. -
Decorate:
Just before serving, gently mound cotton candy on top of the cake. Add sprinkles and edible glitter if you want extra sparkle. (Tip: Wait until the last minute to add cotton candy, as it melts with moisture.)
Prep Notes: Don’t refrigerate the cake after adding cotton candy. If you must make it ahead, decorate with cotton candy just before serving. If your cake layers dome too much, level them with a serrated knife for a pro finish.
Sensory cues: The cake should look light golden, spring back when gently pressed, and smell like a sweet dream. The frosting should be smooth and spreadable—not runny or stiff.
Cotton Candy Cake Cooking Tips & Techniques
Here’s where experience pays off—these little tricks make a big difference in your cotton candy cake’s final look and taste!
- Don’t Overmix: Once you add the flour to the wet ingredients, mix just until combined. Overmixing leads to a tough cake (been there, regretted that).
- Room Temp Ingredients: Letting your eggs, butter, and milk come to room temperature helps everything blend smoothly. Cold ingredients can make the batter curdle or bake unevenly.
- Use Gel Food Coloring: Liquid food colorings can thin your batter or frosting. Gel is concentrated and keeps the texture perfect—and the colors pop!
- Cotton Candy Timing: Add the cotton candy right before serving. Humidity or moisture from frosting melts it fast, so don’t decorate hours in advance. (I’ve learned this the hard way—no one likes a soggy topper!)
- Leveling Cake Layers: Use a serrated knife to trim domed tops. This makes stacking easier and gives a more professional look.
- Swirl for Style: For that dreamy, cloud-like look, use a spoon to gently swirl pink and blue frosting on the cake. Don’t overdo it—less mixing keeps the colors distinct and pretty!
- Keep the Cake Covered: If you’re waiting to serve, cover the assembled (but undecorated) cake with plastic wrap or a cake dome to keep it moist.
Honestly, the biggest lesson I’ve learned is not to sweat the little imperfections. Even if your frosting isn’t perfectly smooth or the swirls aren’t symmetrical, the cotton candy cake will still look—and taste—magical. Sometimes, the most memorable cakes are the ones with character!
Variations & Adaptations
- Gluten-Free Cotton Candy Cake: Swap the all-purpose flour for a trusted 1:1 gluten-free baking flour. I’ve tried King Arthur’s and Bob’s Red Mill with great success.
- Dairy-Free Version: Use vegan butter and plant-based milk in both the cake and frosting. I love using almond milk for a slightly nutty flavor, and Earth Balance sticks for the butter.
- Unicorn Cake Variation: Divide the batter into three or four bowls and tint each with different pastel colors—think pink, blue, yellow, and lavender. Swirl them together for a magical unicorn effect!
- Mini Cupcakes: Make cotton candy cupcakes by baking the batter in lined muffin tins. Top each with a dollop of frosting and a little puff of cotton candy for individual treats.
- Allergy-Friendly: For egg-free, use a flax egg (1 tablespoon ground flax mixed with 2.5 tablespoons water per egg). For nut-free, double-check all your decorations and extracts.
- Personal Twist: I once added a thin layer of raspberry jam between the cake layers for a fruity surprise—the tartness balanced the sweet cotton candy perfectly. Highly recommend if you want an extra burst of flavor!
This cake is endlessly customizable. No matter how you tweak it, the cotton candy cake is sure to be a hit at your next celebration.
Serving & Storage Suggestions
Serving: This cake is best served at room temperature, where the flavors really shine and the frosting is soft and creamy. Present it on a pastel cake stand with extra cotton candy clouds around the base for maximum wow-factor. Pair with fun drinks like strawberry milk or lemonade for kids—or a pretty rosé for the adults.
Storage: If you have leftovers (which is rare!), remove any remaining cotton candy and cover the cake tightly with plastic wrap or place in an airtight container. Store at room temperature for up to 2 days, or in the fridge for up to 4 days. Let refrigerated cake sit out for 30 minutes before serving so the frosting softens up again.
Freezing: You can freeze unfrosted cake layers for up to 2 months. Wrap well in plastic and foil, then thaw at room temp before frosting and decorating. (Don’t freeze cotton candy—it will dissolve!)
Flavor Notes: The cake’s vanilla or cotton candy essence deepens a bit after a day, so leftovers taste even better. Just remember to add fresh cotton candy each time you serve for that signature magic.
Nutritional Information & Benefits
Let’s be real—cotton candy cake is a treat, not a health food, but it’s all about balance and celebration!
- Estimated per slice (1/12 of cake): Calories: 410, Fat: 19g, Carbs: 58g, Sugar: 44g, Protein: 4g
- Key Ingredients: Milk and eggs add a bit of protein, and using real butter means no hydrogenated oils.
- Dietary Considerations: Easy to adapt for gluten-free and dairy-free diets with swaps. Nut-free if you double-check decorations.
- Potential Allergens: Contains wheat, eggs, dairy (unless adapted). Always check for cross-contamination if serving to allergy-prone guests.
From a wellness perspective, I love that this cake is all about joy and making memories. It’s a “sometimes” treat that brings people together—so go ahead and enjoy every magical bite!
Conclusion
If you’re searching for a show-stopping dessert that’s easy, adorable, and guaranteed to make your party unforgettable, this cotton candy cake recipe is it. It’s the kind of cake that brings out smiles, sparks conversations, and makes even the simplest gathering feel a little more magical.
Don’t be afraid to put your own spin on it—play with flavors, colors, or even swap in your favorite extract. The best part about this cake is how customizable it is. Every time I make it, it feels like a new adventure in baking (and decorating!).
I hope you love this recipe as much as my family and friends do. If you try it, let me know how it turned out! Leave a comment below with your favorite adaptation, share your party pictures, or tag me on social media. Here’s to sweet memories and even sweeter cake—happy baking!
Frequently Asked Questions
How far in advance can I make the cotton candy cake?
You can bake and frost the cake up to two days ahead. Just keep it covered and add the cotton candy right before serving so it stays fluffy and magical.
Does the cotton candy topping melt on the cake?
Yes, cotton candy can melt when exposed to moisture from the frosting or humidity in the air. For best results, add it just before serving and avoid refrigerating after decorating.
Can I use store-bought cake mix for this recipe?
Absolutely! Use your favorite vanilla or white cake mix, and add a little cotton candy or vanilla extract for flavor. Split and color the batter as described for the same whimsical effect.
What’s the best way to get vibrant pastel colors in the cake?
Gel food coloring works best for bright, pastel shades without thinning out the batter or frosting. Start with a small amount and add more until you reach your desired color.
How do I keep the cake moist?
Don’t overbake—check for doneness a few minutes early. Keep the cake covered until serving, and if you’re storing leftovers, wrap tightly to prevent drying out. Room temperature ingredients and proper mixing also help!
Pin This Recipe!
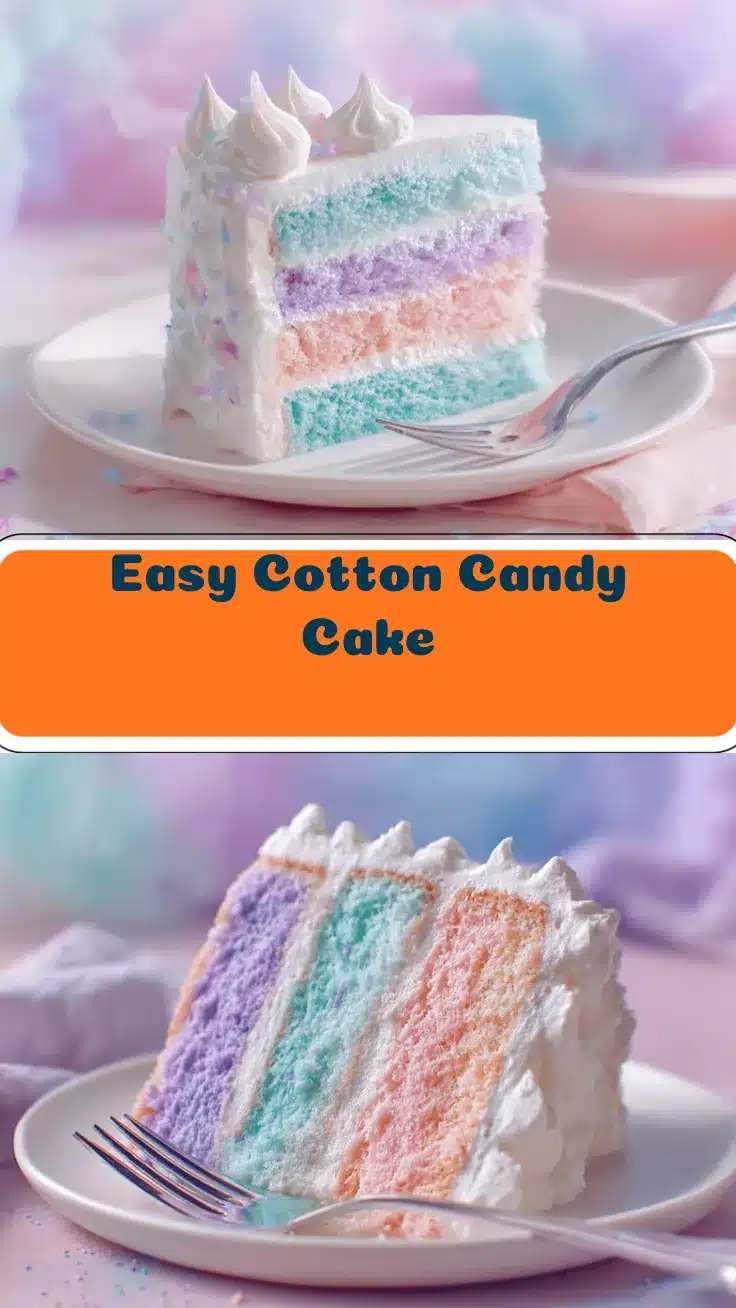
Cotton Candy Cake

This whimsical cotton candy cake is a show-stopping, pastel party dessert with a light, moist vanilla cake, fluffy swirled frosting, and a magical cotton candy topping. It’s easy to make, perfect for birthdays or celebrations, and guaranteed to delight kids and adults alike.
- Prep Time: 20 minutes
- Cook Time: 28 minutes
- Total Time: 1 hour
- Yield: 12 servings 1x
- Category: Dessert
- Cuisine: American
Ingredients
- 2 1/2 cups all-purpose flour
- 2 1/2 teaspoons baking powder
- 1/2 teaspoon salt
- 1 cup unsalted butter, softened
- 1 3/4 cups granulated sugar
- 4 large eggs, room temperature
- 1 tablespoon pure vanilla extract (or cotton candy extract)
- 1 cup whole milk, room temperature
- Pink and blue gel food coloring (optional, for pastel swirls)
- For the Frosting:
- 1 cup unsalted butter, softened
- 4 cups powdered sugar, sifted
- 2–3 tablespoons whole milk or heavy cream
- 1 teaspoon pure vanilla extract (or cotton candy extract)
- Pinch of salt
- Pink and blue gel food coloring
- For Decorating:
- Cotton candy (store-bought or homemade, pastel colors)
- Sprinkles (optional)
- Edible glitter or stars (optional)
Instructions
- Preheat oven to 350°F (175°C). Grease two 8-inch round cake pans and line the bottoms with parchment paper.
- In a medium bowl, whisk together flour, baking powder, and salt. Set aside.
- In a large bowl, beat softened butter with sugar on medium speed until pale and fluffy, about 3 minutes.
- Beat in eggs, one at a time, scraping down the bowl after each. Mix in vanilla or cotton candy extract.
- On low speed, add the flour mixture in three parts, alternating with milk. Begin and end with flour. Mix until just combined.
- Divide the batter between two bowls. Tint one bowl pink and the other blue with gel food coloring. Gently swirl the two colors together in the pans with a knife or skewer.
- Pour the batter into prepared pans. Bake for 25-28 minutes, or until a toothpick inserted in the center comes out clean.
- Let cakes cool in pans for 10 minutes, then run a knife around the edge and flip onto a wire rack to cool completely.
- For the frosting: Beat softened butter until smooth. Gradually add powdered sugar, milk or cream, vanilla or cotton candy extract, and a pinch of salt. Beat until light and fluffy, about 3-4 minutes. Divide and tint the frosting pink and blue as desired.
- Place the first cake layer on a cake stand. Spread a layer of frosting on top. Add the second layer, then frost the top and sides with remaining frosting. Swirl pink and blue frosting together for a fun look.
- Just before serving, gently mound cotton candy on top of the cake. Add sprinkles and edible glitter if desired. (Add cotton candy at the last minute to prevent melting.)
Notes
Add cotton candy just before serving to prevent melting. For gluten-free or dairy-free versions, use a 1:1 gluten-free flour blend and plant-based milk/butter. Use gel food coloring for vibrant pastel colors. Level cake layers with a serrated knife for a professional finish. Store leftovers without cotton candy topping in an airtight container.
Nutrition
- Serving Size: 1 slice (1/12 of cake)
- Calories: 410
- Sugar: 44
- Sodium: 210
- Fat: 19
- Saturated Fat: 12
- Carbohydrates: 58
- Protein: 4
Keywords: cotton candy cake, party dessert, birthday cake, pastel cake, kids cake, easy cake recipe, whimsical cake, DIY cake, vanilla cake, funfetti, colorful cake