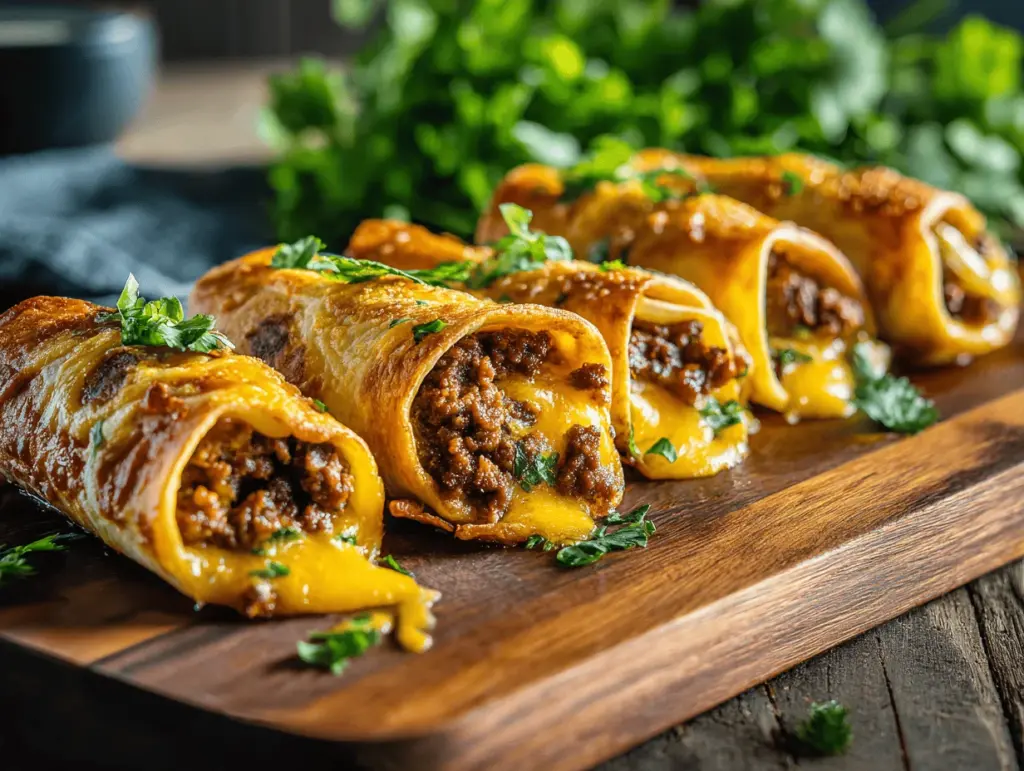
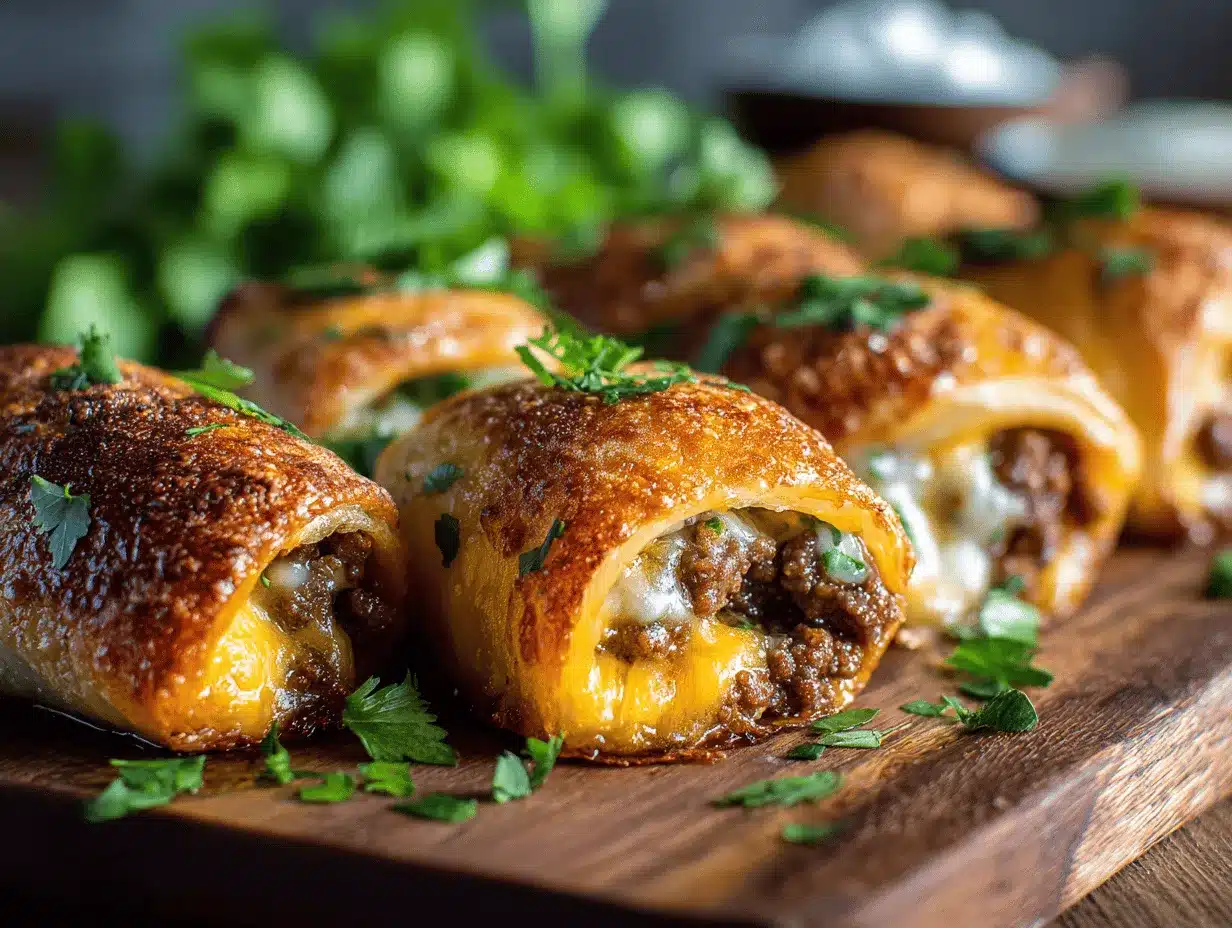
That first whiff of sizzling garlic butter and juicy beef—honestly, it’s pure magic. You know that feeling when a recipe comes out of the oven, all golden and bubbling, and your family starts drifting into the kitchen like they can’t help themselves? That’s exactly the vibe with these Garlic Butter Beef Cheeseburger Rollups. I stumbled onto this idea on a wild weeknight when everyone was “hangry” and we were out of burger buns (classic). So, I grabbed what we had and, well, the rest is delicious history.
These rollups are everything you love about cheeseburgers—savory ground beef, gooey cheese, and those must-have burger fixings—tucked into soft dough, all brushed with garlicky butter. They’re easy enough for busy weeknights, fun for kids to help make, and honestly, they just taste incredible. After making these a dozen times (seriously, they’re a regular at our table), I can say with confidence: Garlic Butter Beef Cheeseburger Rollups are a total game-changer for family dinners, potlucks, or anytime you want the comfort of a cheeseburger without the mess.
What I love is how flexible this recipe is. Whether you’re feeding picky eaters, craving a twist on classic flavors, or just need something quick after a long day, these rollups deliver. Plus, it’s a fun way to sneak in extra veggies or use up leftovers. As a busy parent and lifelong home cook, I’m always looking for recipes that check all the boxes: flavor, ease, and a little “wow” factor. This one absolutely nails it.
If you’re ready for a family dinner that’s as fun to eat as it is to make, you have to try these Garlic Butter Beef Cheeseburger Rollups. Trust me, once you taste them, you’ll be hooked!
Why You’ll Love These Garlic Butter Beef Cheeseburger Rollups
After plenty of experiments (and plenty of taste tests!), I can say these rollups seriously outshine your average cheeseburger night. Here’s why they’re a keeper in my recipe book—and why they might just become your go-to, too:
- Quick & Easy: Ready in under 40 minutes—from prep to table. No fancy techniques, no babysitting the stove. Perfect for those “what’s for dinner?” days when you need a win.
- Simple Ingredients: You probably have everything you need on hand—ground beef, cheese, refrigerated dough, and a handful of pantry staples. No emergency grocery runs required!
- Perfect for All Occasions: Whether it’s a weeknight dinner, a game day snack, or a fun party appetizer, these rollups fit right in. I’ve even packed them in lunchboxes with rave reviews.
- Crowd-Pleaser: Let’s face it—kids, teens, and grown-ups all love cheeseburgers. The rollup format makes them extra fun to eat (no utensils needed!).
- Unbelievably Delicious: The combo of buttery, garlicky crust, juicy beef, and molten cheese is pretty much irresistible. Every bite feels like comfort food at its best.
What sets these Garlic Butter Beef Cheeseburger Rollups apart is the little details: sautéing the beef with onion and seasoning, layering in sharp cheddar (or whatever cheese you love), and that final garlicky butter brush that turns the dough golden and flavorful. I always get requests for seconds—sometimes before the first round is even finished!
This recipe isn’t just about convenience—it’s about joy. There’s something special about everyone reaching for a warm, cheesy rollup and grinning after the first bite. If you crave meals that are easy and memorable, these rollups are for you. Trust me, you’ll be making them again and again.
What Ingredients You Will Need
This recipe uses simple, wholesome ingredients to deliver bold flavor and a crowd-pleasing texture—without a fuss. Most are pantry or fridge staples, and plenty have easy swaps if needed.
- For the Filling:
- Ground beef – 1 pound (450g), 85/15 or 90/10 for less grease
- Yellow onion – 1 small, finely diced (adds sweetness and depth)
- Garlic – 2-3 cloves, minced (fresh is best for big flavor)
- Kosher salt – 1 teaspoon (or to taste)
- Black pepper – ½ teaspoon, freshly ground
- Worcestershire sauce – 1 tablespoon (adds that classic burger umami)
- Ketchup – 2 tablespoons (optional, but it gives a little tang)
- Mustard – 1 teaspoon (yellow or Dijon; use less if you prefer mild flavor)
- Shredded cheddar cheese – 1 to 1 ½ cups (110-165g), sharp or mild (swap for Monterey Jack, mozzarella, or your favorite cheese)
- Pickles – ⅓ cup chopped (optional, but highly recommended for that classic cheeseburger zing)
- For the Rollup Dough:
- Refrigerated pizza dough or crescent roll dough – 1 can (13.8 oz/390g), or homemade if you’re feeling ambitious (I like Pillsbury for store-bought ease)
- For the Garlic Butter:
- Unsalted butter – 3 tablespoons (42g), melted
- Garlic powder – ½ teaspoon (or more if you love garlic!)
- Fresh parsley – 1 tablespoon, chopped (optional, but adds color and freshness)
- Toppings (Optional but Delicious):
- Sesame seeds – sprinkle on top for that “burger bun” finish
- Sliced green onions – for a mild kick
- Extra cheese – never a bad idea, right?
Ingredient Tips:
- If you’re gluten-free, use a gluten-free pizza dough or crescent-style dough.
- For a lighter version, swap ground beef for ground turkey or chicken.
- Vegan? Use plant-based ground “meat,” dairy-free cheese, and vegan butter.
- Don’t have pickles? Chopped jalapeños or roasted peppers work great, too.
I usually go with Cabot sharp cheddar for the cheese and store-brand dough for budget-friendly ease. Feel free to play around with what you’ve got in your fridge!
Equipment Needed
- Large skillet or frying pan: For browning the beef and cooking the aromatics. I prefer cast iron, but nonstick works fine, too.
- Baking sheet or large rimmed tray: Lined with parchment for easy cleanup. If you don’t have parchment, a little nonstick spray does the trick.
- Mixing spoon or spatula: For stirring up the filling (a wooden spoon is my go-to—it just feels right!).
- Rolling pin: To flatten the dough. A wine bottle or tall glass works in a pinch—done that more than once!
- Sharp knife or pizza cutter: For slicing the dough into strips or rectangles.
- Basting brush: For brushing on all that garlicky butter. If you don’t have one, use the back of a spoon.
- Measuring cups and spoons: For accuracy (though honestly, this recipe’s pretty forgiving).
Budget Tip: I’ve used dollar-store rolling pins and basic baking trays for years, and they work just fine. If you’re using cast iron, give it a good scrub and dry after cooking to keep it in top shape. For easy cleanup, always line your baking sheet!
How to Make Garlic Butter Beef Cheeseburger Rollups
-
Prep Ingredients (5 minutes):
Chop your onion and garlic, shred the cheese (if not pre-shredded), and preheat your oven to 375°F (190°C). Line a baking sheet with parchment paper. -
Brown the Beef (8 minutes):
Heat your skillet over medium-high heat. Add the ground beef and cook for about 4-5 minutes, breaking it up with a spoon, until mostly browned. Drain excess fat if needed.
Tip: If you see a lot of liquid in the pan, tilt and spoon it out. Too much grease will make the rollups soggy. -
Saute Aromatics (4 minutes):
Toss in the diced onion and minced garlic. Cook for another 2-3 minutes, until the onion is soft and the garlic is fragrant. The kitchen will smell amazing at this point! -
Season the Filling (2 minutes):
Sprinkle in salt, pepper, and add the Worcestershire sauce, ketchup, and mustard. Stir well and cook for another minute. Remove from heat and let cool for 2-3 minutes.
Warning: If the beef mixture is too hot, it can melt the cheese and make rolling messy. Let it cool slightly. -
Add Cheese & Pickles (2 minutes):
Stir in the shredded cheese and chopped pickles. The cheese doesn’t need to melt completely—it’ll finish in the oven. -
Roll the Dough (5 minutes):
Unroll your pizza/crescent dough onto a lightly floured surface. Roll it into a rectangle about ¼-inch (0.6 cm) thick. Use a pizza cutter to slice into strips (about 3×5 inches/8×13 cm each).
Tip: If using crescent dough, pinch seams together for a smooth sheet. -
Fill & Roll (6 minutes):
Place a heaping spoonful of beef filling on one end of each dough strip. Roll up tightly, sealing the edges if possible. Place seam-side down on your prepared baking sheet.
Don’t overfill—if they burst, it’s no biggie, but less is neater. -
Make Garlic Butter (2 minutes):
Melt the butter in a small bowl. Stir in garlic powder and parsley. -
Brush & Top (2 minutes):
Brush the tops of each rollup with the garlic butter. Sprinkle on sesame seeds and extra cheese if using. -
Bake (15-18 minutes):
Bake in the preheated oven for 15-18 minutes, or until golden brown and bubbling. The tops should be shiny and crisp, the cheese fully melted.
Sensory cue: You’ll see the edges turning deep golden and some cheese oozing out—yum! -
Cool & Serve (2 minutes):
Let the rollups cool for 2-3 minutes before serving (molten cheese can burn!). Use a spatula to transfer to a plate and serve warm.
Troubleshooting: If the filling leaks, just tuck it back in. If the bottoms brown too fast, move the tray up a rack. And if you’re short on time, prep the filling ahead and assemble right before baking!
Cooking Tips & Techniques
Over the years, I’ve picked up a few tricks that keep these Garlic Butter Beef Cheeseburger Rollups foolproof every time:
- Drain the Beef: Leaving too much fat in the pan makes the rolls soggy. Always drain off excess grease before adding your aromatics—your rollups will bake up crisp, not greasy.
- Cool Filling Before Rolling: Warm filling will melt your dough and make rolling tricky (learned this the hard way!). Let it cool for a few minutes—you’ll thank me later.
- Don’t Overfill: It’s tempting to stuff as much as possible, but too much filling makes the rollups hard to seal and more likely to burst. Stick to about 2 tablespoons per piece.
- Seal the Edges: Pinch the dough closed or tuck in the sides if you can. This keeps everything neatly inside and makes for easier serving.
- Even Baking: Arrange rollups evenly spaced on the baking sheet. Crowding leads to uneven browning. If you have a small oven, bake in batches.
- Prep Ahead: The beef filling can be made a day in advance and stored in the fridge. I love this for busy nights—just assemble and bake!
- Multitasking: While the beef cools, get your dough ready and melt the butter. A little planning makes everything run smoother and faster.
- Consistency: Use the same size dough pieces and similar amounts of filling. This way, everything bakes at the same rate—no undercooked or overdone surprises.
Honestly, my first batch was a bit messy (too much cheese, not enough sealing). Still tasted great, though! Every time you make these, you’ll get a little better—and a little more addicted, trust me.
Variations & Adaptations
One thing I love about Garlic Butter Beef Cheeseburger Rollups: you can make them your own. Here are a few ways to switch things up:
- Dietary Tweaks: Use gluten-free or low-carb dough for special diets. Swap in ground turkey or chicken for a lighter version. Vegan? Try plant-based meat and vegan cheese—they work surprisingly well!
- Seasonal Add-Ins: In summer, add chopped tomatoes or fresh corn to the filling. In fall, diced roasted mushrooms or caramelized onions are incredible.
- Spicy Version: Add jalapeños to the filling or a pinch of cayenne to the garlic butter. Pepper jack cheese gives a nice kick, too.
- Different Cooking Methods: Air fryer fans—rollups bake up crispy in about 10-12 minutes at 375°F (190°C). Just don’t overcrowd the basket.
- Flavor Bombs: Try BBQ sauce instead of ketchup, or add cooked bacon for a smoky twist. Blue cheese lovers—swap in crumbled blue for cheddar.
- Personal Favorite: I once made these with leftover taco meat and pepper jack cheese for a Tex-Mex spin. So good, there were no leftovers!
Allergen Swaps: For dairy allergies, use vegan cheese and plant-based butter. Egg-free dough is widely available if needed. Always double-check if cooking for guests!
Serving & Storage Suggestions
These Garlic Butter Beef Cheeseburger Rollups are best hot and fresh, but leftovers are pretty tasty too. Here’s how I like to serve and store them:
- Serving Temp: Serve warm, right from the oven. The cheese is gooey, and the dough is soft—just the way you want it.
- Presentation: Pile rollups on a platter with little bowls of ketchup, mustard, or ranch for dipping. Sprinkle extra parsley for a pop of color.
- Pairings: Great with a crisp green salad, oven fries, or coleslaw. Kids love them with carrot sticks and apple slices.
- Storage: Cool leftovers completely, then store in an airtight container in the fridge for up to 3 days.
- Freezing: Freeze baked rollups (wrapped tightly) for up to 2 months. Thaw overnight in the fridge before reheating.
- Reheating: Bake at 350°F (175°C) for about 8-10 minutes or pop in the air fryer for 5 minutes to crisp up. Microwaving works in a pinch, but you lose some texture.
- Flavor Tip: The flavors deepen as they sit—leftovers the next day are even cheesier and more garlicky!
Nutritional Information & Benefits
Each Garlic Butter Beef Cheeseburger Rollup (based on 8 per batch) contains approximately:
- Calories: 270
- Protein: 13g
- Fat: 17g
- Carbs: 16g
- Fiber: 1g
These rollups are a good source of protein (thanks to the beef and cheese), and you can sneak in extra veggies for fiber. If you use lean meat and reduced-fat cheese, you’ll cut back on fat. For gluten-free or low-carb diets, just swap in alternative dough.
Allergens: Contains wheat/gluten and dairy. Can be made nut- and egg-free with the right dough choice. As someone who tries to balance comfort food with nutrition, I love that you get big flavor and satisfaction in a portion-controlled package. Pair with veggies for a well-rounded meal!
Conclusion
These Garlic Butter Beef Cheeseburger Rollups are, hands-down, one of my favorite family dinners. They’re fast, fun, and totally crave-worthy. Whether you’re feeding a crowd, impressing friends, or just trying to get everyone to the table without complaints, this recipe delivers every time.
Feel free to make it your own—switch up the cheese, add your favorite burger toppings, or sneak in those veggies the kids won’t notice. That’s the beauty of a rollup: it’s endlessly adaptable and always delicious.
I hope you love these as much as my family does. If you try them, let me know how it goes! Drop a comment below with your twists or share your rollup photos—nothing makes my day like seeing your kitchen wins. Happy rolling, and happy eating!
FAQs About Garlic Butter Beef Cheeseburger Rollups
Can I prepare the rollups ahead of time?
Yes! You can make the beef filling up to a day ahead and store it in the fridge. Assemble and bake just before serving for best results.
What’s the best cheese for these rollups?
I love sharp cheddar for classic cheeseburger flavor, but mozzarella, Monterey Jack, or even Swiss work well. Use what you love or have on hand!
Can I freeze Garlic Butter Beef Cheeseburger Rollups?
Absolutely. Once baked and cooled, freeze them in a freezer-safe bag for up to 2 months. Thaw and reheat in the oven or air fryer for best texture.
How do I make these gluten-free?
Use a gluten-free pizza dough or crescent dough (many stores carry options now), and double-check all other ingredients for hidden gluten.
What sides go well with these rollups?
Oven fries, sweet potato wedges, green salad, or even simple steamed veggies. These rollups are also great as a party snack with dipping sauces!
Pin This Recipe!
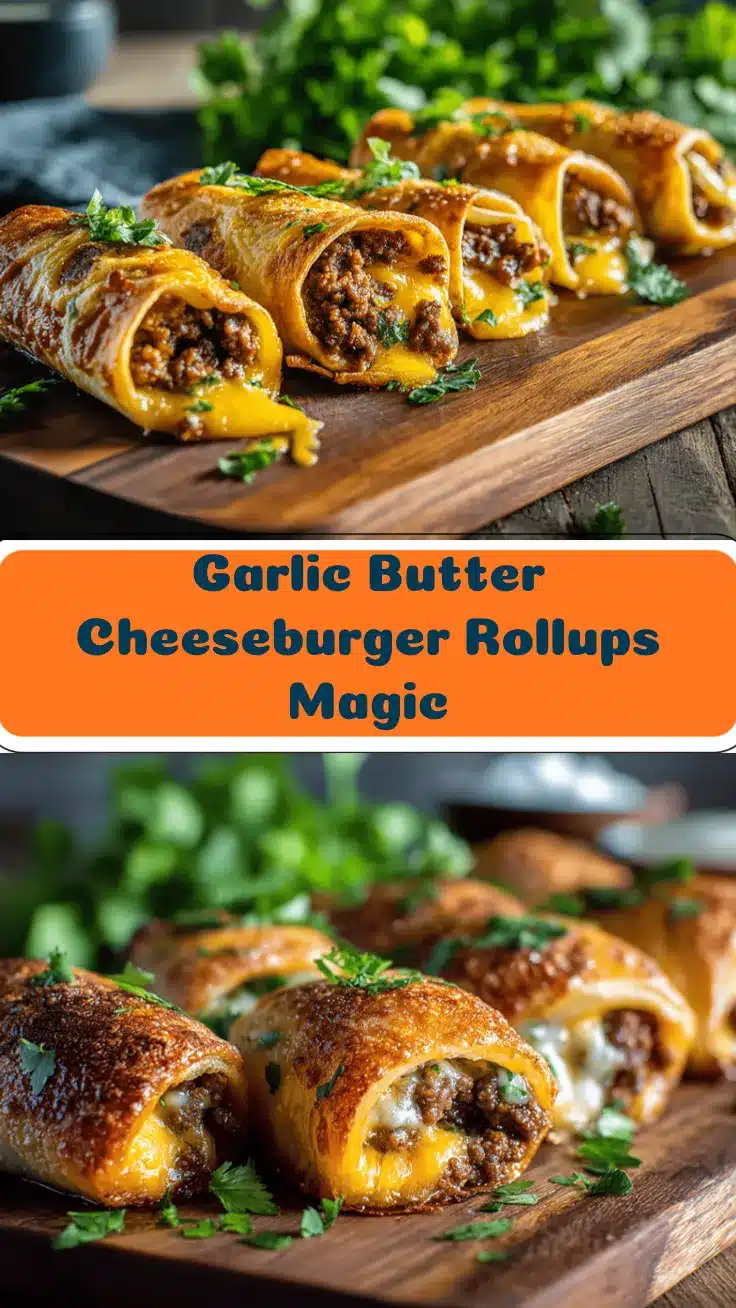
Garlic Butter Beef Cheeseburger Rollups
These Garlic Butter Beef Cheeseburger Rollups combine all the flavors of a classic cheeseburger—savory beef, gooey cheese, and tangy pickles—wrapped in soft dough and brushed with garlicky butter. Perfect for busy weeknights, parties, or family dinners, they’re easy to make, fun to eat, and always a crowd-pleaser.
- Prep Time: 15 minutes
- Cook Time: 18 minutes
- Total Time: 33 minutes
- Yield: 8 rollups 1x
- Category: Main Course
- Cuisine: American
Ingredients
- 1 pound ground beef (85/15 or 90/10)
- 1 small yellow onion, finely diced
- 2–3 cloves garlic, minced
- 1 teaspoon kosher salt (or to taste)
- 1/2 teaspoon black pepper, freshly ground
- 1 tablespoon Worcestershire sauce
- 2 tablespoons ketchup (optional)
- 1 teaspoon mustard (yellow or Dijon)
- 1 to 1 1/2 cups shredded cheddar cheese (sharp or mild, 110-165g)
- 1/3 cup pickles, chopped (optional)
- 1 can (13.8 oz) refrigerated pizza dough or crescent roll dough
- 3 tablespoons unsalted butter, melted
- 1/2 teaspoon garlic powder
- 1 tablespoon fresh parsley, chopped (optional)
- Sesame seeds (optional, for topping)
- Sliced green onions (optional, for topping)
- Extra cheese (optional, for topping)
Instructions
- Chop onion and garlic, shred cheese if needed, and preheat oven to 375°F (190°C). Line a baking sheet with parchment paper.
- Heat a large skillet over medium-high heat. Add ground beef and cook for 4-5 minutes, breaking it up, until mostly browned. Drain excess fat.
- Add diced onion and minced garlic to the skillet. Cook for 2-3 minutes until onion is soft and garlic is fragrant.
- Stir in salt, pepper, Worcestershire sauce, ketchup, and mustard. Cook for 1 minute. Remove from heat and let cool for 2-3 minutes.
- Stir in shredded cheese and chopped pickles.
- Unroll pizza/crescent dough onto a lightly floured surface. Roll into a rectangle about 1/4-inch thick. Cut into strips about 3×5 inches each.
- Place a heaping spoonful of beef filling on one end of each dough strip. Roll up tightly, sealing edges if possible. Place seam-side down on prepared baking sheet.
- Melt butter in a small bowl. Stir in garlic powder and parsley.
- Brush tops of rollups with garlic butter. Sprinkle with sesame seeds and extra cheese if desired.
- Bake for 15-18 minutes, or until golden brown and bubbling.
- Let cool for 2-3 minutes before serving. Serve warm.
Notes
Let the beef filling cool before rolling to prevent melting the dough. Don’t overfill the dough to avoid bursting. The filling can be made ahead and stored in the fridge. For gluten-free, use gluten-free dough. Leftovers can be stored in the fridge for up to 3 days or frozen for up to 2 months.
Nutrition
- Serving Size: 1 rollup
- Calories: 270
- Sugar: 2
- Sodium: 480
- Fat: 17
- Saturated Fat: 8
- Carbohydrates: 16
- Fiber: 1
- Protein: 13
Keywords: cheeseburger rollups, garlic butter, beef rollups, family dinner, easy recipe, kid-friendly, party appetizer, comfort food


