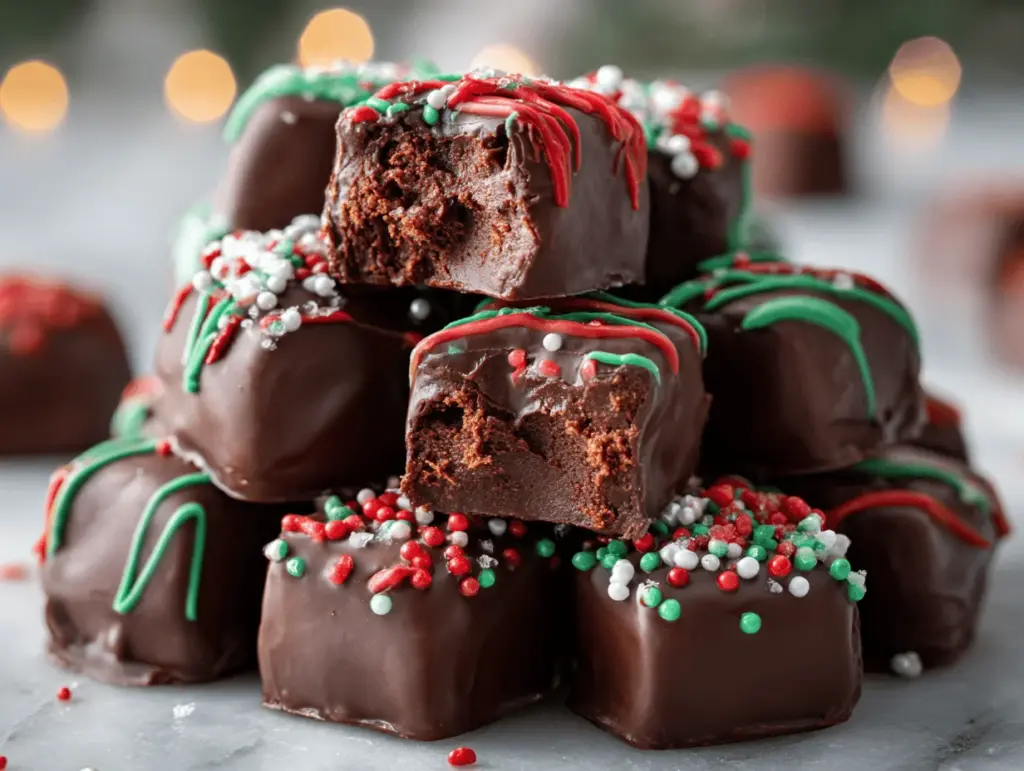
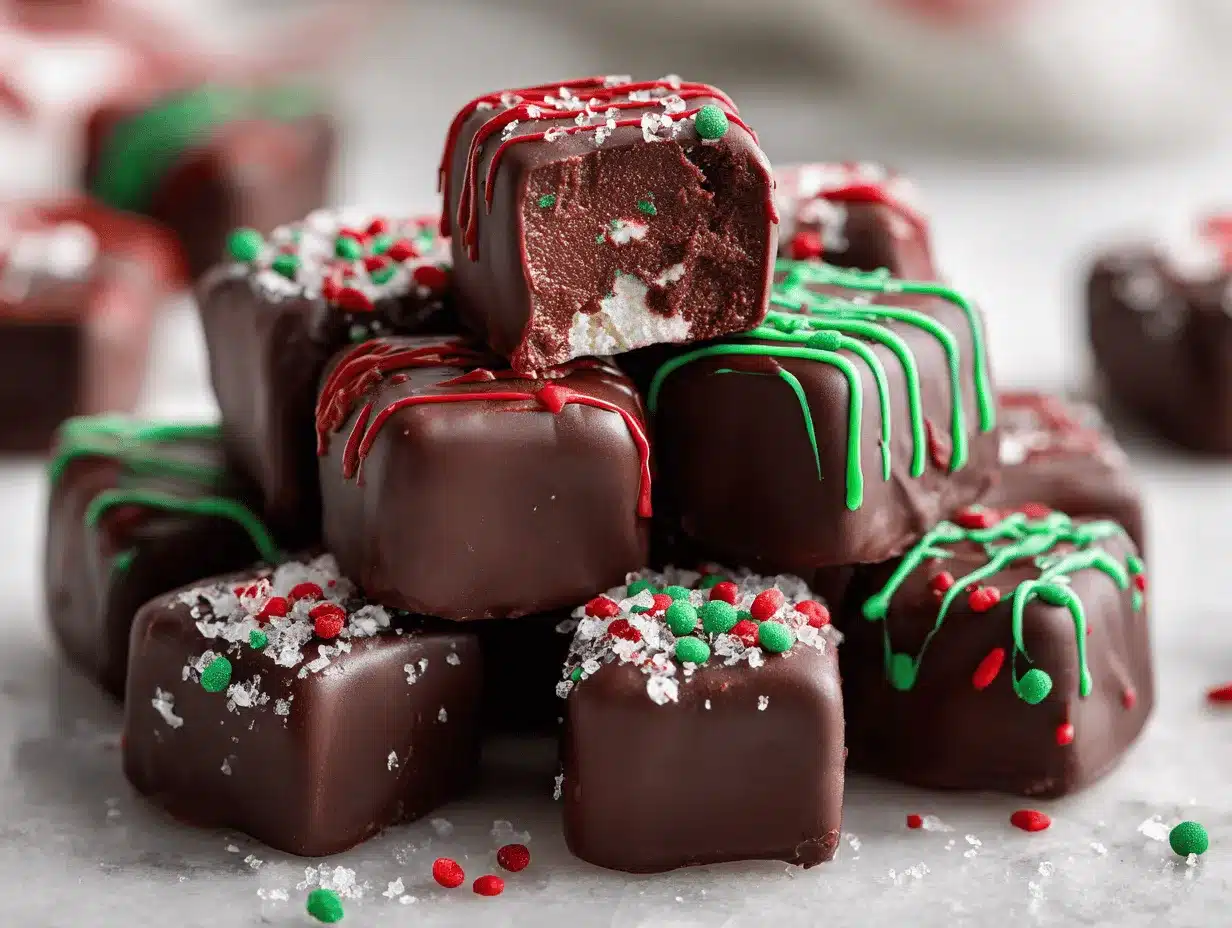
Soft, pillowy centers wrapped in a crisp chocolate shell—just thinking about this Cool Whip candy recipe makes my mouth water. The first time I made these chocolate-dipped treats, I was honestly just trying to satisfy a late-night sweet tooth with whatever I had in the fridge. Now, they’re a full-blown family tradition, especially around the holidays. You know that magical moment when you bite into something and it just melts away? That’s exactly what you get here—plus, they look adorable on any cookie tray.
Let’s face it: sometimes you want candy that looks fancy, but you don’t want to spend hours fussing with sugar thermometers or complicated steps. Enter Cool Whip candy. All you need is a few pantry basics, a tub of Cool Whip, and some chocolate. The result? A treat that’s light, creamy, and surprisingly decadent. I’ve tested this recipe for every occasion—from Christmas parties to birthday sleepovers—and it always steals the show.
Whether you’re here because you saw these trending on Pinterest, or you’re simply looking for a no-fail, crowd-pleasing dessert, this Cool Whip candy recipe is about to become your new holiday favorite. It’s easy enough for kids to help with, customizable for any season, and, let’s be honest, dangerously addictive. If you’re looking for a sweet treat that’s festive, foolproof, and fun to share, you’re definitely in the right place!
Why You’ll Love This Cool Whip Candy Recipe
- Quick & Easy: You can whip these up in under an hour (including chill time). Perfect when you need a last-minute treat or just want something sweet without the wait.
- Simple Ingredients: No need for a special shopping trip. If you’ve got Cool Whip, chocolate, and a bit of sugar, you’re already halfway there.
- Perfect for Celebrations: Whether it’s Christmas, Valentine’s Day, or just a cozy movie night, these chocolate-dipped Cool Whip candies fit right in.
- Crowd-Pleaser: Everyone—from picky kids to dessert-loving adults—can’t resist these. They disappear fast at every gathering (so you might want to make a double batch).
- Unbelievably Delicious: The texture is what sets this Cool Whip candy recipe apart. The filling is so fluffy and light, it almost floats. Paired with a rich chocolate shell, it’s pure comfort in every bite.
What makes this recipe special is the unique combo of airy Cool Whip and sweet chocolate. Some folks use marshmallow fluff or fudge for similar treats, but honestly, nothing compares to the creamy bite you get here. I love blending in a hint of vanilla or peppermint for an extra festive twist—just one of the ways you can make this recipe your own.
Making candy at home always felt intimidating to me, but this is the recipe that changed my mind. No tricky techniques, no fancy gadgets—just melt, mix, and dip. It’s the perfect project for kids to help with (warning: there may be a few sticky fingers), and it’s a total showstopper on any holiday treat board. If you’re looking for a treat that’s as fun to make as it is to eat, you’ll fall hard for these Cool Whip candies.
What Ingredients You Will Need
This Cool Whip candy recipe keeps things simple—no hard-to-find ingredients or tricky substitutions. Here’s what you’ll need to make a batch of these dreamy, chocolate-dipped bites:
- Cool Whip (8 oz / 225 g, thawed): The star of the show! I usually stick to the original, but lite versions also work.
- Semi-Sweet Chocolate Chips (2 cups / 340 g): For dipping. You can sub in dark or milk chocolate if you prefer. I love using Ghirardelli or Guittard for a smoother shell, but honestly, any brand will do.
- Powdered Sugar (1 ½ cups / 180 g): This thickens the filling and adds sweetness. Don’t skip it, or your candy won’t hold its shape.
- Vanilla Extract (1 tsp / 5 ml): Adds a subtle, cozy flavor. Swap for peppermint or almond extract for a fun twist.
- Coconut Oil (2 tbsp / 28 g, optional): Mixes with your chocolate for a shinier coating and easier dipping. If you don’t have it, vegetable oil works too, or you can skip it for a thicker shell.
- Pinch of Salt: Just a little helps balance the sweetness and brings out the chocolate flavor (don’t overlook this tiny step!).
Optional Toppings:
- Sprinkles (for festive flair)
- Finely crushed peppermint candies (perfect for Christmas)
- Shredded coconut
- Mini chocolate chips
Ingredient Tips:
- If you’re dairy-free, try coconut whipped topping and vegan chocolate chips. It works surprisingly well!
- Powdered sugar is key—granulated won’t dissolve enough and will leave your filling grainy.
- For a gluten-free version, double-check your chocolate chips and toppings. Most are safe, but it’s worth a peek at the label.
- If you want to get fancy, swirl in a bit of peanut butter or Nutella to the filling before freezing. Talk about irresistible!
Equipment Needed
- Mixing Bowl: A medium or large bowl will do. I prefer glass for easy cleanup.
- Hand Mixer or Stand Mixer: You can mix by hand with a sturdy spatula, but an electric mixer makes the filling extra smooth (and saves your arm a workout!).
- Baking Sheet: For freezing and arranging the candies. Line it with parchment or wax paper for easy removal.
- Small Cookie Scoop or Spoon: Helps portion the candy evenly. I use a 1-tablespoon scoop, but any spoon will work.
- Microwave-Safe Bowl: For melting chocolate. A glass measuring cup works great too.
- Fork or Dipping Tool: For dunking the candies in chocolate. If you don’t have a proper dipping tool, two forks work just fine.
- Parchment or Wax Paper: Keeps things from sticking and makes cleanup a breeze.
Personal Note: I’ve tried both silicone mats and parchment for this Cool Whip candy recipe, and parchment always wins—less sticking, less mess. If you’re tight on kitchen gadgets, don’t worry! I’ve made these with nothing but a bowl, spoon, and a little patience. Just be sure to let everything chill properly for the best results.
Quick tip: If you’re using a hand mixer, wipe the beaters clean between mixing and dipping. Chocolate sets fast and can get a bit messy if you’re not careful!
How to Make Cool Whip Candy – Step-by-Step Preparation
- Make the Filling: In a medium mixing bowl, combine 8 oz (225 g) thawed Cool Whip, 1 ½ cups (180 g) powdered sugar, 1 tsp (5 ml) vanilla extract, and a pinch of salt. Using a hand mixer (or a sturdy spatula and some elbow grease), beat until the mixture is thick, smooth, and fluffy. This will take about 2-3 minutes. The filling should be soft but not runny—if it’s too loose, add an extra tablespoon or two of powdered sugar.
- Scoop and Freeze: Line a baking sheet with parchment paper. Using a small cookie scoop or spoon, portion the mixture into about 1-tablespoon mounds. Space them out so they’re not touching. Place the tray in the freezer for at least 30 minutes, or until the filling is firm to the touch. (If you’re in a rush, 20 minutes works, but they’ll be a bit sticky.)
- Melt the Chocolate: In a microwave-safe bowl, combine 2 cups (340 g) semi-sweet chocolate chips and 2 tbsp (28 g) coconut oil (if using). Microwave in 30-second intervals, stirring after each, until fully melted and smooth. This usually takes about 1 ½ minutes total. Be careful not to overheat—the chocolate should be glossy and pourable.
- Dip the Candies: Working quickly, use a fork or dipping tool to lift each frozen Cool Whip mound and dip it into the melted chocolate. Let excess chocolate drip off, then return to the parchment-lined tray. If you’re adding toppings (like sprinkles or crushed peppermint), sprinkle them on while the chocolate is still wet.
- Chill to Set: Once all candies are dipped, place the tray back in the freezer for 10-15 minutes, or the fridge for about 30 minutes, until the chocolate shell is completely set and firm.
- Serve and Enjoy: Once set, your Cool Whip candies are ready to eat! Serve them chilled for the best bite, and watch them disappear.
Preparation Notes:
- If your filling is sticky and hard to scoop, pop the whole bowl in the freezer for 10 minutes to firm it up before shaping.
- For neater dipping, only take a few candies out of the freezer at a time. They soften quickly!
- Don’t worry if your chocolate gets thick—zap it in the microwave for 10 seconds to loosen it up again.
- If you’re working in a warm kitchen, keep finished candies in the fridge until ready to serve.
Troubleshooting: If your chocolate coating cracks, it’s probably too cold. Let the candies sit at room temperature for 2 minutes before dipping. If the filling starts to ooze, your freezer time wasn’t quite long enough. No worries—just pop them back in to firm up!
Cooking Tips & Techniques for Cool Whip Candy
- Chill Thoroughly: Freezing the filling is your secret weapon. Don’t rush this step or your candies will be tricky to dip. I learned this the hard way after a few melty disasters on a warm day!
- Don’t Overheat Chocolate: Short bursts in the microwave are best. Stir well between intervals—chocolate burns fast, and there’s no saving it if it goes too far.
- Work in Batches: Only dip a few candies at a time, keeping the rest chilled. This helps the filling stay firm and makes the dipping process way less messy.
- Use a Fork for Dipping: Forget fancy tools—an ordinary fork gets the job done. Tap it gently on the bowl to remove extra chocolate for a smooth finish.
- Customize the Coating: If you want a thicker shell, let the first coat set and repeat for double-dipped candies. My kids love this extra-chocolatey version!
- Decorate Fast: Add sprinkles or toppings as soon as you dip. The chocolate sets quickly, so don’t wait.
- Storing: Keep candies in a single layer if possible. They stick together if piled up, especially in warm weather.
I’ve definitely had my fair share of “oops” moments with this Cool Whip candy recipe—like forgetting to chill the filling long enough and ending up with chocolate-slathered hands. But honestly, that’s half the fun! The more you make them, the easier it gets, and you’ll find your own rhythm for dipping and decorating.
Pro tip: If you’re prepping for a big event, you can make these up to a week ahead and store them in the freezer. Just let them sit at room temp for 5-10 minutes before serving for the perfect bite.
Variations & Adaptations
- Peppermint Party: Add ½ tsp peppermint extract to the filling and sprinkle crushed candy canes on top. This is a holiday favorite at my house!
- Dairy-Free Delight: Use coconut whipped topping and dairy-free chocolate chips. The texture is slightly different, but still so good—my friend with a dairy allergy begs for these every Christmas.
- Nutty Crunch: Swirl in 2 tbsp of creamy peanut butter before freezing, or roll the finished candies in finely chopped nuts. The sweet-and-salty combo is downright addictive.
- Flavor Swaps: Try almond or orange extract instead of vanilla for a fresh twist. A little goes a long way!
- Different Shapes: Use silicone candy molds for hearts, stars, or whatever matches your party theme (just be sure to freeze until very firm before dipping).
- Gluten-Free: Most Cool Whip and chocolate chips are gluten-free, but always double-check your ingredients and toppings.
One of my favorite spins was using lemon extract with white chocolate for a springtime treat—so bright and cheerful! The beauty of this Cool Whip candy recipe is how easily you can make it your own. Have fun experimenting with flavors, colors, and toppings to match any holiday or craving.
Serving & Storage Suggestions
These Cool Whip candies are best served chilled, straight from the fridge or freezer. I love arranging them on a pretty platter with a mix of sprinkles and toppings—they look so festive, especially for holiday parties or cookie exchanges. Pair them with a cup of coffee, hot chocolate, or a glass of milk for the ultimate treat.
For storage, keep candies in an airtight container in the fridge for up to 1 week or in the freezer for up to 2 months. Place parchment or wax paper between layers to prevent sticking. To serve from frozen, let them sit at room temperature for 5-10 minutes for the perfect creamy texture.
Honestly, the flavor gets even better after a day or two in the fridge. The chocolate shell protects the filling, so they stay fresh—and that makes them perfect for gift boxes or make-ahead party trays. If you plan on gifting, just tuck a little sheet of parchment between layers to keep them looking as good as they taste.
Nutritional Information & Benefits
Each Cool Whip candy (about 1 tablespoon size) is approximately 80-100 calories, with around 5g fat, 10g carbs, and 1g protein. The actual numbers depend on chocolate type and toppings. If you use sugar-free chocolate or whipped topping, you can tweak the macros a bit for a lighter version.
Key ingredients like Cool Whip and chocolate provide quick energy, while the portion size keeps things in check. For gluten-free or dairy-free diets, use appropriate substitutes as mentioned above. Most commercial Cool Whip is gluten-free but does contain dairy—always check labels if allergies are a concern.
From a wellness perspective, I treat these as a fun, occasional treat—a sweet bite to share and enjoy without overthinking. They pack a lot of joy into every bite, especially during the festive season!
Conclusion
This Cool Whip candy recipe is the kind of treat you’ll find yourself making again and again. Easy enough for beginners, festive enough for special occasions, and so tasty you’ll want to hide a few for yourself. I love how versatile and forgiving this recipe is—it’s basically foolproof, even if you’re new to candy-making.
Don’t be afraid to make it your own! Swap in your favorite extracts, top with colorful sprinkles, or try different chocolates. The best part? Sharing these with friends and family and watching their faces light up with that first bite.
If you try this recipe, let me know how it goes! Drop a comment, share a photo, or tell me about your favorite holiday twist. There’s nothing better than bonding over homemade treats—so grab a tub of Cool Whip and get dipping. Happy candy making!
Frequently Asked Questions
Can I use homemade whipped cream instead of Cool Whip?
It’s possible, but store-bought Cool Whip holds its shape better during freezing and dipping. If you use homemade, make sure it’s whipped very stiff and add extra powdered sugar to help it set.
How do I keep the chocolate coating from cracking?
Let the frozen filling sit at room temperature for 2-3 minutes before dipping. If the filling is too cold, the chocolate may crack as it sets.
Can I make Cool Whip candy ahead of time?
Absolutely! Store the finished candies in the fridge for up to a week or freeze for up to two months. They’re perfect for making ahead of busy holidays.
What kind of chocolate works best for dipping?
Semi-sweet chocolate chips are classic, but dark, milk, or even white chocolate all work. Just be sure to melt it gently and add a bit of coconut oil for easier dipping if needed.
Is this recipe gluten-free?
Yes, if you use gluten-free Cool Whip and chocolate chips. Always check labels and watch out for gluten in any toppings you add.
Pin This Recipe!
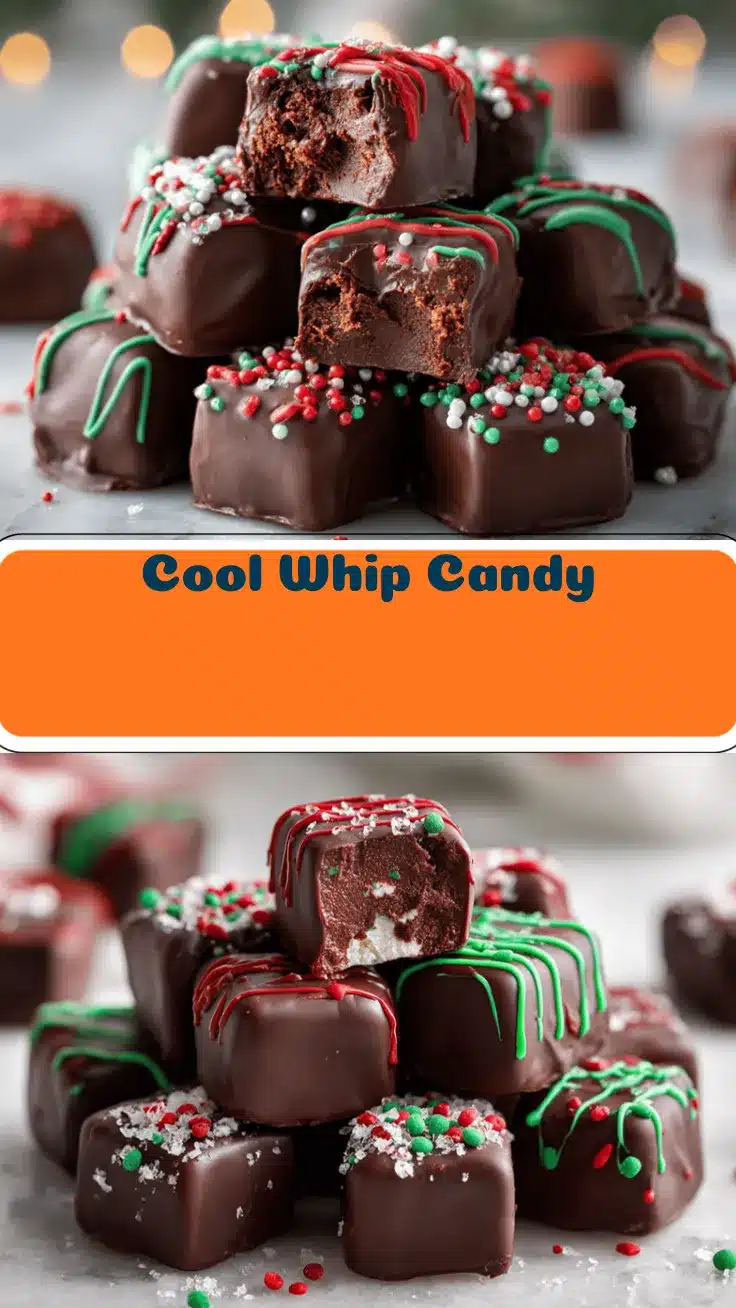
Cool Whip Candy Recipe – Easy Chocolate-Dipped Holiday Treats

Soft, pillowy Cool Whip centers wrapped in a crisp chocolate shell make these chocolate-dipped candies a festive, no-fuss treat. Perfect for holidays or any occasion, they’re easy to make, customizable, and always a crowd-pleaser.
- Prep Time: 15 minutes
- Cook Time: 0 minutes
- Total Time: 45 minutes
- Yield: 24 candies 1x
- Category: Dessert
- Cuisine: American
Ingredients
- 8 oz Cool Whip, thawed
- 1 1/2 cups powdered sugar
- 1 teaspoon vanilla extract (or peppermint/almond extract for variation)
- Pinch of salt
- 2 cups semi-sweet chocolate chips
- 2 tablespoons coconut oil (optional, or substitute vegetable oil)
- Optional toppings: sprinkles, finely crushed peppermint candies, shredded coconut, mini chocolate chips
Instructions
- In a medium mixing bowl, combine Cool Whip, powdered sugar, vanilla extract, and a pinch of salt. Beat with a hand mixer or sturdy spatula until thick, smooth, and fluffy (about 2-3 minutes). If too loose, add more powdered sugar by the tablespoon.
- Line a baking sheet with parchment paper. Scoop the mixture into 1-tablespoon mounds and place on the sheet, spacing them apart. Freeze for at least 30 minutes, or until firm.
- In a microwave-safe bowl, combine chocolate chips and coconut oil (if using). Microwave in 30-second intervals, stirring after each, until melted and smooth (about 1 1/2 minutes total).
- Using a fork or dipping tool, dip each frozen Cool Whip mound into the melted chocolate, letting excess drip off. Return to the parchment-lined tray. Add toppings while chocolate is still wet, if desired.
- Once all candies are dipped, chill the tray in the freezer for 10-15 minutes or in the fridge for about 30 minutes, until the chocolate is set.
- Serve chilled and enjoy! Store leftovers in an airtight container in the fridge for up to 1 week or freeze for up to 2 months.
Notes
For best results, freeze the filling thoroughly before dipping. Only dip a few candies at a time to keep them firm. Customize with different extracts or toppings for any occasion. Store in a single layer to prevent sticking. For a dairy-free version, use coconut whipped topping and vegan chocolate chips.
Nutrition
- Serving Size: 1 candy (about 1 tablespoon each)
- Calories: 90
- Sugar: 8
- Sodium: 20
- Fat: 5
- Saturated Fat: 4
- Carbohydrates: 10
- Fiber: 1
- Protein: 1
Keywords: Cool Whip candy, chocolate dipped candy, holiday treats, easy candy recipe, no bake dessert, Christmas candy, party dessert, gluten free candy, kid friendly dessert, homemade candy


