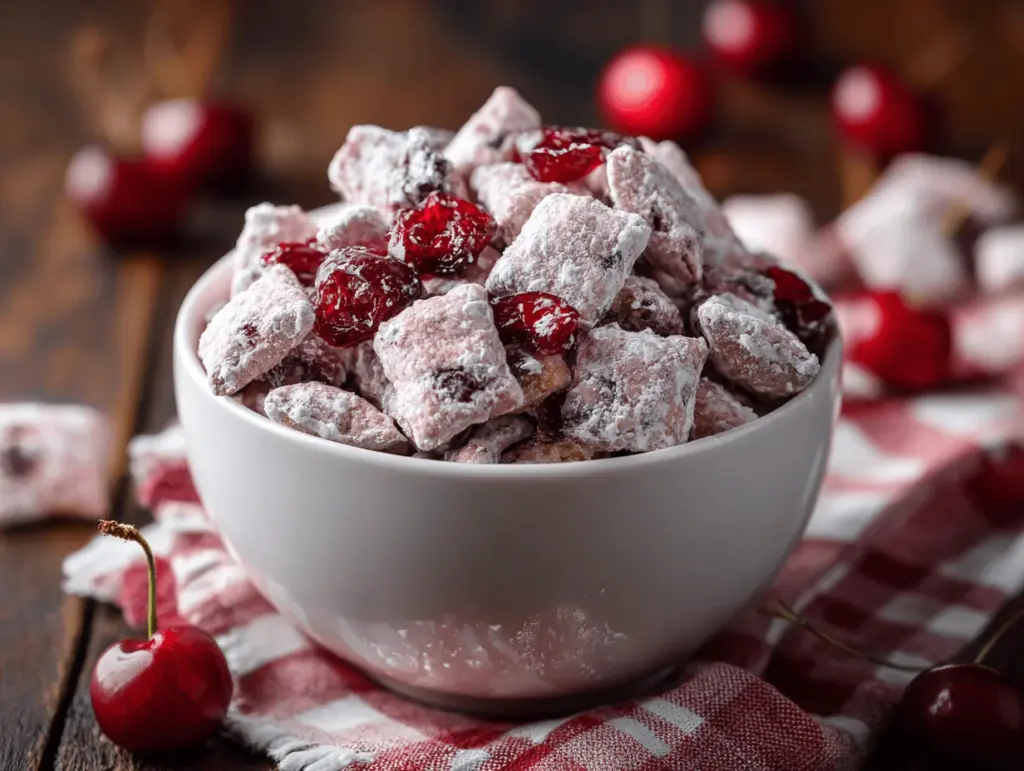
There’s something downright magical about the way cherry cheesecake and classic puppy chow come together in this ridiculously simple, no-bake snack. The first time I tossed together a batch of cherry cheesecake puppy chow, the sweet-tart aroma made my kitchen feel like a summer carnival. It’s one of those snacks you can’t stop reaching for—think crunchy cereal hugged by a creamy, tangy cheesecake coating, dotted with bursts of real cherry flavor and a dusting of powdered sugar. I stumbled onto this twist during a late-night pantry raid when I was desperate for something fun but didn’t want to turn on the oven. Turns out, this recipe is a total lifesaver for last-minute parties, movie nights, or when you just need a little nostalgic comfort food with a grown-up twist.
Why do I love it so much? For one, cherry cheesecake puppy chow nails that perfect balance of creamy, crunchy, and fruity. Plus, it’s a breeze to whip up—no fancy equipment, no waiting for anything to bake, and it’s basically impossible to mess up. I’ve made it for birthday parties, potlucks, and just to brighten up a boring Tuesday. Every single time, it’s the first snack to disappear. If you’re a fan of classic puppy chow (aka muddy buddies), you’ll fall hard for this cheesecake-inspired version. It’s festive, quick, and totally Instagram-worthy. Whether you’re busy wrangling kids or need a sweet treat for your next girls’ night, you’ll want to keep this cherry cheesecake puppy chow recipe handy. I’ve tested it more times than I can count, tweaking the ratios for max flavor and crunch, and I promise it’s worth every bite!
Why You’ll Love This Cherry Cheesecake Puppy Chow Recipe
- Quick & Easy: You can pull this together in under 20 minutes—no oven required, no fancy steps. Perfect for those days when you need a party snack, stat!
- Simple Ingredients: Everything comes from the pantry or fridge—no hunting down obscure extracts or specialty flours. Most of the time I’ve already got everything on hand, and you probably do too.
- Perfect for Parties: Cherry cheesecake puppy chow is always a hit at birthdays, baby showers, game nights, and holiday gatherings. It’s the ultimate crowd-pleaser for any age group.
- Crowd-Pleaser: Grown-ups love the nostalgic puppy chow crunch, and kids go wild for the sweet cherry flavor. I always get asked for the recipe—sometimes before people even finish their first handful!
- Unbelievably Delicious: The combo of tangy cream cheese, white chocolate, and real cherry flavor is next-level. It’s rich, satisfying, but not too heavy, with a crunch that’s totally addictive.
What sets this cherry cheesecake puppy chow apart? For starters, I use real freeze-dried cherries to pack in that authentic fruit flavor—none of those artificial aftertastes you sometimes get with flavored candy melts. Blending soft cream cheese into the coating gives every bite a rich, cheesecake-y tang. And let’s face it, no-bake means you’re snack-ready in no time. I’ve played with other versions, but this one’s my hands-down favorite for flavor AND texture.
This isn’t just a snack; it’s a mood-booster. Cherry cheesecake puppy chow is the kind of treat that makes everyone smile and turns any occasion into a little celebration. Whether you’re hosting friends or just treating yourself to something sweet after a long day, you’ll love how easy and satisfying it is. Plus, you can tweak it to fit your family’s tastes—swap in raspberries, use gluten-free cereal, or toss in some mini marshmallows for extra fun. I promise, once you try this, you’ll be hooked!
What Ingredients You Will Need
This cherry cheesecake puppy chow recipe is all about big flavor with simple, easy-to-find ingredients. I love that most of these are pantry staples or just a quick grocery run away. Here’s what you’ll need and why:
- Rice Chex or Crispix Cereal (6 cups/160g): The classic base—light, crunchy, and perfect for soaking up all that cheesecake coating. I’ve tried both and honestly, they both work great. (Gluten-free option!)
- White Chocolate Chips or Melting Wafers (1 ½ cups/255g): These melt smoothly and create a sweet, creamy shell. I like Ghirardelli or Guittard for extra richness, but any brand will do.
- Cream Cheese, Softened (4 oz/113g): Adds authentic cheesecake flavor and keeps the coating creamy. Use full-fat for best results. If you’re dairy-free, try a plant-based cream cheese—just watch the texture.
- Butter, Unsalted (2 tbsp/28g): Helps everything melt together and adds a little extra richness.
- Powdered Sugar (1 ½ cups/180g), plus more for dusting: The magic finishing touch that keeps everything from sticking and adds that classic puppy chow sweetness.
- Freeze-Dried Cherries (1 cup/30g): These little flavor bombs bring real cherry zing. If you can’t find them, use freeze-dried strawberries or raspberries as a backup. (Don’t use dried cherries—they’re too sticky.)
- Vanilla Extract (1 tsp/5ml): Rounds out the cheesecake flavor—just a splash goes a long way.
- Graham Cracker Crumbs (½ cup/50g): For that classic cheesecake “crust” vibe. You can use gluten-free graham crackers if needed.
- Pinch of Salt: Just a little brings out all the flavors—don’t skip it!
Optional add-ins: Want to make it your own? Try mini chocolate chips, a handful of chopped almonds for crunch, or swap the freeze-dried cherries for another berry. If you’re feeling extra, drizzle with a little melted dark chocolate after tossing in powdered sugar. I once threw in some rainbow sprinkles for a birthday party, and the kids went wild!
Equipment Needed
- Large Mixing Bowl: For tossing everything together. I use a big glass bowl so I can really get in there and coat every piece.
- Microwave-Safe Bowl: For melting the white chocolate, butter, and cream cheese. Glass or ceramic works best—plastic can sometimes make the chocolate seize up.
- Rubber Spatula: Helps scrape every last bit of cheesecake coating onto the cereal. Wooden spoons work too, but I find a spatula is less messy.
- Gallon-Size Zip-Top Bags or Large Container with Lid: For shaking the cereal in powdered sugar. If you don’t have bags, just toss it gently in a bowl with a lid.
- Baking Sheet or Parchment Paper: To spread out the puppy chow while it cools and sets—prevents clumping and makes cleanup a breeze.
If you don’t have a microwave, you can melt the coating on the stovetop over low heat—just stir constantly so nothing scorches. I’ve even used a double boiler in a pinch. For the shaking step, big Tupperware works if you’re out of zip bags (I’ve definitely had to get creative when packing this for road trips). Clean your spatula right away; melted chocolate gets sticky fast!
How to Make Cherry Cheesecake Puppy Chow

-
Prep the Cereal:
Measure 6 cups (about 160g) Rice Chex or Crispix into a large mixing bowl. Set aside. If you want to add any nuts or extra cereal, do it now. -
Melt the Cheesecake Coating:
In a microwave-safe bowl, combine 1 ½ cups (255g) white chocolate chips, 4 oz (113g) softened cream cheese, and 2 tbsp (28g) unsalted butter. Microwave in 30-second bursts, stirring well after each, until completely smooth (about 1 ½–2 minutes total). Don’t overheat or the chocolate may seize—if it starts to thicken, add 1–2 tsp milk, just until pourable. -
Add Flavor:
Stir in 1 tsp (5ml) vanilla extract and a pinch of salt. If you love extra cheesecake flavor, add 2 tbsp (15g) graham cracker crumbs now; save the rest for topping. -
Crush the Freeze-Dried Cherries:
Place 1 cup (30g) freeze-dried cherries in a zip-top bag and lightly crush with a rolling pin or your hands. You want some powder, some bigger bits. Set aside. -
Coat the Cereal:
Pour the warm cheesecake mixture over the cereal. Gently fold with a spatula until every piece is coated. Work quickly—if the mixture cools too much, it’ll get sticky. -
Add the Cherries:
Toss in the crushed freeze-dried cherries and stir gently. Reserve a few bits for sprinkling on top if you want a pretty finish. -
Powdered Sugar Shake:
Transfer the coated cereal to a large zip-top bag or lidded container. Add 1 ½ cups (180g) powdered sugar. Seal and shake until every piece is snowy white and separated. If it clumps, break up with your hands. -
Final Touches:
Spread the puppy chow on a baking sheet lined with parchment. Sprinkle with remaining graham cracker crumbs and reserved cherry pieces. Let set for 10–15 minutes until dry to the touch. -
Serve or Store:
Once cool, transfer to a serving bowl or airtight container. Puppy chow keeps well at room temp up to 5 days (if it lasts that long!).
Troubleshooting Tips: If your chocolate mixture seizes or gets gritty, add a splash of milk or coconut oil and stir until smooth. If the puppy chow seems sticky after shaking, add a bit more powdered sugar and shake again. I’ve learned the hard way that patience pays off—let it cool completely before sealing it up, or you’ll get soggy pieces.
Cooking Tips & Techniques
- Don’t Overheat the Chocolate: White chocolate is finicky—it scorches and seizes easily. Use low heat and stir often. When in doubt, microwave less and stir more.
- Work Fast: Once you add the coating, toss the cereal quickly. The mixture sets fast, and you want every piece covered before it stiffens up.
- Crush Cherries by Hand: I used a food processor once and ended up with cherry dust everywhere! Trust me, a zip bag and a rolling pin work best—aim for a mix of big and small bits for texture.
- Avoid Overpacking: Don’t cram too much cereal into your coating bowl; split into two batches if you’re doubling the recipe. Even coating is key for that perfect puppy chow crunch.
- Be Generous With Powdered Sugar: If it looks sticky, add more sugar and shake again. You want a nice, powdery finish so it doesn’t clump.
- Let It Cool Completely: I’ve made the mistake of sealing it up too soon—learn from me! Let it sit out until completely dry before storing or serving, or you’ll get soggy puppy chow (nobody wants that).
If you accidentally overheat the coating, don’t panic—just add a splash of milk and whisk until smooth. Multitasking tip: While the coated cereal is cooling, clean up your bowls and prep your serving dish. This recipe is pretty forgiving, so don’t stress if things aren’t perfect. The end result is always delicious!
Variations & Adaptations
- Gluten-Free Cherry Cheesecake Puppy Chow: Use gluten-free cereal and graham crumbs. Most major brands have gluten-free options now, and you won’t miss a thing.
- Dairy-Free & Vegan Option: Substitute dairy-free white chocolate, plant-based cream cheese, and vegan butter. I’ve made this version for a friend with allergies, and it turned out just as creamy and dreamy.
- Chocolate Cherry Cheesecake Puppy Chow: Swap half the white chocolate chips for semi-sweet or dark chocolate. Adds a deep, decadent flavor that’s perfect for grown-up palates (and chocolate lovers like me!).
- Seasonal Swaps: In summer, try freeze-dried strawberries or blueberries. For the holidays, toss in a little ground cinnamon or crushed peppermint candy for a festive twist.
- Nutty Crunch: Add a handful of chopped pecans or almonds before coating for extra texture and flavor.
I once ran out of cherries and used freeze-dried raspberries instead—honestly, it was a happy accident! You can even add mini marshmallows or a drizzle of dark chocolate if you’re feeling extra. If you have allergy concerns, skip the graham crumbs or use allergy-friendly brands. Don’t be afraid to make this cherry cheesecake puppy chow your own!
Serving & Storage Suggestions
Cherry cheesecake puppy chow is best served at room temperature, in a big bowl so everyone can grab a handful (or three!). For parties, I love portioning it into cute cupcake liners or mason jars tied with ribbon—super cute for gifting or snack tables. Pair it with lemonade, iced coffee, or a glass of cold milk for the ultimate treat.
To store, keep your puppy chow in an airtight container at room temp for up to 5 days. Any longer and it starts to soften, but honestly, it never lasts that long around here. For longer storage, freeze in a zip-top bag for up to 2 months—just let it thaw at room temp before serving. If it gets a bit sticky after a day or two, toss with a touch more powdered sugar and it’ll perk right up. The flavors deepen after a day, so leftovers taste even more like cheesecake!
Nutritional Information & Benefits
This cherry cheesecake puppy chow is a sweet treat, so it’s definitely a snack for special occasions! Each serving (about ½ cup) has roughly 210 calories, 5g fat, 38g carbs, and 2g protein. The freeze-dried cherries bring a pop of vitamin C and antioxidants, while the cereal adds a little fiber. If you use gluten-free or dairy-free swaps, it works for those with dietary restrictions (just check the labels for allergens like dairy, soy, or wheat). Personally, I love that you can make a big batch and share—it’s all about balance, right? Treat yourself, enjoy every bite, and don’t stress the numbers on this one.
Conclusion
Cherry cheesecake puppy chow is one of those recipes that just makes people happy. It’s fast, fun, and totally delivers on that sweet, tangy, crunchy magic we all crave from classic puppy chow—with a grown-up cherry cheesecake twist. Whether you stick to the original or mix things up with your favorite add-ins, there’s no wrong way to enjoy it. I love how easy it is to whip up a batch, and honestly, it always brings a smile to everyone’s face.
Let this recipe be your go-to for last-minute parties, cozy movie nights, or just a little self-care treat. If you try it, I’d love to hear what you think—drop a comment below, share your creative twists, or tag me on social with your cherry cheesecake puppy chow creations. Happy snacking, friends—don’t forget to save a handful for yourself!
FAQs
Can I use fresh or dried cherries instead of freeze-dried?
Stick with freeze-dried cherries for the best texture. Fresh or regular dried cherries are too moist and will make the puppy chow sticky and clumpy.
How do I keep the puppy chow from getting soggy?
Let it cool completely after coating and before sealing in a container. If it feels sticky, toss with a little extra powdered sugar and spread out to dry again.
Can I make this ahead of time?
Absolutely! Cherry cheesecake puppy chow keeps well for up to 5 days in an airtight container. In fact, the flavors get even better after a day.
What’s the best way to melt the white chocolate?
Use a microwave in short bursts (30 seconds at a time), stirring between each. Don’t overheat, or it may seize. You can also melt it on the stovetop over low heat if you prefer.
Is this recipe gluten-free?
It can be! Just use gluten-free cereal and graham cracker crumbs. Always double-check labels for any hidden gluten if you’re serving someone with celiac or severe allergies.
Pin This Recipe!
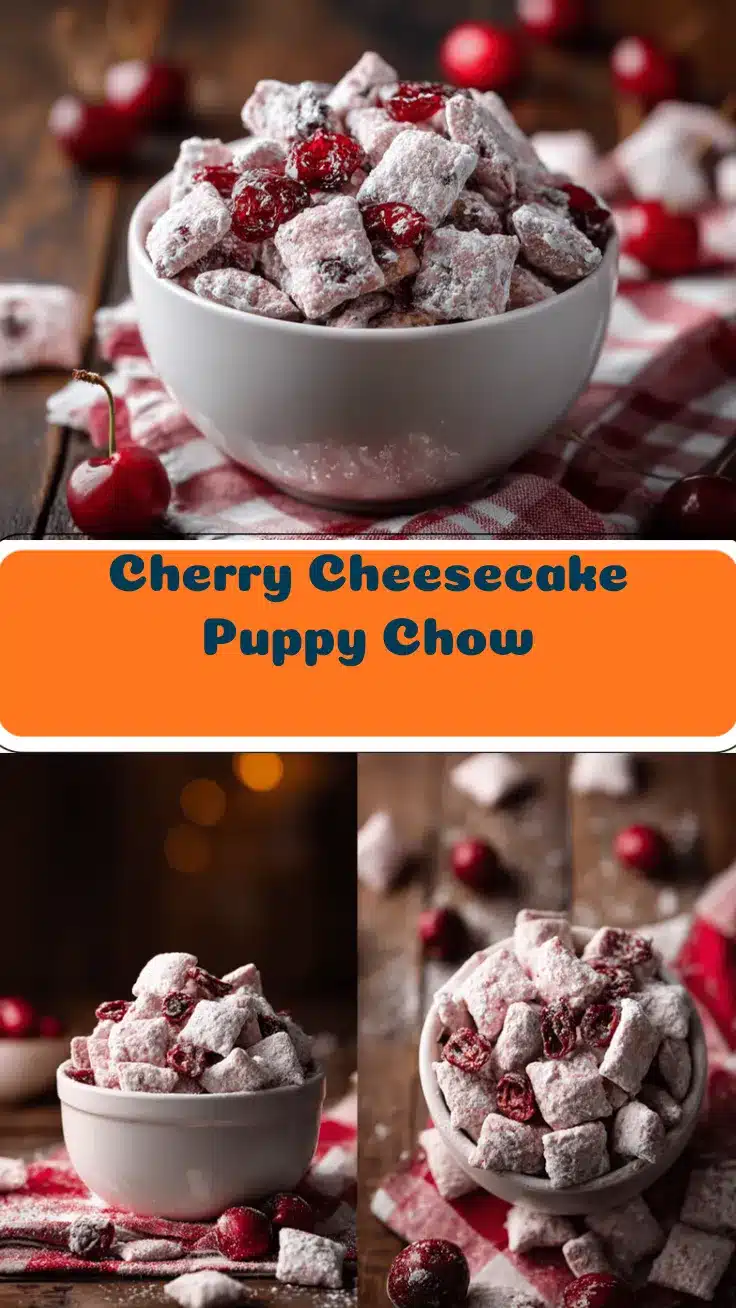
Cherry Cheesecake Puppy Chow
This easy, no-bake Cherry Cheesecake Puppy Chow combines crunchy cereal with a creamy cheesecake coating and bursts of real cherry flavor. It’s the perfect quick snack for parties, movie nights, or whenever you need a sweet treat.
- Prep Time: 10 minutes
- Cook Time: 5 minutes
- Total Time: 15 minutes
- Yield: 8 servings 1x
- Category: Snack
- Cuisine: American
Ingredients
- 6 cups Rice Chex or Crispix cereal (about 160g)
- 1 1/2 cups white chocolate chips or melting wafers (about 255g)
- 4 oz cream cheese, softened (about 113g)
- 2 tbsp unsalted butter (about 28g)
- 1 1/2 cups powdered sugar (about 180g), plus more for dusting
- 1 cup freeze-dried cherries (about 30g)
- 1 tsp vanilla extract (about 5ml)
- 1/2 cup graham cracker crumbs (about 50g)
- Pinch of salt
Instructions
- Measure 6 cups Rice Chex or Crispix into a large mixing bowl and set aside.
- In a microwave-safe bowl, combine white chocolate chips, softened cream cheese, and unsalted butter. Microwave in 30-second bursts, stirring after each, until smooth (about 1 1/2–2 minutes). If mixture thickens, add 1–2 tsp milk until pourable.
- Stir in vanilla extract and a pinch of salt. Add 2 tbsp graham cracker crumbs if desired; reserve the rest for topping.
- Place freeze-dried cherries in a zip-top bag and lightly crush with a rolling pin or hands, leaving some powder and some larger bits. Set aside.
- Pour the warm cheesecake mixture over the cereal. Gently fold with a spatula until every piece is coated.
- Add the crushed freeze-dried cherries and stir gently. Reserve a few bits for sprinkling on top if desired.
- Transfer the coated cereal to a large zip-top bag or lidded container. Add powdered sugar, seal, and shake until every piece is coated and separated. Break up any clumps with your hands.
- Spread the puppy chow on a baking sheet lined with parchment. Sprinkle with remaining graham cracker crumbs and reserved cherry pieces. Let set for 10–15 minutes until dry to the touch.
- Once cool, transfer to a serving bowl or airtight container. Store at room temperature for up to 5 days.
Notes
For a gluten-free version, use gluten-free cereal and graham cracker crumbs. Work quickly when coating the cereal, as the mixture sets fast. If the coating seizes, add a splash of milk and stir until smooth. Let the puppy chow cool completely before storing to prevent sogginess. Optional add-ins include mini chocolate chips, chopped nuts, or a drizzle of dark chocolate.
Nutrition
- Serving Size: About 1/2 cup
- Calories: 210
- Sugar: 20
- Sodium: 90
- Fat: 5
- Saturated Fat: 3
- Carbohydrates: 38
- Fiber: 1
- Protein: 2
Keywords: puppy chow, muddy buddies, cherry cheesecake, no-bake snack, party snack, easy dessert, sweet snack, gluten-free option, kid-friendly, white chocolate, freeze-dried cherries


