
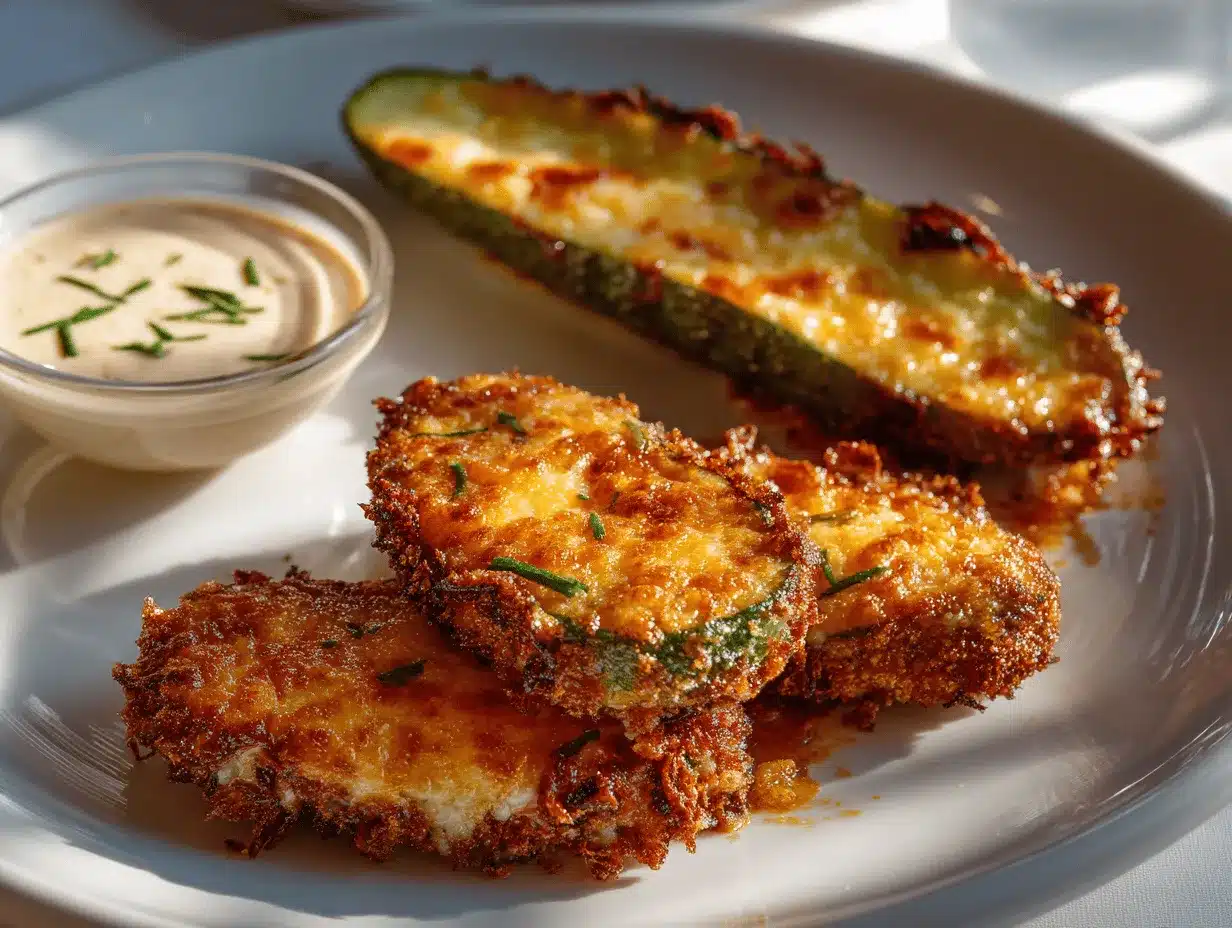
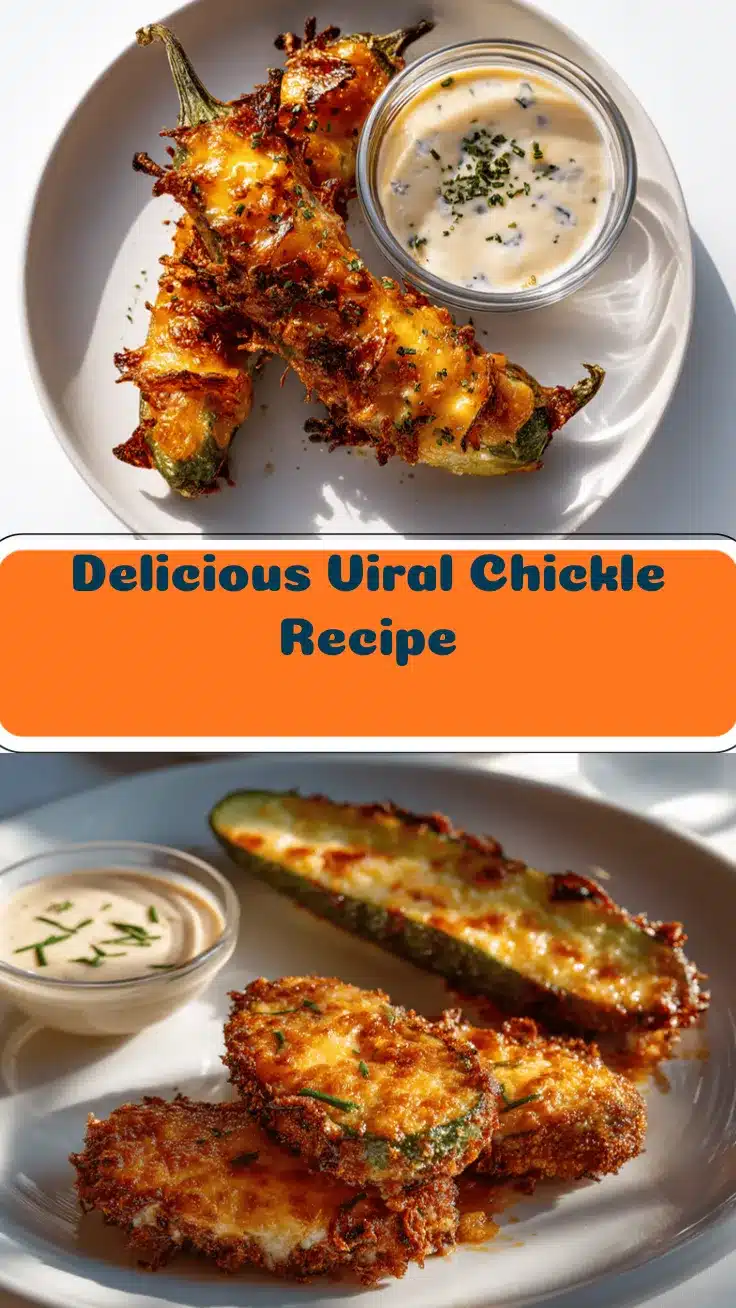
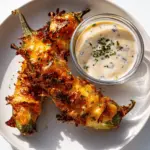
The sizzle of cheese hitting a hot skillet, the tangy pop of a pickle, and that golden, crispy bite—if you haven’t tried the viral chickle recipe yet, you’re seriously missing out. I remember the first time I stumbled across this crunchy cheese-wrapped pickles snack on my feed. I was skeptical (pickles and cheese, really?), but after one bite, I was hooked. This chickle recipe is ridiculously easy, a little quirky, and honestly, it’s the kind of snack that makes you do a happy dance in your kitchen.
Let’s face it: snacks have got to be quick, crave-worthy, and—if you’re like me—fun to make. The chickle recipe checks every box. It’s got that perfect salty crunch from the cheese, the juicy snap of a dill pickle, and it takes less than ten minutes from start to finish. I’ve made this for after-school snacks, girls’ night in, and even as a midnight treat (no regrets). If you love pickles, cheese, or just need to shake up your snack game, you’re going to fall hard for this chickle recipe. And yes, I’ve tweaked and tested this so many times, you can trust it’s foolproof!
What I love most is how this trend blew up for good reason—it’s affordable, uses just two main ingredients, and packs such a punch of flavor. It’s perfect for low-carb eaters, gluten-free snackers, and honestly, anyone who likes bold flavor with a satisfying crunch. Whether you’re making it for yourself, sharing with friends, or showing off on Pinterest, this crunchy cheese-wrapped pickles recipe is about to become your new obsession.
Why You’ll Love This Chickle Recipe
After countless rounds of making chickles for family, friends, and, let’s be real, just myself, here’s exactly why this recipe is a total keeper. I’ve tested different cheeses, tried every pickle under the sun, and even experimented with stovetop versus air fryer. Here’s the breakdown of why this crunchy cheese-wrapped pickles snack is always a hit:
- Quick & Easy: Seriously, you’ll have these done in under 10 minutes. Perfect when you’re hungry right now or want to impress guests fast.
- Minimal Ingredients: Cheese and pickles—plus maybe a sprinkle of seasonings. That’s it. No need for a 20-item shopping list.
- Low-Carb & Gluten-Free: Great for anyone watching carbs or avoiding gluten. Snack without the worry.
- Perfect for Parties: These are crowd-pleasers! Kids, teens, grown-ups—everyone loves the cheesy crunch and tangy center.
- Customizable: Try different cheeses, spicy or garlic pickles, or even add hot sauce for a totally new flavor each time.
- Surprisingly Addictive: The first time I made chickles, my husband ate the whole batch before I could snap a photo. True story!
- Mess-Free: No deep frying, no breading, and barely any cleanup—just a single skillet or air fryer basket.
- Fun & Trendy: This recipe is everywhere for a reason. It’s playful, a little nostalgic, and feels like a snack hack you want to share with everyone you know.
This isn’t just another cheese snack. The trick is letting that cheese crisp up perfectly—no soggy bites here. I love how the pickles stay juicy inside, so every bite is that magical mix of crunchy, salty, creamy, and tangy. It’s the kind of snack that makes you close your eyes and just enjoy the moment.
Plus, you can make a whole batch in minutes—trust me, they’ll disappear even faster. If you’re looking for a snack that’s as fun to make as it is to eat, this viral chickle recipe is absolutely for you.
What Ingredients You Will Need
Grab your shopping bag or just peek in your fridge—you probably have everything you need for this chickle recipe already! I love how simple and flexible this ingredient list is. Here’s what goes into making the perfect crunchy cheese-wrapped pickles:
- Sliced Dill Pickles (whole or sandwich stackers work best; spears can work too, but I love the thin, wide slices for even wrapping)
- Shredded Cheese (cheddar is classic, but mozzarella, Colby Jack, or pepper jack add their own twist—use what you love or mix two for extra flavor!)
- Cooking Spray or Oil (just a tiny bit to prevent sticking—optional if you have a great nonstick skillet)
- Optional Seasonings:
- Garlic powder (for extra savory flavor)
- Crushed red pepper flakes (if you like a little kick)
- Everything bagel seasoning (for crunch and pop)
- Black pepper or smoked paprika (personal favorite—adds a subtle warmth)
- Dipping Sauces (Optional):
- Ranch dressing
- Spicy mayo
- Honey mustard
- Buffalo sauce
Ingredient tips: I’m a die-hard for classic Claussen or Grillo’s pickles, but any dill pickle will work. If you’re dairy-free, use your favorite plant-based shredded cheese—it crisps up nicely! For extra crunch, use cheese that’s not too finely shredded (the pre-shredded bags work, but hand-shredded melts beautifully).
If you’re feeling adventurous, swap in bread and butter pickles for a sweeter vibe or spicy pickles for a real kick. And don’t skip patting the pickles dry—too much moisture makes the cheese soggy (learned that the hard way!).
For those watching sodium, look for lower-salt pickles or cheese, and for keto folks, this recipe is your new BFF. It’s endlessly adaptable, so use what you have and make it your own.
Equipment Needed
You don’t need any fancy gadgets for this chickle recipe—just a few kitchen basics. Here’s what I recommend:
- Nonstick Skillet (8-inch or 10-inch works great; a well-seasoned cast iron pan is perfect too, just be sure to use a little oil)
- Spatula (thin and flexible helps lift the crispy cheese easily; I prefer silicone for gentle handling)
- Paper Towels (for patting pickles dry—trust me, this step is key for crunch)
- Cooking Spray or Brush (just a touch of oil to prevent sticking, especially if your skillet isn’t super nonstick)
- Plate or Cooling Rack (to set the finished chickles and keep them crispy)
- Optional: Air Fryer (if you want to try a hands-off, mess-free method—works like a charm!)
I’ve made chickles in every pan I own. My old nonstick is still the winner, but the air fryer is a close second for batch cooking. Don’t skip cleaning your skillet right after—melted cheese can be stubborn once it sets. If you’re on a budget, even a basic frying pan will do the job—just use a bit more oil and work in smaller batches.
How to Make the Viral Chickle Recipe – Step by Step
-
Prep the Pickles:
- Remove 4-6 pickle slices (whole, sandwich stackers, or spears) from the jar.
- Pat each one dry with paper towels to remove excess moisture.
- Tip: Really press! Damp pickles lead to soggy cheese, and nobody wants that.
-
Heat the Skillet:
- Place a nonstick skillet over medium heat. Allow it to get hot—about 1-2 minutes.
- Spray lightly with cooking spray or brush with a tiny bit of oil.
-
Add Cheese:
- Sprinkle 1/4 cup (about 28g) of shredded cheese in a thin, even layer, roughly the shape of your pickle slice.
- Let it sit undisturbed for 1-2 minutes. It will start bubbling and melting—this is good!
-
Top with Pickle:
- Once the cheese has melted but not yet browned, place a pickle slice on top, pressing gently.
- Let it cook for 1-2 more minutes, until the cheese edges turn golden and crispy.
- Note: Don’t rush this step—the cheese needs to firm up so it wraps around the pickle without falling apart.
-
Wrap and Flip:
- Use a spatula to carefully lift the cheese edge and fold it up and over the pickle (like a cheese blanket!).
- Flip and cook for 30 seconds more if you want extra crunch on both sides.
- If the cheese sticks, let it cool for 10-15 seconds and try again—it will release easier as it crisps.
-
Season and Serve:
- Transfer to a plate or wire rack. Sprinkle with your favorite seasoning while still hot (garlic powder, red pepper flakes, etc.).
- Let cool for 1-2 minutes—the cheese will get even crispier!
-
Repeat:
- Repeat the process for as many chickles as you want. The pan may get a bit greasy—wipe with a dry paper towel between batches if needed.
-
Serve:
- Serve warm with your favorite dipping sauces. Eat immediately for max crunch.
Prep note: If using an air fryer, lay cheese on parchment, top with pickle, and cook at 400°F (200°C) for 4-5 minutes until bubbly and crisp.
Troubleshooting: Cheese not crisping? Turn up the heat slightly. Cheese burning? Lower the heat. Cheese sticking? Wait a few more seconds before flipping. Pickles slipping out? Use less cheese or thicker pickle slices.
My personal tip: Don’t crowd the pan—give each chickle space to crisp up. And if you’re making a bunch, keep finished ones warm in the oven at 200°F (95°C) on a rack.
Cooking Tips & Techniques for Perfect Chickles
After making chickles more times than I can count (and burning a few, not gonna lie), I’ve picked up a few tricks you’ll want to know. Here’s how to nail this viral chickle recipe every single time:
- Dry Those Pickles: Moisture is your enemy here. If you skip patting them dry, the cheese turns chewy instead of crispy.
- Watch Your Heat: Medium heat is the sweet spot. Too low, and the cheese melts but doesn’t crisp. Too high, and it burns before wrapping. Adjust as needed based on your pan.
- Cheese Choices Matter: Pre-shredded cheese is easy, but block cheese you shred yourself melts smoother and crisps up beautifully. If you want super crunchy edges, use a blend (cheddar for flavor, mozzarella for stretch).
- Don’t Rush the Flip: The cheese needs to set and brown before flipping or folding. If it sticks, let it go another 20 seconds. The golden crust will release naturally.
- Use the Right Tools: A thin silicone spatula slides under the chickle without tearing. Metal spatulas work, but can scratch nonstick pans.
- Batch Cooking: If you’re making a party platter, keep finished chickles warm on a wire rack in the oven. Don’t stack them—they’ll steam and lose crunch.
- Get Creative With Seasonings: I love a sprinkle of everything bagel seasoning or a pinch of smoked paprika. Don’t be afraid to experiment!
My first few tries were a little sad—cheese stuck, pickles slipped out, and things got messy. But once I started using thicker pickles and letting the cheese brown longer, every batch came out crave-worthy. Multitasking tip: While the first chickle cools, start the next one. By the time you’re done, you’ll have a crunchy pile ready to go!
Variations & Adaptations
The beauty of the chickle recipe is how easy it is to switch things up. Here are my favorite ways to customize your crunchy cheese-wrapped pickles:
- Spicy Chickles: Use pepper jack cheese and spicy dill pickles. Add a dash of hot sauce before wrapping for extra heat.
- Bread & Butter Chickles: Swap classic dill pickles for bread and butter pickles for a sweet-and-savory twist. Try with Colby Jack or Swiss cheese.
- Vegan or Dairy-Free: Use your favorite plant-based cheese shreds and vegan pickles (watch for artificial dyes). The results are surprisingly similar!
- Air Fryer Chickles: Lay down cheese and pickle on parchment in your air fryer basket. Cook at 400°F (200°C) for 4-5 minutes for a hands-off method.
- Low-Sodium or Keto: Choose lower-sodium pickles and cheese, or try homemade pickles to control salt. For keto, stick with full-fat cheese and classic dills.
- Allergen-Friendly: If nut or soy allergies are a concern, check cheese labels carefully or use allergy-safe brands like Violife or Daiya.
- My Personal Favorite: I sometimes add a slice of turkey or ham before wrapping for a “chickle roll-up”—protein-packed and so satisfying!
Don’t be afraid to play around—try mini gherkins for bite-size snacks, or wrap pickle spears for a bigger crunch. The chickle recipe is a canvas for your cravings!
Serving & Storage Suggestions
Chickles are best enjoyed hot and fresh—those golden cheese edges are to die for right out of the skillet. Serve them as a snack, easy appetizer, or even as a low-carb side for burgers and BBQs.
Serving Tips: Pile chickles on a platter, sprinkle with fresh herbs or extra seasoning, and serve with little bowls of ranch, spicy mayo, or your favorite dip. For a Pinterest-ready presentation, line them up on a wooden board with toothpicks and colorful sauce swirls.
Storage: Leftovers (if you have any) can be refrigerated in an airtight container for up to 2 days. To reheat, pop them back in a skillet or air fryer for 2-3 minutes until crisp. The microwave softens them, so avoid it if you love crunch.
Honestly, chickles rarely last long enough to store. But if you need to make ahead, cook, cool, and store with parchment between layers. Flavors intensify after a day, making them even more addictive—if that’s even possible!
Nutritional Information & Benefits
Each chickle (made with 1/4 cup cheese and 1 pickle slice) is around 120-150 calories, with 8g protein, 11g fat, 1-2g carbs (depending on cheese and pickles). It’s naturally gluten-free and keto-friendly.
Health Highlights: Cheese packs calcium and protein, while pickles are low-cal and add gut-friendly probiotics (if you use fermented dills). No breading means no extra carbs or gluten. Watch the sodium if you’re sensitive, as both ingredients can be salty.
For my wellness journey, I love that chickles satisfy salty, crunchy cravings without chips or crackers, making them a smart snack for balanced eating. Always check labels if you have allergies or dietary restrictions—some cheeses contain hidden starches or additives.
Conclusion
If you’re looking for a quick, crunchy, and seriously addictive snack, the viral chickle recipe delivers in every single way. It’s easy, affordable, and endlessly customizable—perfect for busy days, parties, or late-night munchies. I make these whenever I need a fast, fun bite, and they never disappoint.
Don’t be shy—switch up the cheese, try spicy pickles, or add your own twist. That’s part of the fun! I hope this crunchy cheese-wrapped pickles recipe brings as much joy to your kitchen as it has to mine. If you try it, let me know in the comments, pin it, or share your wildest chickle variation. Happy snacking, friends!
FAQs About Chickle Recipe – Crunchy Cheese-Wrapped Pickles
What is a chickle?
A chickle is a viral snack made by wrapping a pickle slice in crispy, fried cheese. It’s crunchy, tangy, salty, and totally addictive!
Which cheese works best for making chickles?
Cheddar is the classic choice, but any melting cheese (mozzarella, Colby Jack, pepper jack) will work. Block cheese you shred yourself melts best, but pre-shredded is super convenient.
Can I make chickles in the air fryer?
Yes! Lay cheese and a pickle slice on parchment in your air fryer basket and cook at 400°F (200°C) for 4-5 minutes until bubbly and crisp.
How do I keep chickles crispy after cooking?
Let them cool on a wire rack and avoid stacking. If making ahead, reheat in a skillet or air fryer for a few minutes to restore crispiness.
Are chickles keto and gluten-free?
Absolutely! They’re naturally low-carb and gluten-free, with no breading or flour. Just check your ingredients if you have food sensitivities.
Pin This Recipe!
Chickle Recipe Easy Viral Snack – Crunchy Cheese-Wrapped Pickles Tutorial
This viral chickle recipe features tangy dill pickles wrapped in crispy, golden cheese for the ultimate crunchy, salty, and addictive snack. Ready in under 10 minutes, it’s low-carb, gluten-free, and endlessly customizable for any craving.
- Prep Time: 5 minutes
- Cook Time: 4 minutes
- Total Time: 9 minutes
- Yield: 4-6 chickles (serves 2-3 as a snack) 1x
- Category: Snack
- Cuisine: American
Ingredients
- 4–6 sliced dill pickles (whole, sandwich stackers, or spears)
- 1 to 1.5 cups shredded cheese (cheddar, mozzarella, Colby Jack, or pepper jack)
- Cooking spray or oil (optional, for skillet)
- Optional seasonings: garlic powder, crushed red pepper flakes, everything bagel seasoning, black pepper, smoked paprika
- Optional dipping sauces: ranch dressing, spicy mayo, honey mustard, buffalo sauce
Instructions
- Remove 4-6 pickle slices from the jar and pat each one dry with paper towels to remove excess moisture.
- Place a nonstick skillet over medium heat and allow it to get hot for about 1-2 minutes. Spray lightly with cooking spray or brush with a tiny bit of oil if needed.
- Sprinkle 1/4 cup of shredded cheese in a thin, even layer, roughly the shape of your pickle slice.
- Let the cheese sit undisturbed for 1-2 minutes until it starts bubbling and melting.
- Once the cheese has melted but not yet browned, place a pickle slice on top, pressing gently. Let it cook for 1-2 more minutes, until the cheese edges turn golden and crispy.
- Use a spatula to carefully lift the cheese edge and fold it up and over the pickle. Flip and cook for 30 seconds more if you want extra crunch on both sides.
- Transfer to a plate or wire rack. Sprinkle with your favorite seasoning while still hot. Let cool for 1-2 minutes to crisp up.
- Repeat the process for as many chickles as you want, wiping the pan between batches if needed.
- Serve warm with your favorite dipping sauces. Eat immediately for maximum crunch.
- Air fryer method: Lay cheese on parchment, top with pickle, and cook at 400°F (200°C) for 4-5 minutes until bubbly and crisp.
Notes
Pat pickles very dry for maximum crunch. Use block cheese you shred yourself for best melting and crisping. Don’t crowd the pan—give each chickle space. For batch cooking, keep finished chickles warm on a rack in a 200°F oven. Experiment with different cheeses, pickles, and seasonings for endless variations. Chickles are best served hot and fresh.
Nutrition
- Serving Size: 1 chickle (1/4 cup cheese + 1 pickle slice)
- Calories: 135
- Sugar: 1
- Sodium: 600
- Fat: 11
- Saturated Fat: 6
- Carbohydrates: 2
- Protein: 8
Keywords: chickle recipe, cheese wrapped pickles, viral snack, low carb snack, gluten free snack, keto snack, crunchy cheese pickles, easy appetizer, air fryer chickle, cheese pickle roll up


