
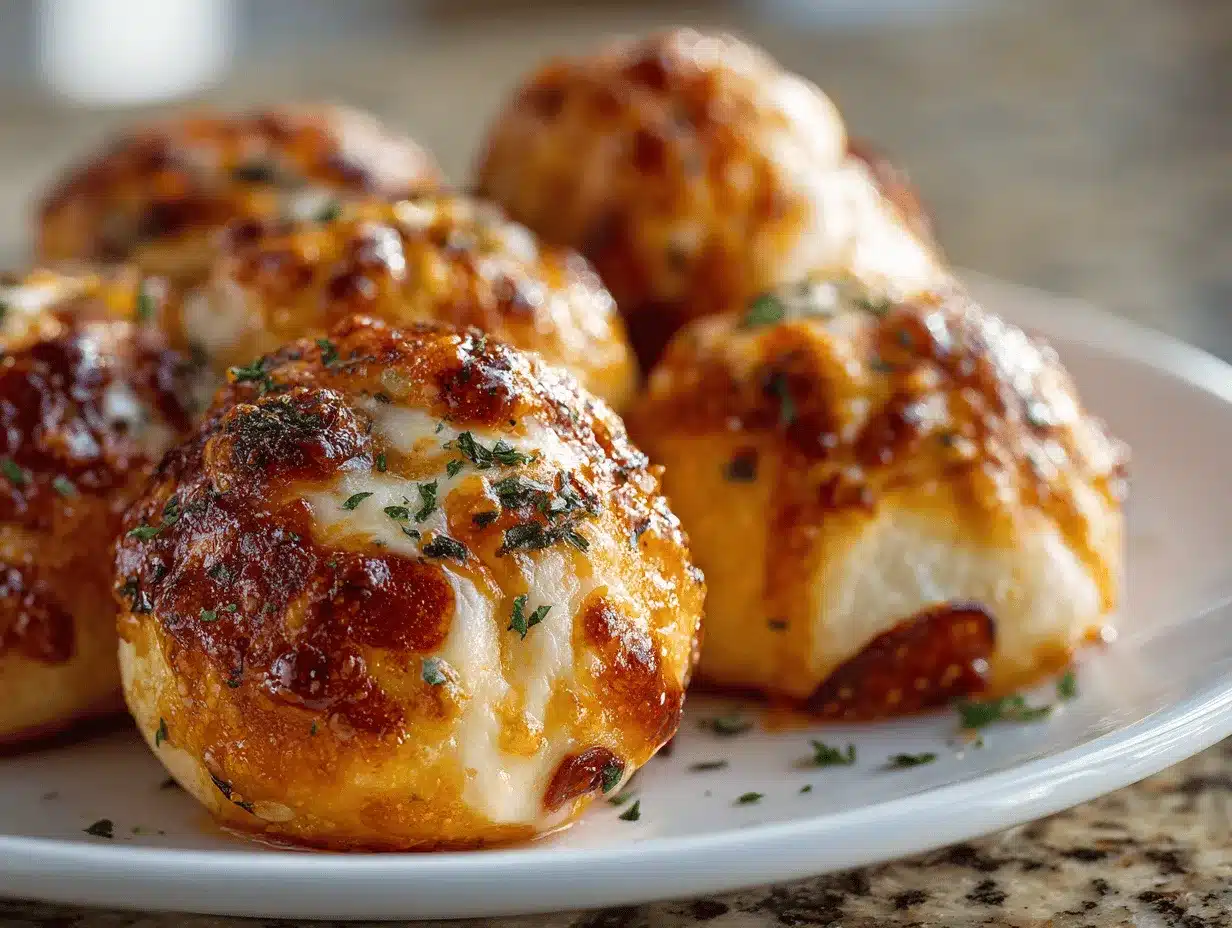
The first time I bit into a loaded pepperoni pizza bomb, I swear I heard angels sing—or maybe that was just the sound of gooey mozzarella stretching as I pulled it apart. Imagine a warm, golden crust brushed with garlicky butter, bursting with melty cheese, zesty pepperoni, and all those classic pizza flavors you crave. Honestly, these aren’t just snacks—they’re a whole experience. I started making pepperoni pizza bombs during a Friday night “make-your-own pizza” party with my family. The regular pies were fun, but these little bundles of joy disappeared in seconds. There’s something extra satisfying about popping one in your mouth and catching that explosion of flavor.
Over the years, I’ve tweaked and tested this loaded pepperoni pizza bombs recipe more times than I can count. It’s now my go-to for game days, kid-friendly dinners, and those nights when you want pizza but without the wait or mess. The garlic butter crust? Oh, it’s a game-changer—think garlic knots meet pizza rolls, but way better. If you love pizza (and let’s face it, who doesn’t?), these pepperoni pizza bombs are about to become your new obsession. They’re quick, customizable, and perfect for sharing—or not. Whether you’re feeding a hungry crowd or looking for a fun snack that packs serious flavor, this recipe checks all the boxes. Trust me, you’ll be hooked after the first batch. As someone who’s made these for everything from slumber parties to work potlucks, I can promise they’re always the first thing to go!
Why You’ll Love This Loaded Pepperoni Pizza Bombs Recipe
- Quick & Easy: Ready in under 35 minutes start to finish—ideal for last-minute cravings or surprise guests.
- Simple Ingredients: Nothing fancy here! You probably already have most of what you need in your fridge or pantry.
- Perfect for Any Occasion: Whether it’s movie night, a potluck, a picnic, or just a Wednesday, these pizza bombs fit right in.
- Crowd-Pleaser: Kids, teens, adults—no one can resist that cheesy, pepperoni-packed center and buttery crust.
- Unbelievably Delicious: The garlic butter crust takes things to a whole new level of comfort food bliss.
This isn’t just another pizza snack recipe. After dozens of rounds testing different doughs, cheese combos, and even sauce placement, I landed on a method that gives you a perfectly sealed, flavor-packed bite every single time. The secret? A generous layer of mozzarella, just the right amount of pepperoni, and that finishing brush of garlic butter to crisp up the edges perfectly. I even use a touch of Italian seasoning (and sometimes a pinch of red pepper flakes) to really amp up the “pizzeria vibe.”
You know that feeling when you take a bite and just have to close your eyes for a second? That’s what these loaded pepperoni pizza bombs deliver. They’re comforting, nostalgic, and just the right amount of indulgent. My family always asks for seconds, and honestly, I’ve never had leftovers. These aren’t just snacks—they’re the highlight of the night. If you want a fun, easy recipe that’ll make you look like a kitchen superstar (without the stress), you’ve found it!
What Ingredients You Will Need
This recipe uses a handful of everyday ingredients to create loaded pepperoni pizza bombs that are cheesy, saucy, and full of classic pizza flavor. Most are probably hanging out in your refrigerator or pantry, and there’s room to swap or adjust based on what you have.
- Refrigerated pizza dough (1 can, about 13.8 oz/390g): Store-bought dough is super convenient, but you can use homemade if you prefer.
- Mini pepperoni slices (1 cup/80g): I love the mini version since they distribute better, but regular pepperoni cut into quarters works too.
- Mozzarella cheese (1 ½ cups/180g, shredded): The gooier the better! Pre-shredded is fine, but freshly shredded melts smoother.
- Pizza sauce or marinara (½ cup/120ml): Use your favorite jarred brand, or homemade if you have some on hand. Thick sauce works best to avoid leaks.
- Parmesan cheese (¼ cup/25g, grated): For a salty, nutty kick—sprinkle inside or on top after baking.
- Butter (4 tbsp/56g, unsalted): For that crave-worthy garlic butter crust.
- Garlic (2 cloves, minced or 1 tsp jarred): Fresh is best, but jarred works in a pinch.
- Italian seasoning (1 tsp): Adds that classic herby note. Dried oregano or basil also work.
- Red pepper flakes (¼ tsp, optional): For a little heat, if you like things spicy.
- Egg (1, beaten): Helps seal the edges and gives the bombs a golden finish.
- All-purpose flour (for dusting): Keeps the dough from sticking to your work surface.
Ingredient Tips and Substitutions:
- For a gluten-free option, use your favorite gluten-free pizza dough (I’ve tried Bob’s Red Mill—works great!)
- Swap mozzarella for a blend of provolone, cheddar, or even Monterey Jack for something different.
- Dairy-free? Use vegan cheese shreds and brush the tops with olive oil instead of butter.
- Turkey pepperoni or veggie pepperoni are awesome for lighter fare.
- If you have fresh basil or parsley, sprinkle some on top for color after baking!
Honestly, the loaded pepperoni pizza bombs are super forgiving. I’ve even tossed in chopped olives or sautéed mushrooms when I had them around. Just don’t overload the filling—you want these to stay sealed and easy to eat!
Equipment Needed
- Baking sheet: A standard rimmed sheet works great. Line with parchment for easy clean-up.
- Rolling pin: To flatten the pizza dough. In a pinch, a wine bottle or even your hands works too.
- Pastry brush: For that glorious garlic butter. If you don’t have one, just use a spoon or paper towel.
- Small bowl: For mixing the garlic butter and beating the egg.
- Sharp knife or pizza cutter: Makes dividing the dough a breeze.
- Measuring cups and spoons: Precision helps, but don’t stress if you eyeball the cheese a little.
- Clean surface for rolling: Dust with a little flour to keep things from sticking.
If you’re short on specialty tools, don’t worry—I’ve made these loaded pepperoni pizza bombs with just my hands, a butter knife, and a coffee mug as a rolling pin. For easy clean-up, parchment paper is your friend. And if you’re using nonstick bakeware, a light spray of oil does wonders. I always rinse my pastry brush right after using it, especially with butter, or it gets all gummy—just a little tip from too many forgotten brushes in the sink!
Preparation Method
-
Preheat and Prep:
- Preheat your oven to 400°F (200°C). Line a baking sheet with parchment paper for easier clean-up.
-
Prepare the Garlic Butter:
- In a small bowl, melt 4 tbsp (56g) butter in the microwave (about 30 seconds). Stir in 2 minced garlic cloves and 1 tsp Italian seasoning. Set aside—it’ll smell incredible already!
-
Roll Out the Dough:
- Lightly dust your work surface with flour. Open your can of pizza dough (13.8 oz/390g) and roll or pat it out into a rectangle, about 14×10 inches (35×25 cm). Try to keep it even, but don’t stress about perfection.
-
Divide and Fill:
- Use a sharp knife or pizza cutter to cut the dough into 12 squares (about 2.5 inches/6 cm each). Place a spoonful of pizza sauce (about 2 tsp/10ml), a pinch of mozzarella (2 tbsp/15g), and 3-4 mini pepperonis in the center of each square. If you like, sprinkle a bit of Parmesan and a pinch of red pepper flakes too.
- Don’t overfill—otherwise, the bombs might burst during baking.
-
Seal the Bombs:
- Fold each dough square up and over the filling, pinching the edges together to seal. Roll gently between your hands to form a ball, then place seam-side down on the prepared baking sheet. (If the dough sticks, a dab of flour helps.)
-
Egg Wash:
- Beat 1 egg in a small bowl. Brush the tops of the dough balls with the beaten egg for a glossy, golden finish.
-
Bake:
- Place the tray in the oven and bake for 15-18 minutes, or until the pizza bombs are golden brown and the cheese is melty. If your oven runs hot, check at 14 minutes.
- You’ll know they’re done when they smell like a pizza shop and the tops are a deep golden color.
-
Garlic Butter Finish:
- Remove the pizza bombs from the oven. While they’re still hot, brush generously with the garlic butter mixture. Sprinkle with extra Parmesan and a pinch of Italian seasoning if you like.
- Let them cool for 5 minutes—they’ll be lava-hot inside!
-
Serve and Enjoy:
- Serve warm, with extra pizza sauce or ranch for dipping. Watch them disappear!
Personal Tips: If the dough feels sticky, use a little extra flour. If any cheese tries to ooze out, just pinch the dough closed again. And if you want extra crispy bottoms, bake on a preheated pizza stone. These loaded pepperoni pizza bombs are all about fun, so don’t stress if they’re not perfectly uniform—no one will notice once they bite in!
Cooking Tips & Techniques
- Don’t Overfill: I know it’s tempting to go wild with the cheese, but too much filling means leaks. Stick to about 2 tbsp of cheese and 2-3 tsp sauce per bomb.
- Seal Well: Pinch those seams tight! If the dough won’t stick, a dab of water helps. I’ve had a few “explosions” when I rushed this step.
- Egg Wash for Color: The egg wash isn’t just for looks—it helps seal the dough and makes the tops beautifully golden. If you skip it, they’ll still taste good, just a bit paler.
- Even Baking: Arrange the bombs with space between them so they crisp up on all sides. Crowding the pan makes them steam instead of bake.
- Garlic Butter Timing: Brush the garlic butter immediately after baking. This way, it melts into the crust and gives maximum flavor.
- Batch Baking: If you double the recipe, bake in two batches or use two trays. I stacked them once and ended up with a doughy mess on the bottom tray!
- Make Ahead: You can assemble the bombs, cover, and refrigerate for up to 8 hours before baking. Great for parties!
- Multitasking: While the bombs bake, set up your dipping sauces or prep a simple salad. It’s a great way to make the meal feel more special.
The biggest lesson I learned? Oven times really do vary. The first time I made these, I left them a bit too long and the bottoms got too dark. Now, I always check at the earliest time. And don’t worry if some cheese escapes—a little crispy cheese is never a bad thing in my book!
Variations & Adaptations
- Veggie Delight: Swap the pepperoni for sautéed mushrooms, bell peppers, or spinach. Make sure veggies are dry to prevent soggy dough.
- BBQ Chicken Bombs: Replace pizza sauce with BBQ sauce, add shredded rotisserie chicken, red onion, and cheddar cheese for a smoky twist.
- Low-Carb/Keto: Use fathead dough (almond flour and mozzarella-based) instead of regular pizza dough and fill with sugar-free sauce and turkey pepperoni.
- Allergen-Friendly: For dairy-free, use vegan cheese and plant-based pepperoni. For gluten-free, try a certified gluten-free dough like Udi’s or make your own.
- Breakfast Bombs: Fill with scrambled eggs, cooked bacon, and cheddar. Serve with salsa for brunch!
- Spicy Lovers: Add jalapeños or hot honey drizzle after baking for a fiery kick.
One of my favorite personal twists? Hawaiian-style: diced ham and pineapple with mozzarella and a sprinkle of red pepper flakes. It’s a family favorite and always gets a “wow” when people bite in. The possibilities are endless—just keep the filling amount reasonable so the bombs seal up nicely.
Serving & Storage Suggestions
Serve these loaded pepperoni pizza bombs hot and fresh from the oven. I love piling them on a big platter, sprinkled with extra Parmesan and chopped parsley for a pop of color. They’re perfect for dipping—set out bowls of warm pizza sauce, ranch, or even garlic aioli for extra fun.
Pair with a crisp green salad, some roasted veggies, or just enjoy them all on their own. For drinks, soda, iced tea, or a cold beer all work great. If you’re feeling fancy, a sparkling lemonade is awesome too.
Storing leftovers (if you have any!) is easy. Let the pizza bombs cool, then store in an airtight container in the fridge for up to 3 days. To freeze, place cooled bombs on a tray to freeze individually, then transfer to a freezer bag for up to 2 months. Reheat in a 350°F (175°C) oven for about 8-10 minutes or until heated through—this keeps them crispy. Microwave works for speed, but the crust stays softer.
Honestly, the flavors develop even more overnight, so sneaking one for breakfast isn’t a bad idea—they’re surprisingly good chilled, too!
Nutritional Information & Benefits
Each loaded pepperoni pizza bomb (based on a batch of 12) is roughly:
- Calories: 160
- Protein: 6g
- Fat: 8g
- Carbs: 16g
These pizza bombs get a protein boost from mozzarella and pepperoni, and you can up the fiber by using whole wheat dough. If you’re watching sodium or fat, swap in turkey pepperoni and reduced-fat cheese.
Allergens to note: wheat, dairy, and egg are present, but easy to adapt for gluten- or dairy-free diets with subs mentioned above. As someone who tries to balance fun and nutrition, I love that these are portion-controlled and easy to fill with extra veggies for a little health boost.
Conclusion
If you’ve ever wished you could eat pizza in one, glorious bite, these loaded pepperoni pizza bombs are your answer. They’re quick, fun, and packed with flavor thanks to that garlic butter crust and gooey center. Whether you stick to the classic or go wild with your own fillings, you really can’t go wrong.
Try them for your next get-together, family dinner, or even as a meal prep snack. I’m always amazed at how something so simple can bring so much joy (and how people always ask for the recipe!). Give these a try, and don’t be afraid to make them your own—half the fun is experimenting!
If you love the recipe, leave a comment below, share your favorite variation, or tag me on social with your creations. Happy pizza-bomb-making—may your cheese always be melty and your crusts golden!
FAQs
Can I use homemade pizza dough for these pizza bombs?
Absolutely! Homemade dough works great—just roll it out to about the same thickness and follow the recipe. The flavor is even better, honestly.
How do I keep the pizza bombs from bursting open in the oven?
Don’t overfill, and make sure to pinch the seams tightly closed. A dab of water helps the dough stick if needed. Sealing well is key!
Can I make these loaded pepperoni pizza bombs ahead of time?
Yes! You can assemble the bombs, cover, and refrigerate them for up to 8 hours before baking. They’re perfect for prepping before a party.
What are some good dipping sauces for pizza bombs?
Warm pizza sauce, ranch dressing, garlic aioli, or even a spicy marinara are all crowd favorites. Sometimes I even serve them with honey mustard for fun.
How do I reheat leftover pizza bombs so they stay crispy?
Bake them in a 350°F (175°C) oven for 8-10 minutes. This keeps the crust crisp. Microwaving works in a pinch, but the texture is softer.
Pin This Recipe!
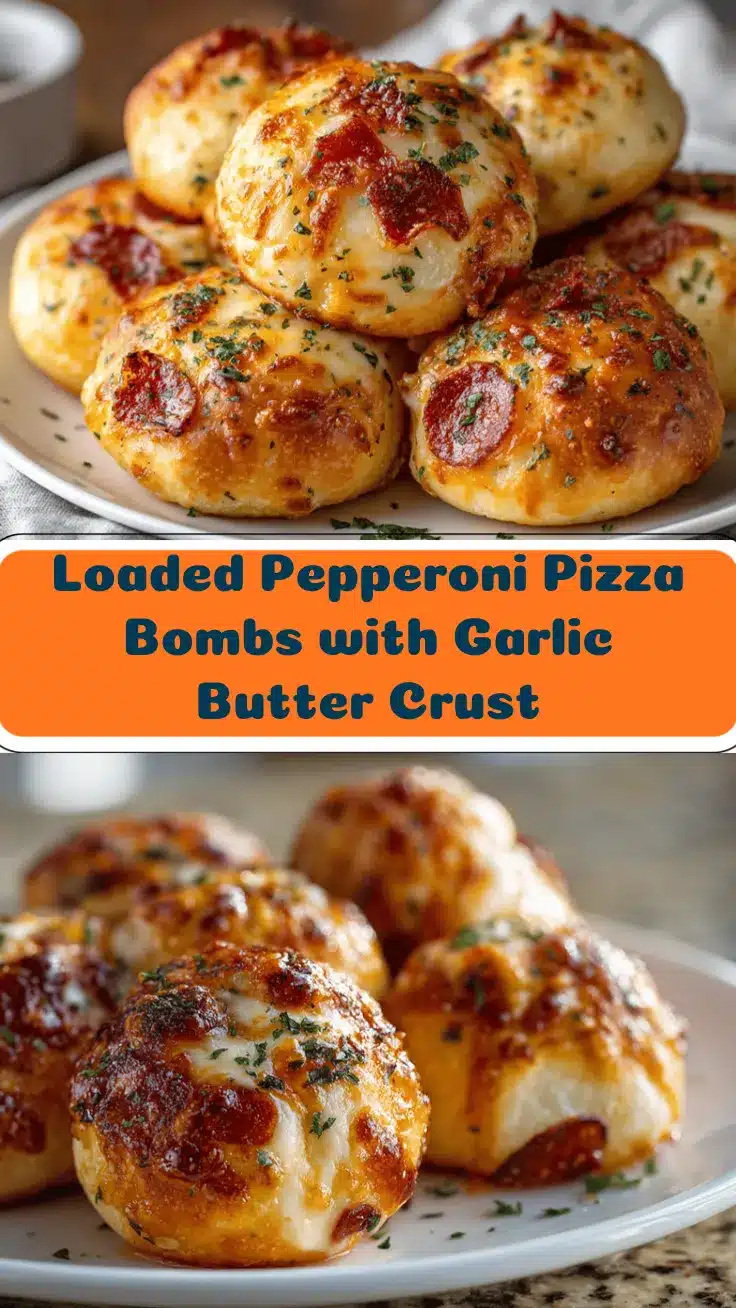
Loaded Pepperoni Pizza Bombs

These loaded pepperoni pizza bombs are bite-sized snacks featuring gooey mozzarella, zesty pepperoni, and a golden garlic butter crust. Quick to make and perfect for parties, game days, or family dinners, they deliver all the classic pizza flavors in a fun, poppable package.
- Prep Time: 15 minutes
- Cook Time: 18 minutes
- Total Time: 33 minutes
- Yield: 12 pizza bombs 1x
- Category: Appetizer
- Cuisine: American
Ingredients
- 1 can (13.8 oz) refrigerated pizza dough
- 1 cup mini pepperoni slices (or regular pepperoni cut into quarters)
- 1 1/2 cups shredded mozzarella cheese
- 1/2 cup pizza sauce or marinara
- 1/4 cup grated Parmesan cheese
- 4 tablespoons unsalted butter
- 2 cloves garlic, minced (or 1 teaspoon jarred garlic)
- 1 teaspoon Italian seasoning
- 1/4 teaspoon red pepper flakes (optional)
- 1 egg, beaten
- All-purpose flour, for dusting
Instructions
- Preheat your oven to 400°F (200°C). Line a baking sheet with parchment paper.
- In a small bowl, melt the butter in the microwave (about 30 seconds). Stir in minced garlic and Italian seasoning. Set aside.
- Lightly dust your work surface with flour. Open the pizza dough and roll or pat it out into a rectangle, about 14×10 inches.
- Cut the dough into 12 squares (about 2.5 inches each).
- Place about 2 teaspoons pizza sauce, 2 tablespoons mozzarella, and 3-4 mini pepperonis in the center of each square. Optionally, add a sprinkle of Parmesan and red pepper flakes.
- Fold each dough square up and over the filling, pinching the edges to seal. Roll gently into a ball and place seam-side down on the prepared baking sheet.
- Brush the tops with beaten egg.
- Bake for 15-18 minutes, or until golden brown and cheese is melty. Check at 14 minutes if your oven runs hot.
- Remove from oven and immediately brush with the garlic butter mixture. Sprinkle with extra Parmesan and Italian seasoning if desired.
- Let cool for 5 minutes before serving. Serve warm with extra pizza sauce or ranch for dipping.
Notes
Don’t overfill the bombs to prevent leaks. Pinch seams tightly to seal. For extra crispy bottoms, bake on a preheated pizza stone. You can assemble ahead and refrigerate up to 8 hours before baking. Variations include veggie, BBQ chicken, or breakfast fillings. For gluten-free, use GF pizza dough; for dairy-free, use vegan cheese and olive oil instead of butter.
Nutrition
- Serving Size: 1 pizza bomb
- Calories: 160
- Sugar: 2
- Sodium: 350
- Fat: 8
- Saturated Fat: 4
- Carbohydrates: 16
- Fiber: 1
- Protein: 6
Keywords: pizza bombs, pepperoni, garlic butter, appetizer, snack, party food, kid-friendly, easy recipe, mozzarella, pizza dough


