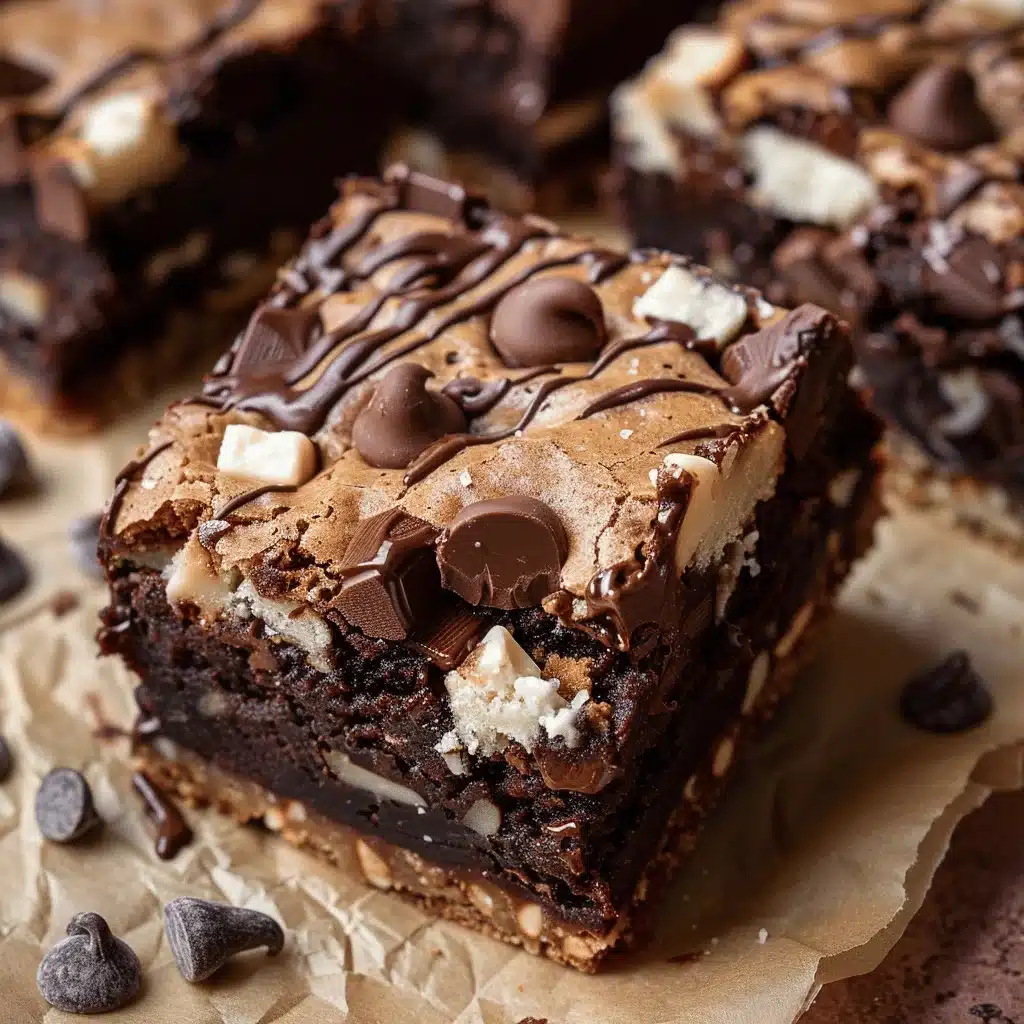
If you’ve ever wondered what happens when brownies, cookies, and chocolate have the ultimate mash-up party, you’re about to find out. These Ultimate Triple Chocolate Monster Cookie Brownie Bars are every chocolate lover’s dream come true. Imagine a fudgy brownie base layered with gooey, melty chocolate chunks and topped off with a chewy monster cookie dough packed with more chocolate chips. It’s indulgence on a whole new level, and honestly, it’s hard to stop at just one piece.
I first came across the idea for these bars during a late-night baking experiment. I couldn’t decide if I was in the mood for cookies or brownies, so I decided to make both. The result? A dessert so rich, so chocolatey, and so undeniably satisfying that it’s become a go-to for potlucks, family gatherings, and, let’s be honest, midnight snacks. If you’re ready to wow everyone (including yourself), grab your apron, and let’s bake!
Why You’ll Love This Recipe
- Triple Chocolate Perfection: Cocoa powder, semi-sweet chocolate chips, and milk chocolate chunks ensure every bite is a chocolate explosion.
- Two Desserts in One: Can’t choose between cookies and brownies? You don’t have to!
- Chewy, Fudgy Texture: The combination of the brownie base and cookie topping is the ultimate contrast in textures.
- Kid and Crowd Approved: These bars are always the first to disappear at parties, and picky eaters absolutely love them.
- Easy to Make: You don’t need fancy equipment or complicated steps—just a couple of mixing bowls and a baking pan.
- Customizable: Whether you want to add peanut butter, swap chocolate chips for white chocolate, or toss in some nuts, this recipe is super flexible.
What sets these bars apart from others is the balance between the rich fudge brownie base and the slightly crispy, chewy cookie layer. Plus, the triple chocolate combination gives them an irresistible depth of flavor. Trust me, they’re the kind of dessert that makes people ask for the recipe before they’ve even finished their first bite.
What Ingredients You Will Need
This recipe uses simple, pantry-friendly ingredients that come together to create pure magic. Here’s what you’ll need:
- For the Brownie Base:
- 1/2 cup (115g) unsalted butter, melted
- 1 cup (200g) granulated sugar
- 2 large eggs, room temperature
- 1 tsp vanilla extract
- 1/3 cup (30g) unsweetened cocoa powder
- 1/2 cup (65g) all-purpose flour
- 1/4 tsp salt
- 1/4 tsp baking powder
- For the Monster Cookie Layer:
- 1/2 cup (115g) unsalted butter, softened
- 1/4 cup (50g) granulated sugar
- 1/2 cup (100g) brown sugar, packed
- 1 large egg, room temperature
- 1 tsp vanilla extract
- 1 cup (130g) all-purpose flour
- 1/2 tsp baking soda
- 1/4 tsp salt
- 1/2 cup (90g) semi-sweet chocolate chips
- 1/2 cup (90g) milk chocolate chunks
Pro tip: Use high-quality cocoa powder for the brownie base to get that deep, rich chocolate flavor. For the cookie layer, feel free to mix and match your favorite chocolate varieties!
Equipment Needed
- A 9×9-inch (23×23 cm) baking pan—glass or metal works fine, but metal helps achieve those crisp edges.
- Mixing bowls (one for the brownie batter, one for the cookie dough).
- A whisk or hand mixer for combining ingredients.
- Spatula for spreading the layers evenly.
- Parchment paper to line the baking pan (makes cleanup so much easier).
No stand mixer? No problem! I’ve made these bars countless times with just a whisk and some elbow grease. Also, if you don’t have parchment paper, greasing the pan with butter or non-stick spray works just as well.
Preparation Method
- Preheat and Prep: Preheat your oven to 350°F (175°C). Line your baking pan with parchment paper, leaving some overhang for easy removal later.
- Make the Brownie Batter:
- In a mixing bowl, whisk together melted butter and granulated sugar until smooth.
- Add eggs and vanilla extract, whisking until the mixture is light and fluffy.
- Gently stir in the cocoa powder, flour, salt, and baking powder until just combined. Be careful not to overmix!
- Pour the brownie batter into the prepared pan and spread it out evenly.
- Prepare the Cookie Dough:
- In another bowl, cream softened butter, granulated sugar, and brown sugar until smooth and creamy.
- Add the egg and vanilla, mixing until fully incorporated.
- Mix in the flour, baking soda, and salt until a dough forms.
- Fold in the chocolate chips and chunks.
- Assemble the Bars: Drop spoonfuls of the cookie dough over the brownie layer. Gently spread the dough with a spatula, covering as much of the brownie batter as possible.
- Bake: Bake for 30-35 minutes, or until the cookie layer is golden brown and a toothpick inserted into the center comes out with a few moist crumbs.
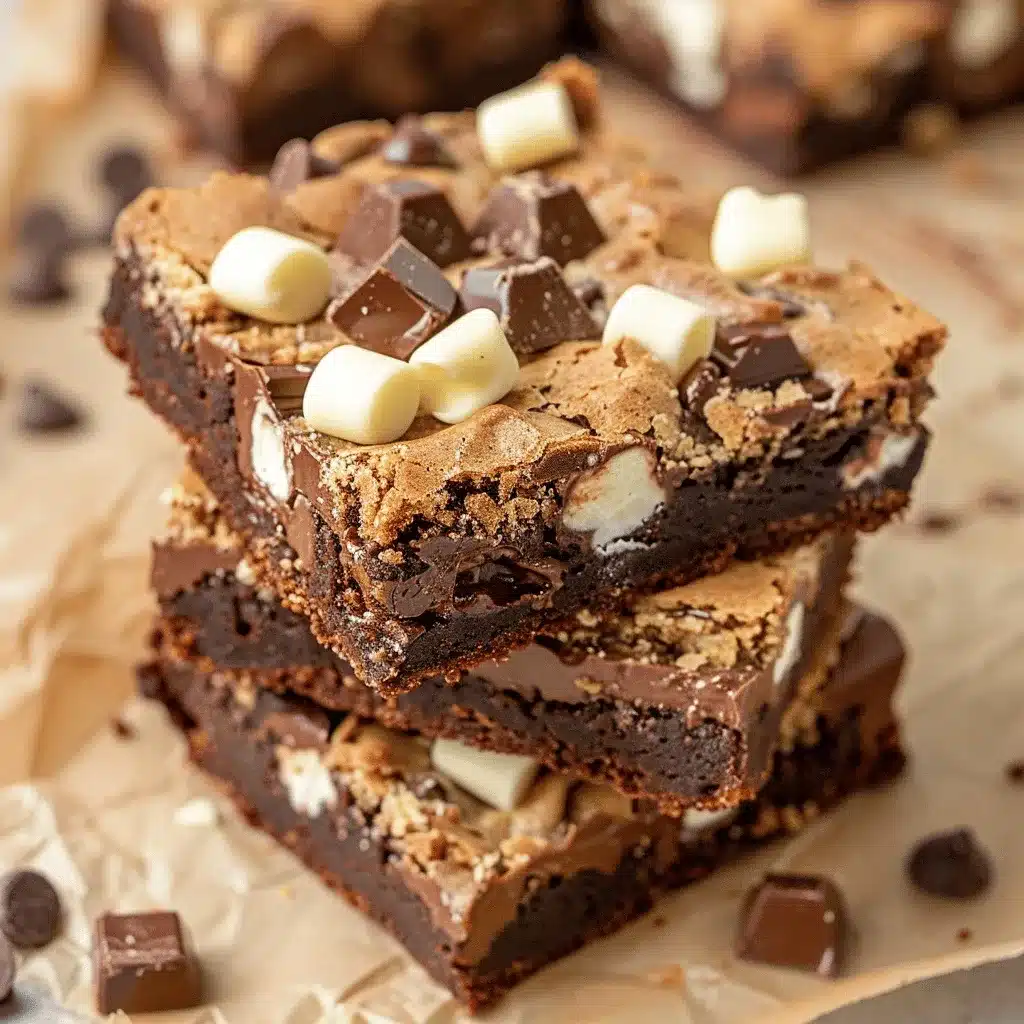
- Cool and Slice: Allow the bars to cool in the pan for at least 20 minutes. Use the parchment paper overhang to lift them out, then slice into squares.
Tip: For cleaner slices, chill the bars in the fridge for 15 minutes before cutting. Trust me, it’s worth the wait!
Cooking Tips & Techniques
- Don’t Overmix: Overmixing the brownie batter can lead to dense, tough brownies. Stir just until the ingredients are combined.
- Even Layers: Use a spatula to evenly spread the brownie and cookie dough layers. This ensures every bite has the perfect balance of flavors.
- Watch the Baking Time: Every oven is different, so keep an eye on the bars in the last few minutes. You want the cookie layer golden but not overbaked.
- Room Temperature Ingredients: Using room temperature eggs and butter helps everything mix together more smoothly.
- Customize the Chocolate: Dark chocolate lovers can swap milk chocolate for bittersweet or dark chocolate chunks.
Variations & Adaptations
- Peanut Butter Lover’s Version: Add 1/4 cup of creamy peanut butter to the cookie dough, or sprinkle peanut butter chips on top.
- Gluten-Free Option: Use a 1:1 gluten-free flour blend in place of all-purpose flour in both layers.
- Seasonal Twist: Add crushed candy canes during the holidays or sprinkle mini pastel candies for Easter.
- Nutty Addition: Fold in chopped walnuts or pecans to the cookie layer for added crunch.
- Dairy-Free Adaptation: Use plant-based butter and dairy-free chocolate chips.
One of my favorite adaptations? Adding a drizzle of salted caramel on top before serving. It’s dangerously good!
Serving & Storage Suggestions
These bars are best served slightly warm with a scoop of vanilla ice cream or a drizzle of hot fudge sauce. For a more polished presentation, dust them with powdered sugar or top with a dollop of whipped cream.
Store leftover bars in an airtight container at room temperature for up to 3 days. For longer storage, wrap them tightly in plastic wrap and freeze for up to 3 months. To reheat, pop a bar in the microwave for 10-15 seconds for that fresh-from-the-oven taste.
Nutritional Information & Benefits
While these bars are definitely a treat, let’s not forget the happiness factor! Here’s an estimate for one serving (based on 12 bars):
- Calories: 320
- Fat: 17g
- Carbohydrates: 42g
- Protein: 4g
They’re indulgent, yes, but they bring joy to any occasion. Plus, with simple swaps like using dark chocolate or reducing sugar, you can adjust them to suit your dietary preferences.
Conclusion
These Ultimate Triple Chocolate Monster Cookie Brownie Bars are more than just a dessert—they’re an experience. Whether you’re making them for a party, a family movie night, or just to treat yourself, they’re guaranteed to impress. The combination of fudgy brownie, gooey chocolate, and chewy cookie is pure magic.
If you give this recipe a try, I’d love to hear about it! Leave a comment below, snap a photo, and share it with me on social media. Let’s spread the chocolatey love!
FAQs
Can I use a different size pan?
Yes! You can use an 8×8-inch pan for thicker bars. Just adjust the baking time by adding 5-10 minutes.
Can I make this recipe ahead of time?
Absolutely. These bars can be baked a day in advance and stored in an airtight container.
How do I know when the bars are done?
Look for a golden cookie layer and a toothpick that comes out with a few moist crumbs—not wet batter.
Can I freeze these bars?
Yes! Wrap them individually in plastic wrap and store them in a freezer-safe bag for up to 3 months.
What’s the best way to reheat them?
A quick 10-15 seconds in the microwave will make them taste freshly baked!


