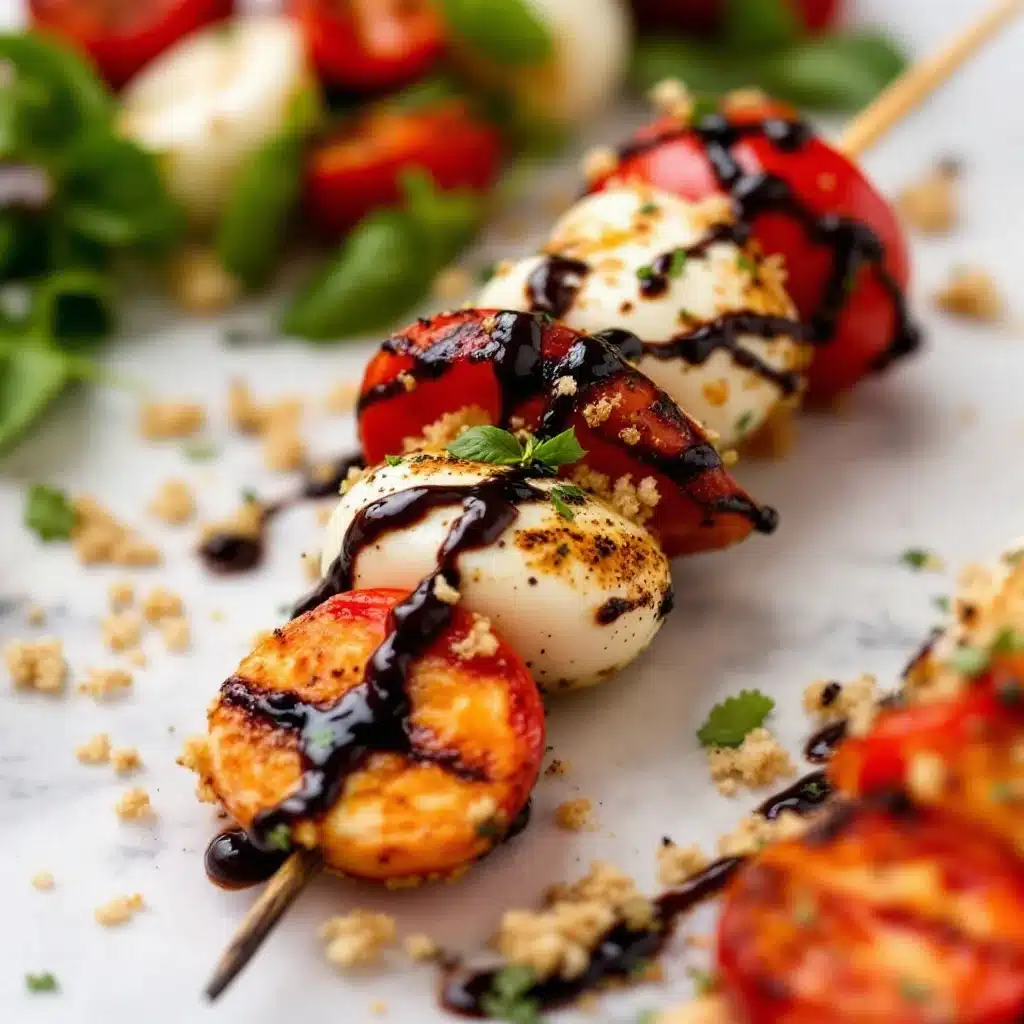
“Wait—you can grill caprese?” My neighbor Karen squinted at me over the fence, a pair of tongs dangling from her hand like she’d just caught me in a lie. It was late June, the kind of sticky evening where the air smells like cut grass and someone’s charcoal starter, and I was standing over my little kettle grill with a tray of skewers that looked more like jewelry than appetizers. I’d threaded mozzarella balls, cherry tomatoes, and basil leaves onto short wooden sticks, brushed them with olive oil, and was about to commit what apparently sounded like a culinary crime.
Honestly, I get the hesitation. Caprese salad is one of those perfect things—cool, simple, no-cook—that feels almost sacred in its simplicity. Why mess with it? But here’s the thing nobody tells you about grilling mozzarella: it gets this soft, almost stretchy interior while the outside takes on a little char. The tomatoes blister and sweeten. The basil wilts just enough to release its perfume. And when you hit those warm skewers with a drizzle of balsamic glaze? It’s not better than cold caprese. It’s just different. And honestly? It might be better.
That first batch disappeared before the burgers even hit the grill. Karen came back for seconds, then thirds, and by the time the sun went down, I’d made two more rounds. That’s the thing about these grilled balsamic caprese skewers—they’re the kind of appetizer that makes people forget there’s a main course coming. I’ve been making them every summer since, and they’ve never once let me down.
Why You’ll Love This Recipe
Let me tell you why these skewers have become my go-to for every barbecue, potluck, and lazy summer dinner. I’ve tested this recipe at least a dozen times—with different cheeses, different tomatoes, different grills—and every single time, people ask for the recipe before they’ve finished chewing.
- Ready in 20 Minutes : From fridge to table in under half an hour. No marinating, no complicated steps, no stress.
- Simple Ingredients : You need exactly six things for the skewers themselves. Chances are you already have the olive oil and salt in your pantry.
- Perfect for Summer Gatherings : These are the appetizer that bridges the gap between fancy and casual. They look impressive but feel completely unfussy.
- Crowd-Pleaser : I’ve served these to kids, vegetarians, steak-lovers, and picky eaters. They disappear every time. Every. Single. Time.
- Unbelievably Delicious : The combination of warm, melty cheese with sweet, charred tomatoes and that tangy-sweet balsamic glaze is honestly addictive. It’s comfort food that somehow feels light.
What makes this recipe different from all the other caprese skewer recipes out there? It’s the technique. Most recipes tell you to just thread and grill, but I’ve learned the hard way that the order of your ingredients, the temperature of your grill, and even the type of mozzarella you choose can make or break these. I’ve burned my fingers, lost cheese to the grill grates, and ended up with sad, soggy basil more times than I’d like to admit. This version? It’s the one that finally worked perfectly. Every time.
These skewers are the kind of appetizer that makes you close your eyes after the first bite. The cheese is warm and yielding, the tomatoes burst with concentrated sweetness, and that balsamic glaze ties it all together like a little black dress. It’s simple food that tastes like you spent hours on it—and honestly, that’s my favorite kind of recipe.
What Ingredients You Will Need
This recipe uses simple, fresh ingredients to create something that feels much more complex than it is. The key is quality—when you’re using so few components, each one really matters. Here’s what you’ll need:
For the Skewers
- 8 ounces fresh mozzarella balls (bocconcini or ciliegine) : Look for the small, bite-sized ones packed in water or brine. I prefer BelGioioso or Galbani for consistent texture. Pat them dry before threading—wet cheese won’t char properly and can make the skewers slide around.
- 1 pint cherry tomatoes : Grape tomatoes work too, but cherry tomatoes have that perfect burst-in-your-mouth texture when grilled. Look for firm, brightly colored ones. If you can find mixed colors, they look gorgeous on the skewer.
- 20-25 fresh basil leaves : Large leaves work best because they wrap around the other ingredients nicely. Avoid the tiny leaves—they’ll just shrivel up and disappear on the grill. I like to use the big, fragrant leaves from the farmer’s market.
- 2 tablespoons extra-virgin olive oil : Use a good quality one here since you’ll taste it. California Olive Ranch or Colavita are solid choices that won’t break the bank.
- 1/2 teaspoon flaky sea salt : Maldon or another flaky salt is ideal—it adds little bursts of salinity that regular table salt just can’t replicate.
- 1/4 teaspoon freshly ground black pepper : Freshly ground makes a difference here. Pre-ground pepper tastes flat and dusty.
For the Balsamic Glaze
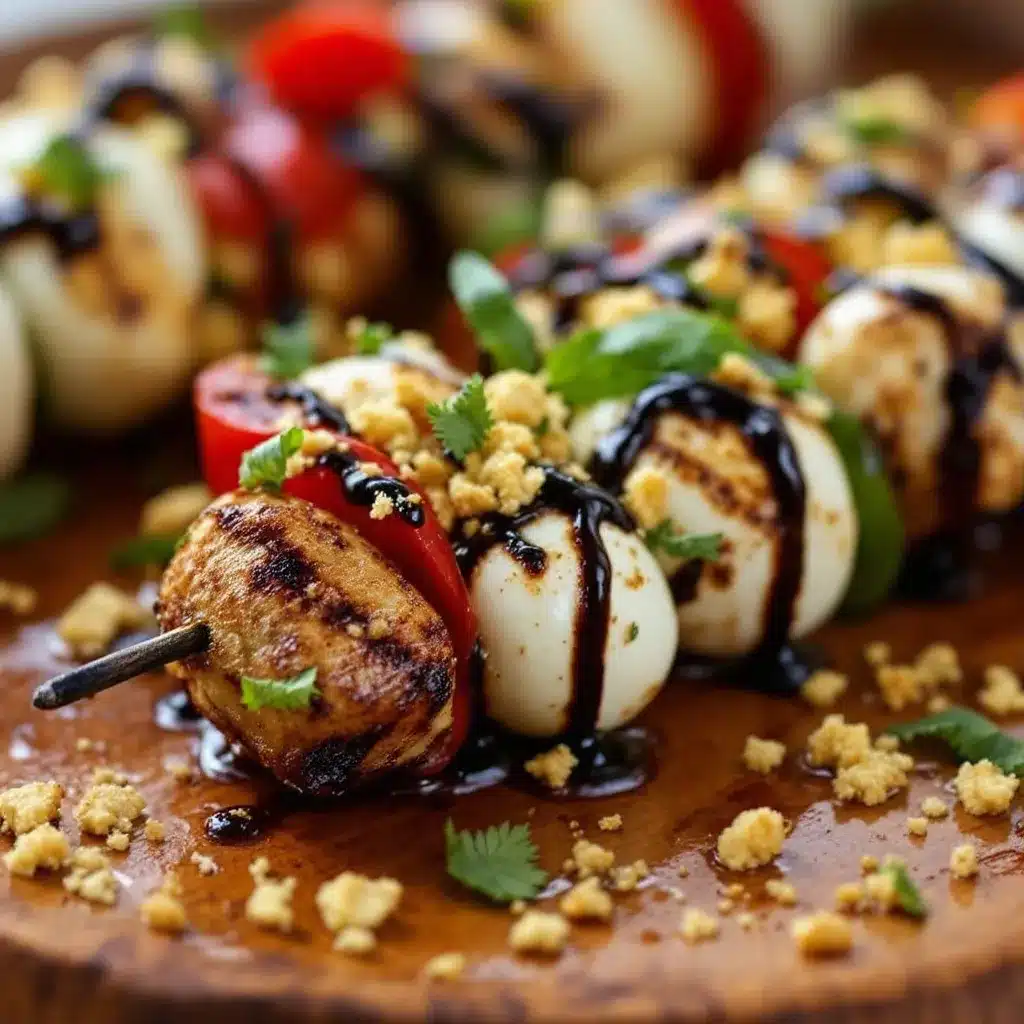
- 1/2 cup balsamic vinegar : Don’t use the super expensive aged stuff here—you’re going to cook it down anyway. A good quality supermarket brand works perfectly. I like the one from Trader Joe’s or the 365 brand from Whole Foods.
- 1 tablespoon honey or brown sugar : This balances the acidity and helps the glaze get that syrupy consistency. Honey gives a slightly floral note, while brown sugar adds deeper caramel flavor.
Substitution Guidance: If you can’t find fresh mozzarella balls, you can cut a larger mozzarella ball into 1-inch cubes. Just make sure they’re roughly the same size as your tomatoes so everything cooks evenly. For a dairy-free version, try using firm tofu that’s been pressed and marinated in olive oil and salt—it won’t melt the same way, but it’ll still be delicious. And if you’re out of balsamic vinegar, you can make a quick glaze with red wine vinegar and a bit more honey, though the flavor will be different.
One thing I’ve learned: don’t skip patting the mozzarella dry. I know it seems like a small step, but wet cheese releases steam instead of browning, and you’ll end up with pale, rubbery skewers instead of those beautiful charred ones. Trust me on this one—I learned it the hard way after three sad batches.
Equipment Needed
You don’t need much for this recipe, which is part of what makes it so great. Here’s what you’ll need:
- Wooden or metal skewers : If using wooden skewers, soak them in water for at least 30 minutes before grilling. This prevents them from burning up on the grill. Metal skewers work great and are reusable—I use flat ones because they prevent the ingredients from spinning around when you flip them.
- Outdoor grill, grill pan, or cast iron skillet : A charcoal grill adds the best smoky flavor, but a gas grill works perfectly too. If you’re cooking indoors, a cast iron grill pan or even a regular cast iron skillet will give you similar results. I’ve even made these on a portable butane burner when camping.
- Tongs : Long-handled tongs are your best friend here. They give you good control for flipping the skewers without getting too close to the heat.
- Small saucepan : For making the balsamic glaze. A 1-quart saucepan is perfect—you want something with a small surface area so the vinegar doesn’t evaporate too quickly.
- Pastry brush or basting brush : For brushing the olive oil onto the skewers. A silicone brush is easiest to clean, but a natural bristle brush works fine too.
- Serving platter : A white or light-colored platter makes the colors really pop. I use a simple ceramic one that lets the skewers be the star.
If you don’t have a grill, don’t worry. I’ve made these in a cast iron skillet on the stovetop and they turned out beautifully. Just get the pan screaming hot and work in batches so you don’t crowd the pan. The key is high heat and not moving the skewers around too much—let them sit and develop that nice char.
Preparation Method
Let’s get to the good stuff. I’m going to walk you through every step, including the little tricks I’ve picked up along the way.
Step 1: Make the Balsamic Glaze
Pour the balsamic vinegar and honey into a small saucepan. Bring it to a gentle simmer over medium heat, then reduce the heat to low. Let it bubble away for about 8-10 minutes, stirring occasionally, until it’s thick enough to coat the back of a spoon. You’re looking for a syrupy consistency—it should be noticeably thicker than when you started, but not so thick that it’s hard to drizzle. Remove from heat and let it cool while you prepare the skewers. It will continue to thicken as it cools. Pro tip: If you accidentally reduce it too much and it becomes too thick, just whisk in a teaspoon of warm water to loosen it up.
Step 2: Prepare Your Ingredients
Take the mozzarella balls out of their packaging and pat them dry with paper towels. This is crucial—wet mozzarella won’t brown properly. Cut any larger balls in half so they’re roughly the same size as your cherry tomatoes. Wash and dry the cherry tomatoes and basil leaves. The basil should be completely dry—wet basil will steam instead of wilt nicely.
Step 3: Assemble the Skewers
Thread the ingredients onto your skewers in this order: tomato, basil leaf (folded in half), mozzarella ball, another basil leaf, tomato. This pattern ensures that the basil is protected between the cheese and tomato so it doesn’t burn, and every bite has a little bit of everything. Leave about 1/2 inch of space between each piece so the heat can circulate. If you pack them too tightly, they’ll steam instead of char. You should get about 5-6 pieces per skewer, depending on the length of your skewers.
Step 4: Season and Oil
Lay the assembled skewers on a baking sheet or large plate. Brush them all over with olive oil—don’t be shy here, the oil helps with browning and prevents sticking. Sprinkle with flaky sea salt and freshly ground black pepper. Let them sit at room temperature for about 10 minutes while you heat the grill. This takes the chill off the cheese and helps everything cook more evenly.
Step 5: Heat the Grill
Preheat your grill to medium-high heat (about 400-450°F or 200-230°C). If using charcoal, the coals should be covered with a light gray ash. For a gas grill, let it preheat for at least 10 minutes with the lid closed. Clean and oil the grates well—I use a folded paper towel dipped in vegetable oil and held with tongs. This prevents the cheese from sticking and tearing when you flip.
Step 6: Grill the Skewers
Place the skewers on the grill perpendicular to the grates. Cook for 2-3 minutes on the first side. You’ll see the cheese start to soften and get little brown spots, and the tomatoes will begin to blister. Using your tongs, carefully flip each skewer. Cook for another 2-3 minutes on the second side. The total cooking time should be about 4-6 minutes. Don’t walk away! These cook fast, and cheese can go from perfectly melty to a melted mess in seconds.
Step 7: Serve Immediately
Transfer the grilled skewers to your serving platter. Drizzle generously with the balsamic glaze—I like to do a zigzag pattern that looks pretty but also ensures every skewer gets some. If you have any extra fresh basil leaves, tuck them around the platter for color. Serve immediately while the cheese is still warm and stretchy. These really don’t hold well, so plan to eat them right away.
Troubleshooting tip: If your cheese is sticking to the grill, it probably means one of three things: the grill wasn’t hot enough, the grates weren’t clean, or you didn’t use enough oil. Don’t try to force the skewers off—let them cook another 30 seconds and try again. They’ll release when they’re ready.
Cooking Tips & Techniques
I’ve made these skewers more times than I can count, and I’ve definitely made my share of mistakes. Here’s what I’ve learned so you don’t have to learn the hard way:
Temperature is everything. If your grill isn’t hot enough, the cheese will melt and ooze through the grates before it gets any color. If it’s too hot, the outside will burn before the cheese has a chance to warm through. Medium-high heat is the sweet spot. I learned this after a particularly frustrating batch where I lost half my cheese to the fiery depths of my grill. Not my finest moment.
Don’t overcrowd the grill. Leave at least an inch of space between each skewer. If you cram them all on there, they’ll steam instead of sear, and you’ll end up with pale, sad skewers. Work in batches if you need to. I know it’s tempting to cook them all at once, but trust me—two batches of perfect skewers are better than one batch of mediocre ones.
Use room temperature ingredients. Cold mozzarella straight from the fridge takes longer to warm through, which means you have to cook the skewers longer, which means the tomatoes get overdone. Let everything sit out for 15-20 minutes before assembling. It makes a real difference.
Flip with confidence. When you flip the skewers, do it quickly and decisively. If you hesitate, the cheese might stick and tear. I use two pairs of tongs—one to hold the skewer steady and one to flip—which gives me more control. It feels a little clumsy at first, but you’ll get the hang of it after a few skewers.
Make extra glaze. The balsamic glaze is the star of the show, and you’ll want more than you think. I always make a double batch because it keeps in the fridge for weeks and is amazing on everything from roasted vegetables to vanilla ice cream. Seriously, try it on ice cream—it’s weirdly good.
Time your cooking. These skewers cook in about 5 minutes, so plan your timing accordingly. I usually get the grill hot, assemble the skewers while the glaze reduces, and then grill them right before serving. They’re best straight off the grill, so I try to have everything else ready to go first.
Variations & Adaptations
One of the best things about this recipe is how easy it is to adapt. Here are some of my favorite variations:
Herb Swap
Don’t have fresh basil? No problem. Try using fresh mint leaves for a bright, unexpected twist, or use oregano for a more Mediterranean vibe. I once made these with a combination of basil and mint and it was honestly incredible—the mint added this cool freshness that played beautifully with the warm cheese.
Add Some Protein
Thread small cubes of grilled chicken or prosciutto between the tomato and cheese for a heartier skewer. The saltiness of prosciutto is particularly good with the sweet balsamic glaze. If you’re making these for a party where you know people want something more substantial, this is the way to go.
Vegetable Variations
Thread small pieces of zucchini, bell pepper, or red onion between the tomatoes and cheese. Just cut them into similar-sized pieces so everything cooks evenly. I love adding little chunks of yellow summer squash—they get this beautiful golden color on the grill and add a nice textural contrast.
Dairy-Free Version
Use firm tofu that’s been pressed and marinated in olive oil, salt, and a little garlic powder. It won’t melt the same way, but it gets beautifully golden and the texture is surprisingly satisfying. I’ve also used vegan mozzarella-style shreds formed into balls, though they melt differently so you’ll need to watch them carefully.
Spicy Kick
Add a small pinch of red pepper flakes to the olive oil before brushing, or thread a thin slice of jalapeño onto each skewer. The heat cuts through the richness of the cheese and the sweetness of the glaze beautifully. My husband loves this version—he says it wakes up the whole dish.
Serving & Storage Suggestions
These skewers are best served immediately, while the cheese is still warm and stretchy and the tomatoes are bursting with juice. I like to arrange them on a white platter with a generous drizzle of balsamic glaze and a few extra fresh basil leaves scattered around for color. They’re perfect as an appetizer for a summer barbecue, but I’ve also served them as a light lunch with a side of crusty bread and a simple green salad.
For a party, I sometimes serve them on a bed of arugula that’s been lightly dressed with lemon juice and olive oil. The peppery greens are a nice contrast to the sweet, rich skewers, and it makes the presentation look really intentional. If you’re serving them as part of a larger spread, they pair beautifully with creamy classic macaroni salad or fresh grandma’s cucumber onion salad for a complete summer meal.
Storage: These really don’t store well—the cheese gets rubbery when it cools and the tomatoes lose their texture. If you have leftovers (which rarely happens in my house), you can store them in an airtight container in the fridge for up to a day. To reheat, pop them in a hot oven or air fryer for a few minutes, but honestly, they’re never as good as fresh. I recommend only making as many as you think you’ll eat in one sitting.
Make-ahead tips: You can assemble the skewers up to 4 hours ahead of time and keep them covered in the fridge. Just let them come to room temperature for 15 minutes before grilling. The balsamic glaze can be made up to a week in advance and stored in a jar in the fridge—it will thicken as it cools, so you might need to microwave it for 10-15 seconds to loosen it up before drizzling.
If you’re planning a summer party, these skewers are also fantastic alongside easy juicy sheet pan Hawaiian chicken for a complete grilled meal that feels like a celebration.
Nutritional Information & Benefits
These skewers are surprisingly light for how indulgent they taste. Here’s the approximate nutritional breakdown for a serving of 2 skewers:
- Calories: 180-200
- Protein: 10-12g
- Fat: 12-14g
- Carbohydrates: 8-10g
- Fiber: 1-2g
- Sugar: 6-8g (mostly from the balsamic glaze)
Health benefits: Fresh mozzarella is a good source of calcium and protein, while tomatoes are packed with lycopene—a powerful antioxidant that’s actually more bioavailable when tomatoes are cooked. Basil contains vitamin K and essential oils with anti-inflammatory properties. The olive oil provides heart-healthy monounsaturated fats. This is one of those appetizers that feels indulgent but is actually pretty good for you.
Dietary considerations: This recipe is naturally vegetarian and gluten-free. To make it dairy-free, use the tofu variation mentioned above. For a lower-sugar version, reduce the honey in the glaze or skip it entirely—the vinegar will still reduce to a syrup, it’ll just be more tart. The recipe is also naturally low-carb, with most of the carbohydrates coming from the tomatoes and balsamic glaze.
I love serving these at parties because they’re one of the few appetizers that almost everyone can eat. They’re light enough that people don’t feel guilty having a few, but satisfying enough that they actually feel like a treat. It’s the kind of food that makes you feel good about what you’re eating.
Conclusion
These grilled balsamic caprese skewers have become my go-to summer appetizer for a reason. They’re quick, they’re simple, and they never fail to impress. Every time I make them, I remember that night with Karen over the fence, and I smile. Sometimes the best recipes come from the simplest ideas—and sometimes they come from someone questioning whether you can even do it at all.
I hope you give these a try. Play with the variations, make them your own, and don’t be afraid to experiment. The beauty of a recipe like this is that it’s forgiving—even if your cheese sticks a little or your tomatoes get a bit too charred, they’ll still be delicious. That’s the kind of cooking I love: low stress, high reward, and always worth sharing.
If you make these skewers, I’d love to hear about it. Drop a comment below and let me know how they turned out, what variations you tried, or if you discovered a new favorite way to serve them. And if you’re looking for more summer appetizer ideas, don’t miss my creamy jalapeño corn dip or ultimate gooey campfire s’mores dip for a sweet finish. Happy grilling!
Frequently Asked Questions
Can I make these skewers ahead of time for a party?
You can assemble the skewers up to 4 hours ahead and keep them covered in the fridge. Just let them come to room temperature for 15 minutes before grilling. The balsamic glaze can be made up to a week in advance. However, these are best served immediately off the grill, so I recommend grilling them right before serving.
What if I don’t have a grill?
No problem! You can use a cast iron grill pan or even a regular cast iron skillet on the stovetop. Get the pan screaming hot over medium-high heat, add a little oil, and cook the skewers for 2-3 minutes per side. The results are almost as good as outdoor grilling.
Can I use regular balsamic vinegar instead of making the glaze?
You can, but the glaze is really worth the extra 10 minutes. The reduction concentrates the flavor and gives you that thick, syrupy texture that clings to the skewers. Regular balsamic vinegar is too thin and will just run off. If you’re in a real hurry, you can buy pre-made balsamic glaze at most grocery stores.
Why did my cheese melt and fall through the grill grates?
This usually happens when the grill isn’t hot enough or the cheese is too cold. Make sure your grill is preheated to medium-high heat and let the mozzarella come to room temperature before grilling. Also, pat the cheese dry thoroughly—excess moisture creates steam that can cause the cheese to soften too quickly.
Can I use different types of tomatoes?
Absolutely! Grape tomatoes work well, though they’re a bit firmer and won’t burst quite as dramatically as cherry tomatoes. You can also use small Roma tomatoes cut into wedges, or even halved Campari tomatoes. Just make sure whatever you use is roughly the same size as your mozzarella balls so everything cooks evenly.
Pin This Recipe!
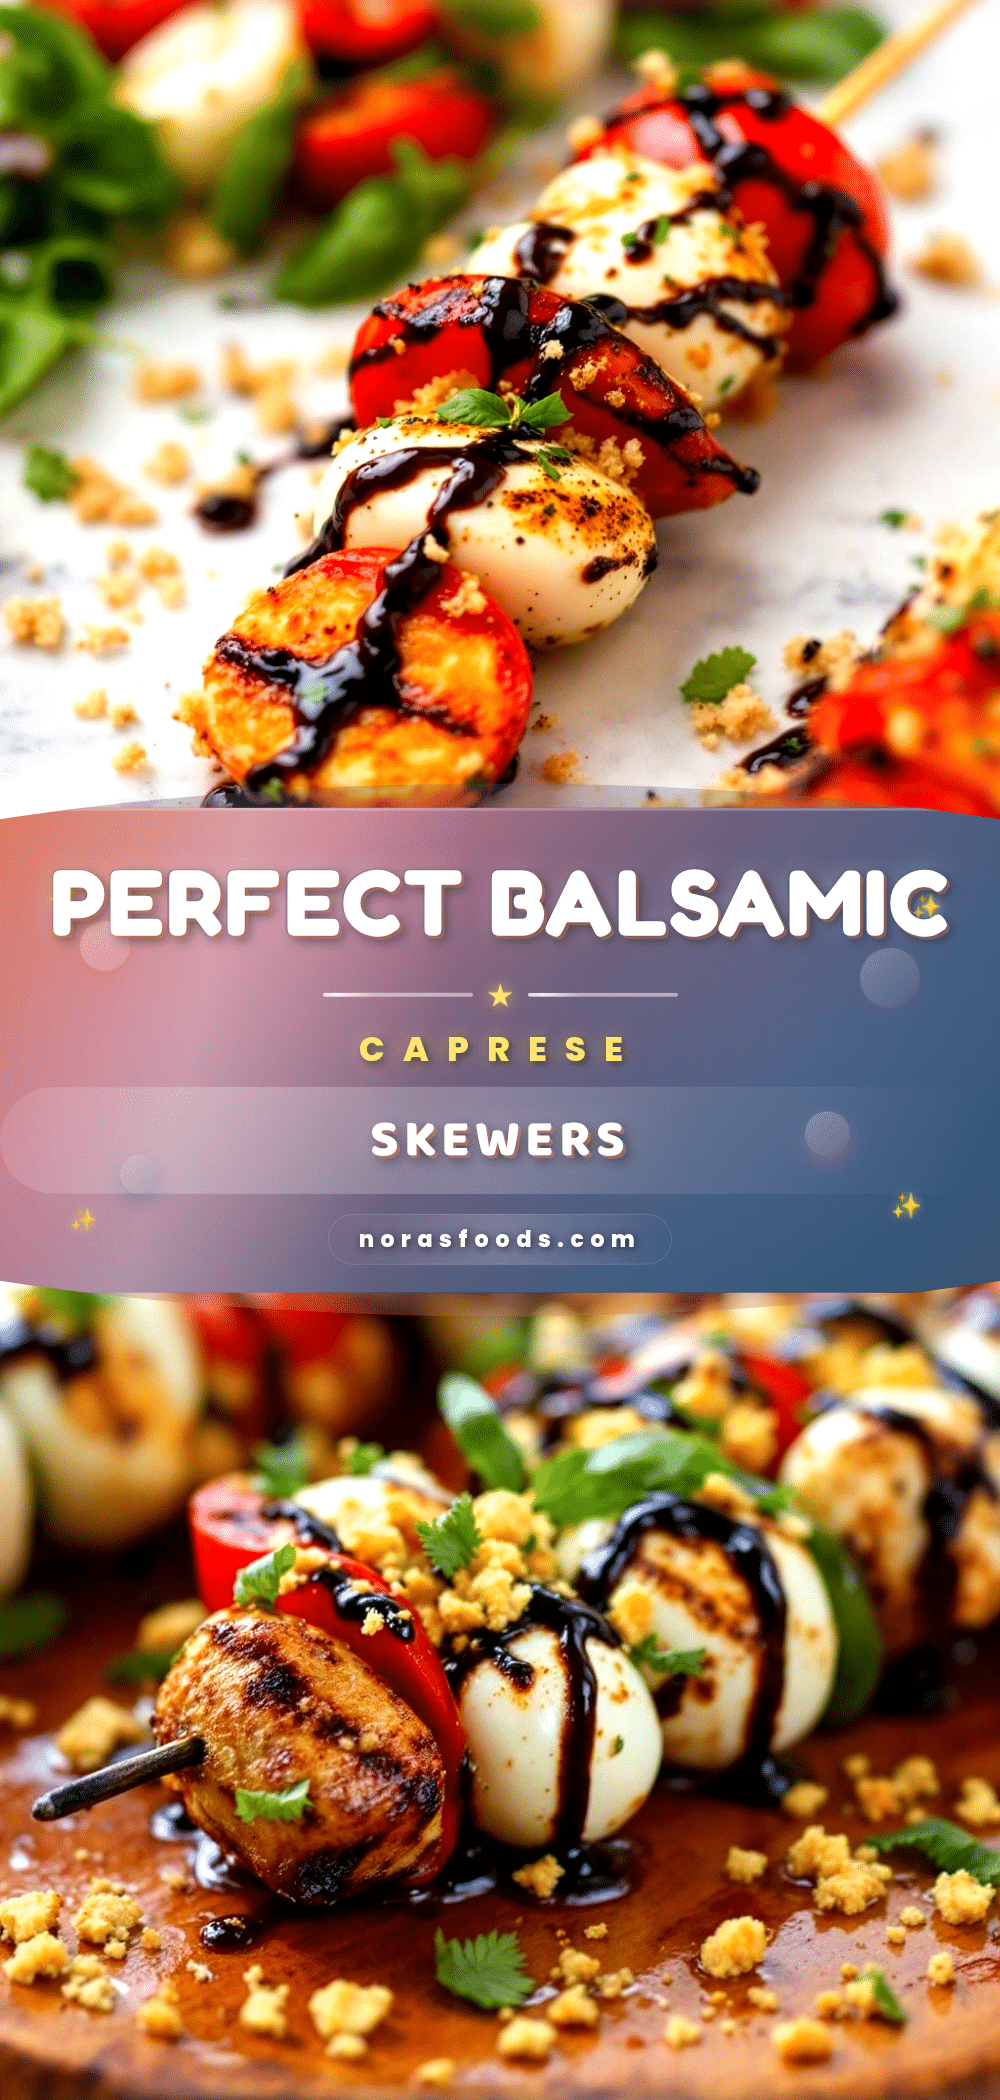
Perfect Grilled Balsamic Caprese Skewers: Easy 20-Minute Appetizer
Grilled caprese skewers with warm, melty mozzarella, blistered cherry tomatoes, and fresh basil, drizzled with a sweet-tangy balsamic glaze. Ready in just 20 minutes, they’re the perfect summer appetizer that disappears before the main course.
- Prep Time: 10 minutes
- Cook Time: 10 minutes
- Total Time: 20 minutes
- Yield: 4 servings 1x
- Category: Appetizer
- Cuisine: Italian
Ingredients
- 8 ounces fresh mozzarella balls (bocconcini or ciliegine)
- 1 pint cherry tomatoes
- 20–25 fresh basil leaves
- 2 tablespoons extra-virgin olive oil
- 1/2 teaspoon flaky sea salt
- 1/4 teaspoon freshly ground black pepper
- 1/2 cup balsamic vinegar
- 1 tablespoon honey or brown sugar
Instructions
- Make the balsamic glaze: Pour balsamic vinegar and honey into a small saucepan. Bring to a gentle simmer over medium heat, then reduce heat to low. Let bubble for 8-10 minutes, stirring occasionally, until thick enough to coat the back of a spoon. Remove from heat and let cool.
- Prepare ingredients: Pat mozzarella balls dry with paper towels. Cut any larger balls in half to match tomato size. Wash and dry cherry tomatoes and basil leaves.
- Assemble skewers: Thread ingredients onto skewers in this order: tomato, folded basil leaf, mozzarella ball, another basil leaf, tomato. Leave about 1/2 inch between pieces. You should get 5-6 pieces per skewer.
- Season and oil: Lay skewers on a baking sheet. Brush all over with olive oil. Sprinkle with flaky sea salt and black pepper. Let sit at room temperature for 10 minutes.
- Heat grill: Preheat grill to medium-high heat (400-450°F or 200-230°C). Clean and oil grates well.
- Grill skewers: Place skewers on grill perpendicular to grates. Cook for 2-3 minutes per side, until cheese is softened with brown spots and tomatoes are blistered. Total cooking time: 4-6 minutes.
- Serve immediately: Transfer to a serving platter, drizzle generously with balsamic glaze, and garnish with extra fresh basil leaves if desired.
Notes
Pat mozzarella dry to ensure proper browning. Use room temperature ingredients for even cooking. Don’t overcrowd the grill; work in batches if needed. Make extra balsamic glaze—it keeps in the fridge for weeks. Serve immediately for best texture.
Nutrition
- Serving Size: 2 skewers
- Calories: 190
- Sugar: 7
- Sodium: 350
- Fat: 13
- Saturated Fat: 5
- Carbohydrates: 9
- Fiber: 1
- Protein: 11
Keywords: grilled caprese skewers, balsamic glaze, summer appetizer, mozzarella skewers, easy appetizer, 20-minute recipe