
My oldest son, Leo, looked at the lunch I packed him and said, “Mom, can we please stop with the leftover pasta? It’s embarrassing.” That stung a little. But he wasn’t wrong. The thermos of spaghetti had leaked again, and the sauce had stained his favorite superhero shirt. I needed something that wouldn’t fall apart in a backpack, something he’d actually eat, and something I could throw together without a lot of fuss. That’s when I remembered the ham and cheese sliders my friend Jen brought to a playdate. They were little, warm, and completely perfect. I asked for the recipe, tweaked it a bit, and now these easy ham & cheese sliders for school lunch have become our go-to. I honestly didn’t think a sandwich could solve so many problems, but here we are. No more sad lunches. Just happy, full kids.
Why You’ll Love This Recipe
These aren’t just any sandwiches. These sliders are a game-changer for anyone packing school lunches. I’ve tested this recipe more times than I can count, and it’s earned a permanent spot in our weekly rotation. Here is why you will love them just as much as we do.
- Quick & Easy: You can prep these in under 10 minutes. The oven does the rest of the work. Perfect for a Sunday meal prep session or a busy weekday morning.
- Simple Ingredients: You need just a few things—dinner rolls, ham, cheese, and a buttery topping. Everything is easy to find at any grocery store.
- Perfect for School Lunches: They hold up beautifully in a lunchbox. No sogginess, no leaks, just a perfectly warm, melty sandwich that tastes great even at room temperature.
- Crowd-Pleaser: Both my kids devour these. So do their friends. And honestly, I’ve been known to eat two of them myself while packing lunches. They’re just that good.
- Unbelievably Delicious: The secret is in the buttery, savory glaze that soaks into the rolls. It adds a richness that makes these sliders taste like something special, not just a quick lunch fix.
What makes this recipe different from all the other slider recipes out there? It’s the balance. The rolls stay soft on the inside but get a slightly crisp edge. The cheese is perfectly melted, and the ham is flavorful without being too salty. This isn’t just another version of a ham and cheese sandwich—it’s the best version for a busy parent who still wants to pack something delicious. It’s the kind of lunch that makes your kid feel like you really listened.
What Ingredients You Will Need
This recipe uses simple, pantry-friendly ingredients to create a warm, satisfying lunch that everyone loves. You probably already have most of these in your kitchen right now.
- 12-count package of Hawaiian sweet rolls (I prefer King’s Hawaiian for their soft texture and slight sweetness)
- 1/2 pound deli-sliced ham (look for a good quality honey ham or black forest ham—avoid pre-packaged sliced ham if you can, it’s often too wet)
- 6 slices of Swiss cheese (you can also use provolone or cheddar, but Swiss melts beautifully and doesn’t overpower the ham)
- 1/4 cup unsalted butter, melted
- 1 tablespoon Dijon mustard (adds a tangy kick that cuts through the richness)
- 1 tablespoon poppy seeds (optional, but adds a lovely crunch and nutty flavor)
- 1 teaspoon Worcestershire sauce (deepens the savory flavor in the butter glaze)
- 1/2 teaspoon onion powder
- 1/4 teaspoon garlic powder
Ingredient Tips & Substitutions:
- Ham: If your family prefers turkey or chicken, those work great here too. Just make sure the slices aren’t too thick, or the sliders will be hard to bite into.
- Cheese: I’ve used provolone, mozzarella, and even a sharp cheddar. Each gives a slightly different flavor, but Swiss is our favorite for its creamy melt.
- Rolls: Hawaiian rolls are ideal because they’re slightly sweet, which balances the salty ham and cheese. You can use any soft dinner roll, but the sweetness really makes these special.
- Butter: Use unsalted butter so you can control the salt level. The ham and cheese already add plenty of salt.
Equipment Needed
You don’t need any fancy kitchen gadgets to make these sliders. Here is what I use every time.
- 9×13-inch baking dish (a glass or ceramic dish works best for even heating)
- Sharp knife (to cut the rolls in half cleanly without squishing them)
- Small bowl (for mixing the butter glaze)
- Whisk or fork (to combine the glaze ingredients)
- Pastry brush (to evenly spread the butter on top—a spoon works too, but a brush is easier)
- Aluminum foil (to cover the sliders while they bake, so the tops don’t burn)
If you don’t have a pastry brush, just use the back of a spoon to spread the butter. It’s not as neat, but it still tastes great. I’ve also used a silicone spatula in a pinch. Honestly, don’t let a missing tool stop you from making these.
Preparation Method

Follow these steps, and you’ll have the most amazing sliders ready in no time. I’ve added some notes from my own kitchen mishaps so you can avoid them.
- Preheat your oven to 350°F (175°C). While it’s heating, lightly grease your 9×13-inch baking dish with a little butter or non-stick spray.
- Prepare the rolls. Keep the 12-count package of Hawaiian rolls intact. Using a sharp knife, carefully slice the entire block of rolls in half horizontally. You want to create one big top half and one big bottom half. Pro tip: Don’t separate the individual rolls yet. Keeping them together makes assembly much faster.
- Place the bottom half in the dish. Gently transfer the bottom half of the rolls to your greased baking dish. If any rolls fall apart, just nudge them back together.
- Layer the ham. Fold the deli ham slices and arrange them evenly over the bottom layer of rolls. Use about half the ham for the first layer, then add the rest. You want a nice, even coverage. I once used too little ham, and the sliders were a bit sad. Don’t be shy with the meat.
- Add the cheese. Place the Swiss cheese slices over the ham. If you’re using large slices, you can tear them in half to fit better. The cheese should cover most of the ham.
- Top with the other half. Carefully place the top half of the rolls over the cheese. Press down gently so everything settles together.
- Make the butter glaze. In a small bowl, whisk together the melted butter, Dijon mustard, poppy seeds, Worcestershire sauce, onion powder, and garlic powder. This is where the magic happens. The smell alone is incredible.
- Brush the glaze. Using your pastry brush, generously brush the butter mixture over the top of the rolls. Make sure you get the edges and any exposed sides. Don’t rush this step—every bit of glaze adds flavor.
- Bake covered. Cover the baking dish with aluminum foil and bake for 15 minutes. This steams the rolls and melts the cheese perfectly.
- Bake uncovered. Remove the foil and bake for another 5-7 minutes, or until the tops are golden brown and slightly crispy. Keep an eye on them during the last few minutes. Ovens vary, and you don’t want burnt tops.
- Let them rest. Remove the dish from the oven and let the sliders sit for 5 minutes. This helps the cheese set a little so it doesn’t all slide out when you cut them.
- Cut and serve. Using a sharp knife, cut along the seams of the rolls to separate them into individual sliders. Serve warm or let them cool completely before packing for school lunches.
Cooking Tips & Techniques
I have made these sliders at least a dozen times, and I’ve learned a few things the hard way. Here are my best tips to make sure yours turn out perfect every time.
- Don’t overbake. The biggest mistake I made was leaving them in the oven too long, hoping for extra crispiness. The tops got hard, and the cheese turned into rubber. Stick to the 15 minutes covered, 5-7 minutes uncovered rule. Golden brown is your goal, not dark brown.
- Use room temperature butter for the glaze. If your butter is too hot, it can melt the mustard and separate. Let it cool for a minute after melting before you add the other ingredients. I learned this after my glaze turned into a greasy mess once.
- Let the sliders rest before cutting. I know it’s hard to wait, but if you cut them right away, the cheese will ooze out and make a sticky mess. Five minutes of patience makes a huge difference.
- Make extra glaze. If you have a little extra butter mixture, don’t throw it away. Brush it on the sides of the rolls before baking. It adds flavor and keeps the edges from drying out.
- Use a serrated knife to cut the rolls. A straight blade can squish the soft bread. A serrated knife gives you a clean cut without crushing the rolls. This was a game-changer for me.
Variations & Adaptations
One of the best things about this recipe is how easy it is to change up. Here are some of my favorite variations.
- Spicy Southwestern Sliders: Swap the Swiss cheese for pepper jack, and add a few slices of pickled jalapeños before baking. The heat from the cheese and peppers pairs perfectly with the sweet rolls. My husband loves this version.
- Breakfast Sliders: Replace the ham with cooked breakfast sausage patties or crispy bacon. Use cheddar cheese instead of Swiss. The butter glaze works just as well, and these are amazing for a quick breakfast or brunch.
- Vegetarian Option: Skip the ham and layer roasted red peppers, sautéed mushrooms, and spinach. Use provolone or mozzarella cheese. They’re still hearty and delicious. My vegetarian friend requests these every time she comes over.
- Gluten-Free Adaptation: Use your favorite gluten-free dinner rolls. The rest of the ingredients are naturally gluten-free, so just swap the bread. I’ve tried this with a few brands, and they work well as long as the rolls are soft.
- Hawaiian BBQ Sliders: Brush a thin layer of BBQ sauce over the ham before adding the cheese. Use smoked gouda or cheddar. The sweet and smoky combo is incredible. I made these for a summer barbecue, and they disappeared in minutes.
Serving & Storage Suggestions
These sliders are incredibly versatile when it comes to serving and storing. Here is what I’ve found works best.
Serving: Serve the sliders warm, right out of the oven. They’re perfect on their own, but you can pair them with a simple side like creamy classic macaroni salad or a fresh green salad. For a heartier lunch, add some old-fashioned ambrosia salad on the side. They also go great with a cup of tomato soup or a handful of chips.
Storage: Let any leftover sliders cool completely. Store them in an airtight container in the refrigerator for up to 3 days. I like to place a paper towel at the bottom of the container to absorb any extra moisture. This keeps the rolls from getting soggy.
Freezing: These sliders freeze beautifully. Wrap each slider individually in plastic wrap, then place them in a freezer-safe bag. They’ll keep for up to 2 months. To reheat, thaw them in the refrigerator overnight, then warm them in a 350°F oven for about 10 minutes. You can also microwave them for 30 seconds, but the oven gives a better texture.
Reheating: The best way to reheat these is in the oven. Place them on a baking sheet and warm them at 350°F for 5-7 minutes. They’ll taste almost as good as fresh. If you’re in a hurry, the microwave works, but the rolls will be softer.
Nutritional Information & Benefits
Here is the estimated nutritional breakdown for one slider (based on the recipe as written).
| Nutrient | Amount per Slider |
|---|---|
| Calories | 210 |
| Total Fat | 10g |
| Saturated Fat | 5g |
| Cholesterol | 35mg |
| Sodium | 480mg |
| Total Carbohydrates | 20g |
| Dietary Fiber | 1g |
| Sugars | 6g |
| Protein | 12g |
Health Benefits: Ham is a good source of protein, which helps keep kids full and focused during the school day. Swiss cheese provides calcium for strong bones. The Hawaiian rolls offer quick energy from carbohydrates. This recipe is also a great way to use up leftover ham from a holiday meal, reducing food waste. For a lower-sodium option, look for low-sodium ham and reduce the added salt in the glaze.
Dietary Considerations: This recipe contains gluten (rolls) and dairy (butter, cheese). For a dairy-free version, use dairy-free butter and cheese alternatives. For a gluten-free version, use gluten-free rolls. It’s not suitable for a vegan diet due to the ham and cheese.
Conclusion
These easy ham & cheese sliders have honestly changed how I think about school lunches. They’re not just a quick fix—they’re a reliable, delicious solution that my kids actually look forward to eating. The buttery glaze, the soft rolls, the melty cheese… it all comes together in a way that feels special without any extra effort. I love that I can make a batch on Sunday and have lunches ready for half the week. It saves me time, money, and a lot of morning stress.
I hope you give these a try and make them your own. Maybe you’ll add a little extra mustard, or swap in your favorite cheese. That’s the beauty of this recipe—it’s a base for whatever your family loves. If you make them, I’d love to hear how they turned out. Leave a comment below or tag me in your photos. And if you have your own twist on these sliders, please share it. We’re all in this together, trying to make lunchtime a little happier.
Frequently Asked Questions
Can I make these sliders ahead of time?
Absolutely! You can assemble the sliders completely, cover them, and refrigerate them overnight. Just add the butter glaze right before baking. You may need to add an extra 5 minutes to the covered baking time since they’ll be cold from the fridge.
Can I use a different type of bread?
Yes, but the texture will change. Hawaiian rolls are ideal because they’re soft and slightly sweet. You can use any soft dinner roll or even slider buns. Avoid crusty bread, as it won’t give you the same soft, pillowy texture.
How do I keep the sliders from getting soggy in the lunchbox?
Let the sliders cool completely before packing them. Place a paper towel at the bottom of the lunchbox or container to absorb any moisture. If you’re packing them warm, make sure they’re not steaming inside the container. I’ve also used a small piece of parchment paper between the sliders to keep them from sticking together.
Can I freeze these sliders?
Yes, they freeze wonderfully. Wrap each slider individually in plastic wrap, then place them in a freezer-safe bag. They’ll keep for up to 2 months. Thaw them in the refrigerator overnight and reheat in the oven or microwave.
What can I serve with these sliders for a complete meal?
These sliders pair perfectly with a simple side like creamy deviled egg potato salad, a fresh fruit salad, or a handful of baby carrots with ranch dip. For a heartier dinner, serve them alongside a warm bowl of tomato soup or a simple green salad.
Pin This Recipe!
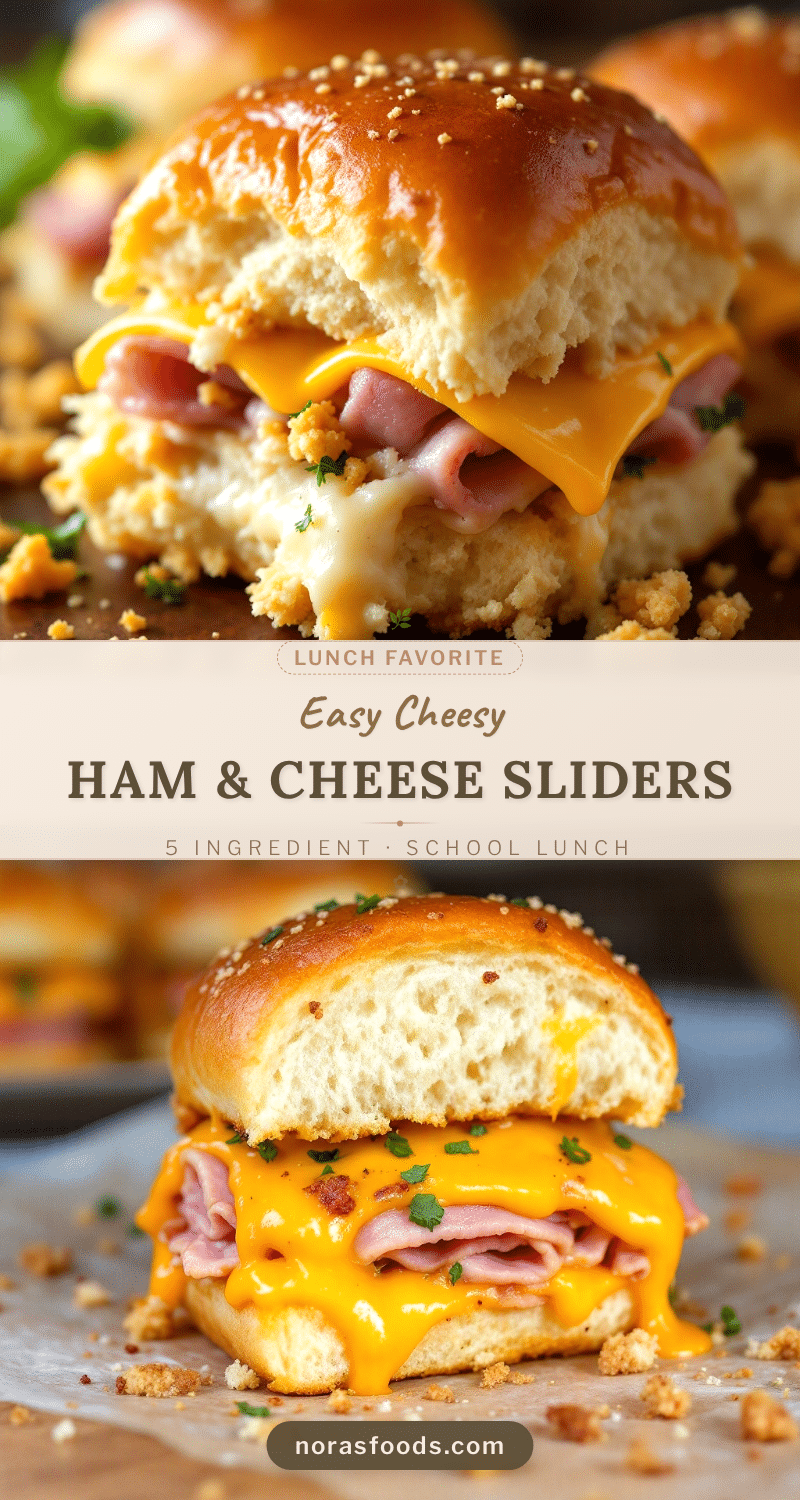
Easy Ham & Cheese Sliders: Best School Lunch Idea

These easy ham and cheese sliders are the perfect school lunch solution—quick to prep, made with simple ingredients, and they hold up beautifully in a lunchbox. A buttery, savory glaze makes them irresistibly delicious.
- Prep Time: 10 minutes
- Cook Time: 22 minutes
- Total Time: 32 minutes
- Yield: 12 sliders 1x
- Category: Main Course
- Cuisine: American
Ingredients
- 12-count package of Hawaiian sweet rolls (e.g., King’s Hawaiian)
- 1/2 pound deli-sliced ham (honey ham or black forest ham)
- 6 slices Swiss cheese
- 1/4 cup unsalted butter, melted
- 1 tablespoon Dijon mustard
- 1 tablespoon poppy seeds (optional)
- 1 teaspoon Worcestershire sauce
- 1/2 teaspoon onion powder
- 1/4 teaspoon garlic powder
Instructions
- Preheat oven to 350°F (175°C). Lightly grease a 9×13-inch baking dish with butter or non-stick spray.
- Keep the 12-count package of Hawaiian rolls intact. Using a sharp knife, carefully slice the entire block of rolls in half horizontally to create one big top half and one big bottom half.
- Place the bottom half of the rolls in the greased baking dish.
- Fold the deli ham slices and arrange them evenly over the bottom layer of rolls.
- Place the Swiss cheese slices over the ham, tearing them in half if needed to cover the ham.
- Carefully place the top half of the rolls over the cheese and press down gently.
- In a small bowl, whisk together the melted butter, Dijon mustard, poppy seeds, Worcestershire sauce, onion powder, and garlic powder.
- Using a pastry brush, generously brush the butter mixture over the top of the rolls, including the edges and any exposed sides.
- Cover the baking dish with aluminum foil and bake for 15 minutes.
- Remove the foil and bake for another 5-7 minutes, until the tops are golden brown and slightly crispy.
- Remove from the oven and let the sliders rest for 5 minutes.
- Using a sharp knife, cut along the seams of the rolls to separate them into individual sliders. Serve warm or let cool completely before packing for school lunches.
Notes
For best results, use room temperature butter for the glaze to prevent separation. Let sliders rest before cutting to keep cheese from oozing out. Make extra glaze to brush on sides for added flavor. Use a serrated knife to cut rolls cleanly without squishing.
Nutrition
- Serving Size: 1 slider
- Calories: 210
- Sugar: 6
- Sodium: 480
- Fat: 10
- Saturated Fat: 5
- Carbohydrates: 20
- Fiber: 1
- Protein: 12
Keywords: ham and cheese sliders, school lunch, easy lunch, kid-friendly, Hawaiian rolls, slider recipe