
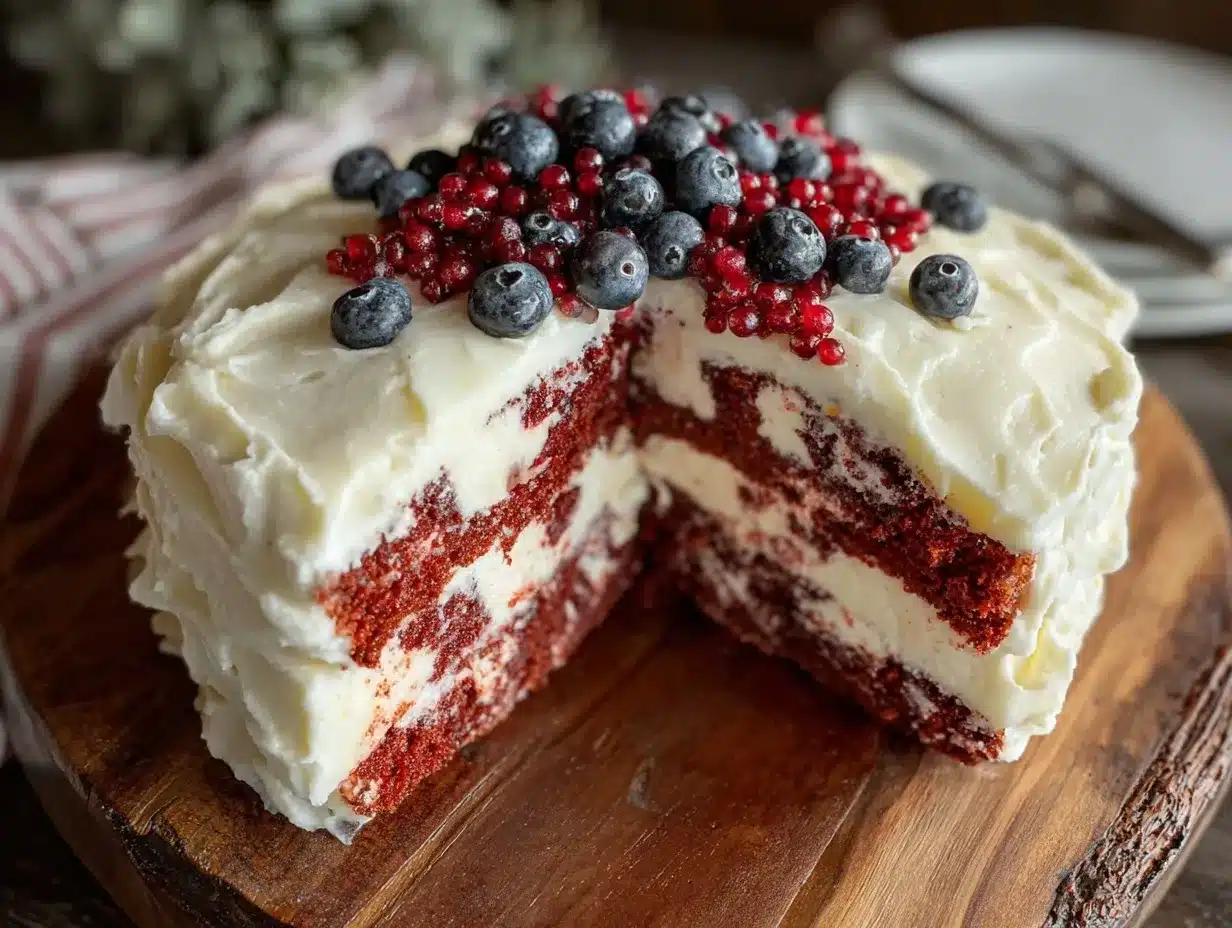
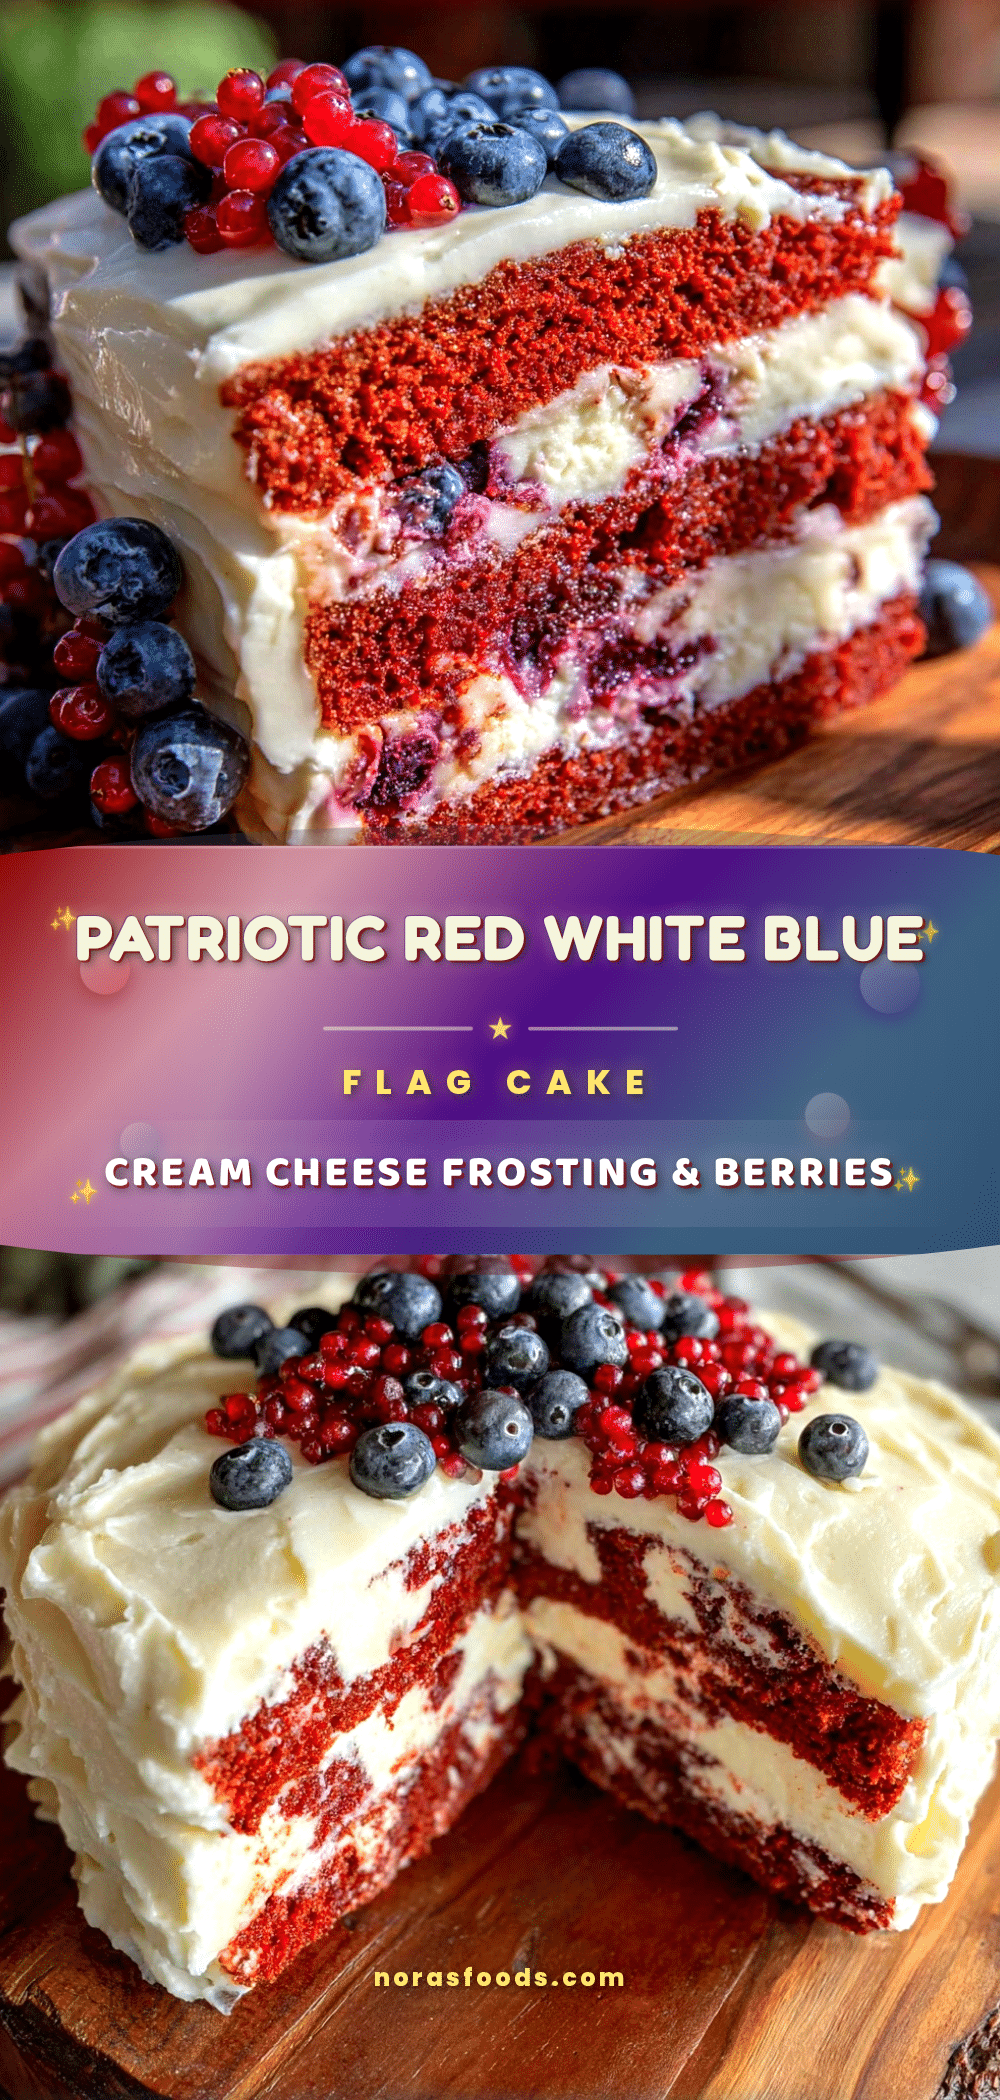
“Hey, did you ever think a cake could look like a flag?” my neighbor joked as I pulled this red white blue flag cake from the oven. Honestly, I was half-expecting the layers to run together into a blurry mess. But no—each vibrant color held its ground, proud and bright like they were ready for a parade. This cake wasn’t some fancy bakery creation; it was born out of a last-minute plan to bring something festive to a casual July 4th picnic.
I remember standing in my kitchen, a bit frazzled after a long day, rummaging through the fridge and pantry, wondering how to whip up something that screamed summer celebration without a ton of fuss. I knew cream cheese frosting would add that tangy, creamy punch to balance the richness of the cake layers. The result? This perfect red white blue flag cake with cream cheese frosting became an unexpected star of the day. Neighbors, kids, and even the picky eaters couldn’t stop asking for seconds. It felt like the kind of recipe that sticks around—not because it’s complicated or fancy, but because it’s joyful, nostalgic, and just plain fun to make.
What surprises me even now is how simple it was to get those sharp, clean color blocks in the cake. No need for special pans or complicated tricks—just good timing and a little patience. This cake somehow turned a hectic day into a calm, sweet moment shared with friends. It’s not just a dessert; it’s a little celebration you can make anytime, and honestly, that’s why it’s stayed in my rotation. You might find yourself coming back to it too, for those easy, happy occasions that deserve something a bit special but not stressful.
Why You’ll Love This Recipe
After making this perfect red white blue flag cake with cream cheese frosting more times than I can count, I’ve come to appreciate exactly what makes it stand out from the sea of patriotic desserts. Here’s why this recipe might just become your go-to for summer gatherings, birthday parties, or whenever you want to impress without the stress:
- Quick & Easy: You’ll have this cake ready to serve in about 90 minutes from start to finish—perfect for last-minute celebrations or when time isn’t on your side.
- Simple Ingredients: No need to hunt down specialty items. Most are pantry staples or easy-to-find basics, so you can pull this together with no fuss.
- Perfect for Patriotic Occasions: Whether it’s July 4th, Memorial Day, or just a summer barbecue, this cake nails the festive vibe with its bold colors and classic flavors.
- Crowd-Pleaser: Kids love the bright colors, adults appreciate the balance of sweetness and tang from the cream cheese frosting, and everyone always asks for the recipe.
- Unbelievably Delicious: The cream cheese frosting adds a subtle tang that pairs beautifully with the moist, fluffy cake layers—trust me, it’s comfort food with a little twist.
What sets this cake apart is the layering technique that keeps the red, white, and blue distinct, without bleeding or blending. I’ve tweaked the frosting to hit just the right balance—not too sweet, not too tangy—thanks to a few trials and happy accidents. Plus, it’s forgiving: even if you don’t get the layering perfect the first time, the flavors still shine through, making every slice a winner.
Honestly, it’s the kind of recipe that makes you pause and smile after the first bite—comfort food that feels festive and a little nostalgic, without any of the usual fuss. If you enjoy desserts like my chewy vegan chocolate chip cookies or crave something bright and homemade that impresses effortlessly, this cake is your new best friend.
What Ingredients You Will Need
This recipe uses simple, wholesome ingredients to build bold colors and classic flavors that everyone loves. Everything you need is easy to find, with a few tips to make sure your layers and frosting turn out just right.
- For the Cake Batter:
- All-purpose flour (2 ¾ cups / 345 g) – I prefer King Arthur for consistent texture
- Baking powder (2 ½ teaspoons) – helps the cake rise nicely
- Baking soda (½ teaspoon) – balances acidity and lightens crumb
- Salt (½ teaspoon)
- Granulated sugar (1 ¾ cups / 350 g) – choose a fine sugar for smooth batter
- Unsalted butter (1 cup / 227 g), softened – adds richness and moisture
- Large eggs (4), room temperature – makes the cake light and tender
- Buttermilk (1 cup / 240 ml), room temperature – tangy and tenderizing (can substitute dairy-free milk with 1 tablespoon lemon juice for acidity)
- Vanilla extract (2 teaspoons) – pure vanilla gives the best flavor
- Red gel food coloring (about 1 tablespoon) – use gel for vibrant color without thinning batter
- Blue gel food coloring (about 1 tablespoon)
- For the Cream Cheese Frosting:
- Cream cheese (8 oz / 225 g), softened – look for full-fat for creaminess
- Unsalted butter (½ cup / 113 g), softened
- Powdered sugar (4 cups / 480 g), sifted – ensures smooth frosting
- Vanilla extract (1 teaspoon)
- Pinch of salt – balances sweetness
Optional but recommended: fresh strawberries or blueberries for decorating the top, tying in with the flag theme and adding fresh bursts of flavor. In summer, swapping in fresh berries for decoration always feels special.
If you need a gluten-free version, substituting the flour with a 1-to-1 gluten-free baking blend works well, although the layers might be a bit more delicate. Dairy-free cream cheese and butter alternatives can be used to make the frosting vegan-friendly, although it won’t be quite as rich.
Equipment Needed
- Three 8-inch (20 cm) round cake pans – the standard size for even layers. If you only have two, you can bake in batches.
- Mixing bowls – at least two (one for dry ingredients, one for wet)
- Electric mixer or stand mixer – makes creaming butter and cream cheese easy and smooth. A handheld mixer works fine too.
- Measuring cups and spoons – precise measurements make a huge difference here.
- Rubber spatula – for folding ingredients gently and scraping bowls clean.
- Cake leveler or serrated knife – for trimming cake layers to even height if needed.
- Cooling racks – to let your cakes cool completely before frosting.
- Offset spatula or butter knife – for spreading frosting evenly.
If you don’t have a cake leveler, a serrated knife works just fine with steady hands. For budget-friendly pans, aluminum pans with non-stick coating are great, but I’ve also used glass pans in a pinch (just add extra baking time). Keeping your pans greased and lined with parchment paper is key to easy release and clean edges.
Preparation Method
- Preheat and prep pans: Heat oven to 350°F (175°C). Grease three 8-inch pans with butter and line bottoms with parchment paper for easy removal. This step saves you from cake breakage later.
- Mix dry ingredients: In a large bowl, whisk together 2 ¾ cups (345 g) all-purpose flour, 2 ½ teaspoons baking powder, ½ teaspoon baking soda, and ½ teaspoon salt. Set aside.
- Cream butter and sugar: In a separate large bowl, beat 1 cup (227 g) softened unsalted butter with 1 ¾ cups (350 g) granulated sugar on medium speed until light and fluffy, about 3-4 minutes. This aerates the batter for a tender crumb.
- Add eggs and vanilla: Beat in 4 large eggs, one at a time, mixing well after each. Then stir in 2 teaspoons vanilla extract until combined.
- Alternate adding dry ingredients and buttermilk: Reduce mixer speed to low. Add dry ingredients in three additions, alternating with 1 cup (240 ml) buttermilk, beginning and ending with the dry ingredients. Mix until just combined—overmixing can make the cake dense.
- Divide batter and color: Separate batter evenly into three bowls. Stir 1 tablespoon red gel food coloring into one bowl, and 1 tablespoon blue gel into another. Leave the third bowl plain for the white layer. Use gel coloring; liquid can thin your batter.
- Layer the batter: Pour the blue batter into one prepared pan, smoothing the top. Repeat with white batter in the second pan and red batter in the third. Tap pans gently on the counter to release air bubbles.
- Bake: Place pans on the center rack and bake for 25-30 minutes. Start checking at 25 minutes by inserting a toothpick; if it comes out clean or with a few crumbs, cakes are done.
- Cool: Let cakes sit in pans for 10 minutes before transferring to wire racks to cool completely. Cooling fully is crucial for frosting to stick without melting.
- Prepare cream cheese frosting: Beat 8 oz (225 g) softened cream cheese and ½ cup (113 g) softened butter until smooth and creamy, about 2 minutes. Gradually add 4 cups (480 g) sifted powdered sugar, mixing on low until incorporated. Add 1 teaspoon vanilla and a pinch of salt. Beat on medium-high for 2-3 minutes until fluffy.
- Assemble the cake: Place the blue layer on your serving plate. Spread an even layer of frosting on top (about ½ cup). Repeat with the white layer and frosting, then top with the red layer. Cover the entire cake with a thin crumb coat and chill for 20 minutes. Finish frosting with a smooth, even layer.
- Decorate (optional): Arrange fresh blueberries on the blue layer area to mimic stars, and scatter sliced strawberries along the red layers for a fresh touch.
If your layers aren’t perfectly flat, a quick trim with a serrated knife fixes that. Also, don’t rush cooling—warm cake under frosting turns messy fast. Taking these little steps makes a big difference in the final look and taste.
Cooking Tips & Techniques
Making a red white blue flag cake that looks as good as it tastes is easier when you know a few tricks I’ve picked up along the way. First, always use gel food coloring—it keeps the batter thick and vibrant without watering it down.
When folding colors into the batter, do so gently but thoroughly to avoid streaks that muddy your layers. Also, portioning the batter evenly is key. I use a kitchen scale to weigh each bowl—around 400 grams per color ensures balanced layers.
Be mindful of oven hotspots. If your oven is uneven, rotate the pans halfway through baking for even color and rise. Avoid opening the oven door too often; sudden temperature drops can cause sinking.
For the frosting, cream the butter and cream cheese well before adding sugar. If the frosting seems too soft, chilling it briefly helps it firm up for easier spreading. If it’s too stiff, a quick beat with a tablespoon of milk smooths it out.
One rookie mistake I made was frosting a warm cake—never do that. The frosting melts and slides off, turning your flag into a mess. Patience here really pays off.
Lastly, chilling the crumb coat before the final frosting makes decorating so much easier. If you want to save time, you can freeze the layers briefly, but thaw completely before frosting to avoid cracking.
Variations & Adaptations
This perfect red white blue flag cake is flexible enough to suit different diets and occasions. Here are some ways to tweak it:
- Gluten-Free Option: Swap all-purpose flour for a 1-to-1 gluten-free baking blend. The texture will be slightly different but still delicious.
- Vegan Adaptation: Use dairy-free cream cheese and vegan butter alternatives for the frosting. Replace eggs with flax eggs (1 tablespoon ground flax + 3 tablespoons water per egg). I’ve done this before, and while the cake is a bit denser, the flavors hold up beautifully.
- Flavor Twists: Add lemon zest to the batter for a bright, citrusy note, or swap vanilla extract for almond extract for a nutty aroma. Both changes add an unexpected depth without overpowering the patriotic theme.
- Seasonal Decorations: In winter, swap fresh berries for sugared cranberries or pomegranate seeds for a festive twist on the classic colors.
- Alternative Frostings: For a lighter option, try a whipped coconut cream frosting dyed white with a touch of vanilla. It’s less sweet but lovely with the colorful layers.
Once, I swapped the blue layer for a blueberry compote swirl in the batter. It wasn’t as clean visually, but the flavor was a big hit at a family brunch. Feel free to experiment within the framework—you might discover your own signature version.
Serving & Storage Suggestions
This cake shines best served chilled or at room temperature. The cream cheese frosting firms up in the fridge, making slices clean and neat. I like to take it out about 30 minutes before serving so the cake softens slightly and the flavors come forward.
Pair it with a simple glass of sparkling lemonade or iced tea for a refreshing contrast. It also works well alongside lighter dishes like fresh salads or grilled chicken, making it a perfect finale to a summer meal.
Store any leftovers tightly wrapped in the refrigerator for up to 4 days. The flavors actually meld and deepen overnight, so it’s great for making ahead. You can freeze unfrosted layers wrapped in plastic wrap and foil for up to 2 months; just thaw fully before frosting and assembling.
Reheat slices gently in the microwave for 10-15 seconds if you want a softer texture, but be careful not to melt the frosting too much.
The fresh fruit decoration loses a bit of its crispness after a day or two, so if you want to prep early, consider adding berries right before serving for the best presentation.
Nutritional Information & Benefits
A slice of this red white blue flag cake with cream cheese frosting delivers a satisfying mix of carbs, fats, and a bit of protein, making it a balanced treat rather than just empty sweetness. The cream cheese adds calcium and a touch of protein, while the butter provides richness.
The buttermilk in the batter offers a slight tang and helps tenderize the crumb, while fresh berries on top contribute antioxidants and vitamins when used as decoration. If you use gluten-free flour or vegan substitutes, this recipe can accommodate various dietary needs.
Be mindful that this cake contains dairy, gluten, and eggs, so it’s not suitable for all allergen-sensitive diets without the adaptations mentioned earlier. Still, it’s a festive, indulgent treat that’s easy to customize for many eating styles.
Personally, I appreciate that this recipe doesn’t rely on artificial fillers or overly processed ingredients—it’s a wholesome way to celebrate with family and friends.
Conclusion
Making the perfect red white blue flag cake with cream cheese frosting isn’t about perfection—it’s about the joy of sharing something colorful, homemade, and a little nostalgic. Whether you’re hosting a casual summer barbecue or just craving a slice of something festive, this cake is a reliable, crowd-pleasing choice that feels special but doesn’t demand hours in the kitchen.
Feel free to play with the layers, swap in your favorite flavors, or decorate it to suit your style. I promise, once you get the hang of the layering, it becomes a fun project you actually look forward to. It’s become a tradition in my neighborhood, and I love that it brings people together with smiles and hungry forks.
If you try it out, I’d love to hear how you made it your own. And if you’re interested in other easy, comforting recipes with a homemade touch, you might enjoy the creamy goodness of this slow cooker French onion soup or the homey delight of moist homemade carrot cake with cream cheese frosting.
Happy baking and celebrating, one colorful slice at a time.
FAQs
- How do I keep the red, white, and blue layers from mixing? Use gel food coloring to keep batter thick, pour each colored batter into separate pans, and avoid overfilling. Bake layers separately and let cool completely before stacking.
- Can I make this cake ahead of time? Yes! Bake the layers up to 2 days ahead and store wrapped in the fridge. Assemble and frost on the day you plan to serve for best freshness.
- What if I don’t have buttermilk? Make a simple substitute by adding 1 tablespoon lemon juice or white vinegar to 1 cup milk. Let it sit for 5 minutes before using.
- Can I use frozen berries for decoration? Fresh berries are best, but if using frozen, thaw and pat dry to avoid excess moisture that can sog the frosting.
- How do I store leftover cake? Store wrapped tightly in the fridge for up to 4 days. You can freeze slices, but cream cheese frosting may change in texture after thawing.
Pin This Recipe!
Perfect Red White Blue Flag Cake Recipe with Easy Cream Cheese Frosting
A festive and easy-to-make red, white, and blue layered cake with a tangy cream cheese frosting, perfect for patriotic celebrations and summer gatherings.
- Prep Time: 30 minutes
- Cook Time: 30 minutes
- Total Time: 90 minutes
- Yield: 12 servings 1x
- Category: Dessert
- Cuisine: American
Ingredients
- 2 ¾ cups (345 g) all-purpose flour
- 2 ½ teaspoons baking powder
- ½ teaspoon baking soda
- ½ teaspoon salt
- 1 ¾ cups (350 g) granulated sugar
- 1 cup (227 g) unsalted butter, softened
- 4 large eggs, room temperature
- 1 cup (240 ml) buttermilk, room temperature (or dairy-free milk with 1 tablespoon lemon juice)
- 2 teaspoons vanilla extract
- 1 tablespoon red gel food coloring
- 1 tablespoon blue gel food coloring
- 8 oz (225 g) cream cheese, softened
- ½ cup (113 g) unsalted butter, softened
- 4 cups (480 g) powdered sugar, sifted
- 1 teaspoon vanilla extract
- Pinch of salt
- Optional: fresh strawberries or blueberries for decoration
Instructions
- Preheat oven to 350°F (175°C). Grease three 8-inch round cake pans and line bottoms with parchment paper.
- In a large bowl, whisk together flour, baking powder, baking soda, and salt. Set aside.
- In a separate large bowl, beat softened butter and granulated sugar on medium speed until light and fluffy, about 3-4 minutes.
- Beat in eggs one at a time, mixing well after each. Stir in vanilla extract.
- Reduce mixer speed to low. Add dry ingredients in three additions, alternating with buttermilk, beginning and ending with dry ingredients. Mix until just combined.
- Divide batter evenly into three bowls. Stir red gel food coloring into one, blue gel into another, and leave the third plain.
- Pour blue batter into one pan, white batter into second, and red batter into third. Tap pans gently to release air bubbles.
- Bake for 25-30 minutes, checking at 25 minutes with a toothpick for doneness.
- Let cakes cool in pans for 10 minutes, then transfer to wire racks to cool completely.
- For frosting, beat cream cheese and butter until smooth and creamy, about 2 minutes. Gradually add powdered sugar, mixing on low until incorporated. Add vanilla and salt, then beat on medium-high for 2-3 minutes until fluffy.
- Assemble cake by placing blue layer on serving plate, spreading about ½ cup frosting on top. Repeat with white layer and frosting, then top with red layer.
- Apply a thin crumb coat over entire cake and chill for 20 minutes.
- Finish frosting with a smooth, even layer.
- Optionally, decorate with fresh blueberries on the blue layer and sliced strawberries on the red layer.
Notes
Use gel food coloring to keep batter thick and vibrant. Cool cakes completely before frosting to prevent melting. Chill crumb coat before final frosting for easier decorating. For gluten-free or vegan versions, substitute ingredients as noted. Fresh berries for decoration are optional but recommended for a festive touch.
Nutrition
- Serving Size: 1 slice (1/12 of cak
- Calories: 420
- Sugar: 38
- Sodium: 320
- Fat: 22
- Saturated Fat: 13
- Carbohydrates: 53
- Fiber: 1
- Protein: 5
Keywords: red white blue cake, patriotic cake, cream cheese frosting, July 4th dessert, layered cake, easy cake recipe, summer cake


